
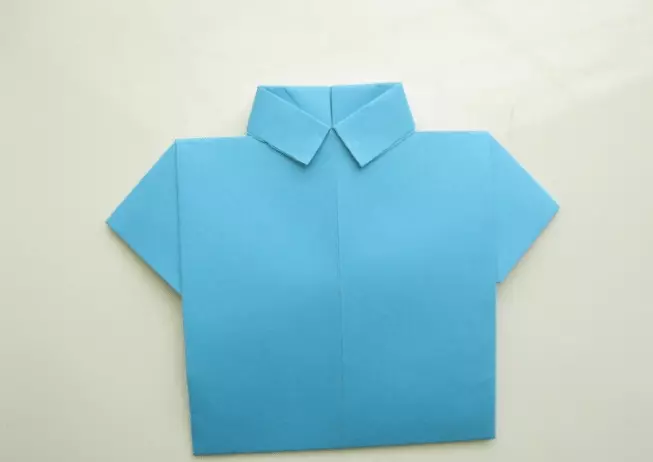
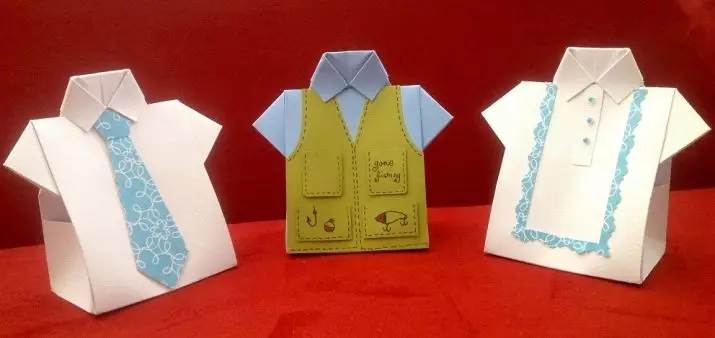
In the Japanese Origami technology, you can make practically any figures. This may be not only animals and plants, but also crafts in the form of a shirt with a tie. There are many schemes for manufacturing such an interesting form. In today's article, we learn all the features of creating origami in the form of a shirt with a tie.

Simple option
Origami equipment is available to masters of all ages. There are many extremely simple and understandable simulation schemes that are suitable even for young children.
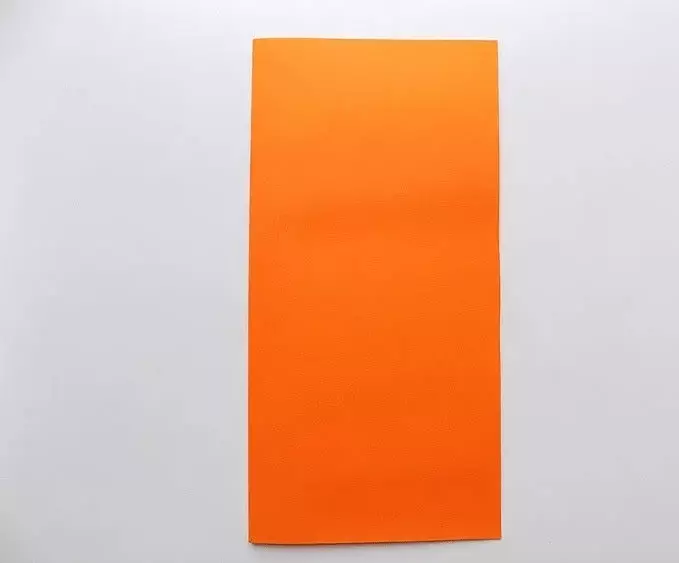
For the manufacture of a simple figurine in the form of a shirt with a tie, beginning and young origamists need to prepare only sheet paper sheets.
Consider stages, how to correctly make a simple craft from paper in the form of the considered form.
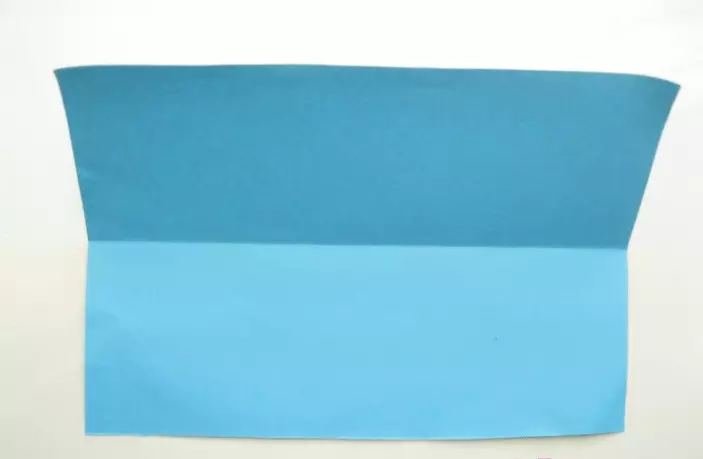
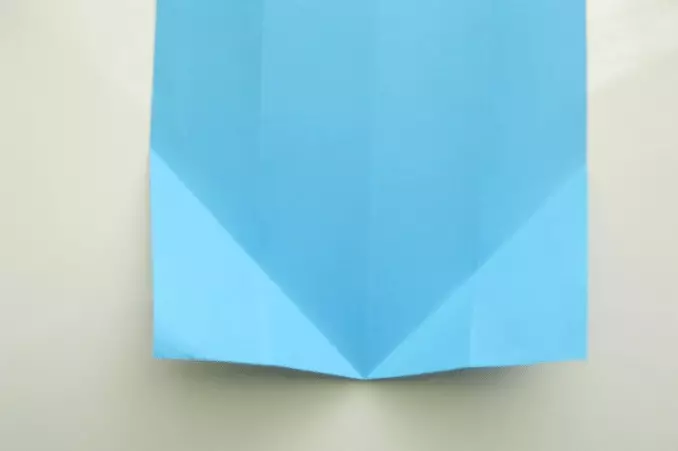
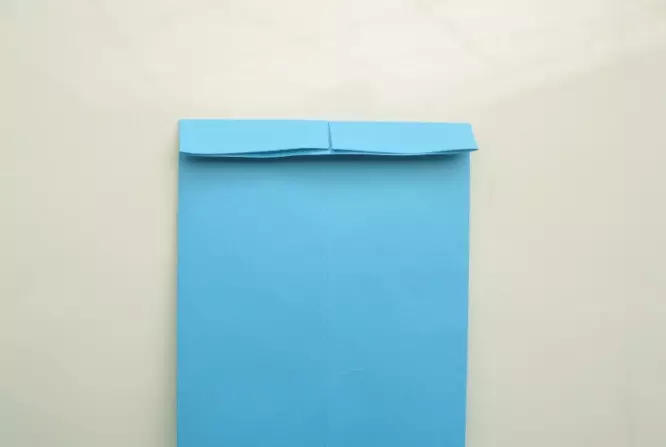
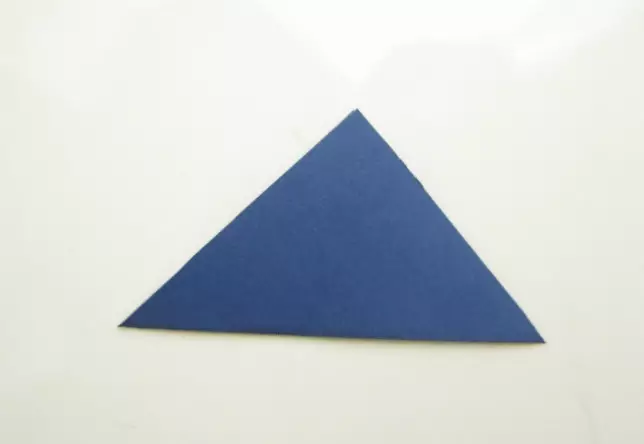
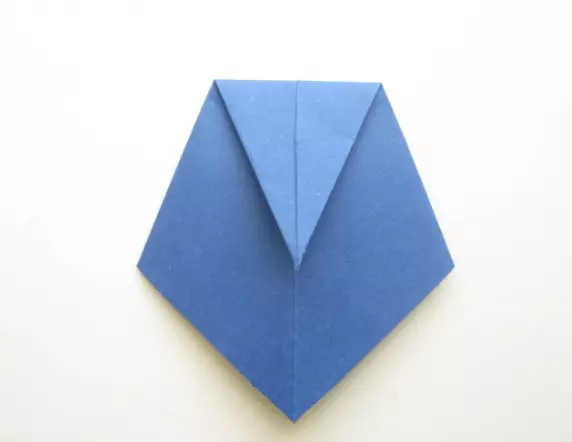
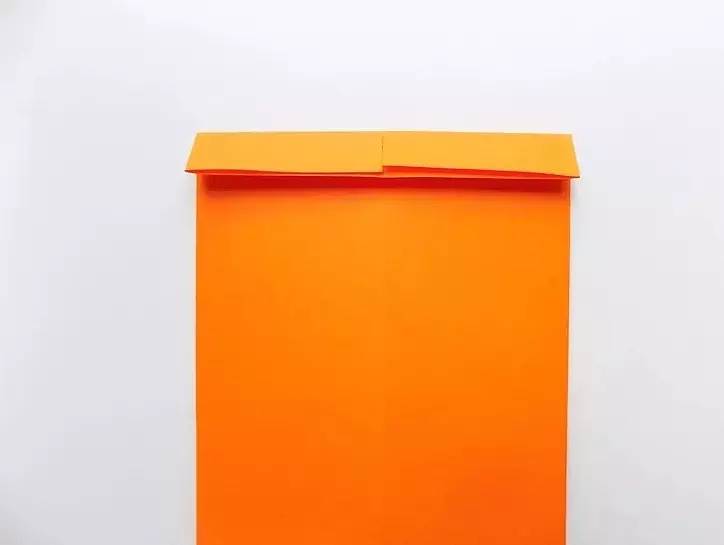
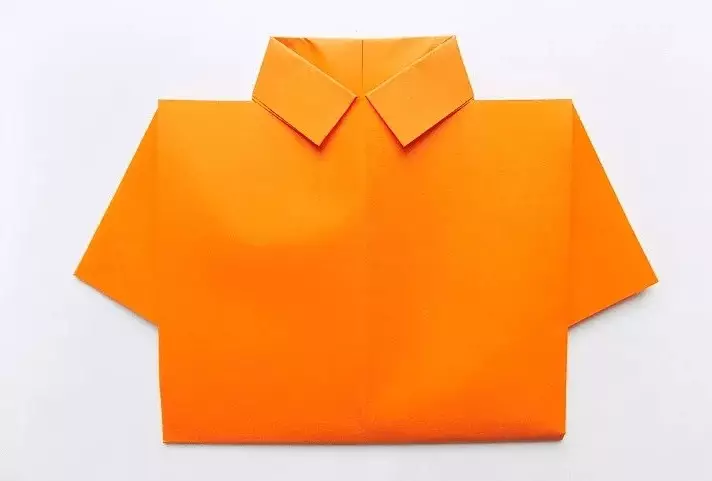
- It is necessary to prepare a sheet of format A5. Its color can be almost any, for example: blue or green. At the first stage, the sheet bend along the line along twice, and then unfold. The elongated edges of the workpiece are folded towards the middle. It is done in the same way as in the basic form "Doors."
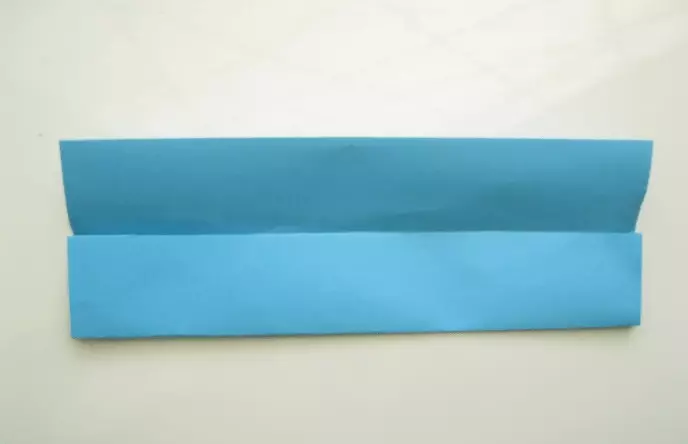
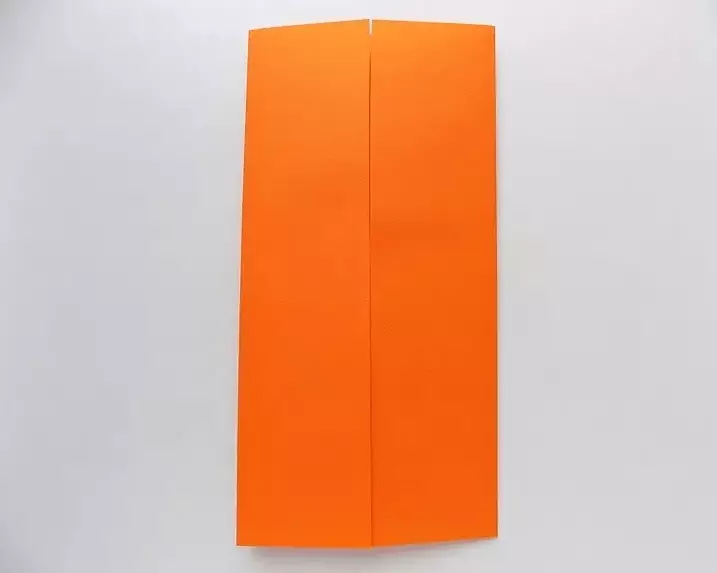
- At the next stage, the workpiece opens. Leafs are vertically.
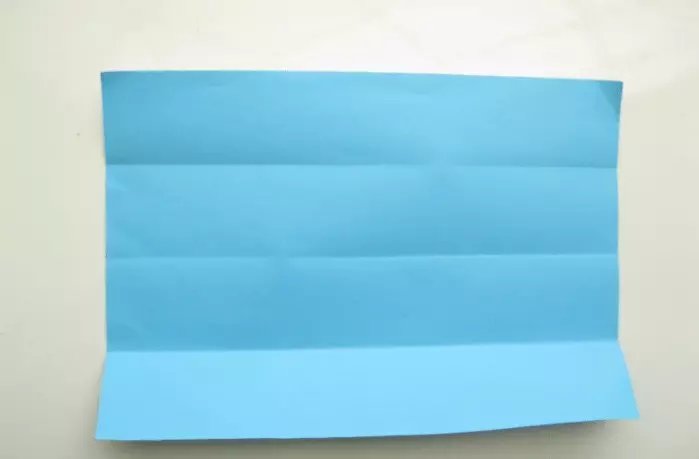
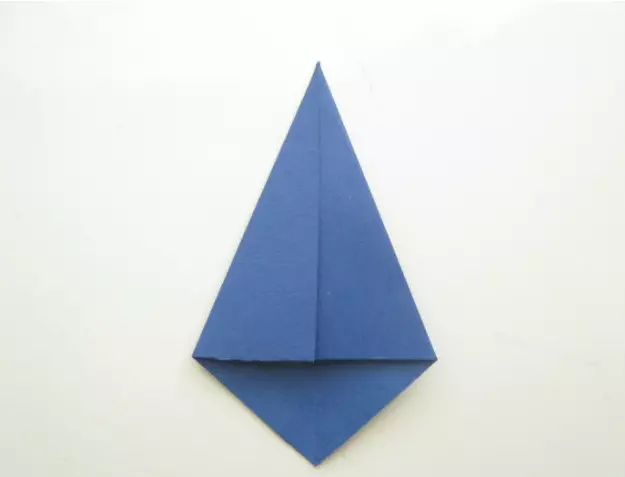
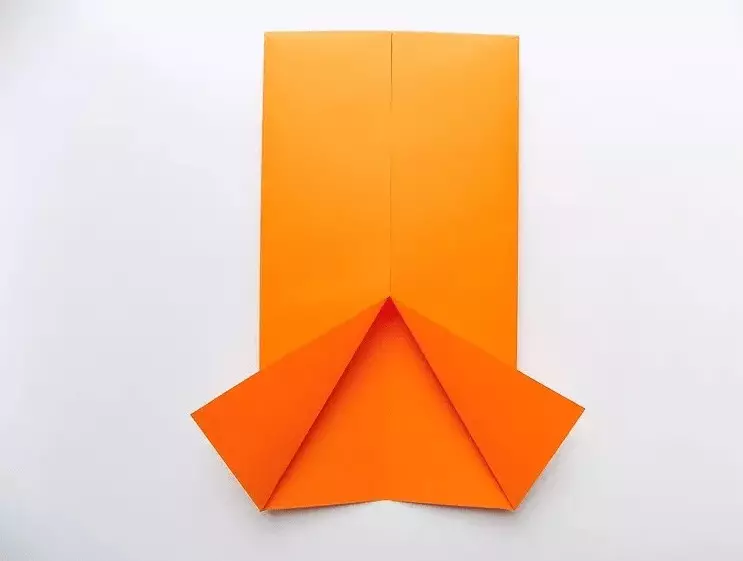
- The corners located at the bottom are sweep towards the central line. The leaf is deployed.
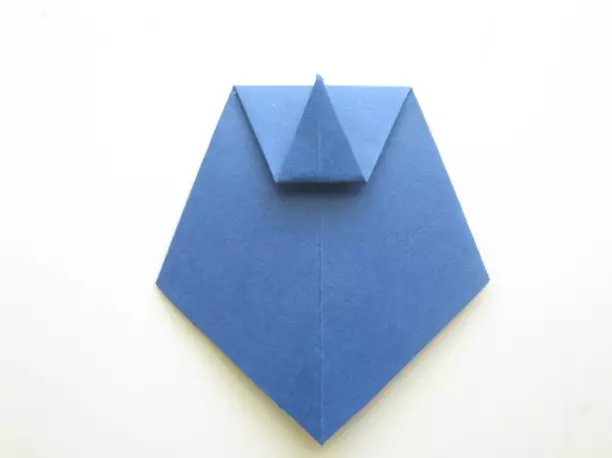
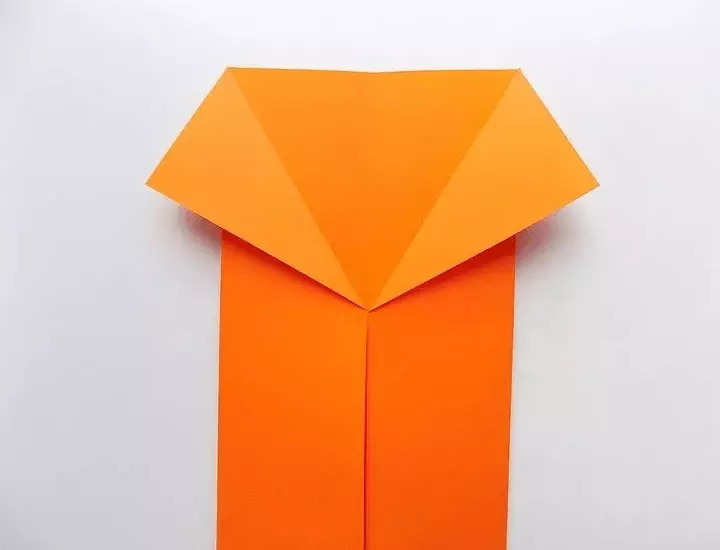
- Now paper blank should be turned over. Corners on the sides of the product are sweep towards previous bends.
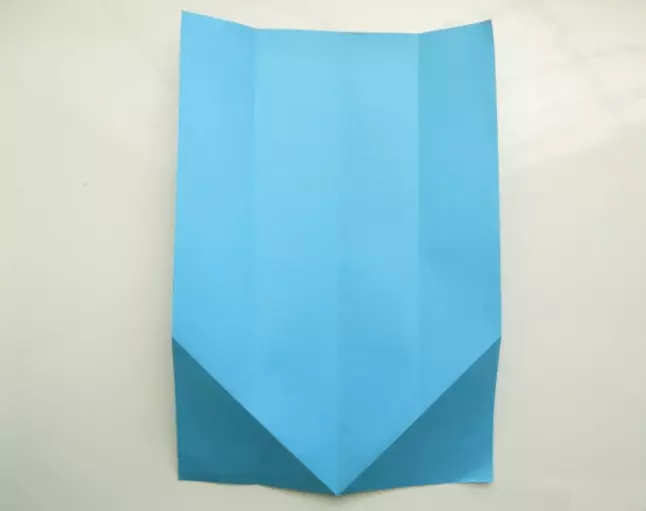
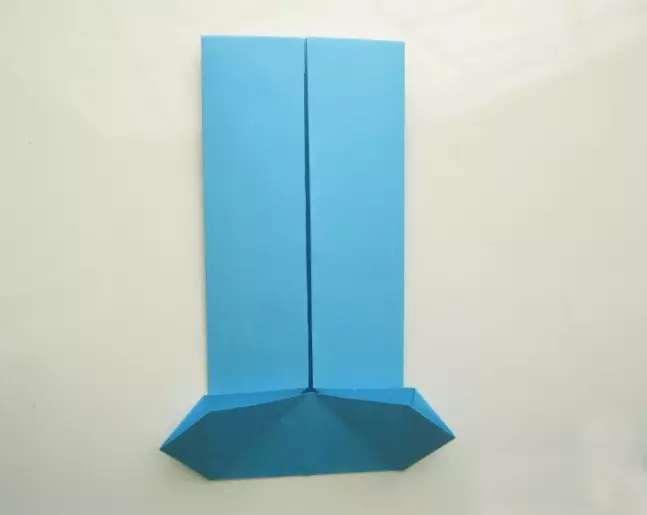
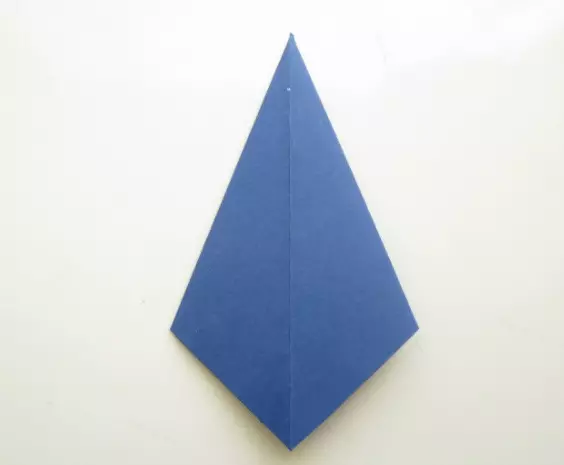
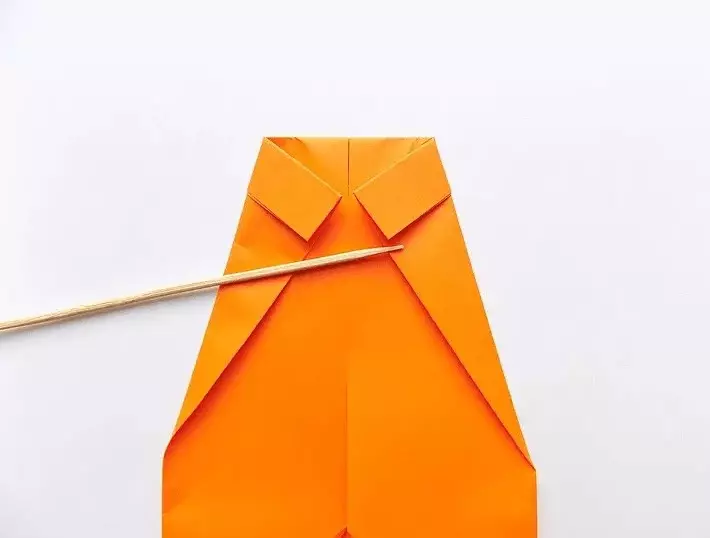
- According to the horizontally located edges of the corner of the product, the lower half bends up. The leaf is unfolding.
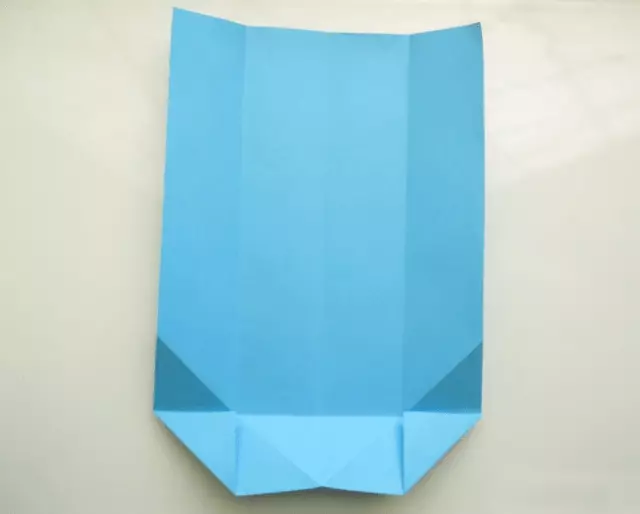
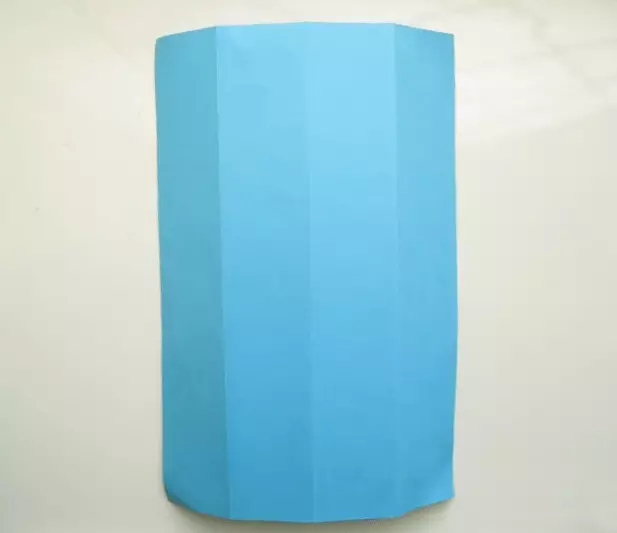
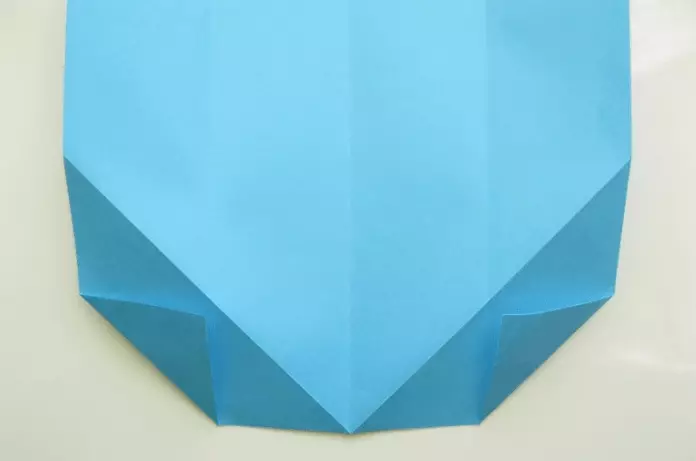
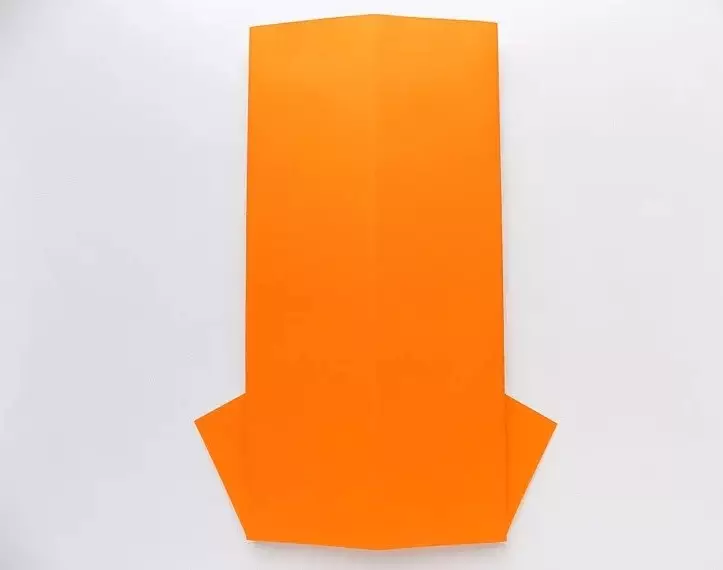
- The side of the billets are folded towards the central line. At the bottom it is necessary to make a fold on the marked lines. The bottom is folded up.
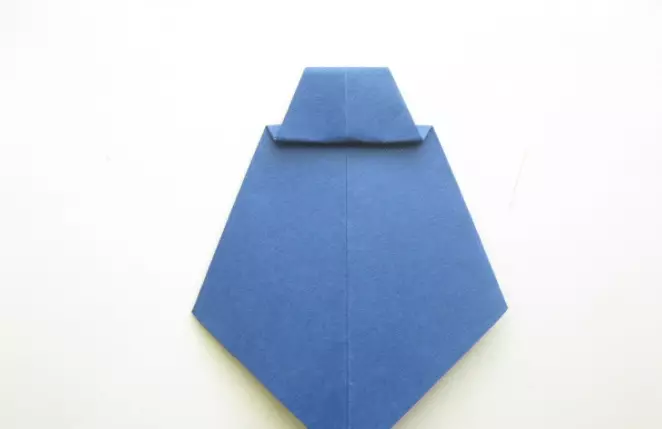
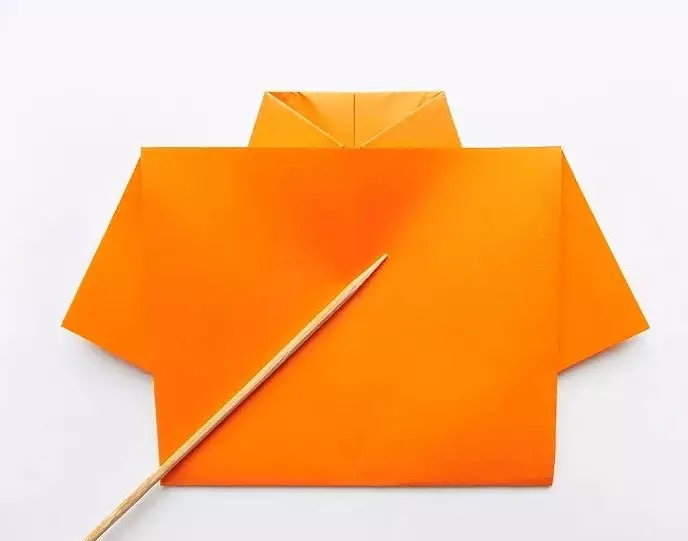
- The product must be turned over. The edge on top of the workpiece fell down the book about 1 cm.
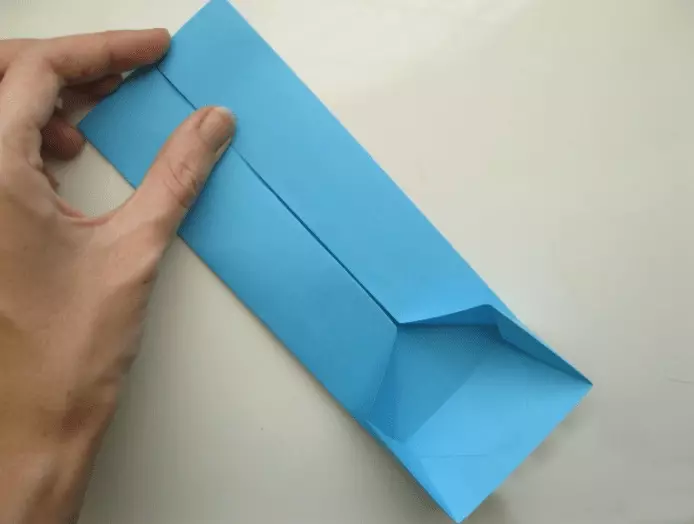
- The product is once again turned over the other side. The upper corners located on the sides are folded towards the central line (1 cm lowering the edge).
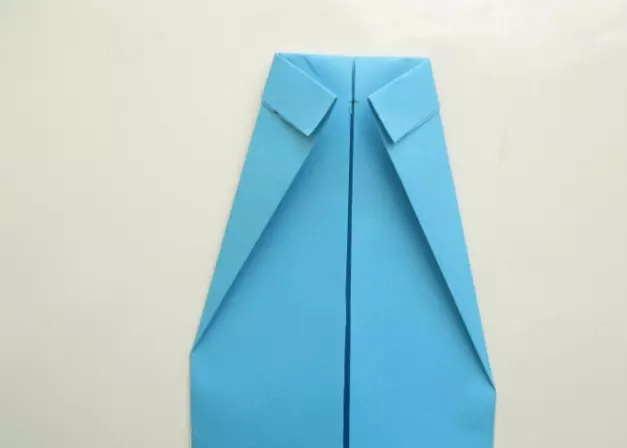
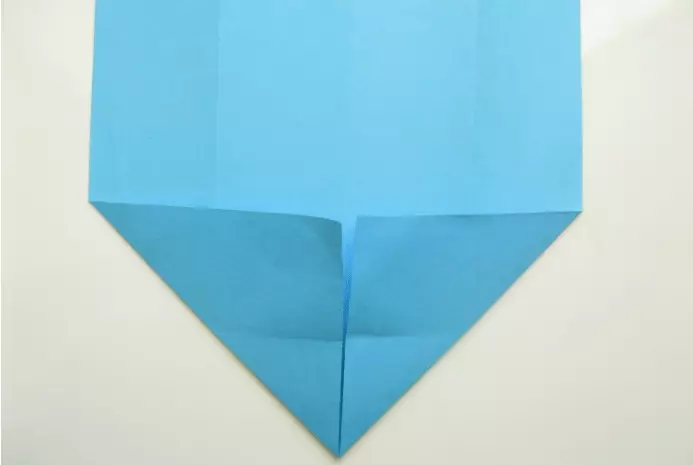
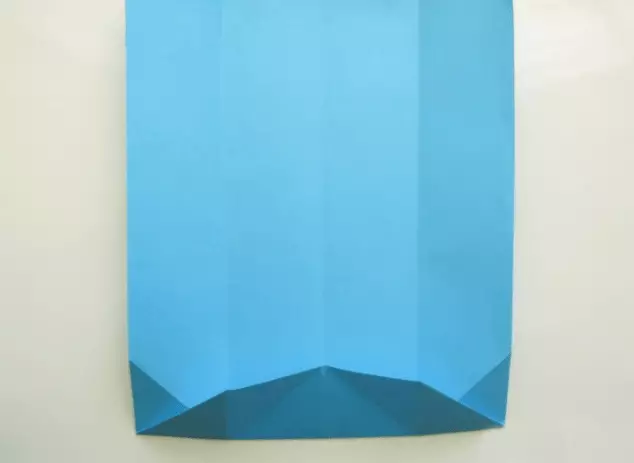
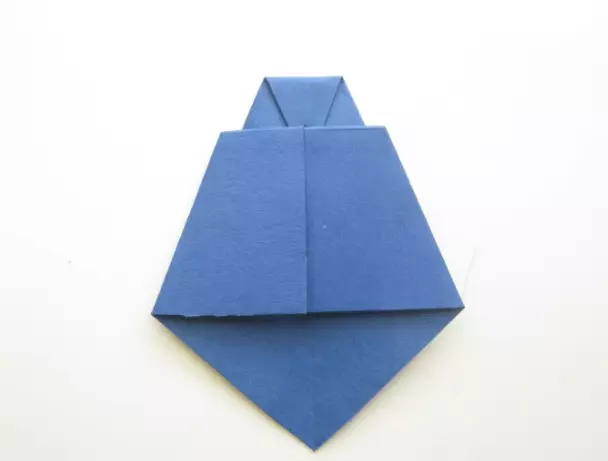
- Now the edge will need to start the corners in the paper design.
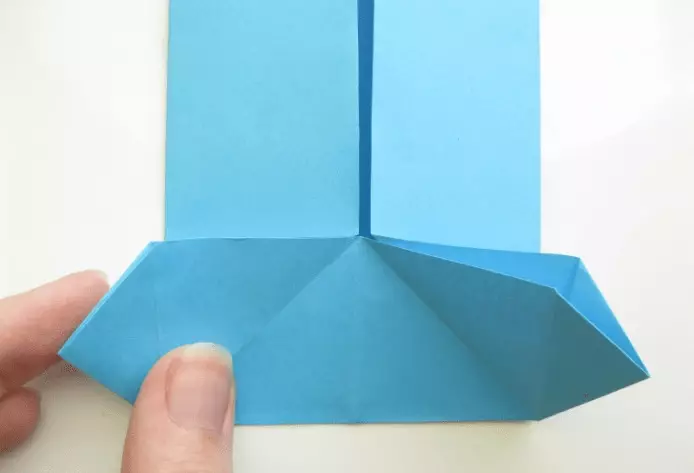
- A small square should be diagonally in half. Then they unfold. Related sides of the product are laid to the fold line.
- The product is turned over. A pointed corner, located on top, fell down the book on the level of corners on the sides.
- Creating a fold of 5 mm, the element is lifted up. The workpiece is turned over to the other side.
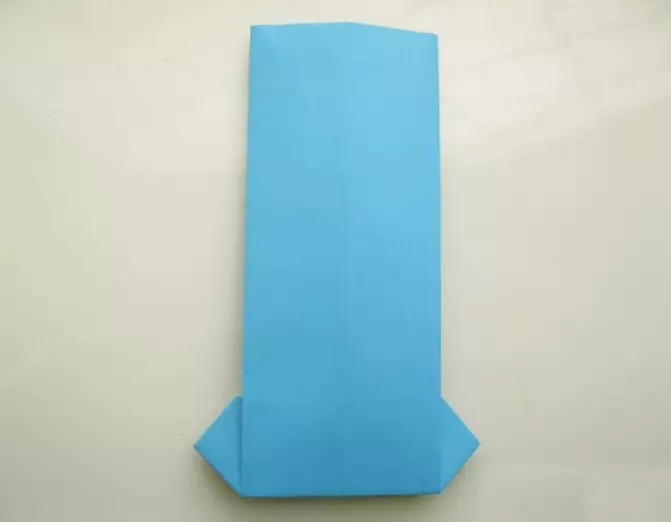
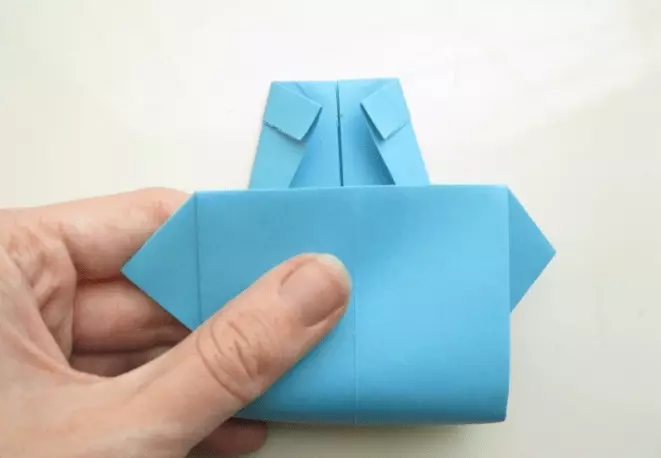
- Side sections of the product laid to the middle. Now paper products need to turn again.
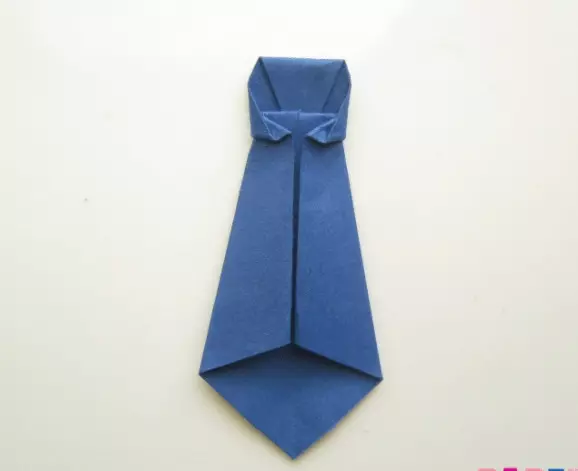
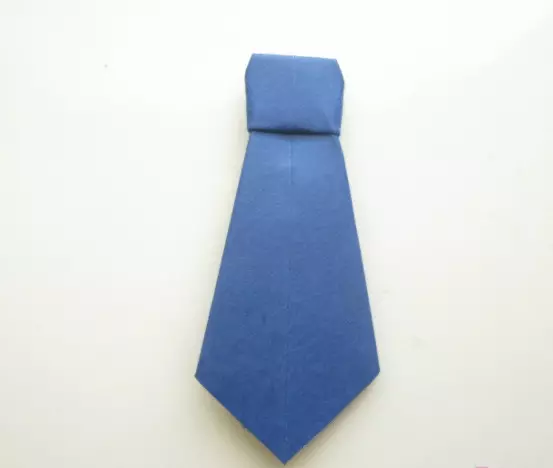
- At the final stage, only join the tie to the shirt. Original handicraft in Origami technique is ready!
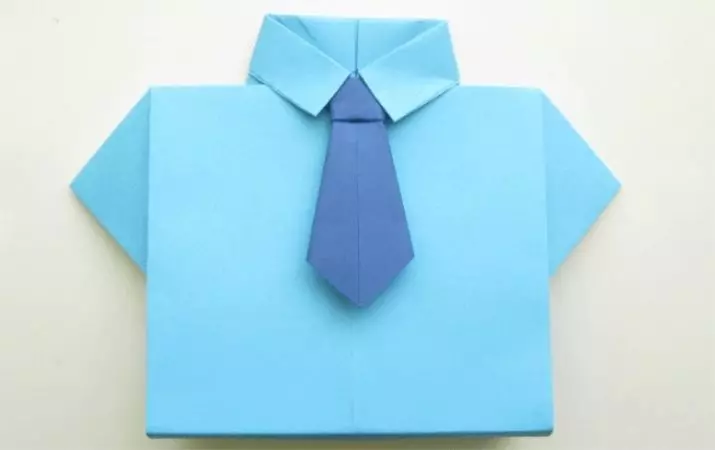
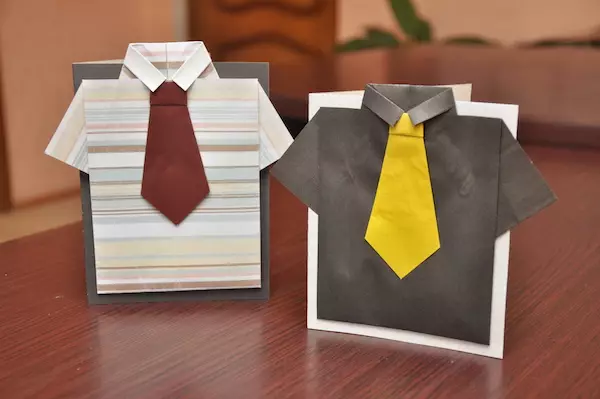
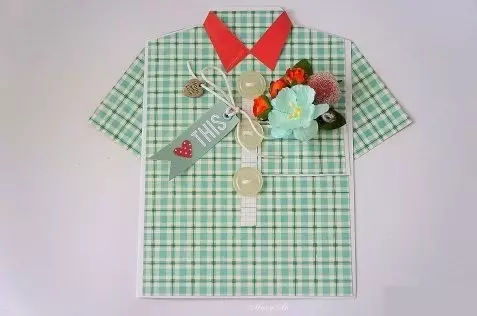
Attractive and creative paper craft can be a classified gift for dad or grandfather. With its modeling, it is easy to cope, if strictly follow the step-by-step instructions.
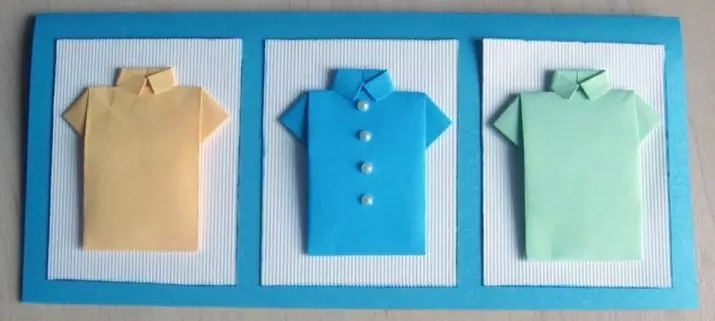
How to fold a shirt with buttons?
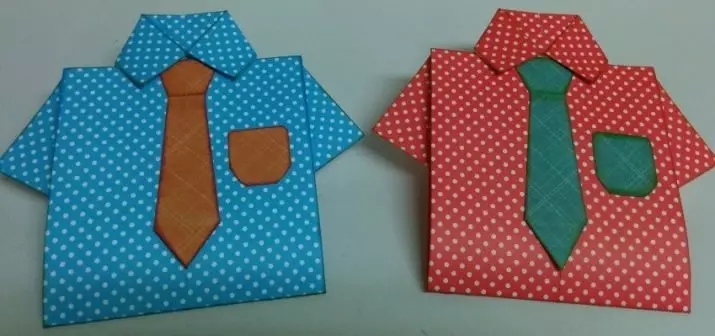
An interesting craft of paper can be made it in the form of a shirt with buttons. From such origami-figure figures will be released creative gift for February 23.
To make such a product, it will be necessary to prepare a square paper sheet, 3 small pumps of different colors, as well as glue. We will analyze the step-by-step instructions for modeling crafts from the listed components.
- First, the square blank will need to be folded twice. The product is disclosed, and then form the basic form of "doors".
- Corners located on the outer layer will need to be divorced from the middle. Now the future shirt with buttons must be flipped over, and then deploy 180 degrees.
- The edge from above the product is slightly sweep downward. The billet is turned over.
- The top corners on the sides are bend towards the central line. At the same time, it is necessary to retreat from the edge from above about 1 cm. The upper half of the product will be needed to raise the area of the intercourse. The edge must be fed under the collar of a paper shirt.
- At the final stage, the master will need to be glued to the finished paper base of pumps. These details will play the role of buttons crafts.
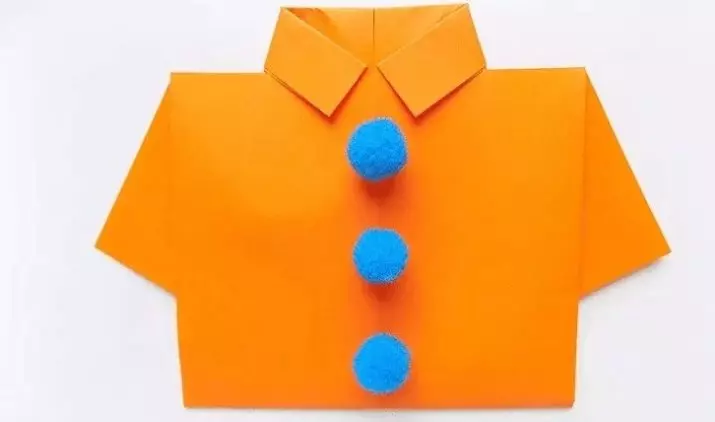
Such an attractive and original product can be a cool decoration of a festive card.
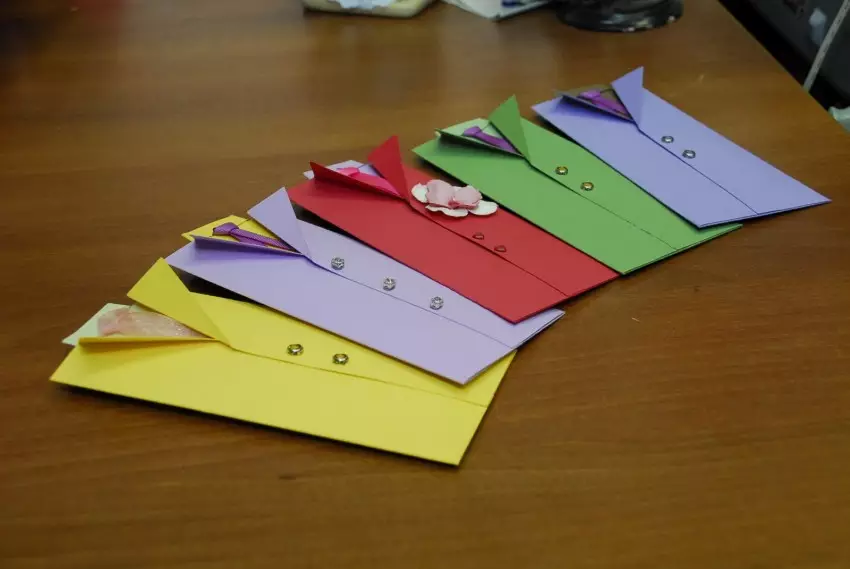
Folding Scheme from Covers
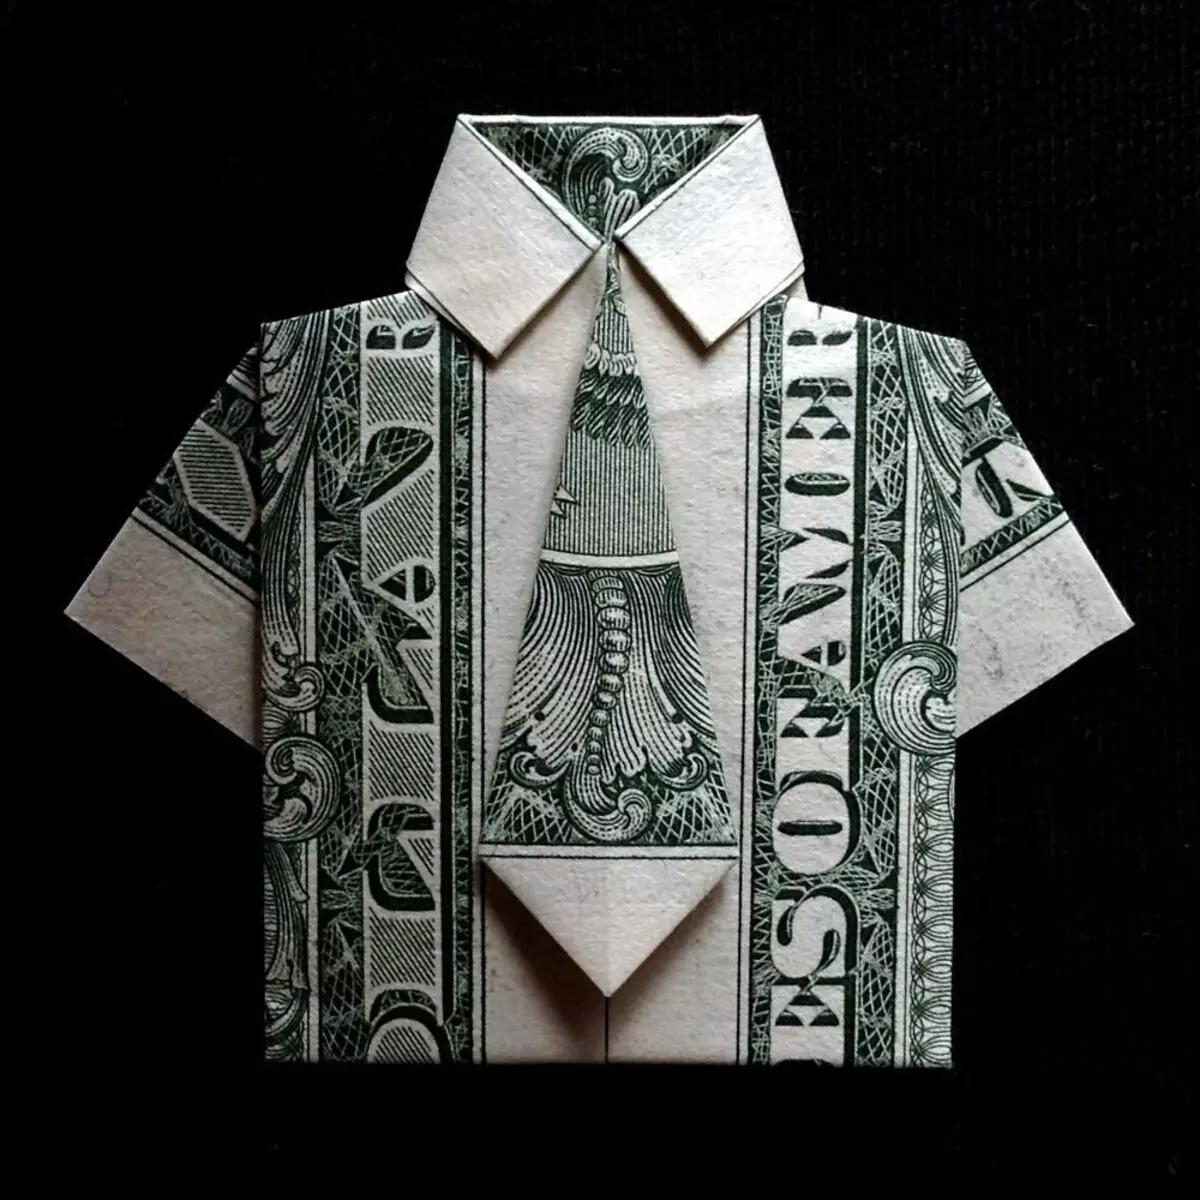
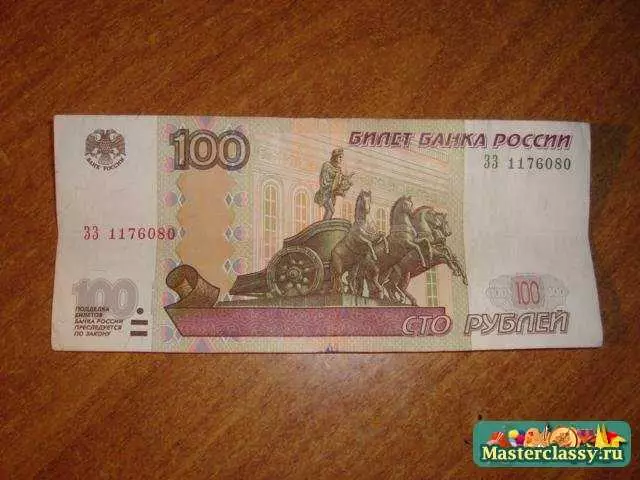
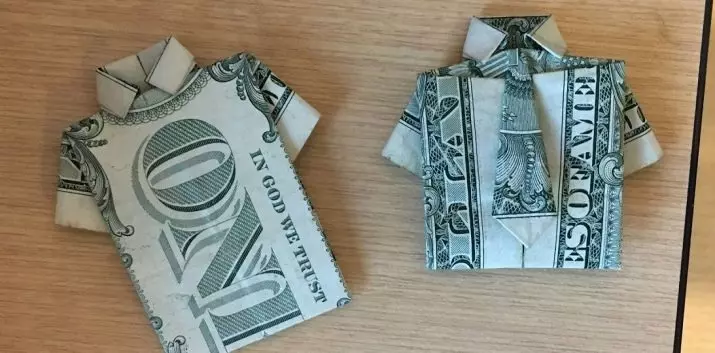
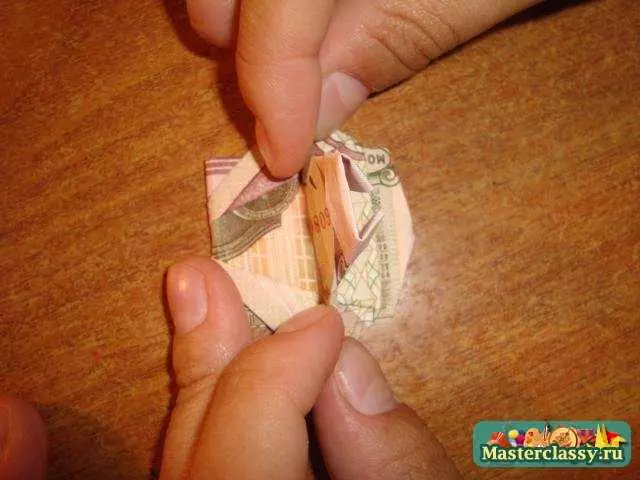
Origami in the form of a male shirt with a tie can make it possible to make not only from a regular piece of paper, but also from monetary bills. If the masters have insufficient experience in such creative work, it is better to use the bill of little nominal at first.
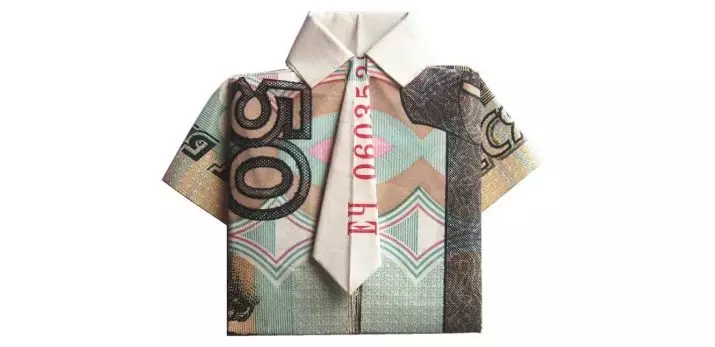
We will analyze a detailed master class on modeling with your own hands of a beautiful figure from monetary bills.
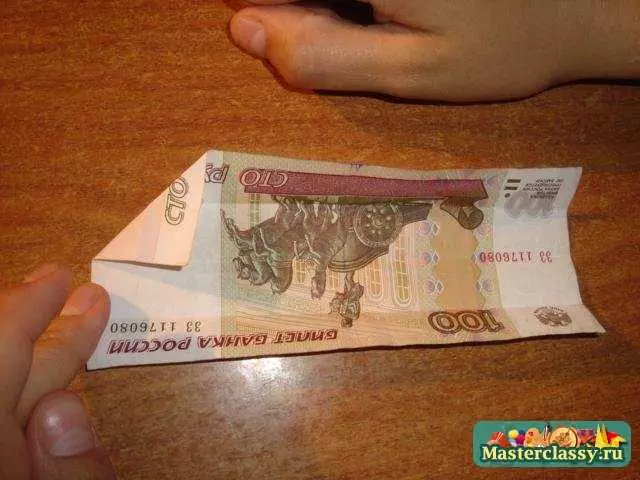
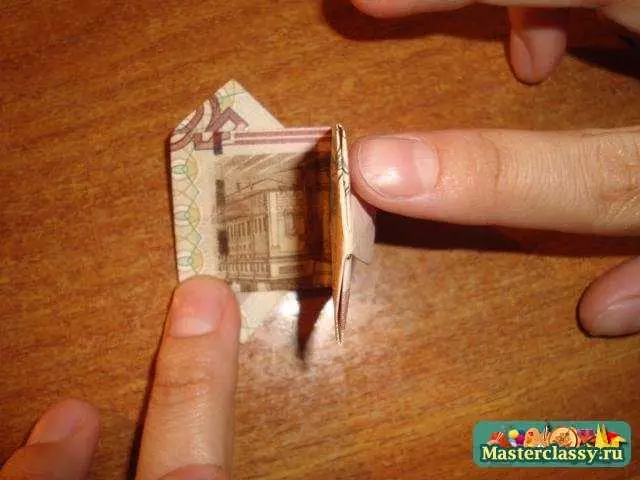
- First you need to turn the bill on its long side twice. Further, each of the halves are folded once again in half, so that as a result, it turned out a bill divided into 4 equal parts.
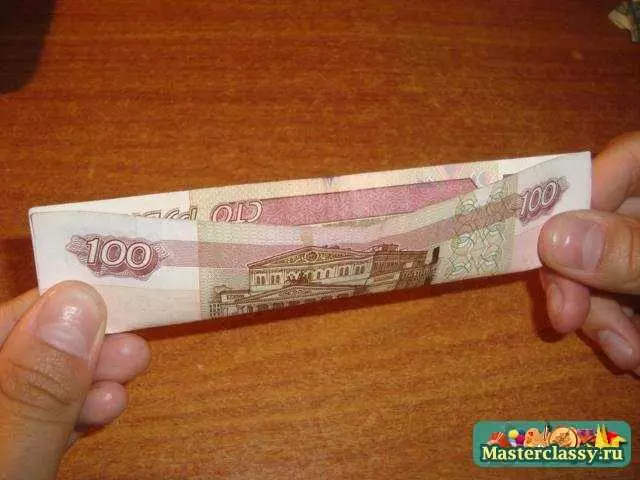
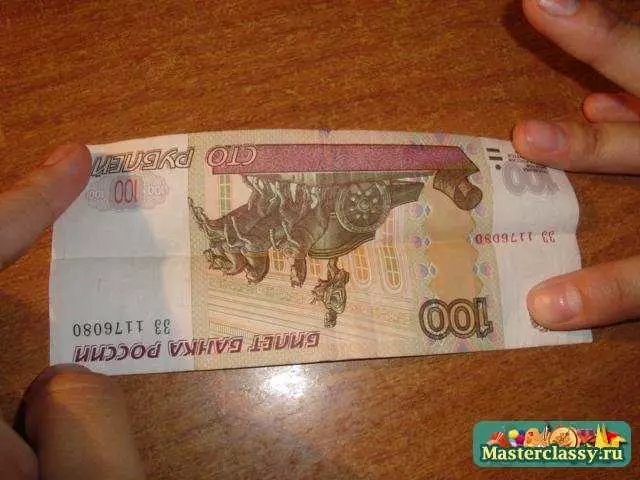
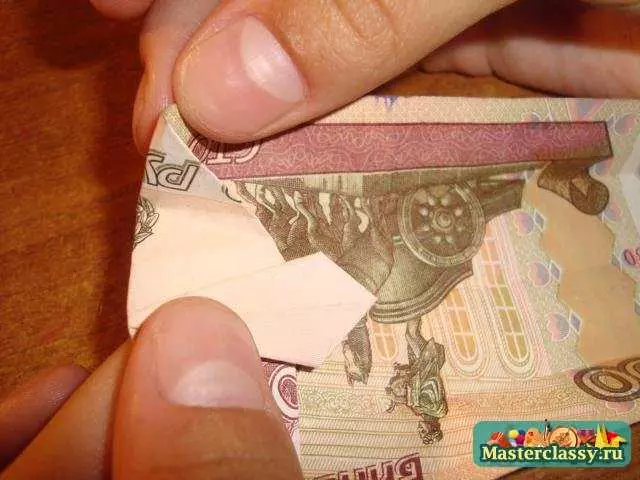
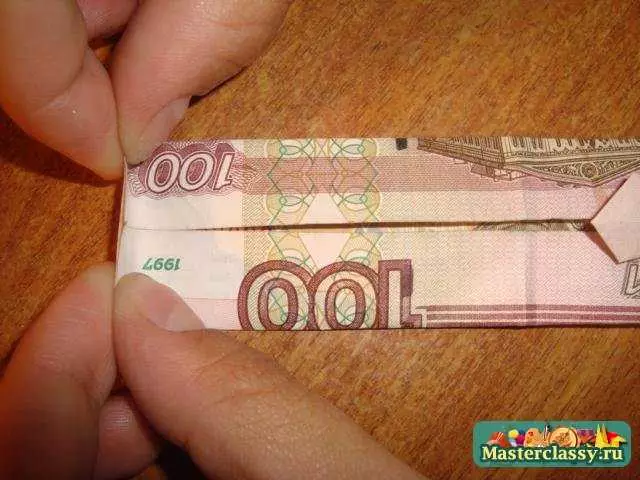
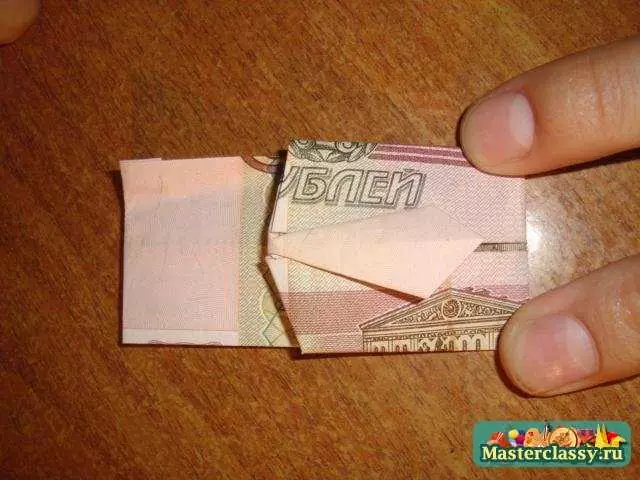
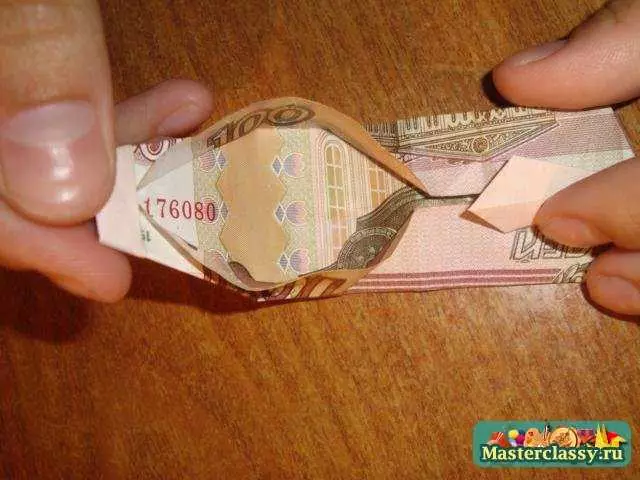
- At the next stage, on the one side of the base, it is necessary to gently break two corroson towards the center. The formed triangle bend on itself. The fold must be made at the very base.
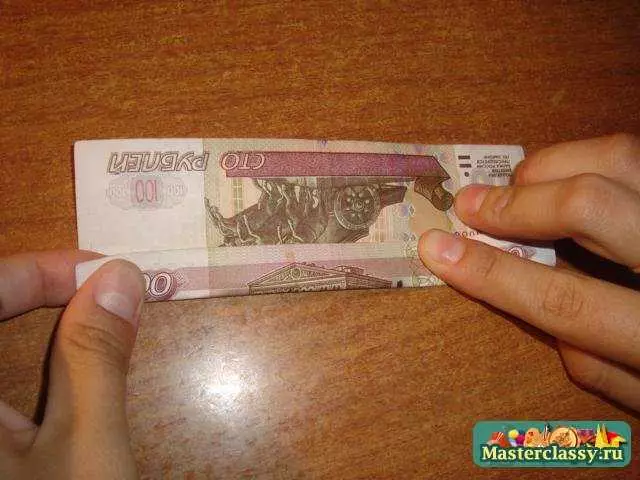
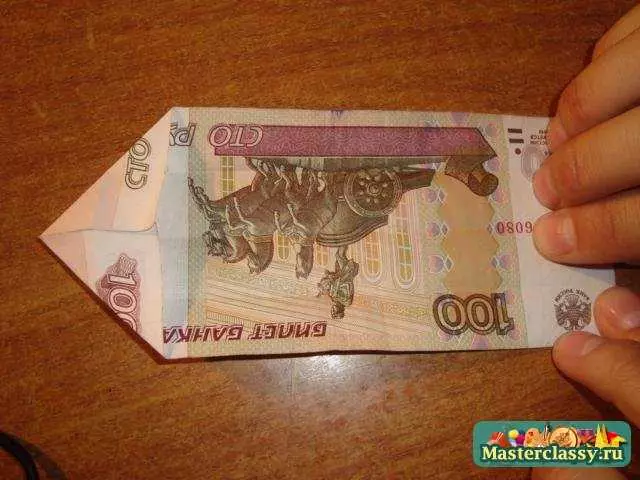
- Now you need to form galete. This component will be located in a portion of a triangle. Tie sizes can be determined arbitrarily. After that, under the tickle, both small parties are bent. At the next stage, it is necessary, gently lifting the previously bent line, to adjust the bill on two sides so that the angles coincide with the very beginning of the tick.
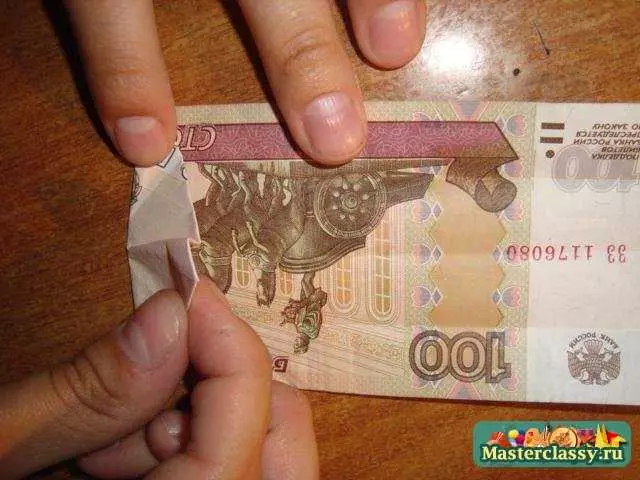
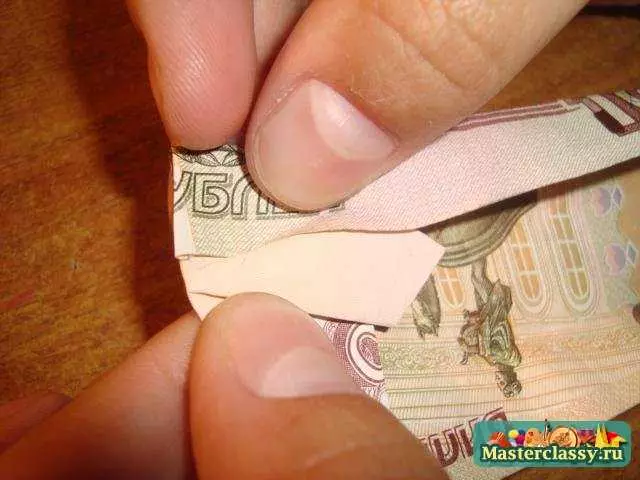
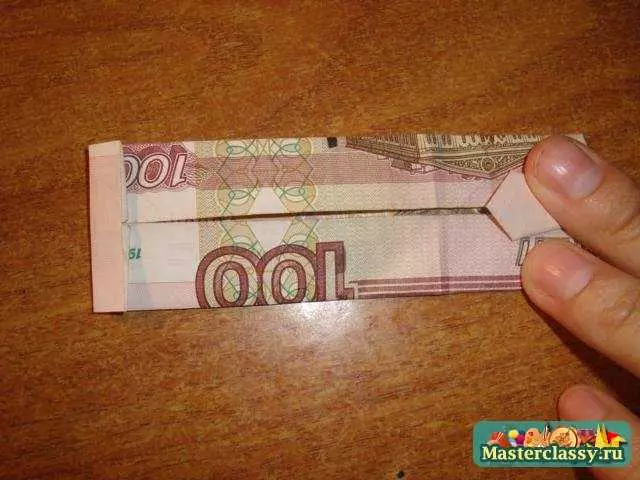
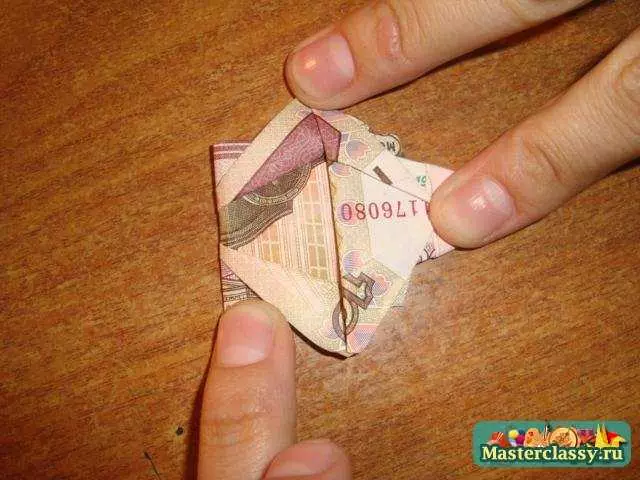
- Now you need to go to the opposite side of the billet bill. You do not need to turn over the product. It is necessary to get the edge of the workpiece on itself (about 5 mm). Next, the monetary bills turn over the other side, that is, a tie to the working surface. It will be necessary to arbitrarily determine the height of the shirt, and then bend it.

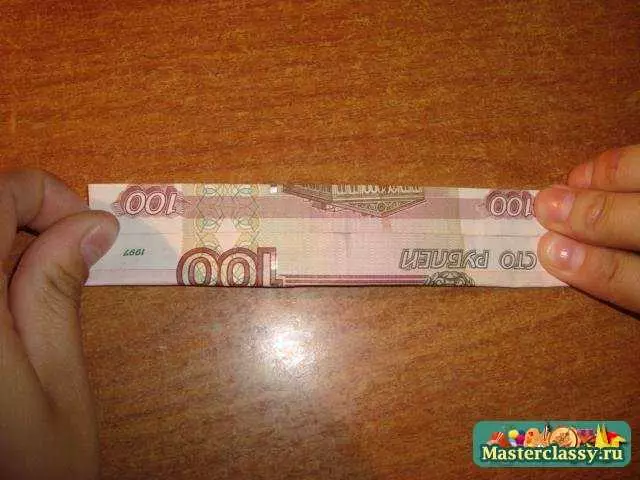
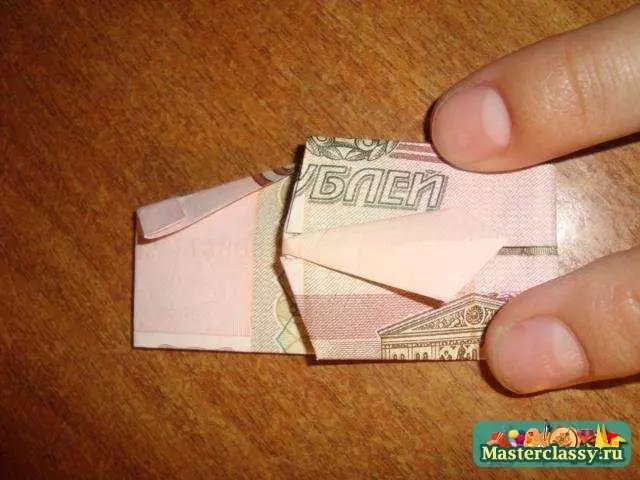
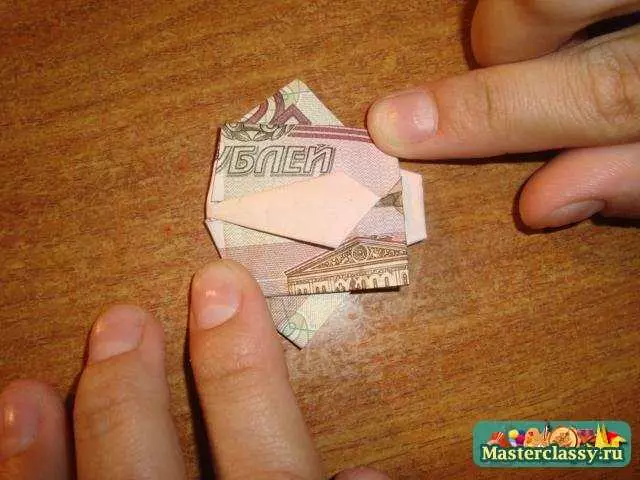
- On the other side where the product collar is located, you will need to adjust the corners towards the middle. It is necessary to do this so that the lower bend end at the very beginning of the shoulders of origami-shirts.
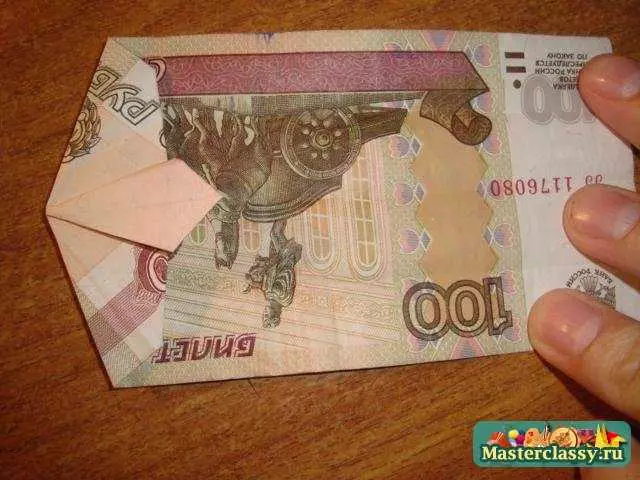
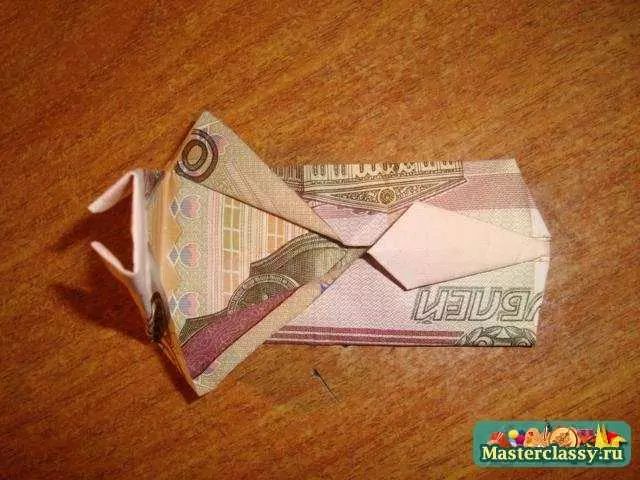
- At the next stage, the product turns over the other side - the touch towards itself. The master should see the seam on the product.
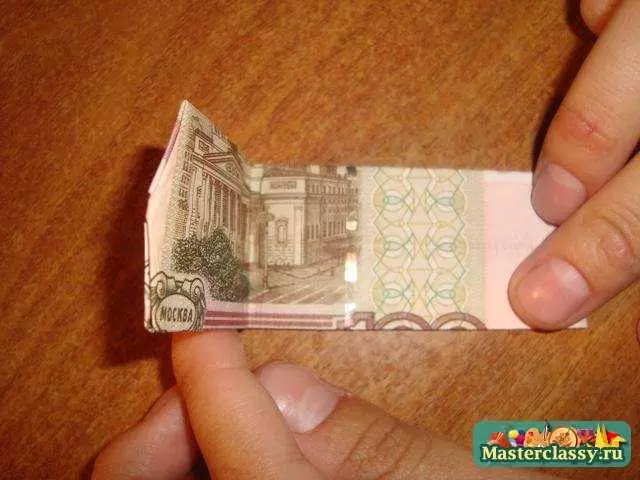
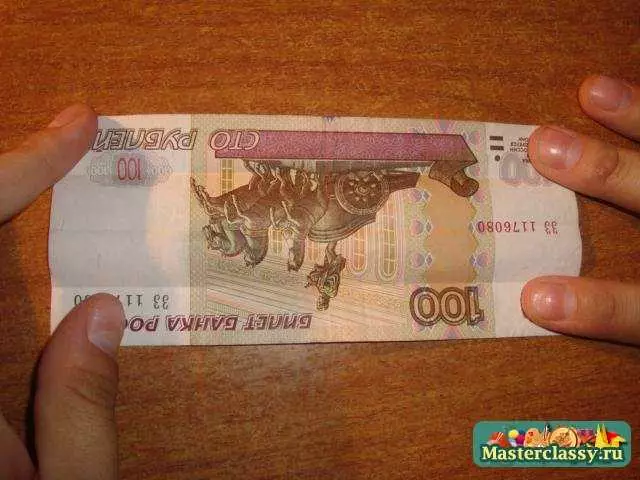
- On both sides of this seam will be needed to make bends at an angle of 45 degrees from the fold of the height of the shirt. It must be done so that the excavation was formed.
- The same actions must be made from the collar of crafts. The angle at the same time is chosen arbitrarily, and the fold will end in the corners below. As a result, a large excavation resembling a boat should be formed.
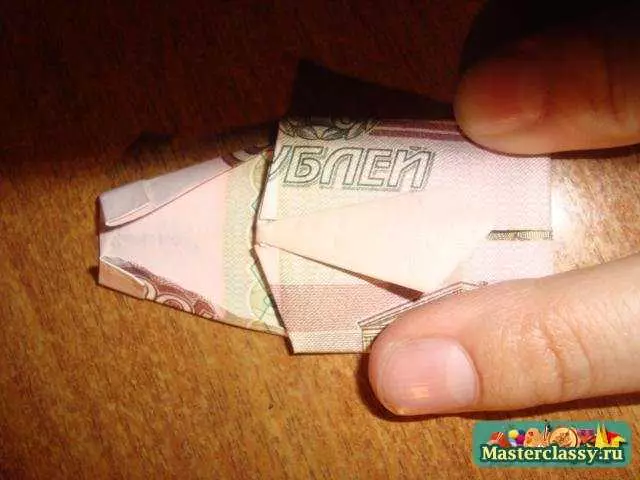
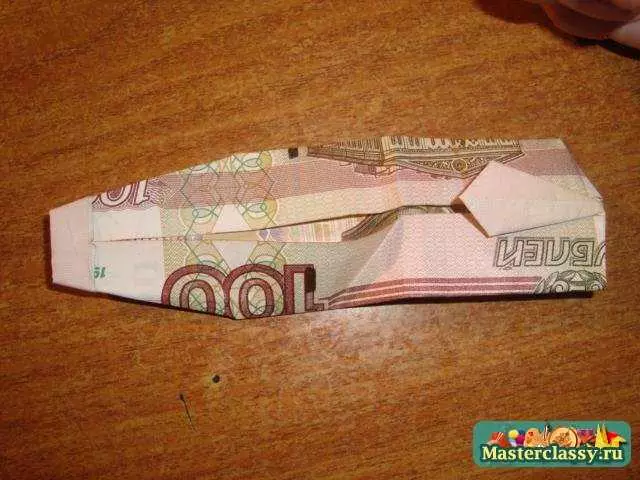
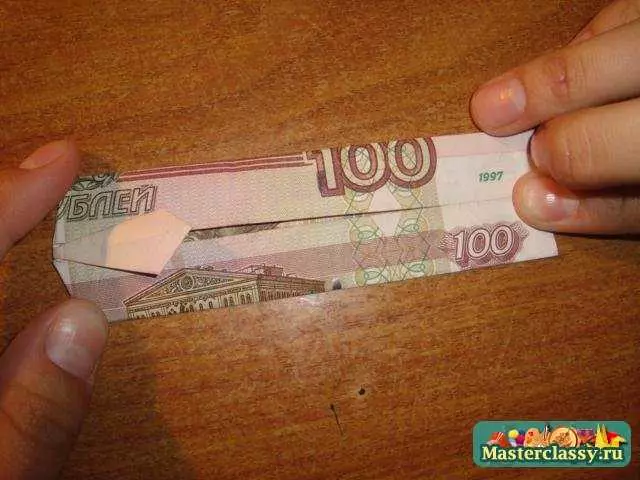
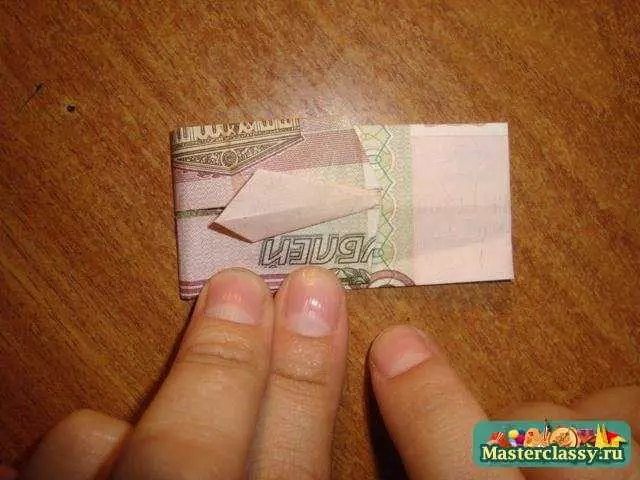
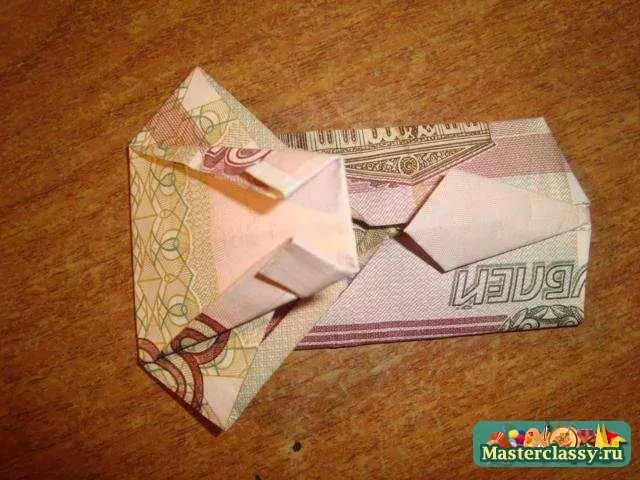
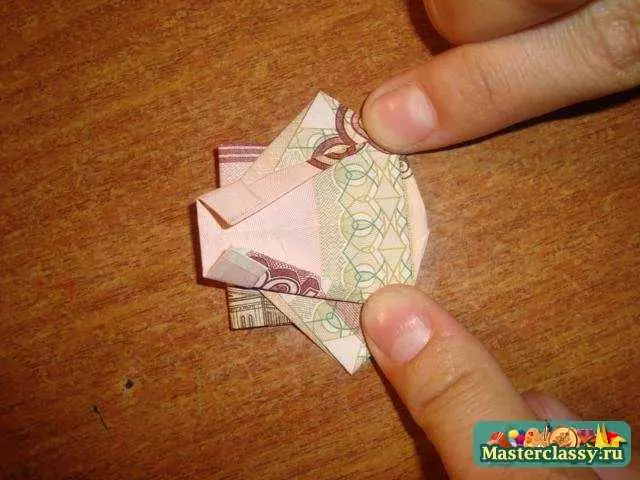
- Now the obtained boat should be bent at the bent of the lower corners from the collar of the workpiece.
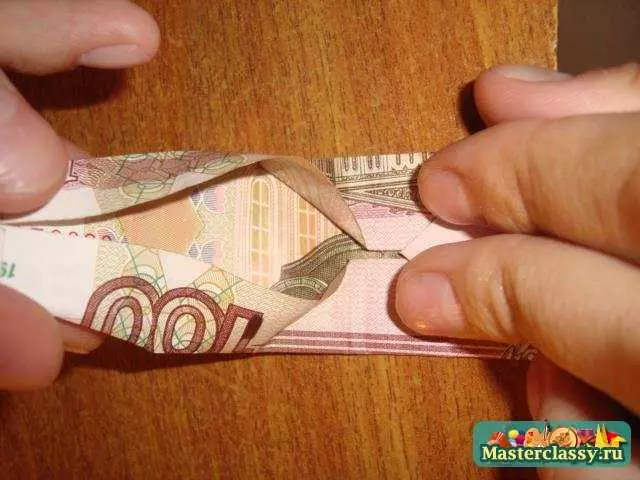
- CUNU is now needed to flip over the other side - the tick of himself. After that, the workpiece is twice as much as the edge.

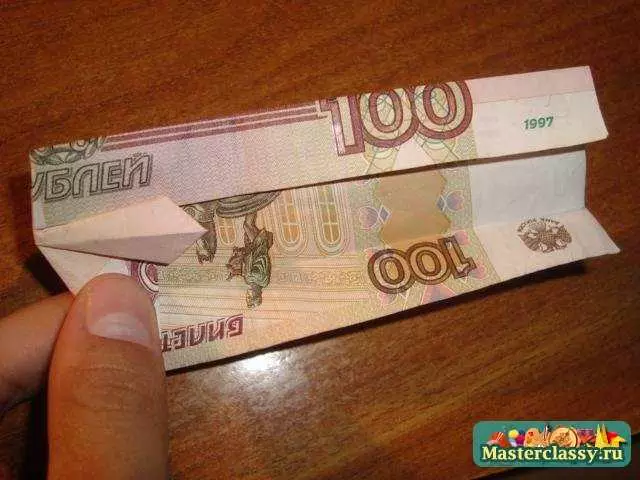
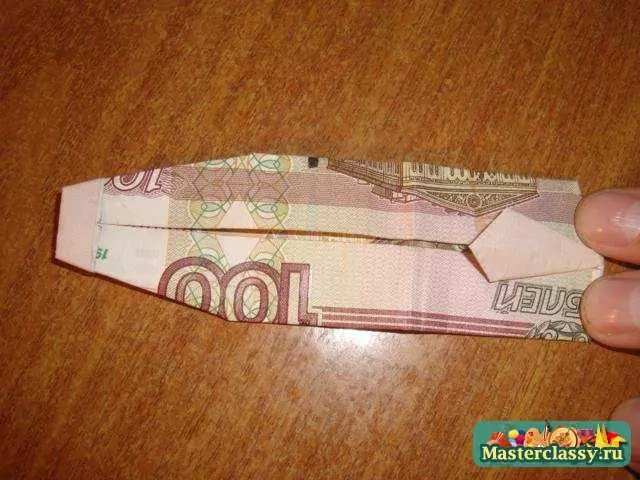
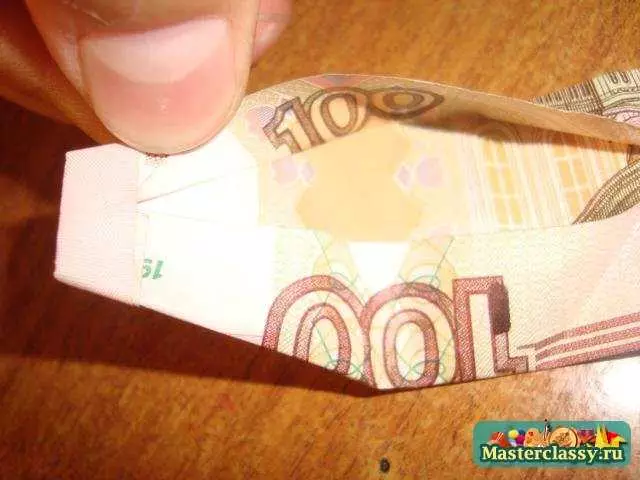
- The product is turned over to the other side. Collar craft bend towards yourself. This should be done so that the collar takes his start right above the tie.
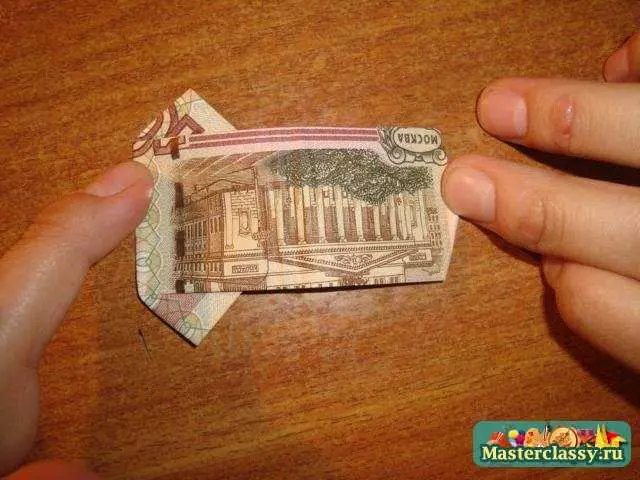
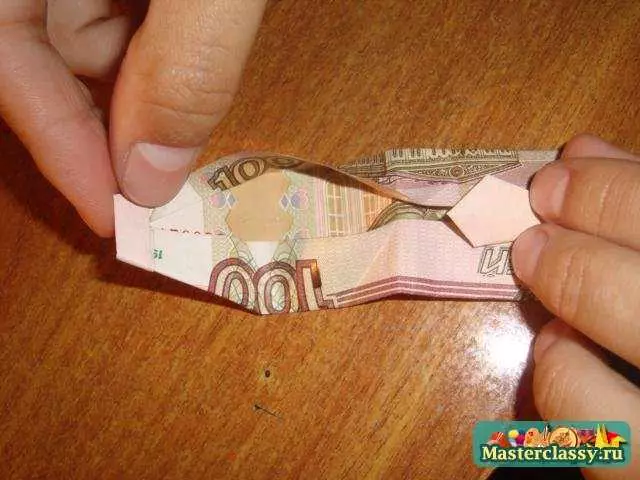
- At the next stage, the "monetary" shirt should be turned over to the face of the face. It is necessary to pull the corners of the collar up. At this stage, an interesting handicraft from monetary bill will be fully ready!
7.
Photos
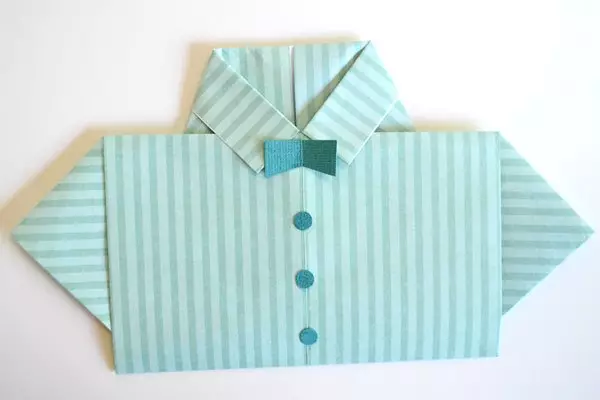
Useful Tips and Recommendations
The original craft in the form of a shirt with a tie can simulate both experienced and beginners of origamists. When conducting such works in Japanese technology, it is worth following useful advice and recommendations.
- To make a really beautiful and creative handicraft, you need to use high-quality paper sufficient density . You can immediately purchase special leaves for origami. Similar materials are sold in stores for creativity and art.
- In the choice of paper paper origamist is not limited. Shirt with a tie can be made from materials absolutely any color. If the product serves as a gift or scenery to a gift, it is advisable to simulate it from the brighter leaves.
- If the manufacture of paper craft will use the adhesive to secure additional elements, it must be used in small quantities. If the adhesive composition is too much, it can negatively affect the external attractiveness and accuracy of the product.
- Original crafts in Origami technique need to be mastered by taking patience. The master should not act too hurry, hurry. Due to the unnecessary rush, the figure may turn out to be unavailable and frankly careless.
- The finished handicraft in the form of a shirt with a tie can be additionally decorated if desired. The craft can be painted, decorate with a variety of drawings and patterns - in this fantasy wizard is no limited.
- It is not recommended to learn to do the origami figures, using too complex and intricate schemes. It is best to start with the maximum easy and affordable master classes. "Hanging a hand", a beginner origamist may gradually move to more complex types of schemes.
The video structure demonstrating the process of folding a shirt with a tie of paper is presented below.