
Children love tiny cute ladybugs. Even those who are afraid of bugs and spiders, boldly take the red insect with black spots, because it personifies the warm sun. The kids are happy to master the masking of the ladybug. The task of parents is to choose bright, safe plasticine and teach crumbling with simple techniques.
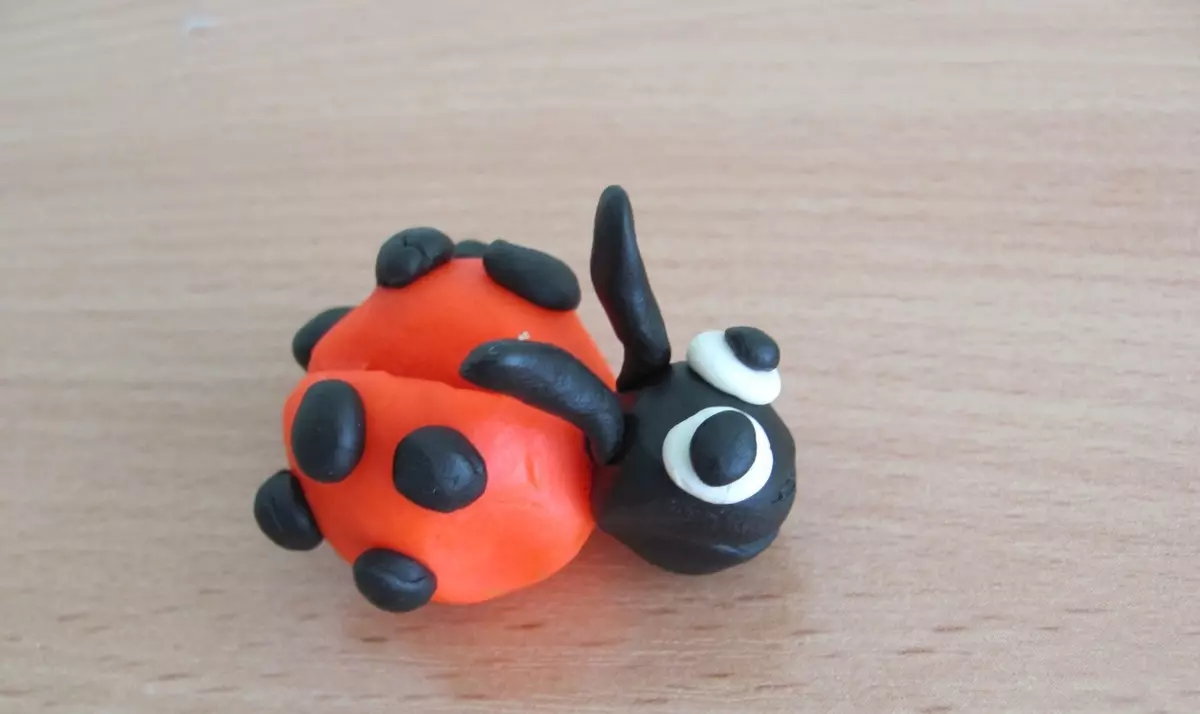
Simple option
Let's start mastering the technique of modeling with a simple version of God's cow. Actions are simple, suitable for young children and for beginners.
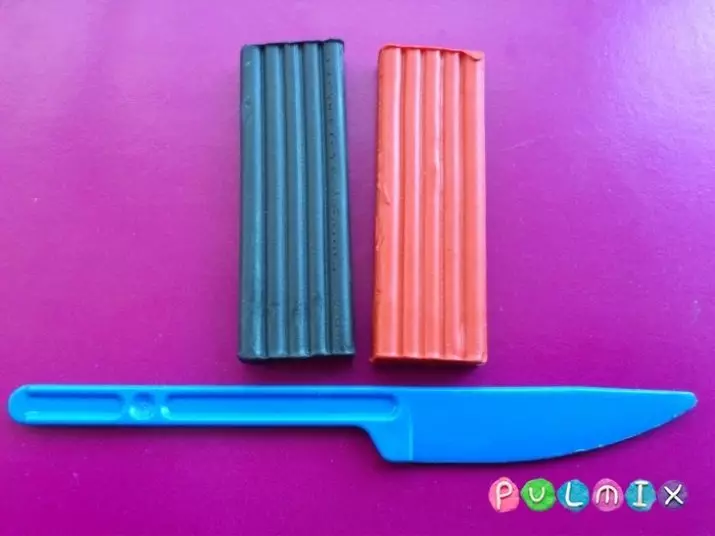
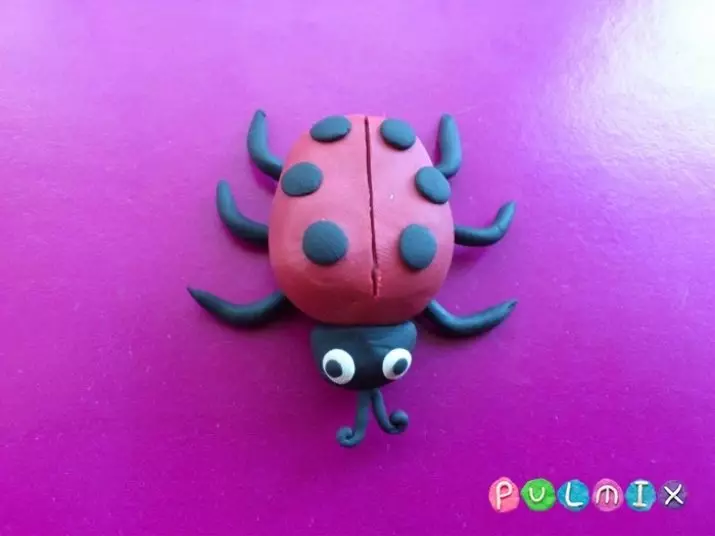
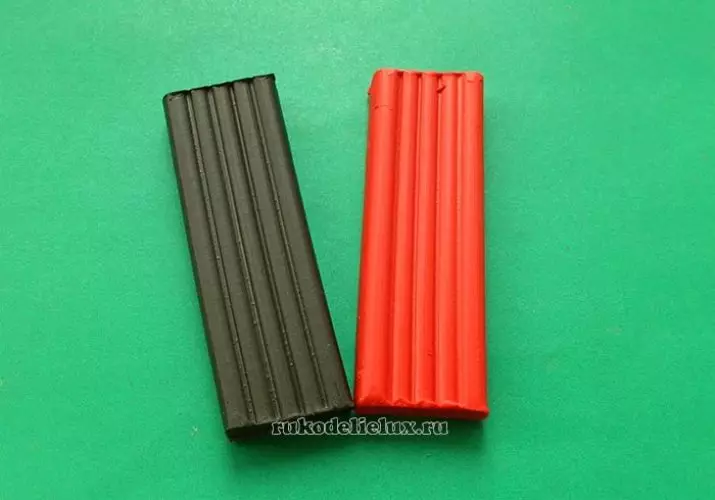
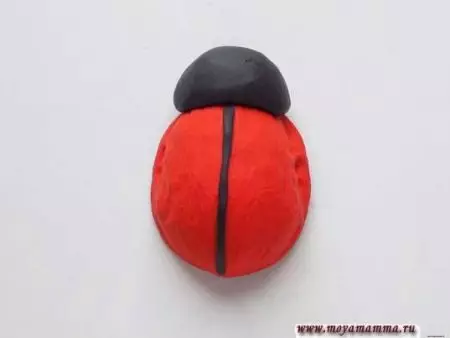
Offer the child to choose a plasticine of three colors - red, black and white. Most likely, he will call the correct shades.
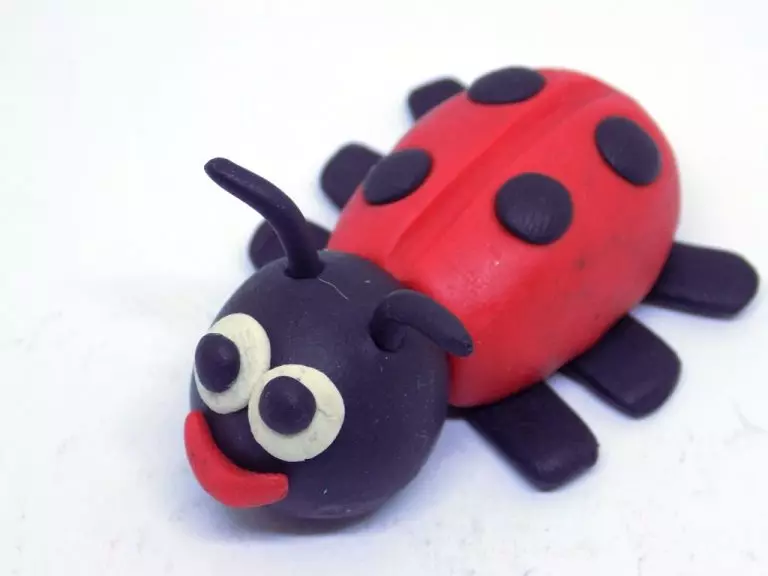
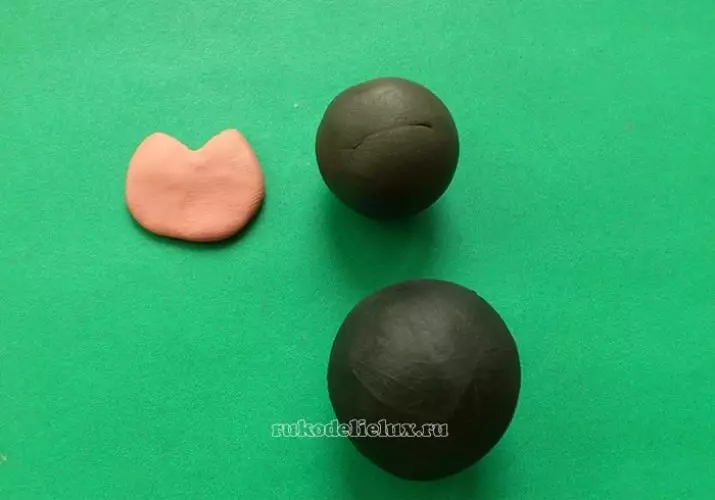
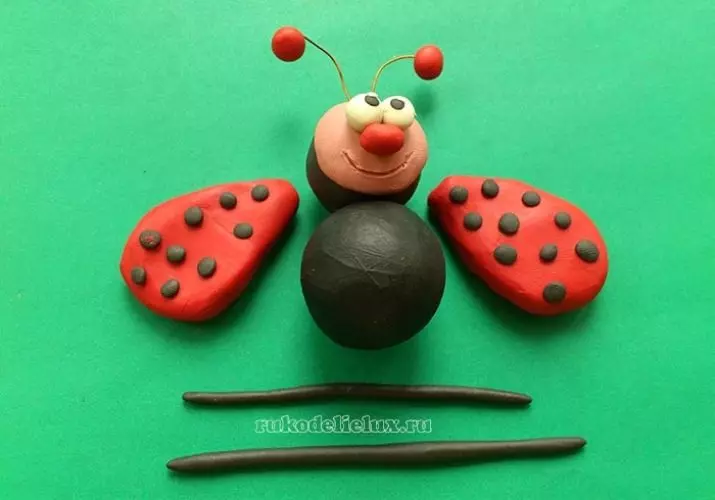
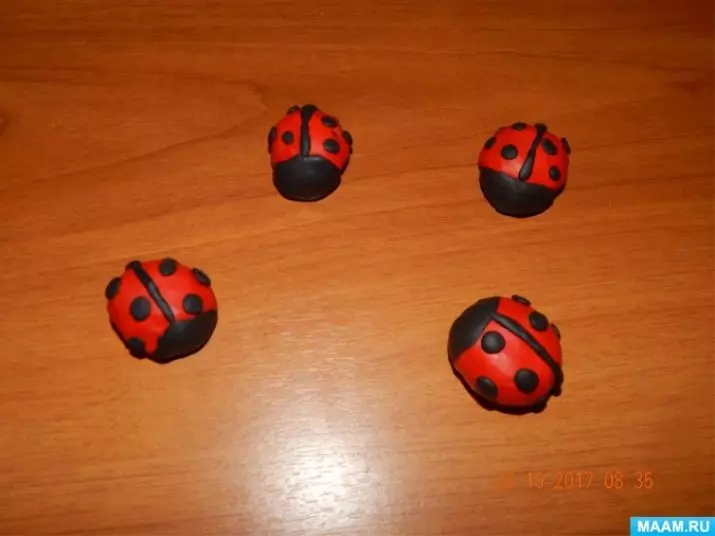
White put aside, from the red, shattered in the hands of the material, roll the ball of magnitude with walnut - it will be a back. From a black piece, form a stomach cake.
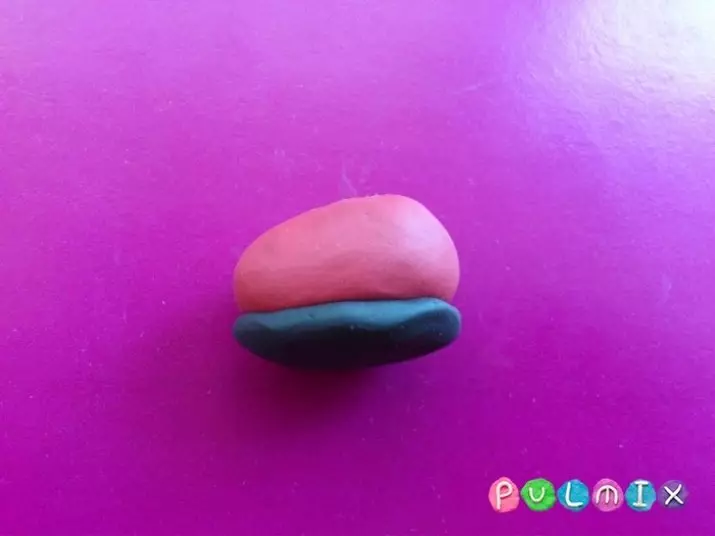
Now you need to fold two fragments, configuring the size one to another. It turned out a rounded bug taurus.
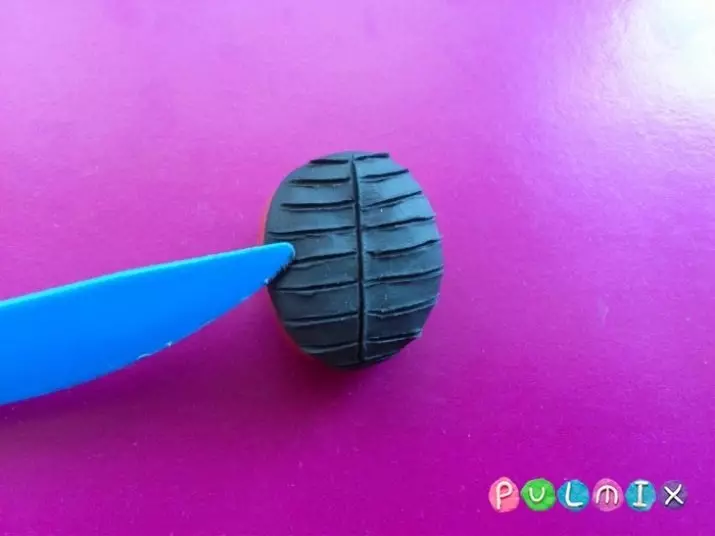
First, work with the bottom of the workpiece. On a black background with a stack, make notches: in the center - longitudinal, from the sides - transverse (from 7 to 9 pieces). Thus, on the trouser we get a beautiful pattern.
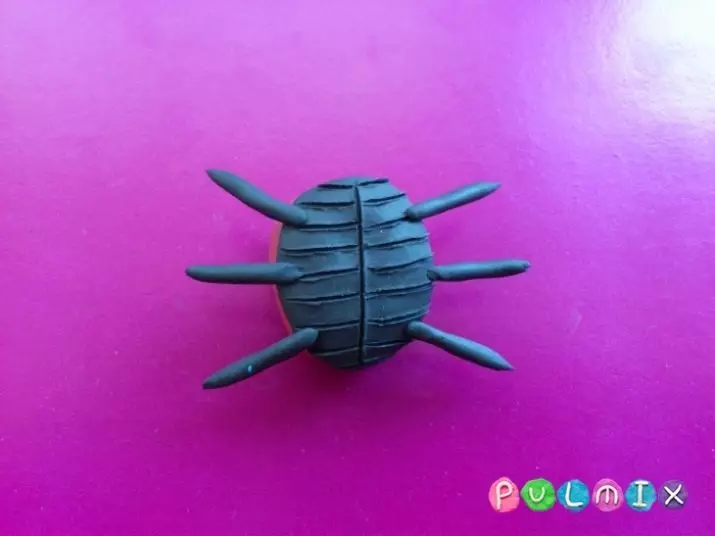
Go to the manufacture of paws. Stop 6 little black balls, each of them put between your palms and move forward-back, seeking lengthening of the workpieces.
Press the legs thus obtained to the sides of God's cows, 3 paws on each side.
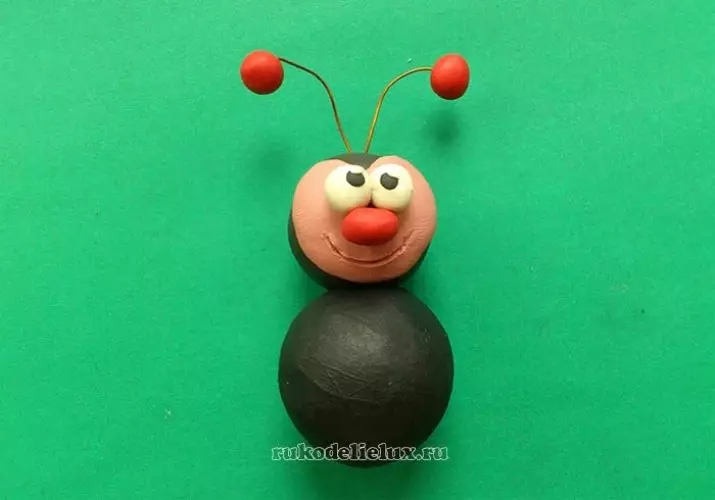
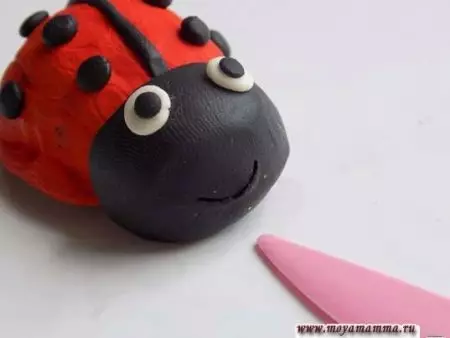
Turn the bug in the red face and slightly bend the legs to him. Along the back, spend the longitudinal line, dividing the surface in half. Now proceed to the formation of black spots. To do this, roll 6 tiny balls from plasticine and put them on the back of the beetle - 3 on each side.
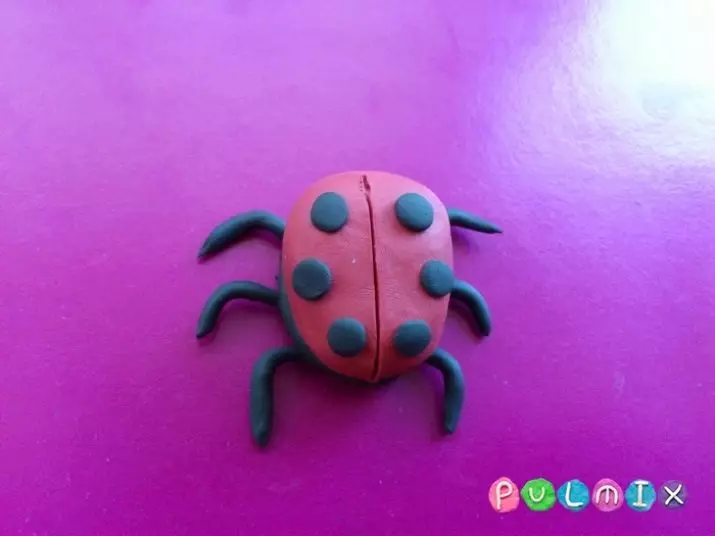
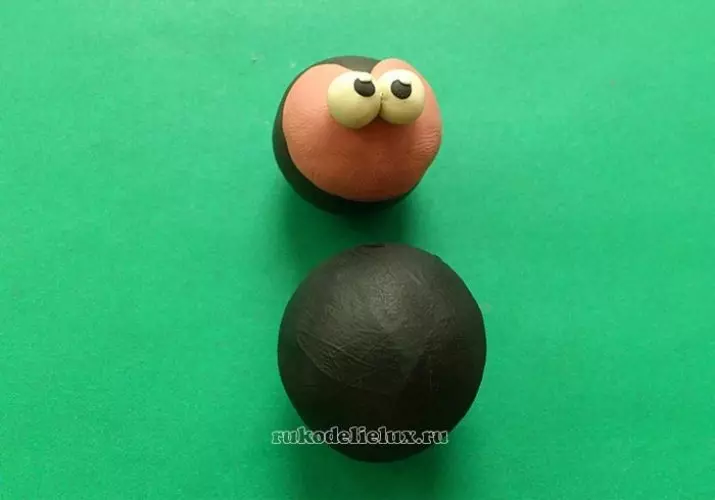
Form another ball, larger, it will become head. It is necessary to make a hemisphere from it. Press the workpiece from one of the sides before the formation of the plane, connect the head with this end with the body.
Make two small round plates from white plasticine, put on a tiny ball - the eyes are ready. Secure them on your head. It remains to attach a mustache, and a cute insect can decorate a flower pot, a vase, any suitable object.
How to make an applique?
Ladybug is a beautiful bright insect, and in the company of motley colors it turns out a stunning summer picture. It can be made with your own plasticine hands in the form of appliqué. Tell step by step how to do it.
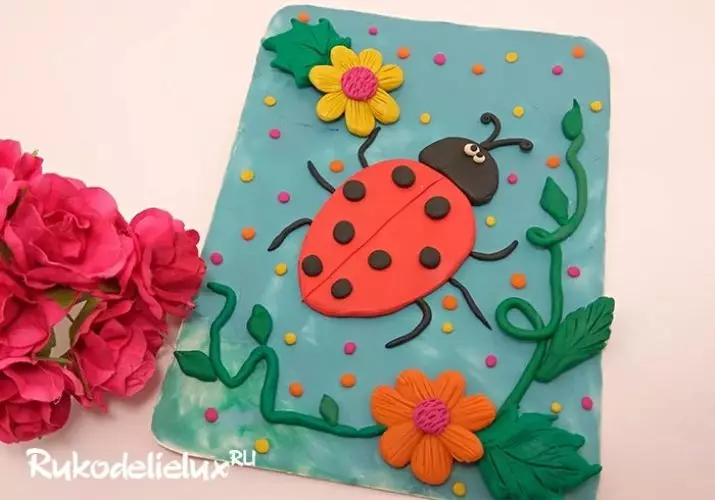
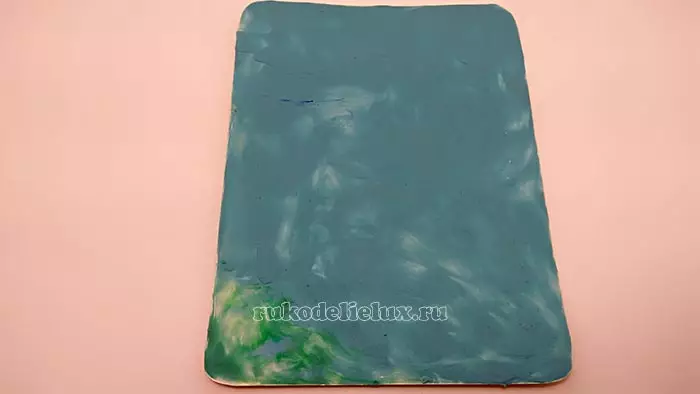
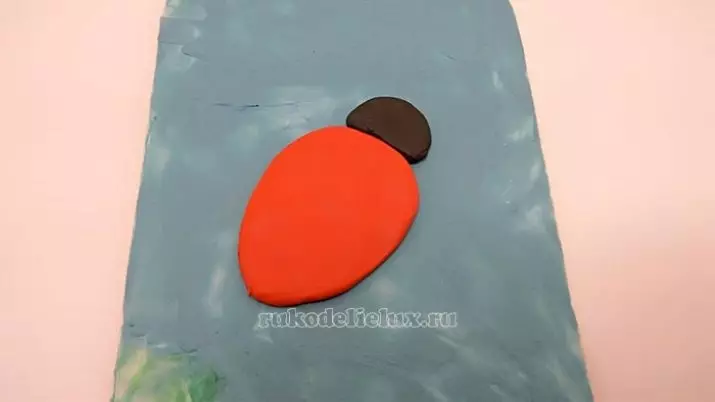
For work, prepare cardboard and plasticine set. Mixing pieces of blue and gray material, softening it and evenly apply to the cardboard.
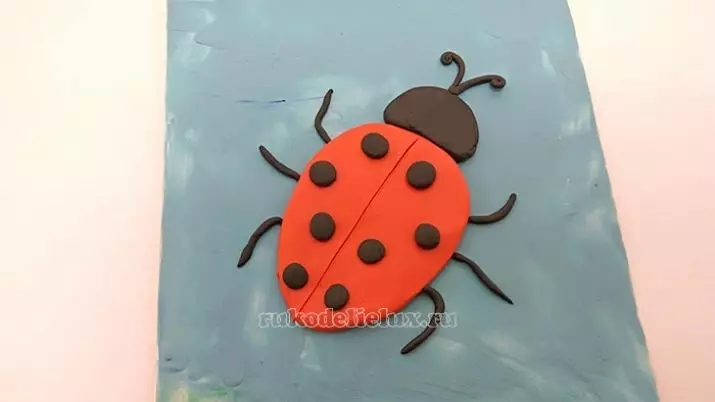
In the center of the appliqué, place God's cow. For the Taurus, form a red flexible hemisphere and a compact black head next to it. Insect relative to the edges of the cardboard should be deployed diagonally.
Next, make a deepening along the back of the beetle and prepare all the missing elements from black plasticine - 6 paws, 8 specks and 2 mustache. Stick billets to the body of God's cows.
Now you can start decoking. Flowers will be located in loose corners of cardboard. From green plasticine to form 3 sheets with carved edges of different quantities, drew accommodation on them. From yellow and pink material to cut out a simple flower.
Large leaf to put in the bottom corner of the background. A medium-sized leaf stick to the top corner and align with a flower.
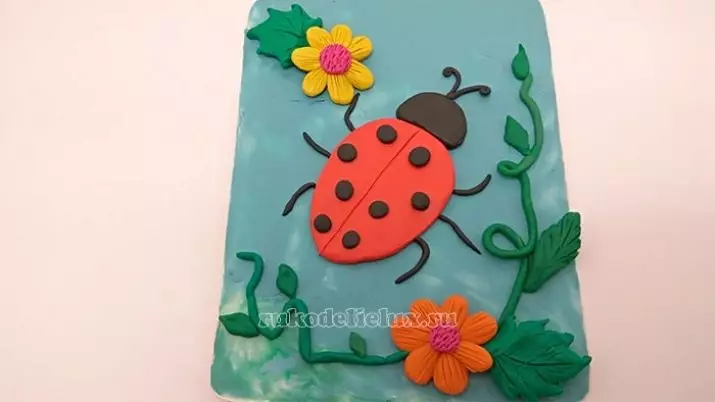
Running green plasticine in the form of a rope, lay it on the bottom of the applique of the flexible stem, decorate the remaining carved sheet and add more tiny leaves. Form a simple flower from orange and pink plasticine, position it on the climbing stem.
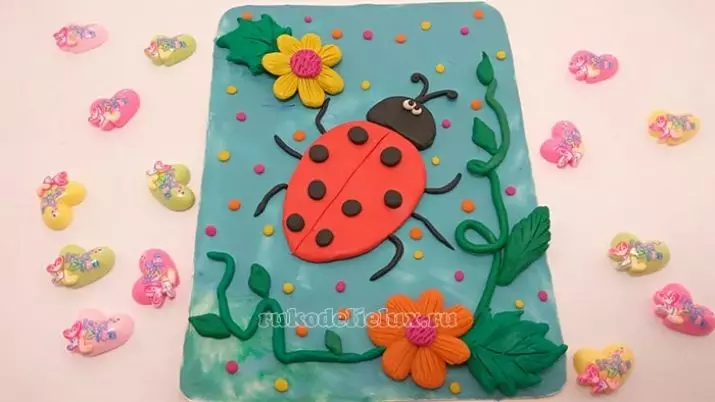
Fill in the empty field with colored peas plasticine, and add the eyes of God's cow. Application is ready, it can be decorated with a child's room, and even participate in the exhibition of children's creativity.
How to make a cheerful figure?
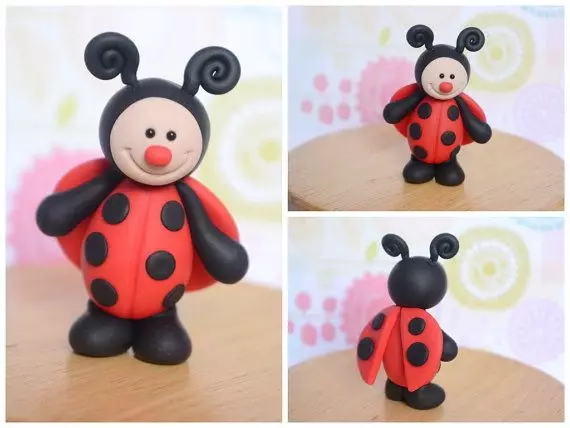
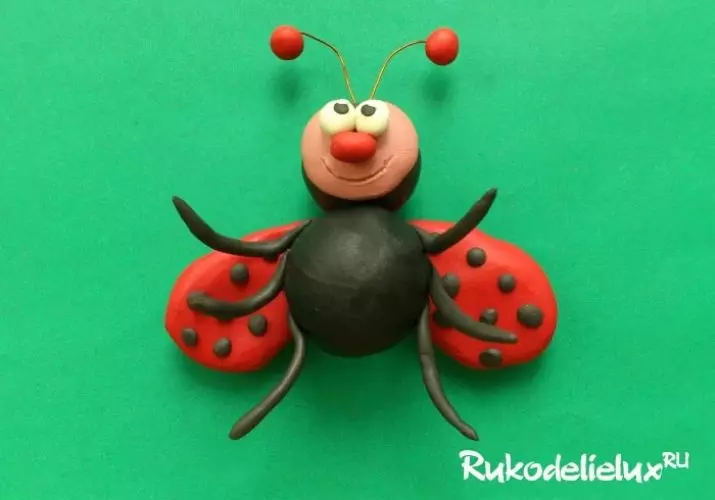
For a small cheerful bug, you will need red and black plasticine, for the face you can choose a material of pink, yellow or bodily color.
From black plasticine, stick 2 round balls of different sizes - for the calf and head. Make a light flat cake, which will later become a fruit insect.
Blank for the head Couple with a muzzle. To make your eyes, roll 2 small white balls, set the center of each of them along a tiny black plate.
Eyes place at the top of the face, glue the red nose of oval shape under them. Smiling mouth just draw any sharp object. Looky plasticine balls attach to two pieces of wire and secure in the top of the head. It turned out elegant cute mustache. Head and torso - Connect.
It's time to do wings. Of the two pieces of red plasticine, make the blanks, on form resembling drops, only flat. Decorate them with tiny plasticine black peas. Finished wings fasten on the back.
Make 6 thin paws in the form of plastic ropes. Stick 3 legs to each insect side.
Such an unusual simpaty will definitely like children.
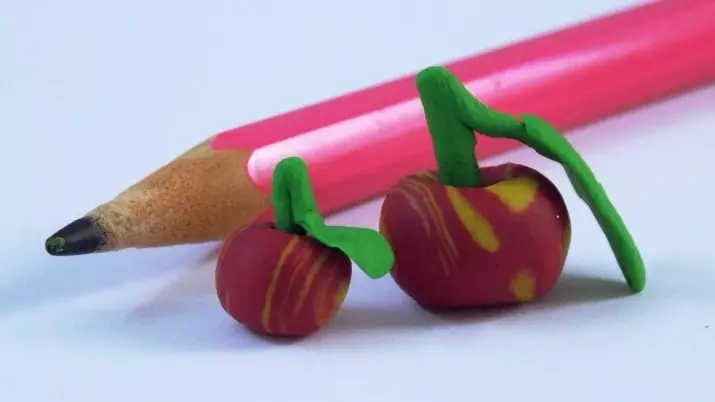
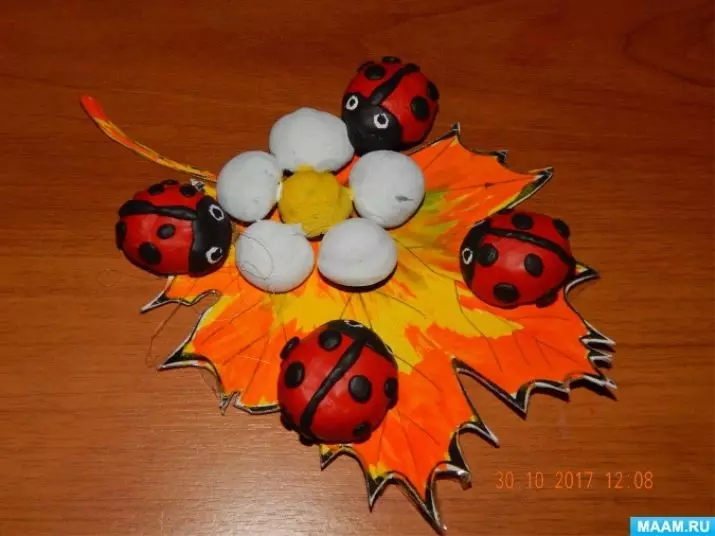
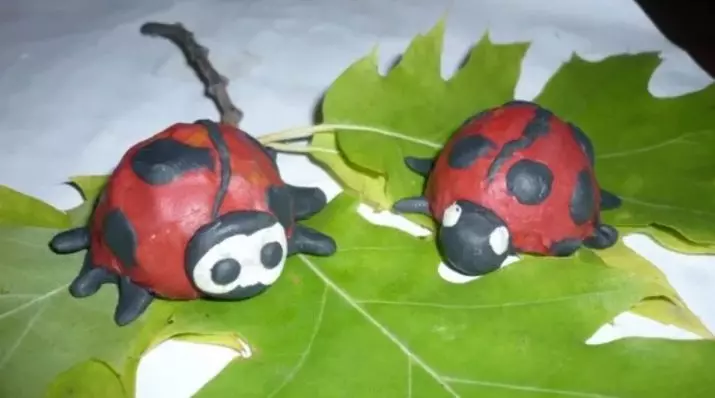
Natural Materials
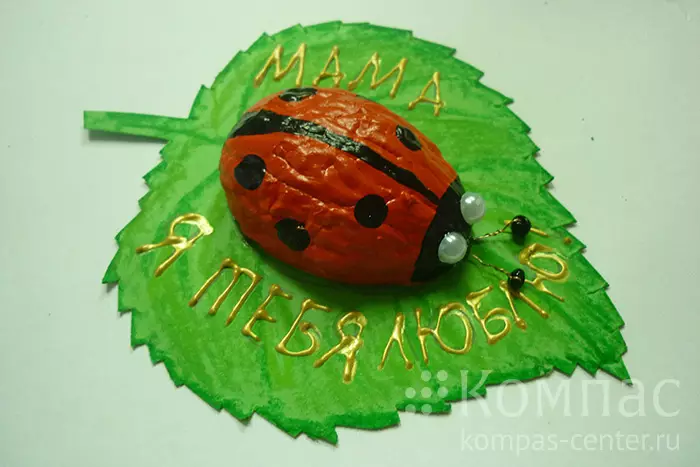
Great features for children's creativity gives natural material combined with plasticine products. Unusually beautiful will look at the homemade ladybug surrounded by Red Rowan, leaves from herbarium, moss. And nuts and chestnuts can be used for the manufacture of the bug. Let's tell me in stages how to do it.With a shell of walnut
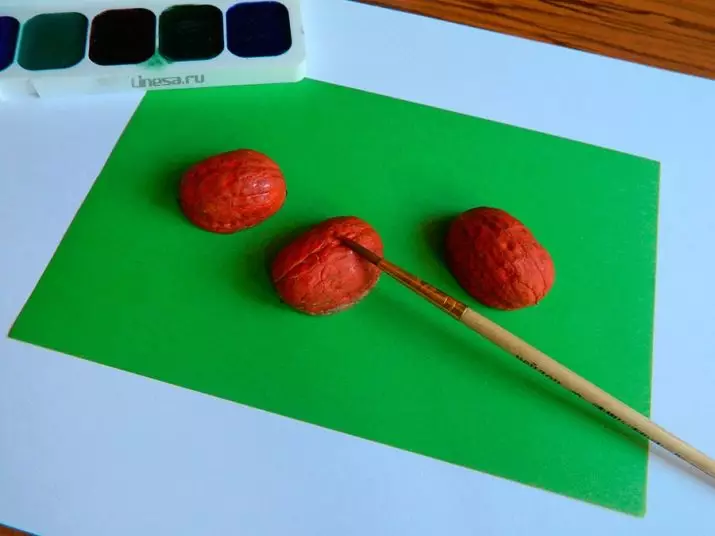
To work, we need a walnut shell, gouache, brush and plasticine.
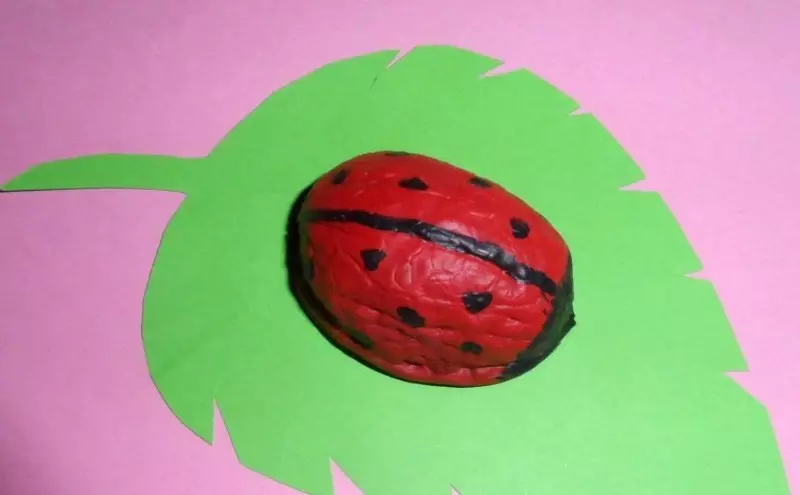
Shell of walnut from the outside paint red gouache, give her time to dry.
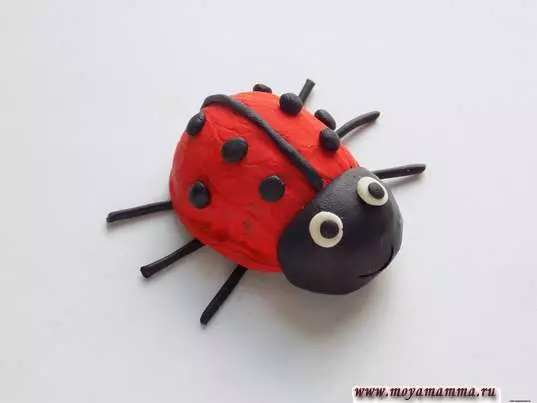
Roll off a small ball of black plasticine and attach to the shell, forming a head bug.
Black material twist into a thin rope. Get it longitudinally on the shell, dividing the back of the insect in half.
Prepare from plasticine 8 black miniature round plates and decorate your back bug.
It's time to "revive" an insect muzzle. Eye from white plasticine, supplemented with tiny black balls. And just draw a smile.
Next, roll a long slim harness and cut 6 legs from it. Secure them on the trouser and place beautifully. It turned out a ladybug with a durable calf made of walnut shells.
With an apple
It is impressive for a ladybug that we made from a walnut shell, in the company with an apple. The composition can be made in several ways.
Present apple . Prepare a large natural apple, beautiful shape, without defects. On the abdomen of the beetle (from the inside of the shell) glue a piece of plasticine. With it, fasten God's cow on the apple.
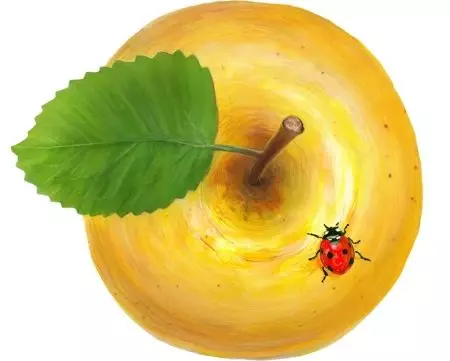
- Cardboard . Deliver in the second way can be made of yellow cardboard. Draw on it an apple and cut it out.
God's cow, as in the first case, secure with plasticine on the trouser.
Plasticine . For the third crafts, you will need an apple from plasticine. Make it yourself. Rock ball from yellow, green or red plasticine.
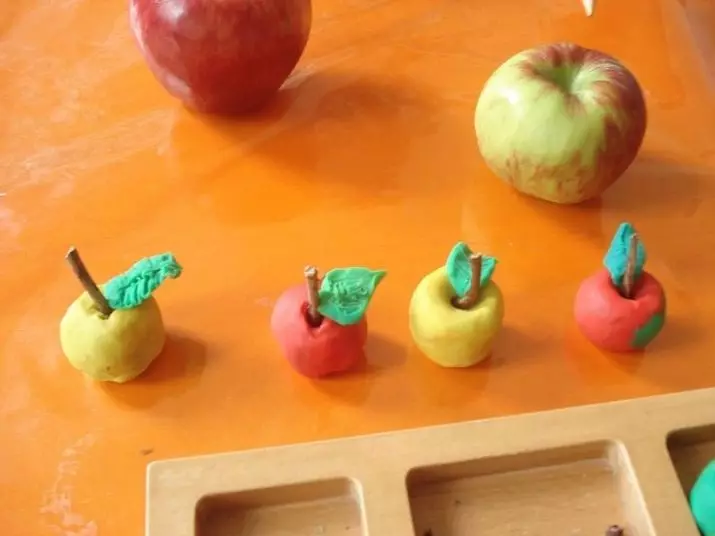
Finger cut out of it the shape of an apple, slightly bevelled down. Top neatly squeeze the hole.
From brown plasticine, make a tail, and from a green material - an elegant leaflet. Connect the tail with the leaves and install in the hole. If the fruit turned out a large, God's cow can be fixed on its surface. Small apple Position next to the bug on any stand.
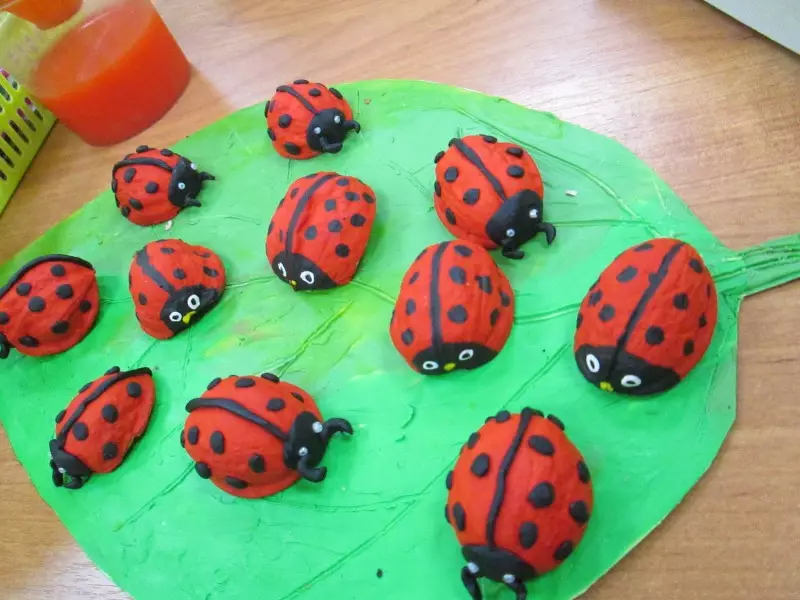
With chestnut
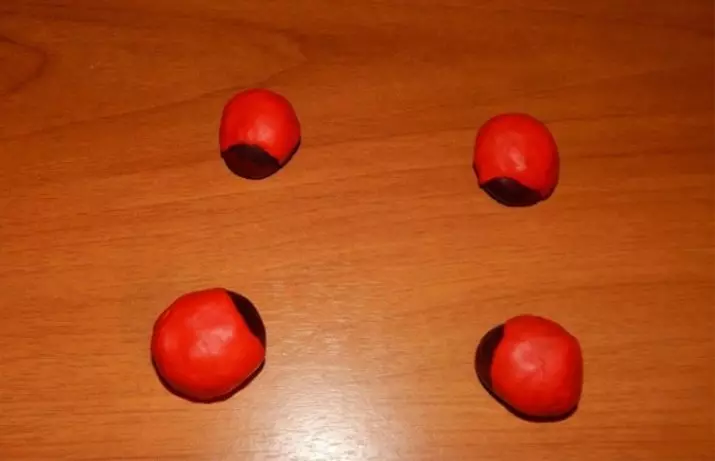
For the crafts, we need chestnut and plasticine, black, black, white colors. Red material remember in their hands until you feel his fuel and plasticity. Then roll the ball. When it acquires a plastic structure, flatten the workpiece to the state of the soft plate.
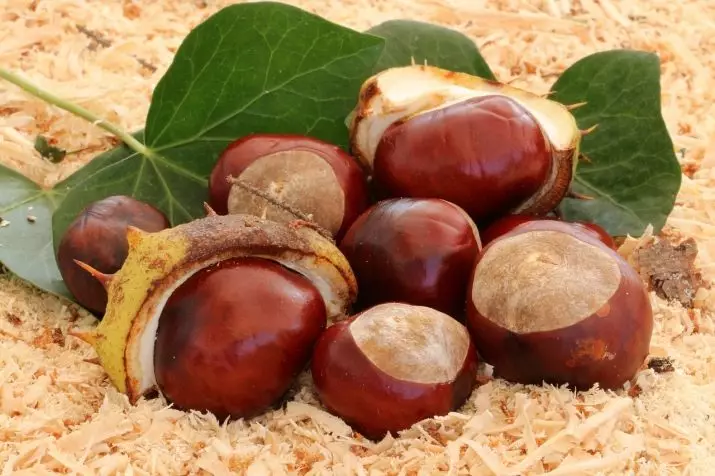
Wrap the chestnut in the plate, achieve a smooth smooth surface with your fingers. In this way, the beetler is formed.
Head is blind from the black material and connect with the torso. Secure on it two white balls and neatly flatten them. In every white circle, place tiny black plates. Beetles are ready.
Thin black plasticine harness fasten the back of the back. Perform miniature balls, flatten them and stick to the back of the insect in the form of beautiful black specks.
Roll another thin harness from plasticine, cut into 6 parts and fix them in the form of a paw on the abdomen.
God's cow can be planted on a leaf drawn on green paper.
Performing crafts with children, it is not necessary to follow the tips of the master class thoroughly, let the kids fantasize. It's not scary if the apple is purple, and the ladybug is green, just a small artist sees her masterpiece so much.
Vividly about how you can make God's cow from plasticine, in the video below.