
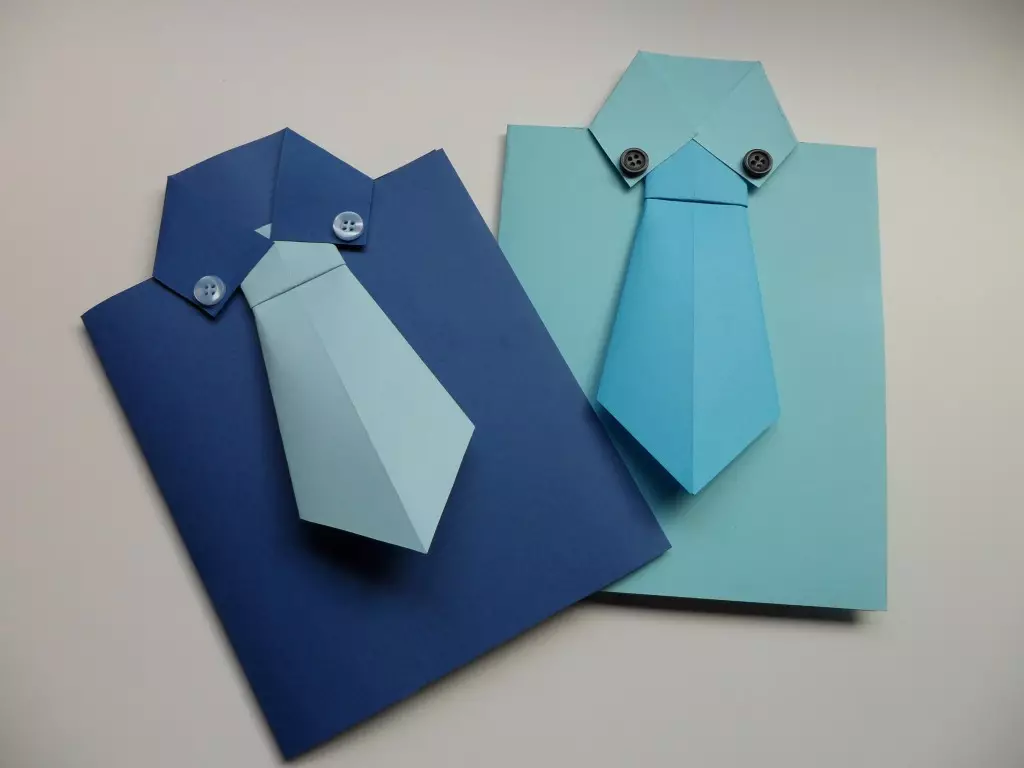
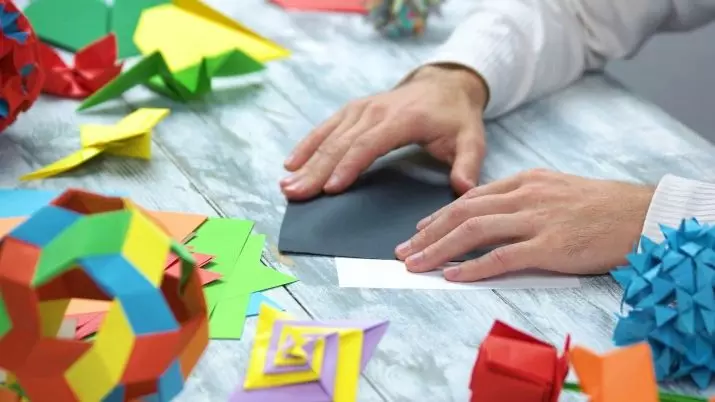
A gift to my own hands has always been valued more purchased postcard. However, you can do something and more original. For example, origami or appliqué in the form of a tie. If you really try, such origami can become an excellent addition to the costume.
A similar tie will be able to decorate a gift packaging, a bouquet of flowers or a gift envelope. Such a gift will definitely give all the nested feelings of the donor.
Classic options
To begin with, it is necessary to consider the most common options for the technician creating a tie by the origami way, because, knowing the basics, then you can entrust the fantasy case.
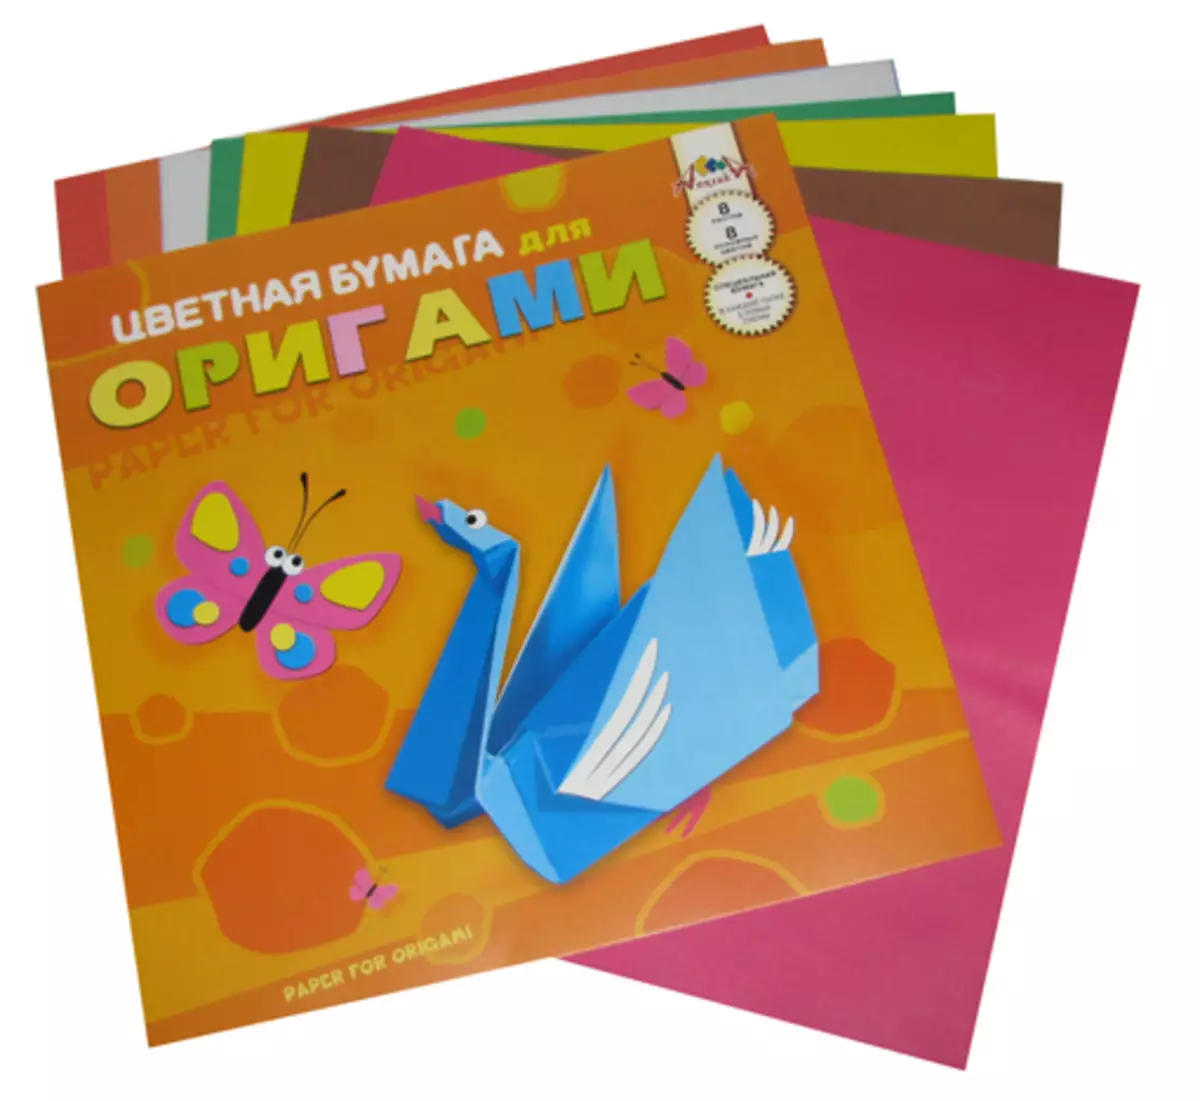
To create such a thing, you will need quite a few materials - two sheets of paper and a little time. The main thing is step by step to follow the instructions. Standard paper size for a tie is 5x5 cm. It all depends on the sample size. The main thing is that the sheet of paper is square, and the aspect ratio was not disturbed.
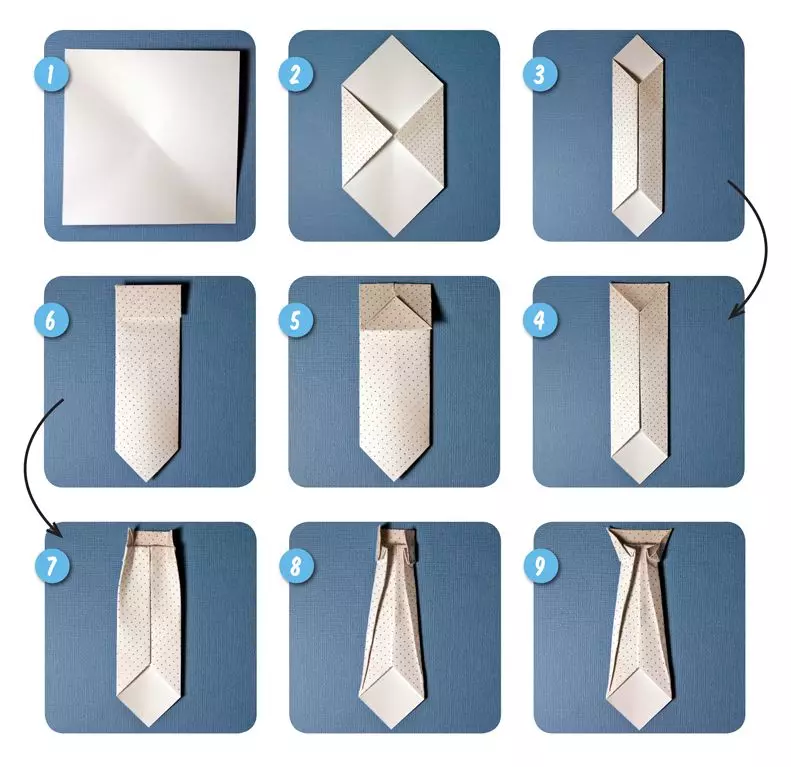
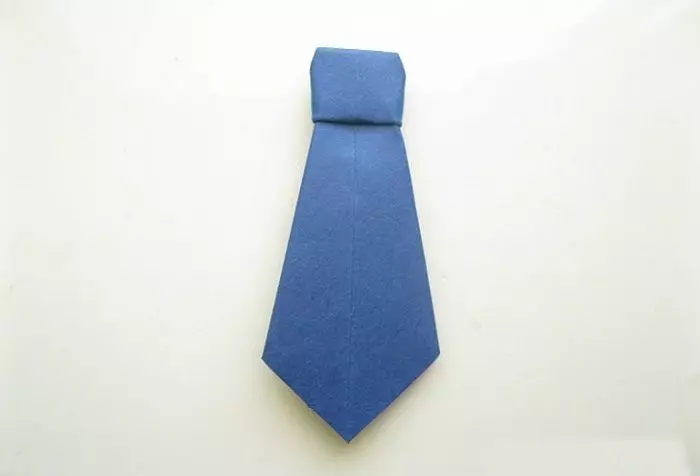
Let's start with classic options. Origami in the form of a tie is not inferior to textile, if it is performed clearly according to the instructions and with love. They can easily decorate a shirt. The paper is better to choose a neutral color, bent two-way. And also need scissors.
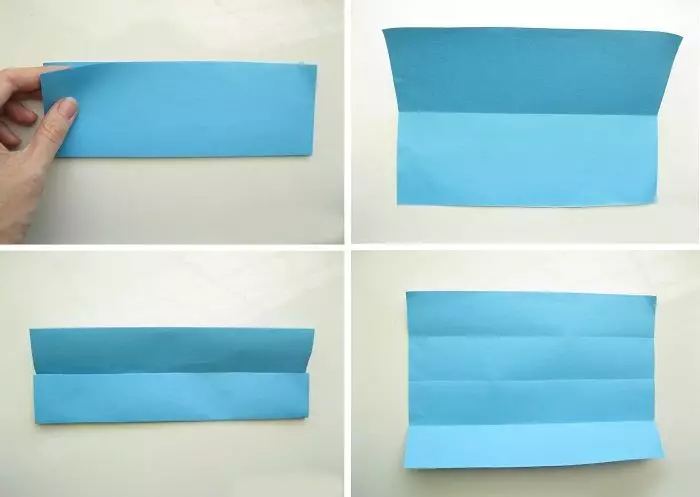
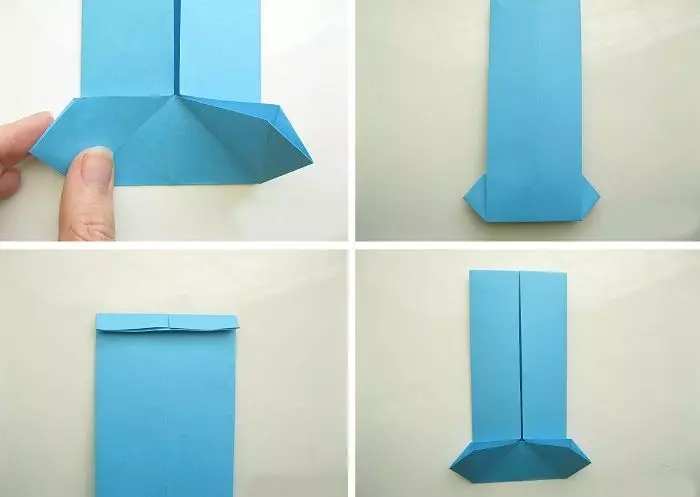
It is necessary to take the paper of the standard size, A4, for example, and cut a smooth square, having previously measured the parties. Next, the sheet is developing diagonally. Then you need to reveal a sheet of paper and smooth out a little. Now you can make bending on both sides directly to the central part of the paper. Everything should be symmetrically. So, opposite angles must be connected.
Two harvested sides need to bend once again half a width of paper. Triangular angles must be beaten inside. The upper part of the corner of the pattern is closed. At this stage, the handicraft should be like a long envelope.
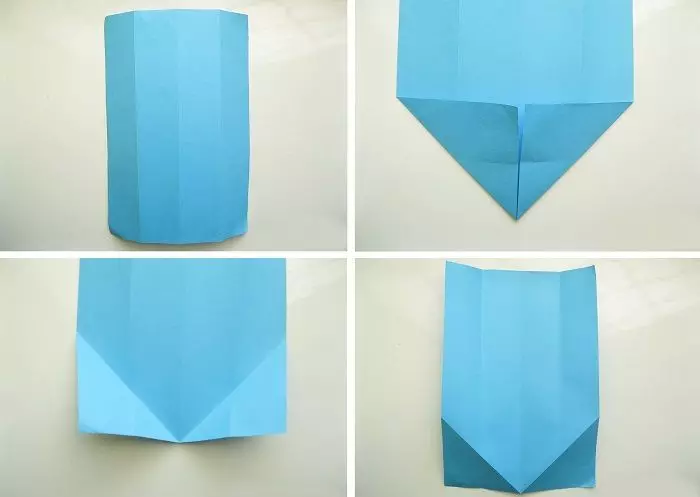
Then the tie should be turned over and outline the node line. To do this, you need to fold the corners of the rectangle and reproduce again. The upper part of the origami should be in the form of a node, for this this part bends forward with nasup.
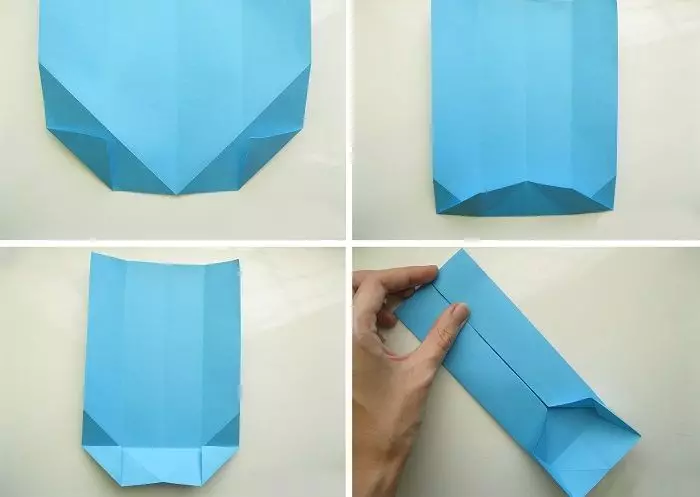
After that, the tie turns over again, the wrong side must be top. The sidewalls of the workpiece add up at an angle to each other. All parameters must be observed to achieve similarity as possible with a real tie.
The technique is very simple and suitable even for children. You can make a gift for the dad on February 23, simply in the form of an accessory, or attach to a homemade postcard.

There is also another option to make a tie from paper. By the way, it is considered easier and more common. Crafts are made using the same tools as in the previous case. You can use not only double-sided paper, but also packaging, or even take old newspapers, it will give the originality of the craft.
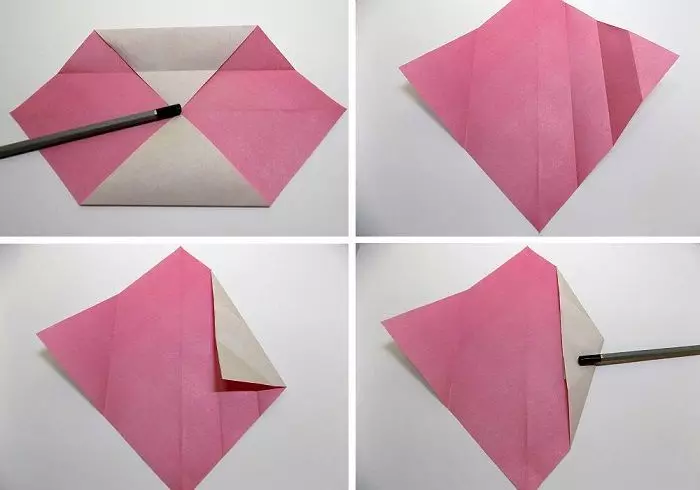
First, the square sheet of paper bends in half, two triangles should form. Then you need to deploy a sheet and put on the surface top up. From the middle of the line there are opposite angles. The resulting figure is bent one-third. Side faces should form a clear line, and a sharp angle - it is concerned.

Paper turns over again. A curved corner is starting on the front side, after which it is folded in half. Then another folding line is being done. To do this, it is necessary to retreat on a half-meter. After that, the workpiece puts up with an invalid up. In part next to the node, two so-called pockets are laid, necessarily symmetrically. At the same time, the side protrusions need to be smoothed.
From the wrong side you need to fold the sidewalls of the workpiece. These parts are refilled under the new formed pockets, after which they need to be aligned in the center of the crafts. The protruding angle hides inside.

Creative ideas
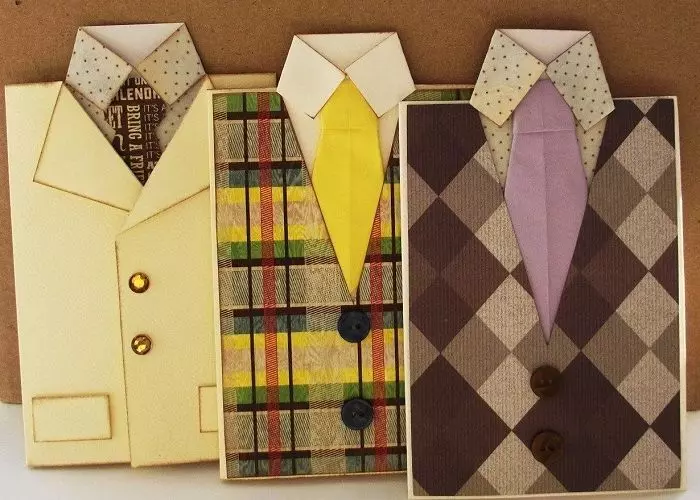
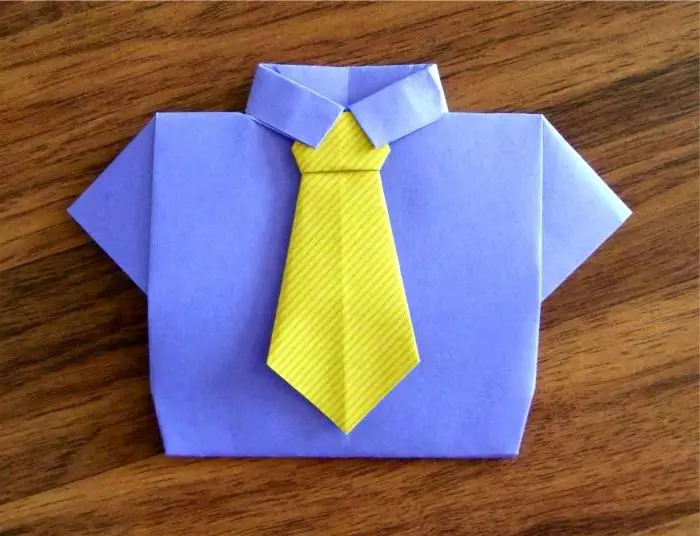
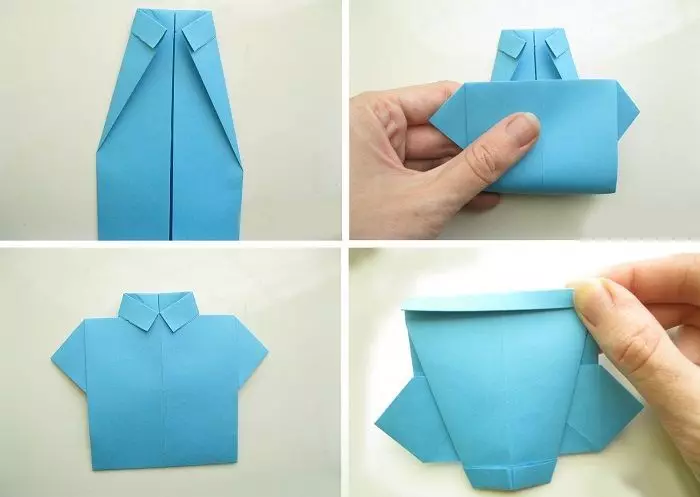
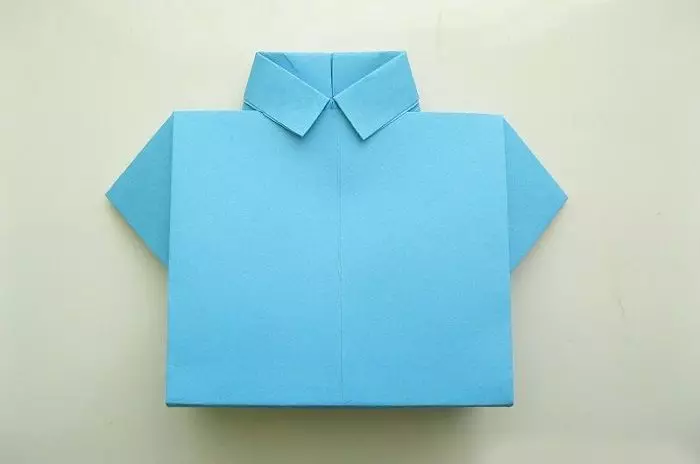
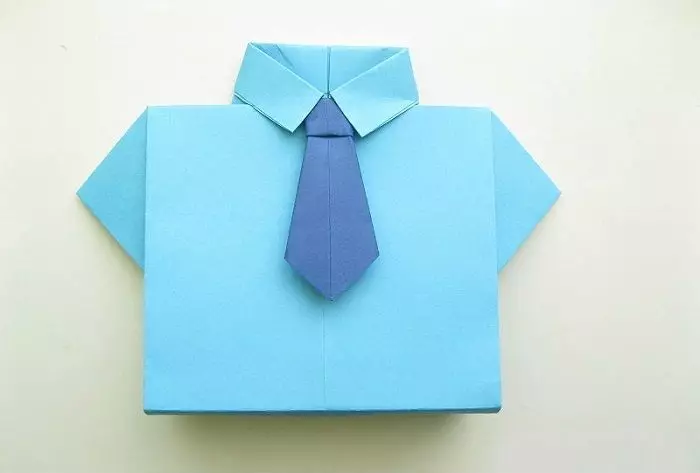
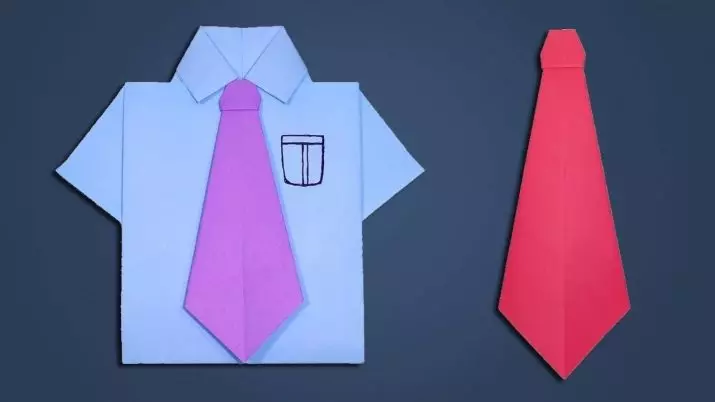
Not all the creative lovers will simulate a tie from origami. Another thing, if it is supplemented with something. In this case, it is proposed to make a small men's shirt out of paper, and attach a tie to it, made according to the same phased scheme as in the previous case. Colors can be chosen any - do everything in some colors, or play contrasts.
You can make a shirt from a tropical or newspaper print, and a contrast tie, as your heart. In this technique there is nothing complicated, in detail the instructions for beginners.
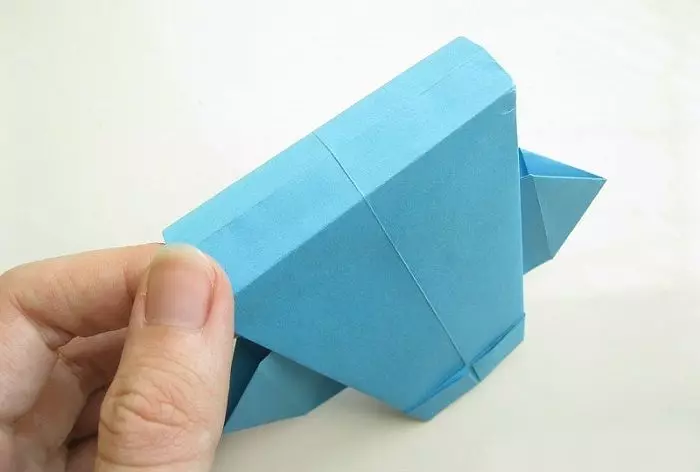
To make a shirt, you need to take a sheet in standard format (A4, A5). We fold the leaf in the length in half. Then you need to reveal the sheet, then bend each side again. The laid sheet of paper is revealed and smoothed. After that, the angles of the side, which turned out to be shorter, add up to the center of the axis of crafts. There should be two lines diagonally. This option is suitable for preschoolers as a gift from Father or Grandfather.
If you wish, you can bend the lower part to the postcard can stand on the surface. Then decorate the accumulated accessories.
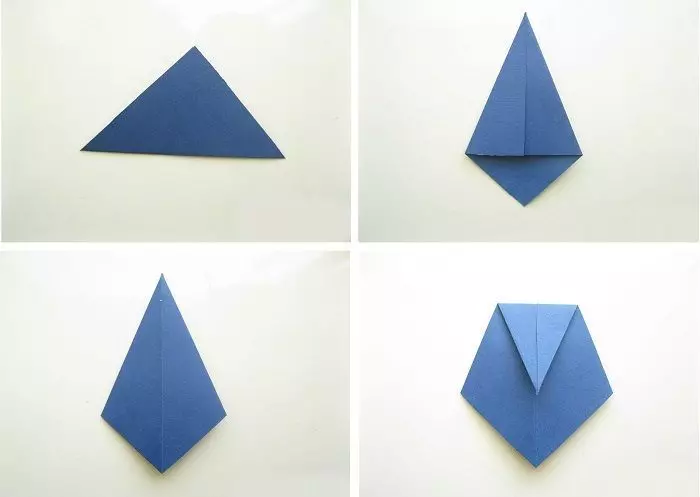
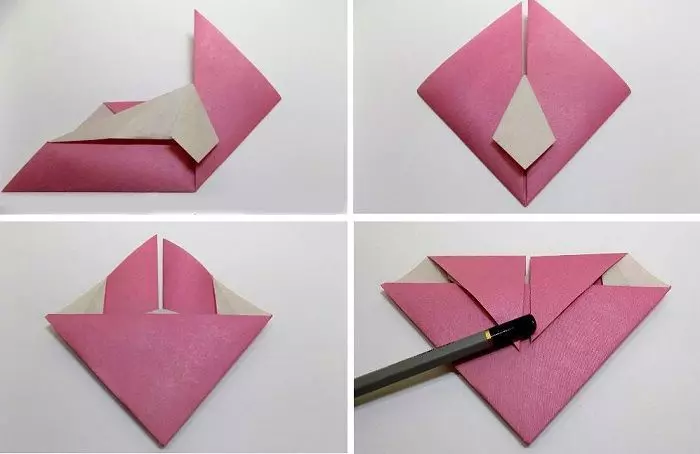
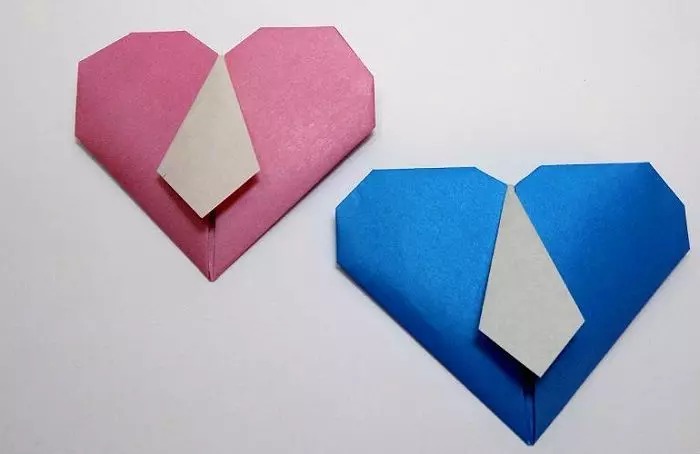
You can make an original gift for Valentine's Day, or just as a sign of attention, or recognition in love. The handicraft looks like a heart with a small tie in the middle. In this case, such origami does not take much time.
All you need is just paper. Suit one-sided. Color is selected according to preferences. You can also take packing material.
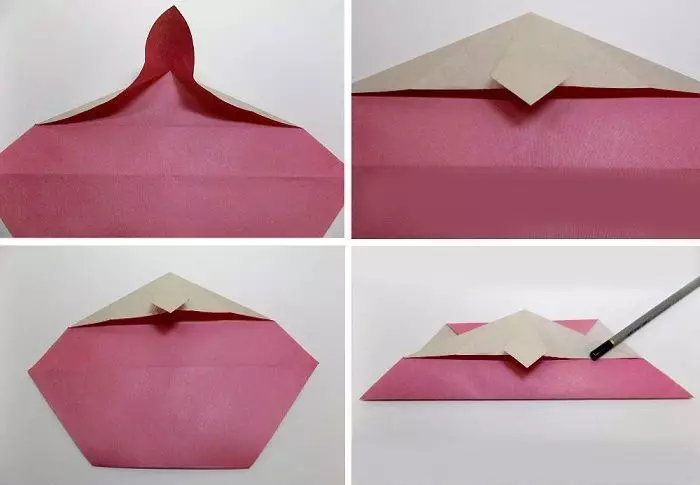
As in the case of a simple tie, the sheet must have a square form. Therefore, a diagonal folding line should be scheduled on the workpiece. After that, the paper is spreads, and the upper angle is bent. It should concern the diagonal marked, after which they turn the angle again.
The workpiece must be put so that the part with the curved angle is above. The square is sprayed and folded in the form of an envelope. The sheet turns 90 degrees, so that three outlined lines are in the right part. Two opposite corners make up towards each other, forming a small pocket.
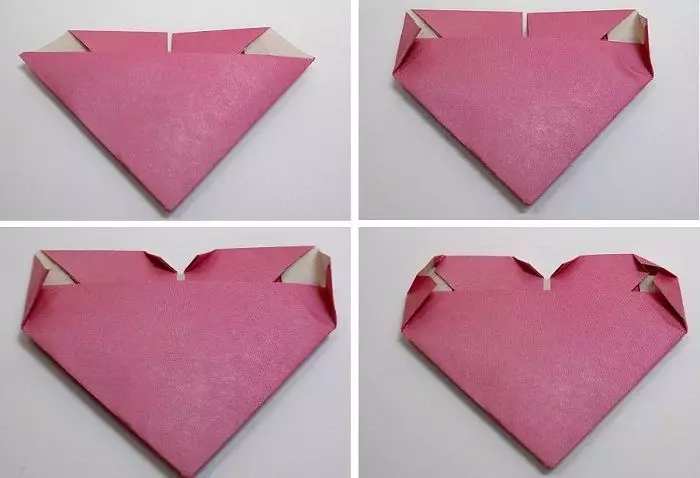
The fold is spreads, and the side faces are loaded. So forms a tie. Next, it is necessary to return to the bottom, it needs to be lit inside out. Then the heart shape consists in the center of the resulting diagonal. Both sides of the workpiece bend and come under tie. Then the origami is turned over, and the upper corners bend. It is necessary to fill them inside the crafts. Corners need to round down so that the form is as much as possible in the heart.
Useful advice
Sometimes it is easy to make a craft of paper not enough, I want to creatively make a product, decorate with accessories. In this case, you can resort to the decoration of the subject. If a gift is done for the holiday of the day of Defender of the middle name, then you can decorate the tie from Origami with stars. It can be homemade applications or stickers. But you should not stop only on the stars. There are still many decorating items.
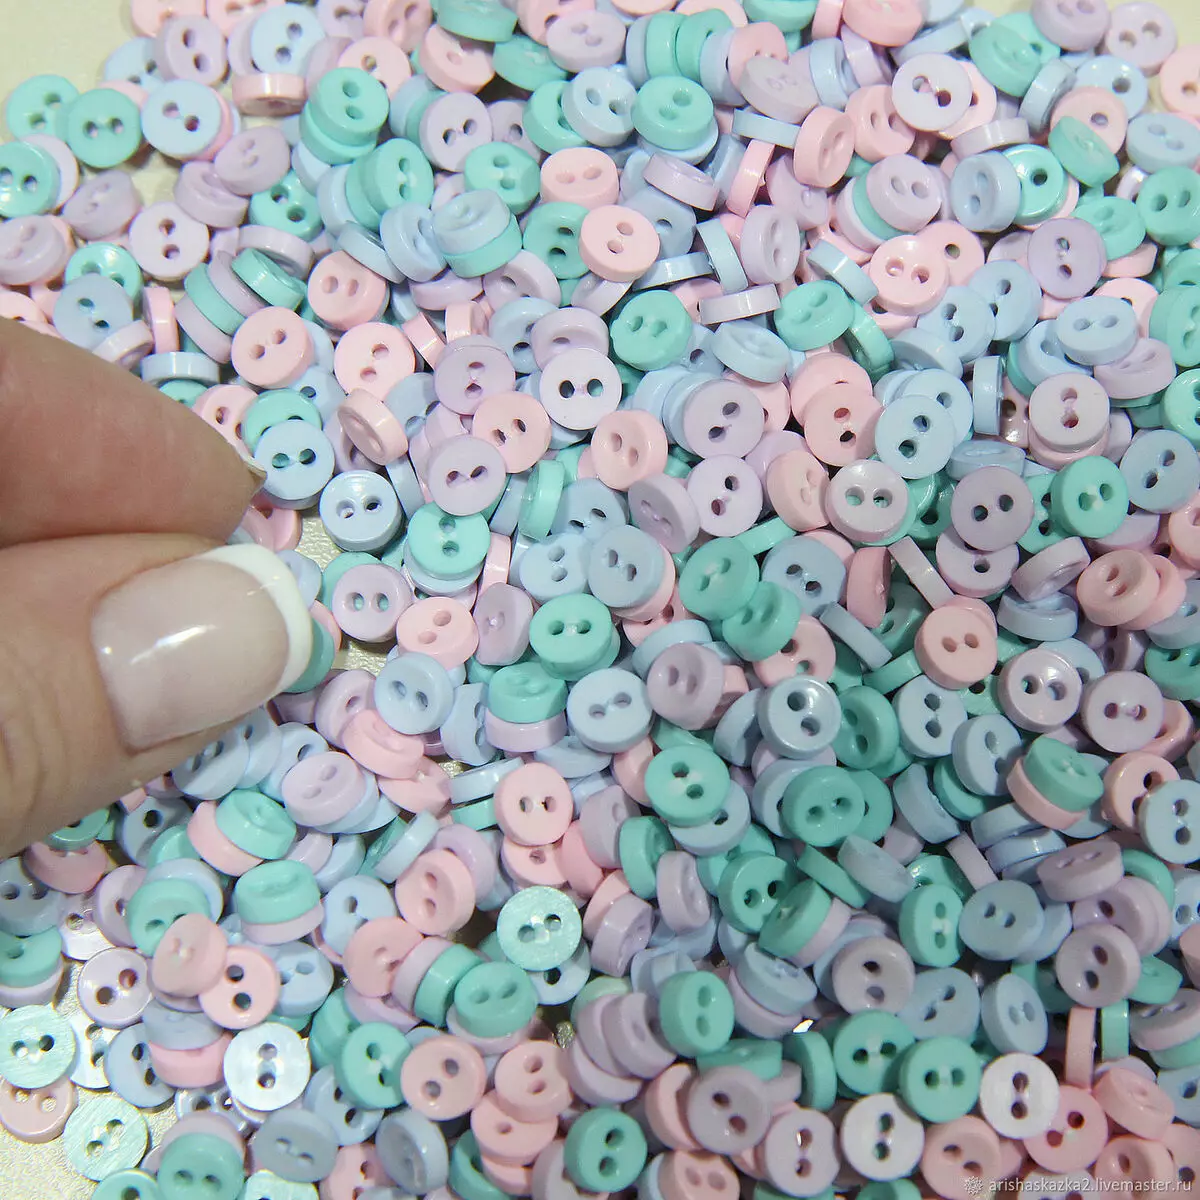
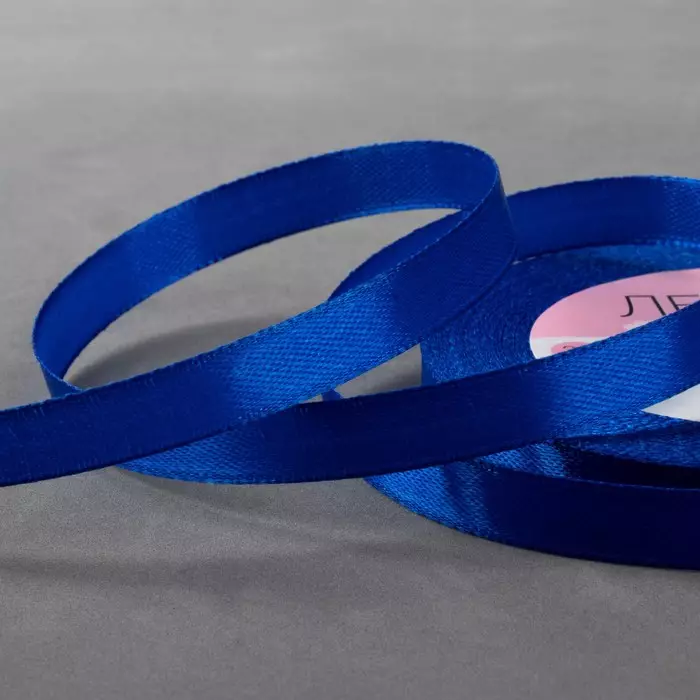
You can decorate origami buttons. They can be performed both in different colors and in one tone. You can also use confetti. To attach decorations, you can use the ordinary PVA glue. However, the glue gun will fix the items better. A satin ribbon will help add the cracker. Attach it to a looping tie.
So origami will look much more effectively.

To make a crawl with your own hands, and speed up this process, it is recommended to prepare patterns for cutting. Therefore, you can simply find a blank templates on the Internet, print and cut a tie.
You need to choose uncomplicated sketches, so you can save a lot of time. The tie should be with pointed edges and corners. Naturally, parts should be of different sizes.
You can also find such templates on which the workpieces under the collar part are depicted. The basis must be loopped, so the product can be easily fixed. Parameters are selected independently depending on the desired product size.
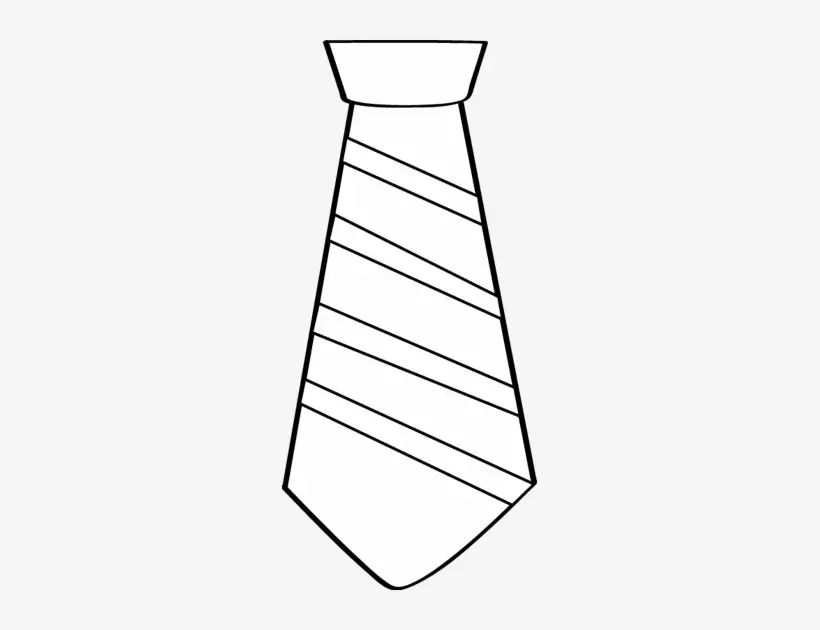
If desired, not to contact any sources, you can independently draw a sketch. Here you can already act at your discretion, according to your tastes, and as you like fantasy. You can draw any shape, adjust to any size. All that will need is a sheet of paper, pencil and ruler. And, of course, a little time.
As it turned out, the manufacture of origami from the tie does not take away a lot of time, and the technique of execution is quite simple. Make a tie with your own hands can people of any age and with different levels of skills. It is noteworthy that the accessory looks good as in a single ensemble, so serves as an excellent decoration to the main gift. Such origami can also be used as a clothing element, such as a photo shoot or a thematic party. Options can be a lot.
About how to make origami in the form of a tie, see the next video.