
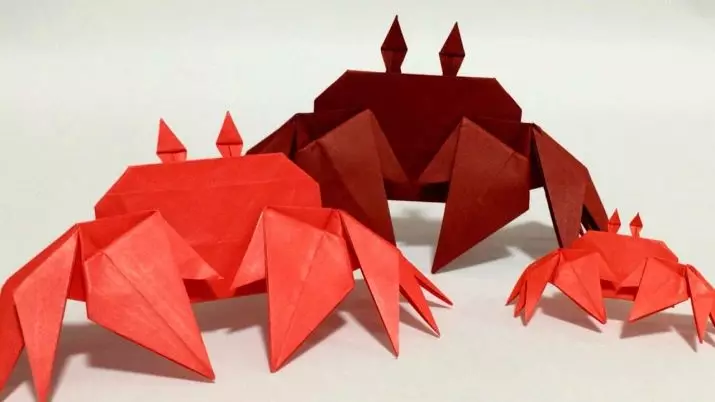
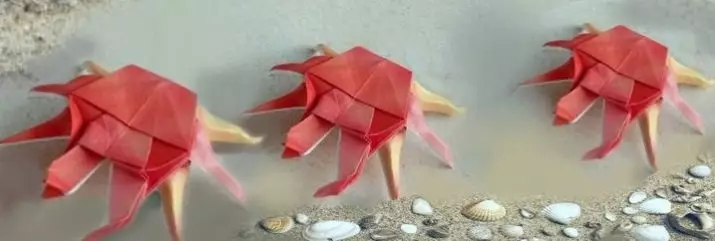
Origami - an unusual and amazing technique that is interesting not only to children, but also adults . If the folding of paper figures are long enough for a short time, even the most complex structures can be learned in a short period of time. The beginners should also begin with simple models. Crab is a craft that even a child can do.
Simple options
Origami models, folding for the minimum number of steps, are recommended for children of 7-9 years. During the folding, children do not get tired, their attention will be focused on action during the entire process, and the result will be perfect. Simple schemes for creating crabs for beginners - the perfect option. You can make different figures, volumetric and for postcards.
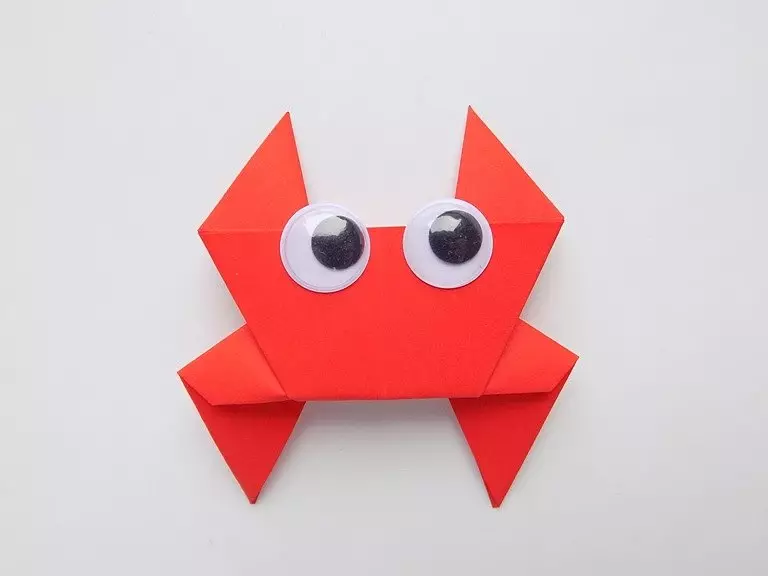
Scheme number 1.
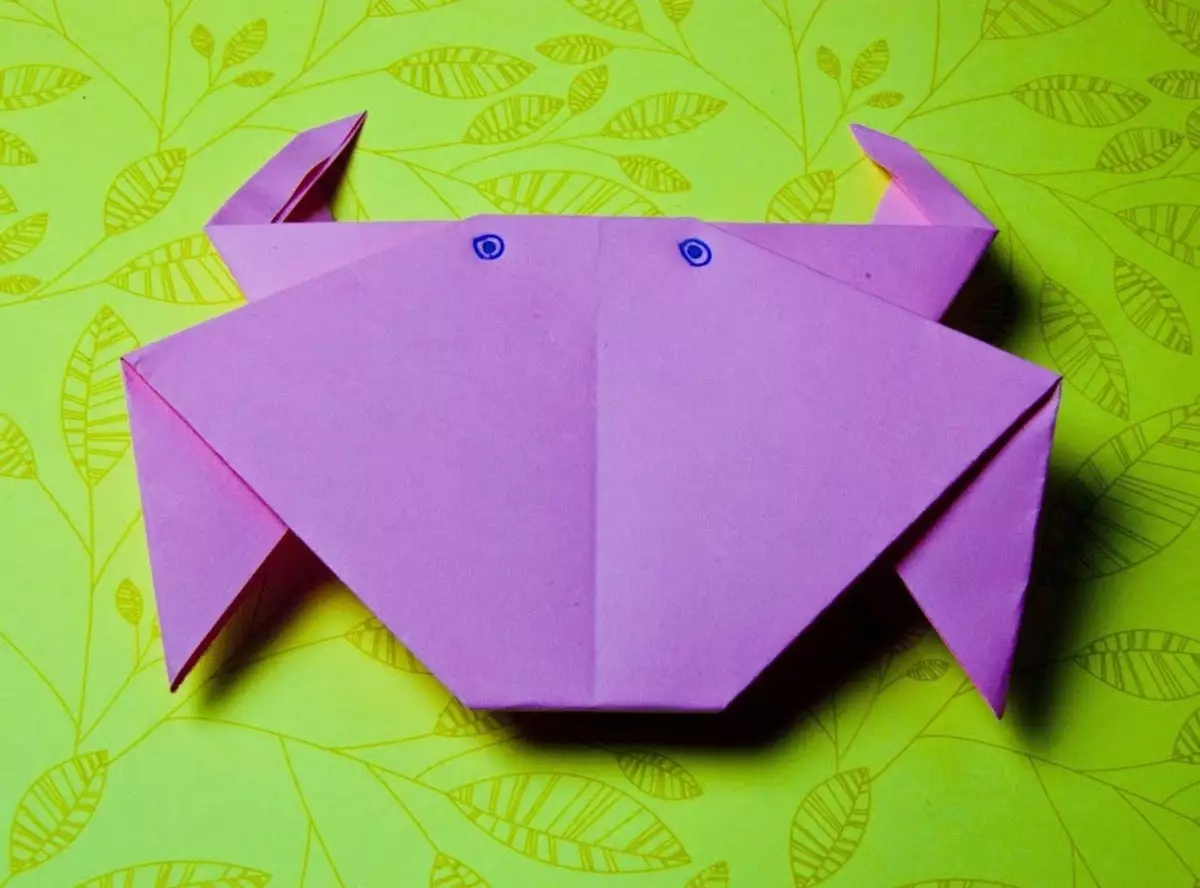
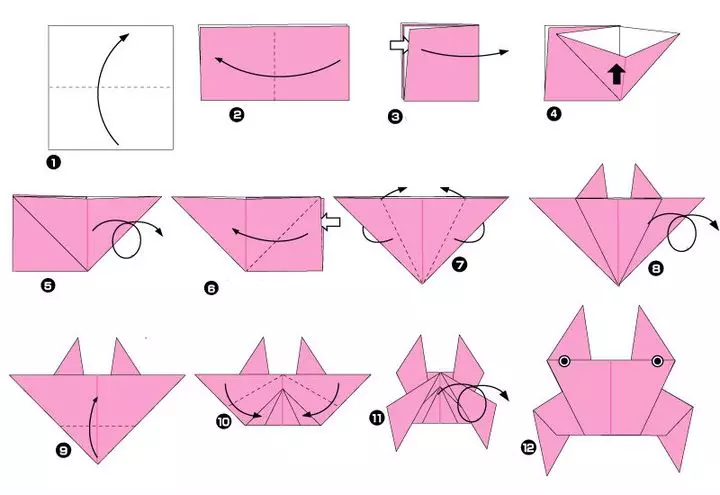
Step-by-step instructions for assembling crab with wide legs.
- Paper square 15x15 cm must be bent twice. The edge located on top should ideally coincide with the bottom edge. The workpiece must be turned in such a way that the open edge "watched" per person.
- The billet is once again twice, but this time to the right left.
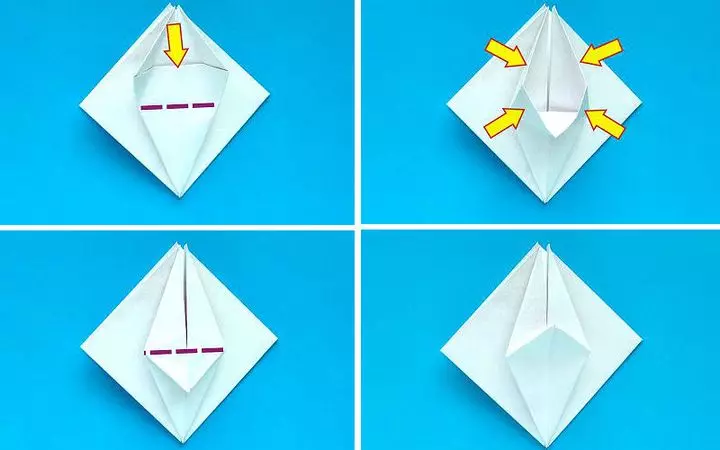
- Top "pockets" should be straightened and flatten. It should turn out a figure resembling a triangle.
- The billet turns over, step 3 is repeated on the back.
- The edges of the layer, which is closer to the person, is waved inside the dotted.
- The billet turns over, the lower angle rises along the arrow.
- The side parts fold on dotted lines.
- The figure turns over the front side to the person.
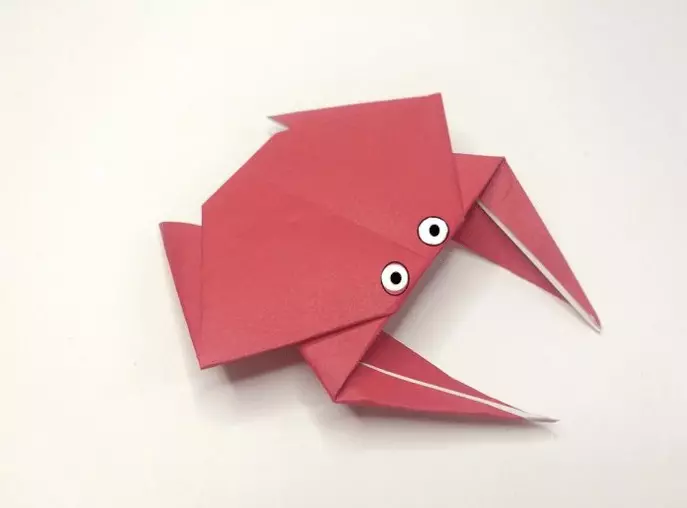
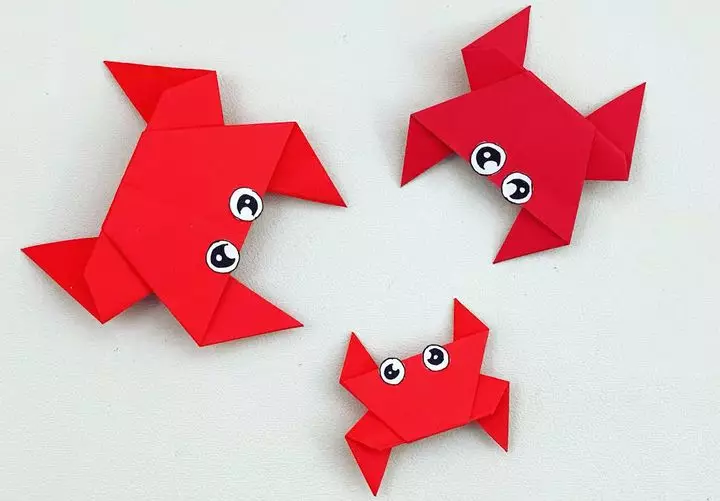
So that the crab looks more effectively, you can add it to the toy eyes.
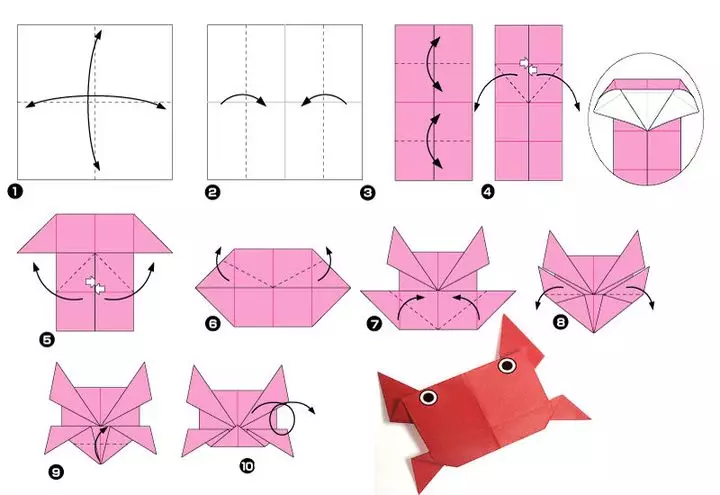
Scheme number 2.
The figure is manufactured using a base form with the poetic name "Catamaran". She is a little bit like the first model, but it is necessary to put it differently.
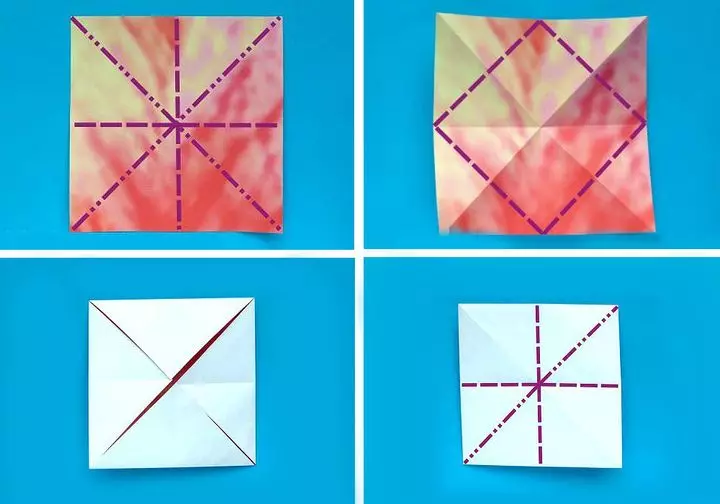
- A sheet of paper in the form of a square must be bent in half, running the axis in the center. There should be two - vertical and horizontal. After that, the square should be revealed.
- Both edges (left and right) add up to the middle to get "doors".
- The upper and lower half bend to the center. It is necessary to make marks and reveal the workpiece.
- Half from above is revealed by arrows and folds along the dotted. Carefully pressed and neatly flattened.
- You need to repeat 4 step and a half below. Now we have a basic form.
- Half's corners are rising from above and folded along the lines.
- Parts on the side are coated along the folding lines, it is necessary to navigate on the arrows.
- Folds are drawn up, the corners are lowered down.
- Often below rises. Figurine turns over.
Beautiful crab ready.
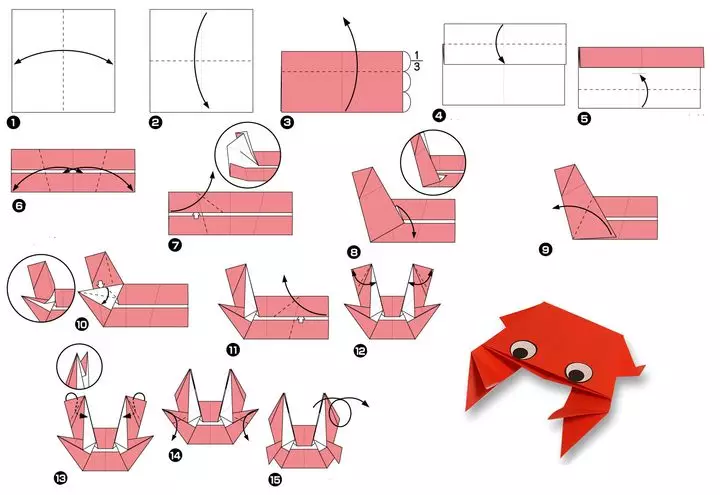
Scheme number 3.
Collect a neat model with naturalistic clamps quite easily.
- On the square denotes the middle with a small fold.
- The material bends in another direction.
- 1 layer is divided into several parts (3). It is important that they are equal. This part is rejected by 1/3.
- The edge located on top, descends to bend made in the third step.
- The edge of the bottom rises to the mark, which can be seen on the detailed assembly scheme. Between the edges, it is necessary to leave the gap.
- The right and left side are folded on the dotted.
- "Pocket" carefully reveals on the left (white arrow).
- The lower part of the valve is lowered to the base.
- The angle is rejected.
- Steps 7-10 are repeated on the right side.
- Elements in the form of rectangles on top are beyond diagonally and disclosed.
- Corners come inside. For this uses reverse fold.
- The side valves that perform should be omitted, and the finished shape is turned over.
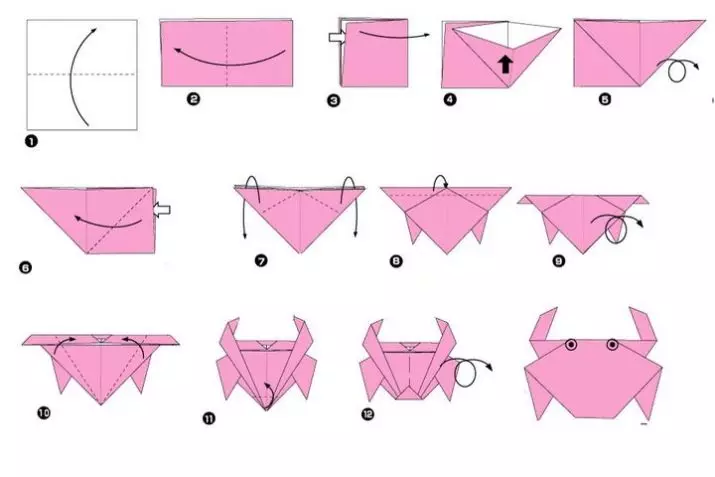
Scheme number 4.
A popular simple model that can be collected based on the "double triangle" form.
- The square is folded in half vertically, after - horizontally.
- The 1st layer is revealed inside, the billet is flattened and turned over.
- 2 step is repeated on the other side.
- The 1st layer of the triangular billet is converted inside by dotted.
- The edge from above must be adjusted by 1 cm.
- The figure turns over.
- Both sides (right and left) add up along line.
- The angle below should be adjusted.
- The finished handicraft is unfolded by the face.
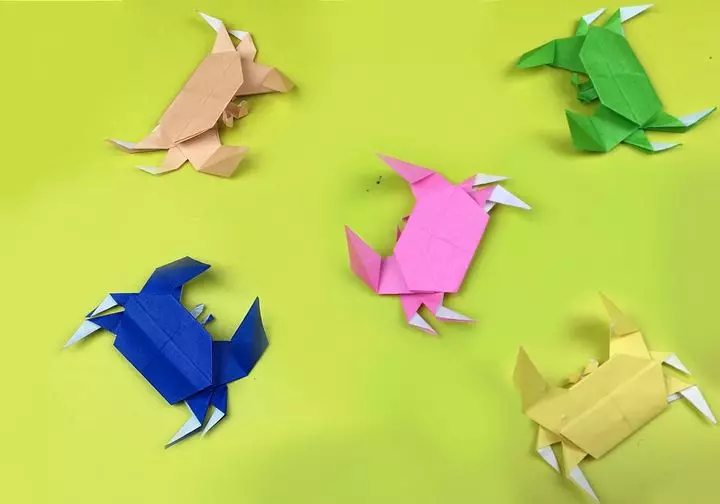
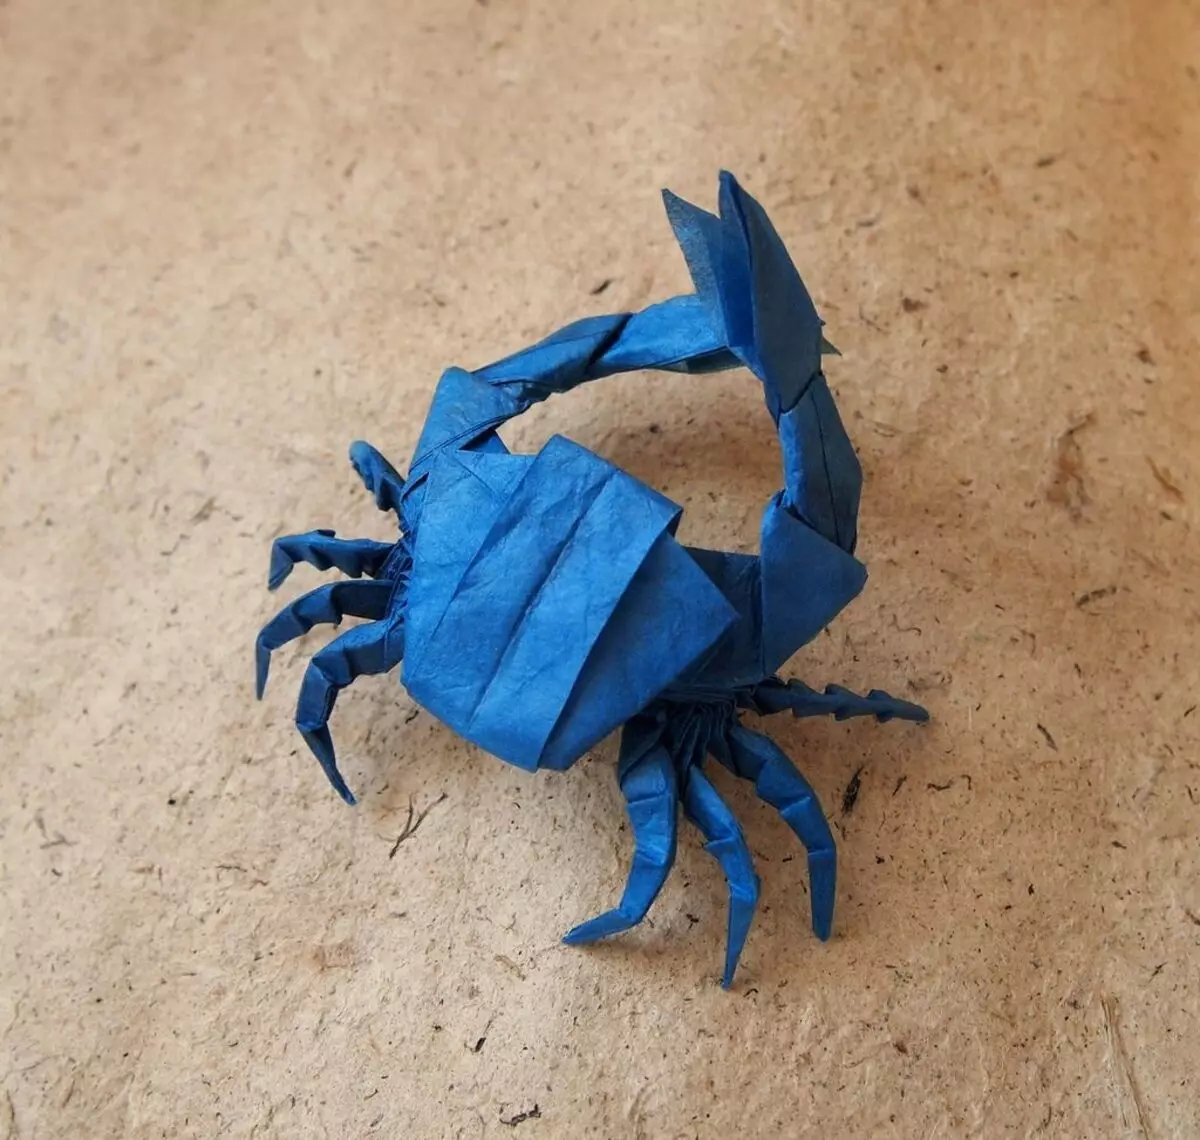
Schemes for experienced
People who have long made simple figures are capable of creating more complex crafts. This will help not only nice to spend your free time, but also to develop this skill even more. Here are some phased schemes for creating origami in the form of a crab for experienced people.

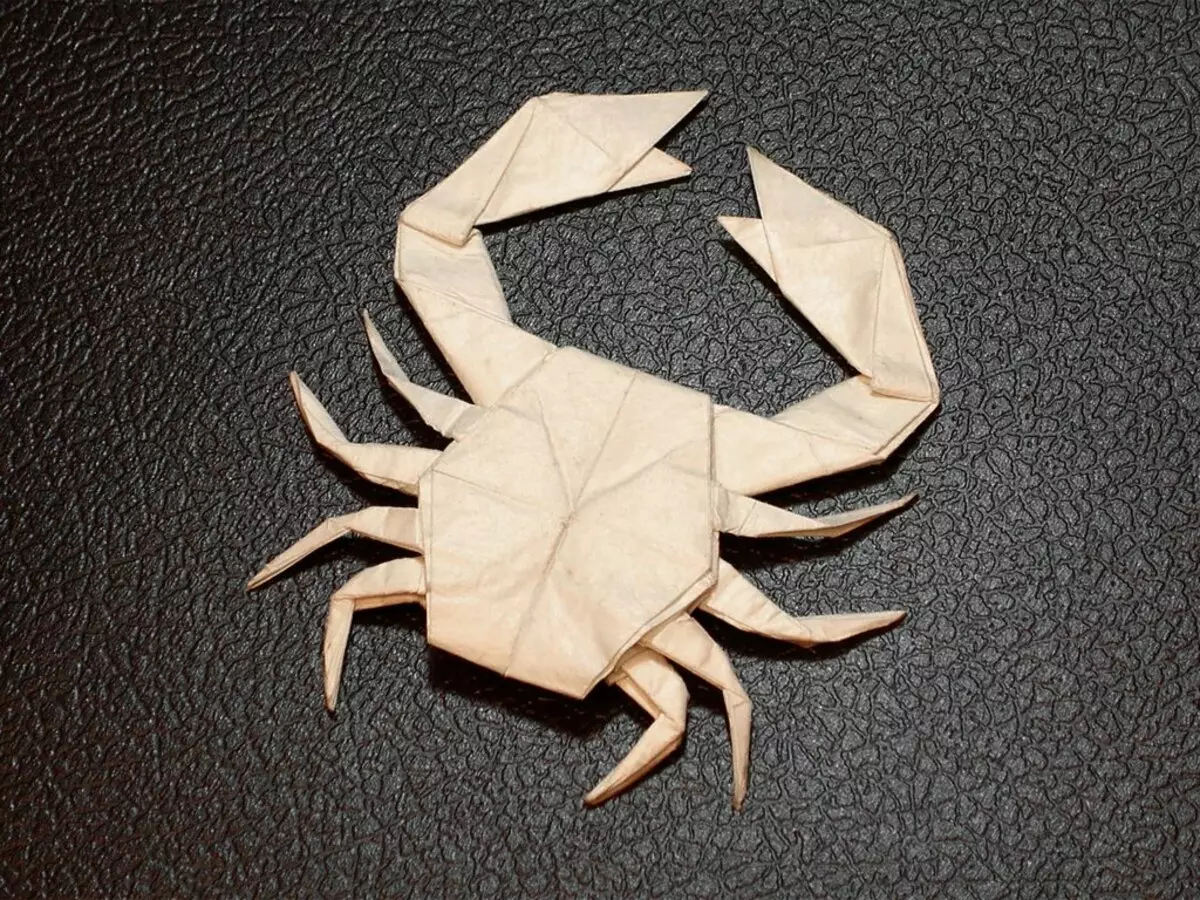
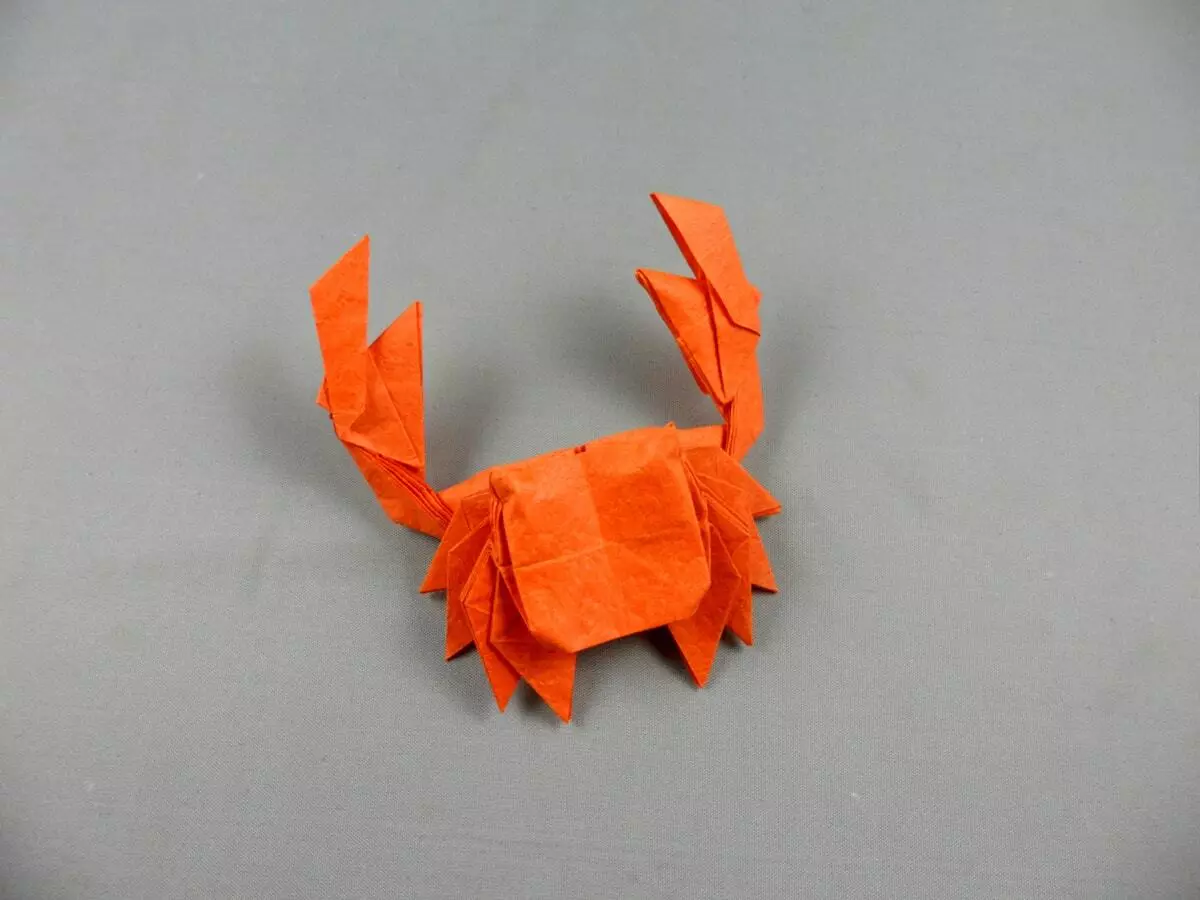
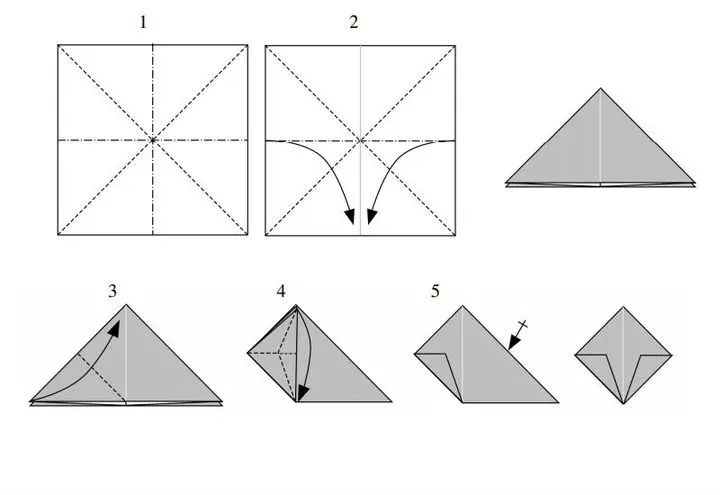
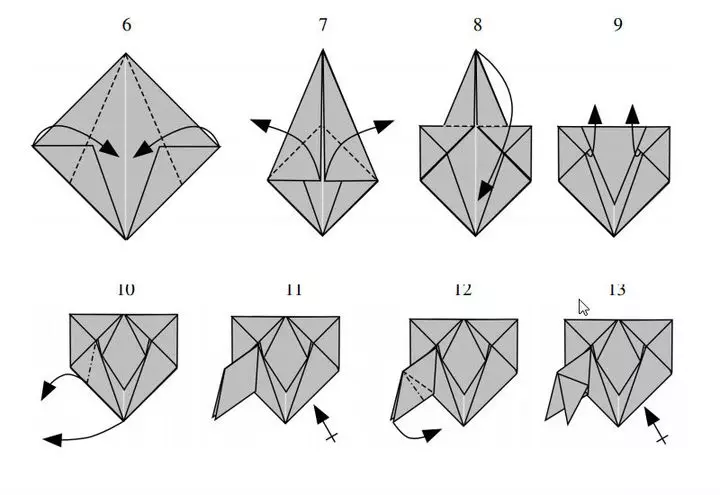
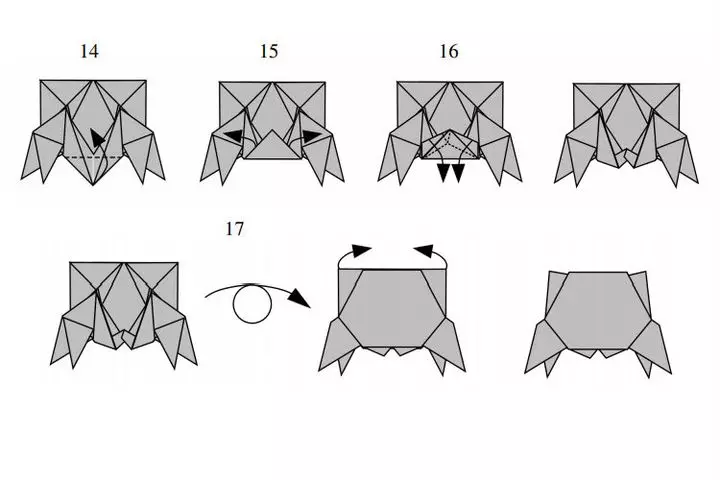
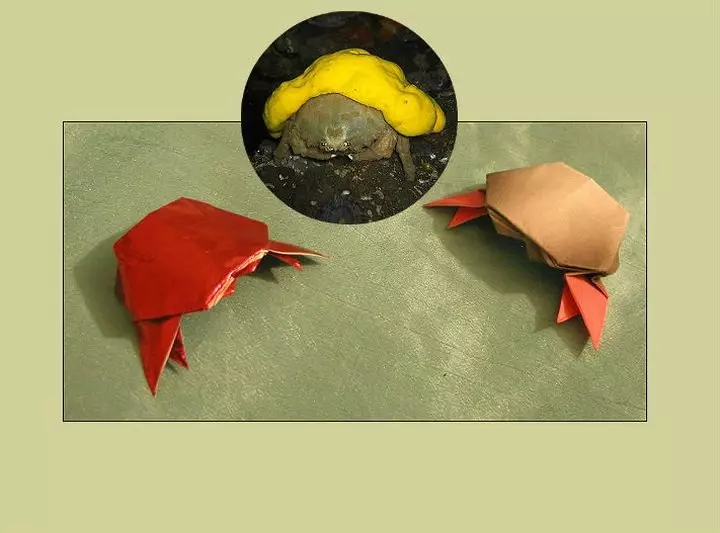
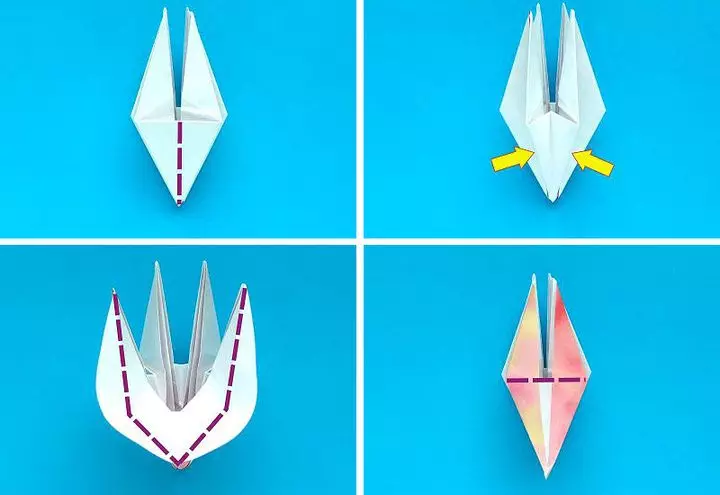
Sponge crab
To fold the original crab, you should prepare a paper square 15x15 cm. It is necessary to choose not too thick paper, otherwise the handicraft will not be neat. Folding begins with the wrong side.
- The material bends in half on a dotted, which can be seen in the diagram. Diagonal - "Valley", central axes - "Mountain".
- Folds are open. The billet is collected using the arrows in such a way that the base for the "water bomb" was formed.
- The triangular blank turns the base to the person. The side on the left rises upwards, after which it is gently rejected down and folds along the dotted.
- The 3rd step must be repeated on the right side.
- The right and left side are folded to the center.
- The ends of two sash will be rejected back in such a way that a smooth line formed.
- The valve is lowered on top of the dotted.
- Folds are translated over a triangle.
- It is necessary to create a "Squash" fold using arrows.
- The 11th step is repeated to the right.
- The 1st layer of Squash is mixed to the side (thus denotes the claw). The same must be done on the other side.
- Part of the bottom is fenced.
- All valves are revealed by arrows.
- Folds are made for eye decoration.
The finished figure turns over to the front side.
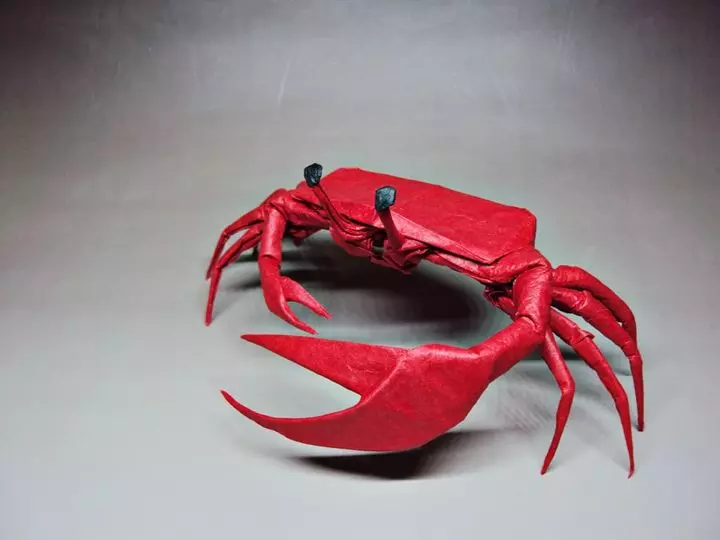
Violinist
If you follow the scheme and collect the model sequentially, you can make an interesting feature of grip-violinist. It is best to use a print material so that the caretaker had a decorative appearance. It is based on the basic form "Damn".
- It is necessary to divide the square sheet of paper 15x15 cm in half using the "Valley", and after diagonally via the "mountain".
- After all the folds marked, the sheet should be revealed.
- All angles bend to the center.
- The billet turns over.
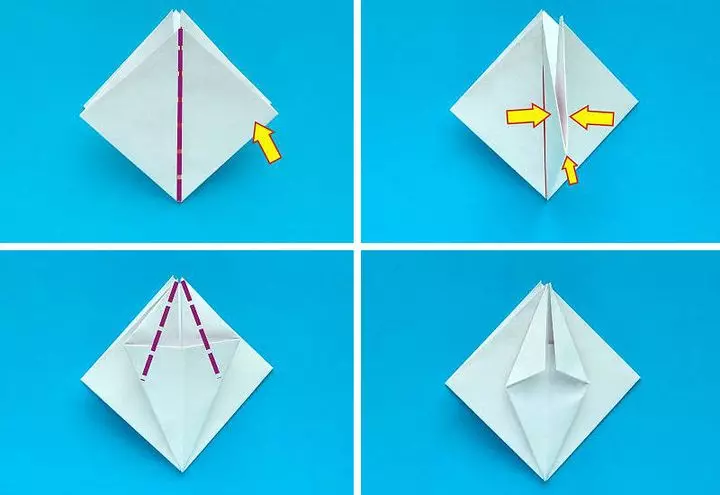
- You need to fold the form "double square". Pull up the element specified by the arrow. After that, make a fold of the "valley" along the line of purple color.
- It should be pressed into a part that stands. It is indicated by a small yellow arrow. After that, it must be flattened.
- The edges are coated to the line in the center of the dotted line.
- The folds of the 7th step are revealed.
- It is necessary to pull the edge down (it is specified by the arrow), in the process bend the valve on the dotted.
- The edges (shooting arrows) should be segged and smooth carefully.
- The bottom shape in the form of a triangle should be raised.
- Press steps 6-11 should be made for other 3 sections of the workpiece.
- Ends from above are stretched towards the arrows.
- Triangles that are under violet lines should be adjusted to the model.
- Ends that are indicated by arrows bend.
- Steps 13-15 are repeated for other sections.
- Details on both sides are shifted by the "Valley" fold.
- The top layer of the material is disconnected from the rest of the crafts in places that are indicated by arrows.
- The billet folds along the lines of purple, you need to use the "Valley".
- An extra end rises up. Steps 17-20 are repeated for other sides.
- "Pockets" is neatly revealed.
- The protruding part is compressed.
- Repeat steps 21 and 22 on the other side.
- Both ends are lowered from the dotted lines.
- 2 folds are formed.
- Through the backrest, you need to lower the beam on top to the right, and after - on the left.
- Repeated step 24 for the ends that are indicated in the diagram.
- The billet turns over.
- At the end, which is noted, folds are formed.
- The return bending is drawn up on the lines in the diagram.
- The 2nd end starts into the workpiece and moves there.
- The edges are pressed according to the scheme. So we give the clans volume
- The product turns over.
- Similarly, other legs are formed.
- The top is cooled to design claws.
The lower triangular element is seduced. Figure is ready.
nine
Photos
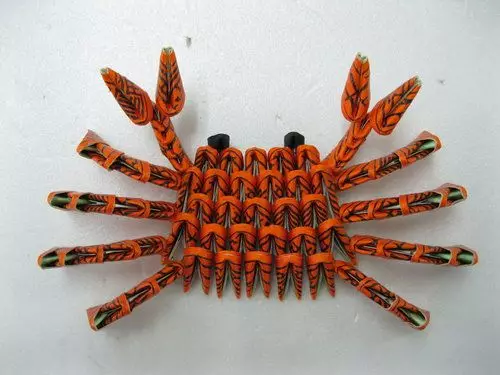
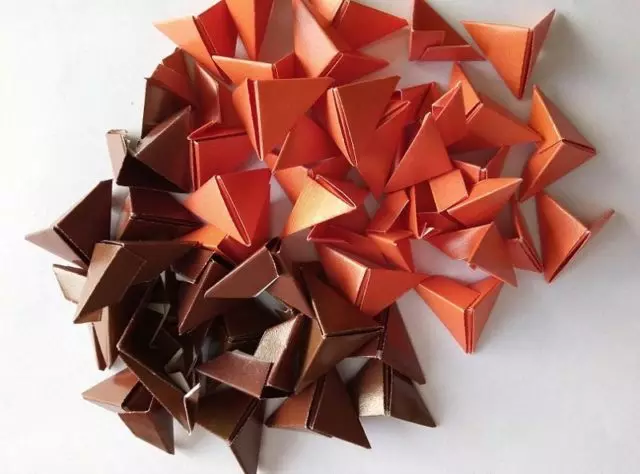
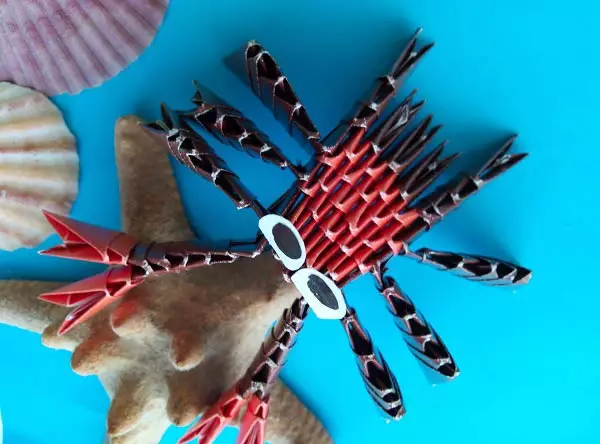
Creating a modular crab
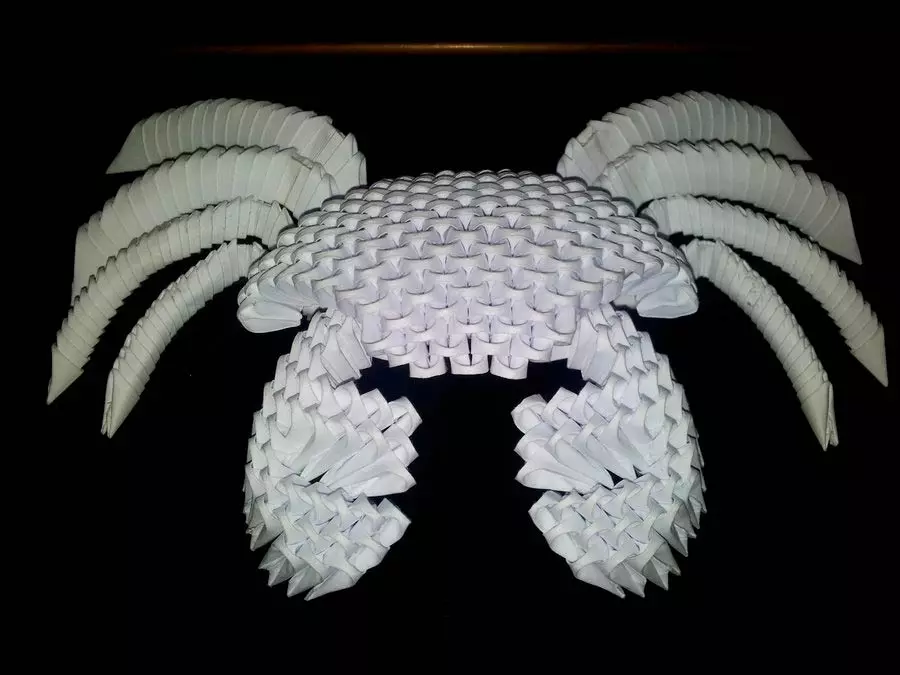
Modular figures are incredibly beautiful and can become an interior decoration. It is difficult to make them enough, but if you constantly practice, the assembly of modules and figures will not take much time.
First you need to make modules from orange and brown paper A4. Each sheet should be divided into 32 rectangles of the same sizes. You need to bend the paper along, thereby making 4 stripes. After each of the bands, it is necessary to cut on 8 parts that should be equal to each other. So it turns out the desired number of rectangles, having a part of about 3.5x5 cm. To build a modular figure, you will need 30 orange and 62 brown modules.
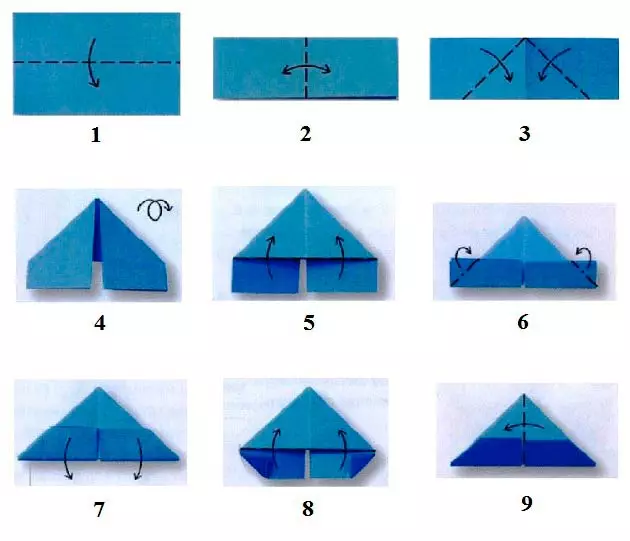
Folding scheme.
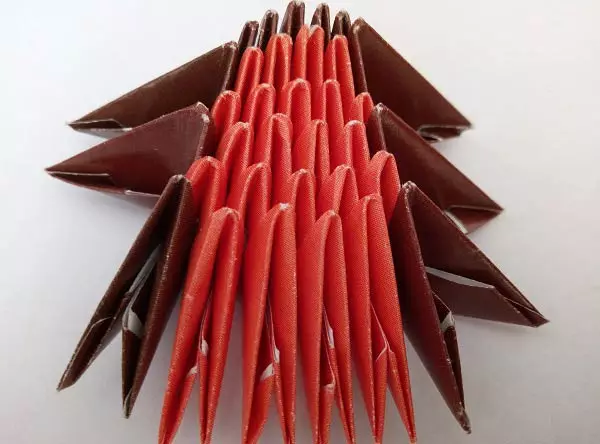
- For the assembly of the body you need to put on the surface of the workplace 5 brown modules. To put them are needed for a short side, "pockets" must "look" ahead.
- All items are connected in such a way that the "chain" formed. This is done using the 2nd row of triangles that are put on short side (6 modules). The 3rd range consists of 5 modules, 4th - from 6, 5th - out of 5, 6th from 6, and 7th (final) - out of 5. The extreme elements should be brown, those that are inside - orange. The finals will get a billet on which there will be three opened side elements.
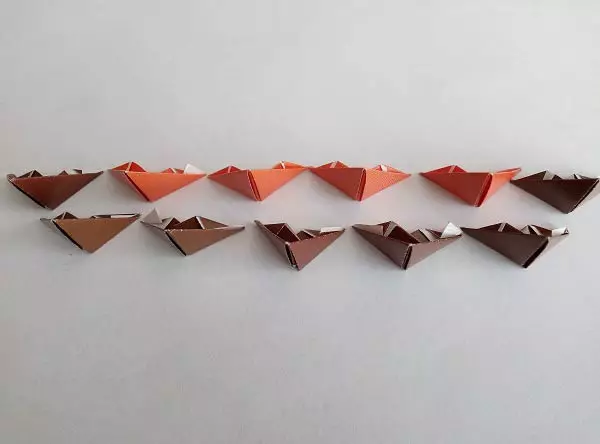
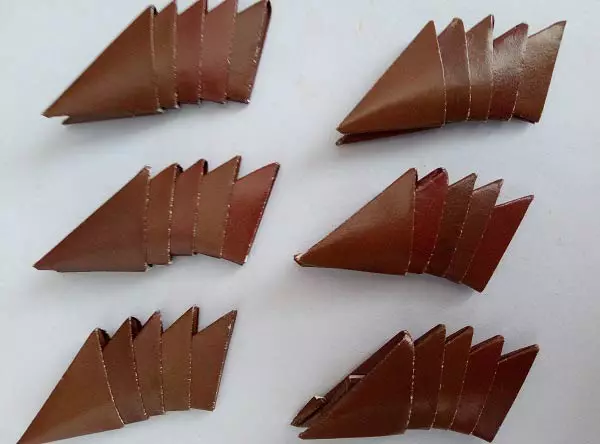
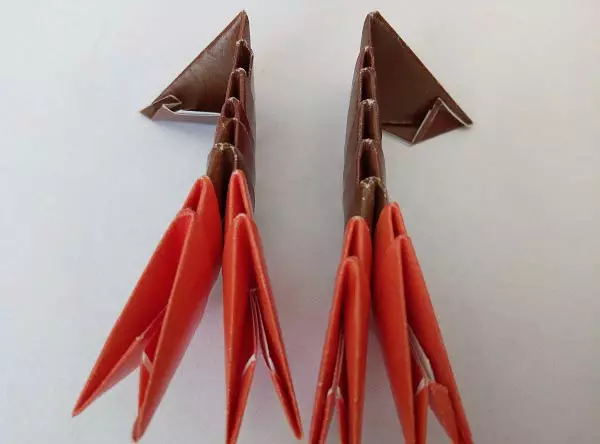
- The limbs must be collected using brown parts. We collect 6 paws by investing modules in each other. Each of the paw is made of five triangles.
- The claws are also folded as folded paws. In each of them, five triangles. The base is invested 1 additional element, which will attach claws to the main element of the craft. Decorate claw 4 triangles of orange.
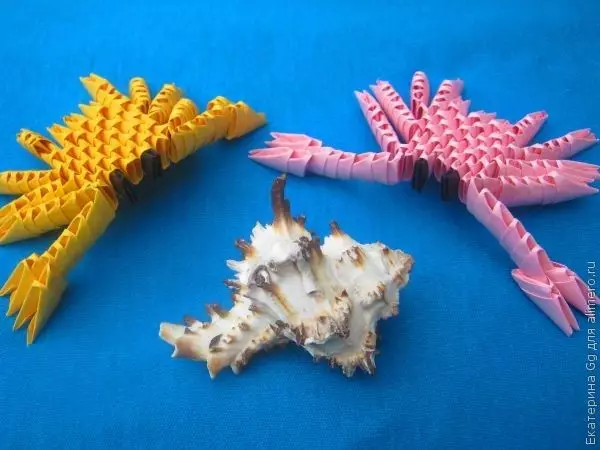
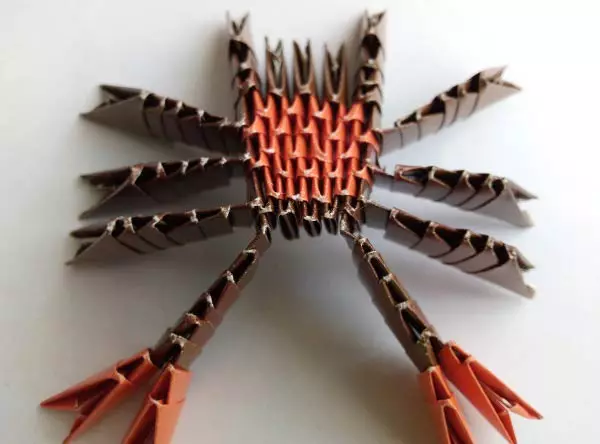
- It is necessary to attach all the elements to the body . At first you should attach the paws. The side elements were left for them. Additional elements on the front clams need to push into the holes of the extreme elements on the body, and after the rear paws are increasing (2 elements per each). The limb should be unhappy a little so that they are more stable.

Eyes cut out of the paper and glued to the body. Beautiful crab ready.
About how with your own hands you can make origami in the form of a crab, see the next video.