
There are a large number of different ideas for creating paper crafts with your own hands. It is interesting to look such products performed in the Origami technique. Today we will talk about how you can make a cradle in the form of the sun origami.
Simple option for children
To begin with, we consider the simplest option to create such a decorative product with your own hands.
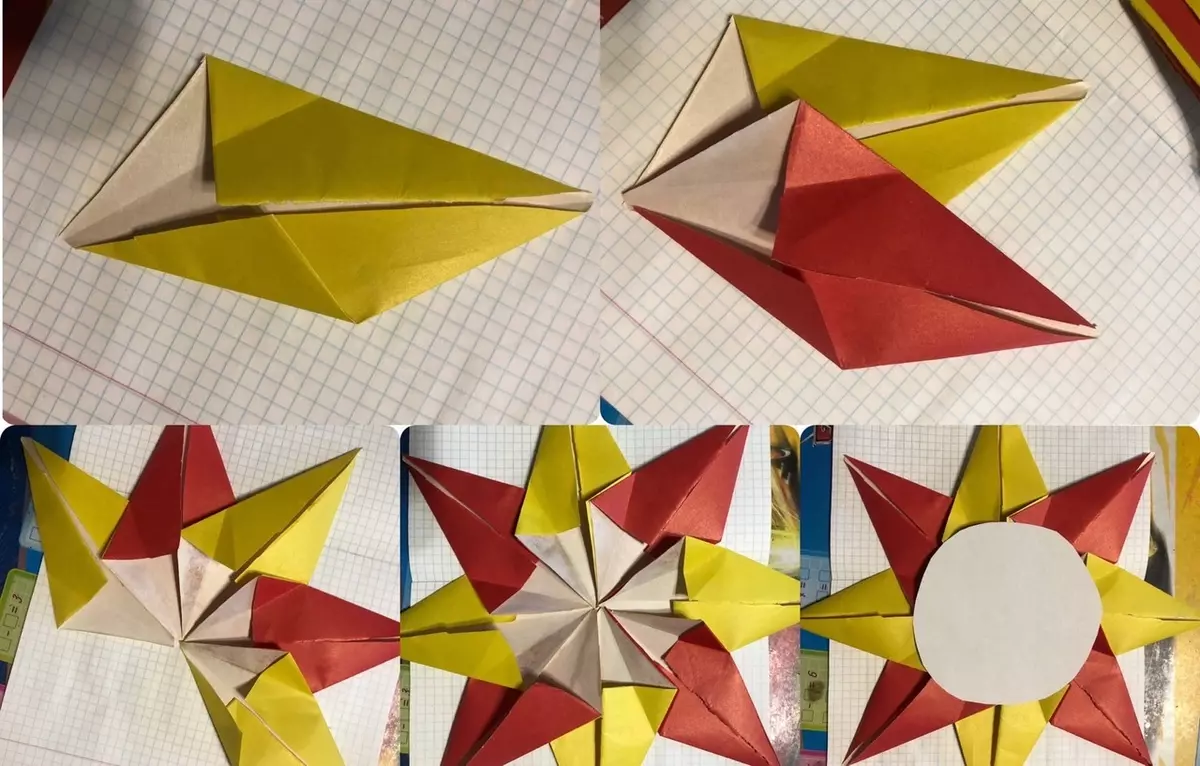
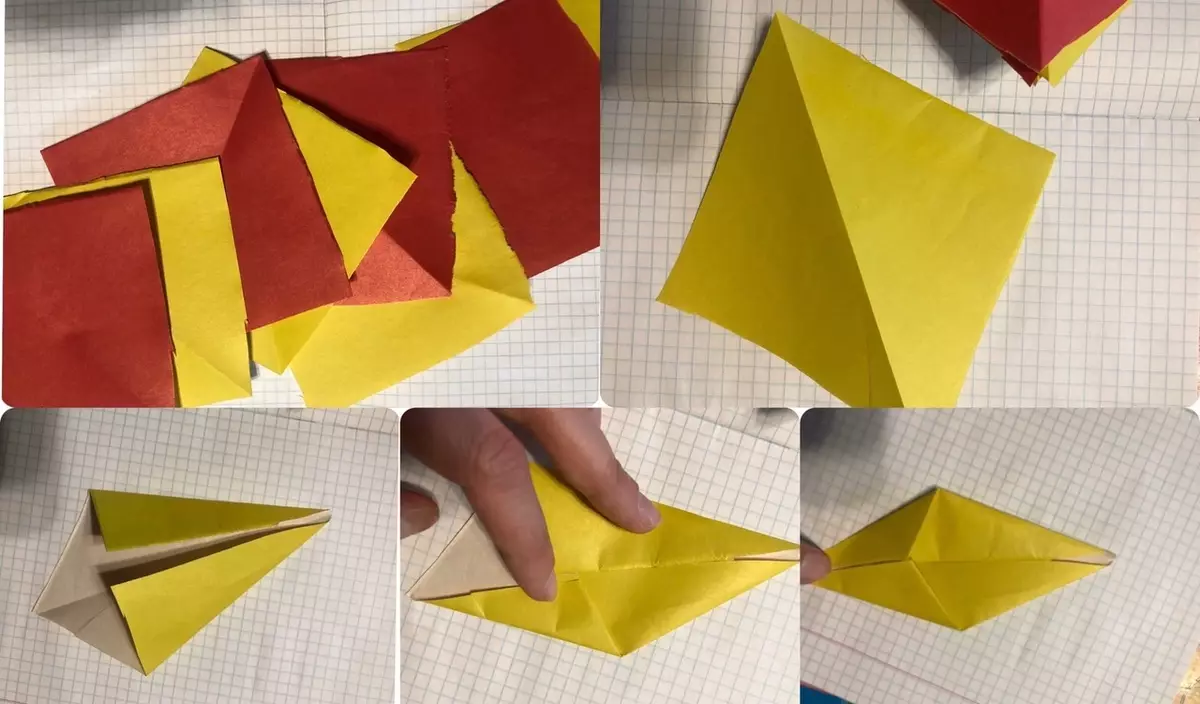
It is necessary to prepare 8 identical square paper blanks of 9x9 centimeters.
After that, all the squares obtained are flexed in the center in the vertical direction. The sides of the products are bent to the middle of the vertical.
The lower sides bend, the triangle on the left returns to its original place. So it will be necessary to do with all the billets.
The place where the triangle is bent, is riveted with glue. The first finished ray glue with the second.
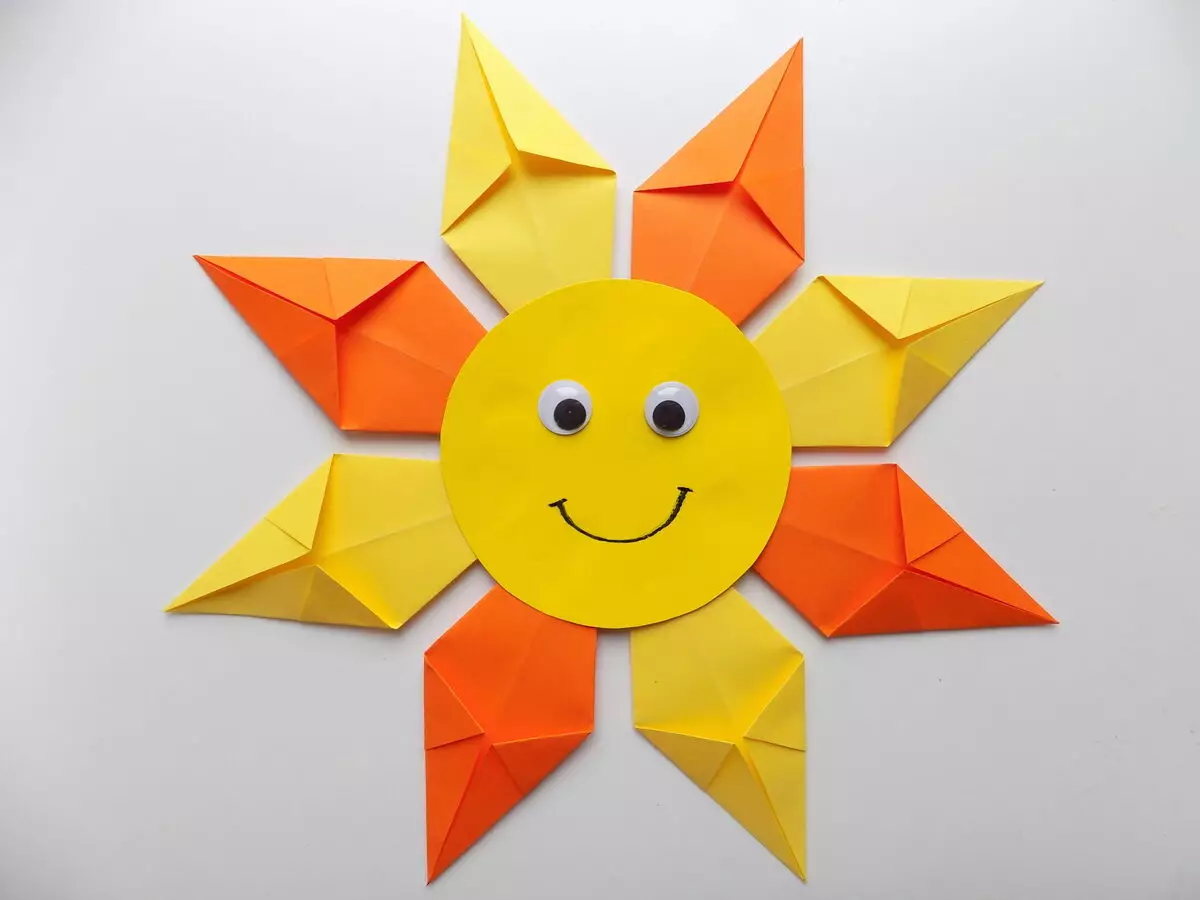
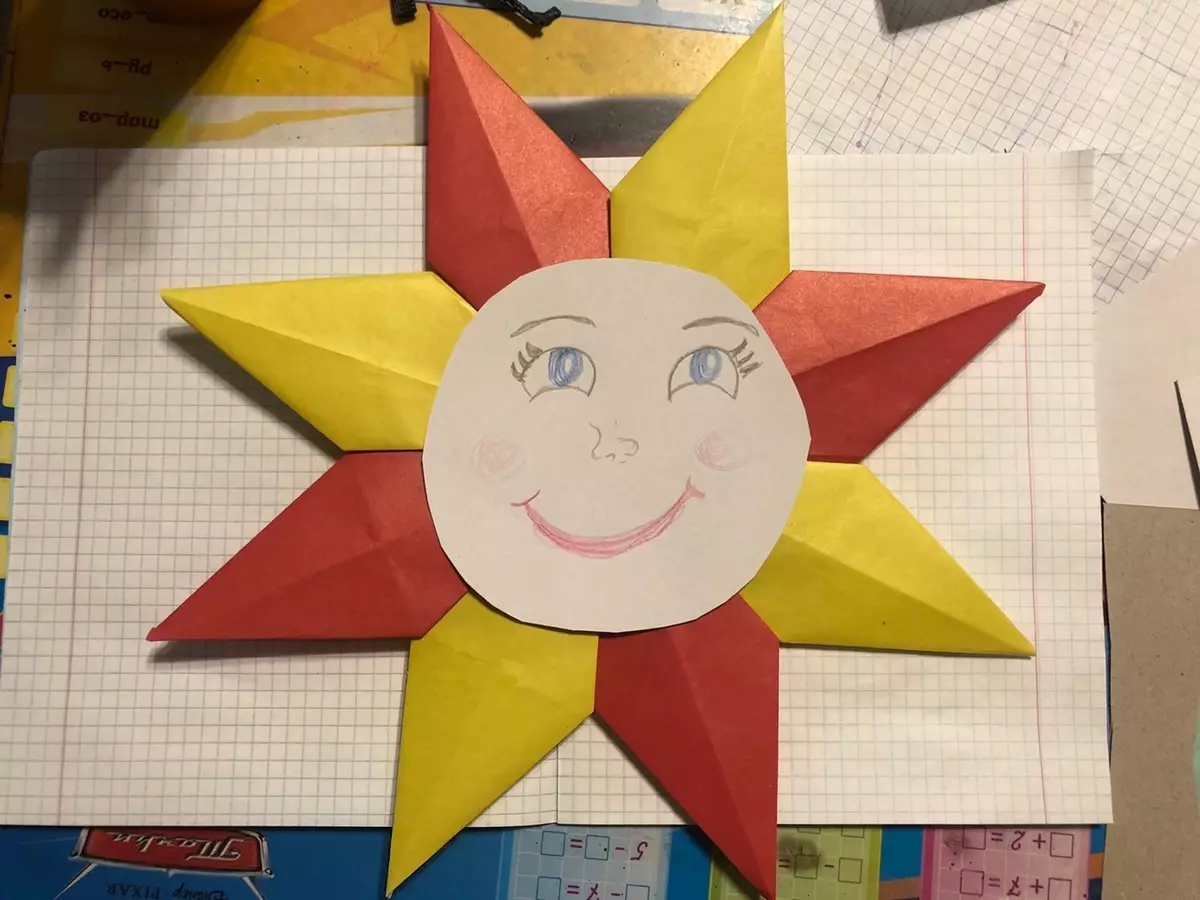
Then the circle with a diameter of 8 centimeters is cut out of the paper. It is glued into the central part of the crafts.
The product is turned over to the other side. After that, the second round of white paper is cut and glued in the middle. Next, with the help of markers, you can draw eyes, nose and mouth. And you can also decorate the finished sun with decorative details.
There is another simple option that is quite suitable for children and for beginners.
Colored paper sheets cut the blanks of a square shape. They may be arbitrary size, everything will depend on what the finished handicraft should be possessed. They are on the line diagonal, and then unfold back. You can use special paper for origami, also an excellent option will be the crepe and corrugated material.
Corners bended to the middle of the product . As a result, it turns out a new color square.
Such a square will need to round the corners, Next, their tops are rejected so that they become visible on the other side. These details will become small rays.
Next, the sun add even rays. Big corners turn away from the central part of the workpiece.
So that the exercise could be stable and not straightened It will be necessary to fix the rays with glue.
The product turns over to the other side . After that, pencils or markers form a "muzzle" in the sun, for this draw the mouth, nose and eyes. All these elements can be cut out of paper black and white coloring and also glued to the finished handicraft.

How to assemble from modules?
Now we will look at a more complex step-by-step scheme for creating such a craft from paper modules.
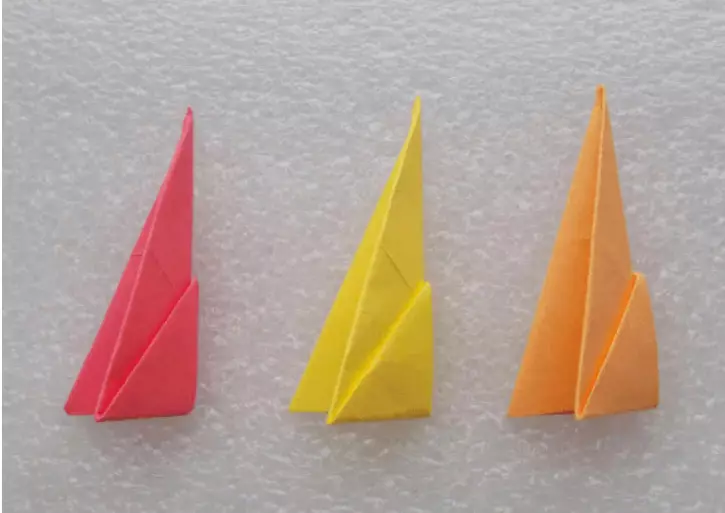
- First you need to prepare paper orange, red and yellow colors. Of these, individual modules will be cut.
To make the workpiece, it is necessary to fold the paper sheet twice, it will also be necessary to schedule the folding line, after that the material is instilled back.
Corners bend to the center.
All this turns over to the other side. Free ends gently bend upstairs. Then the product is turned over again.
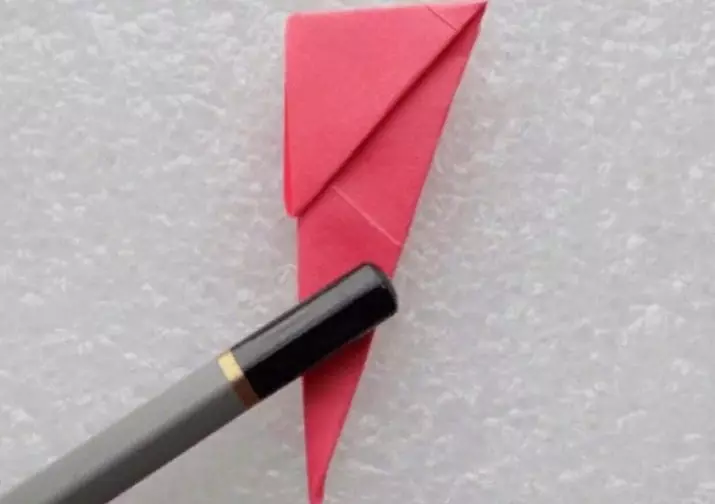
The edges are fused, the corners are inflicted.
The edges bend upstairs, and the angles hide down.
The workpiece is folded in half, in the end there should be a module.
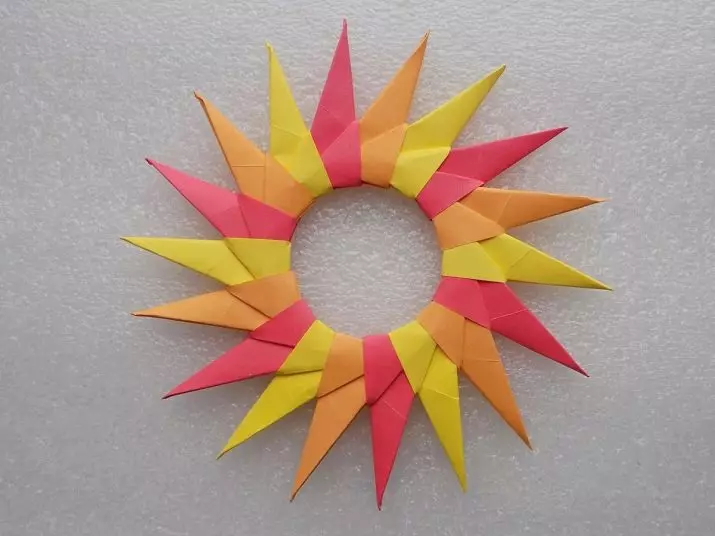
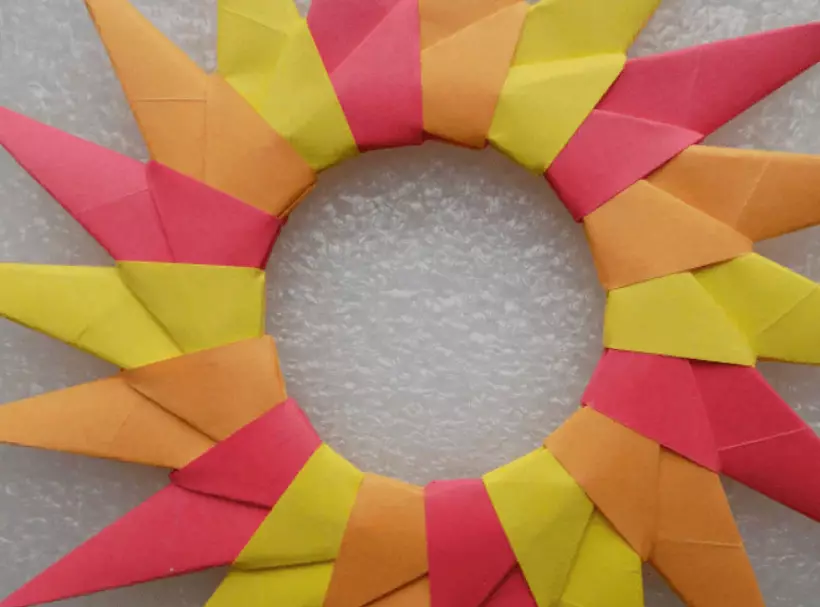
To make a big sun, you will need 700-800 such details.
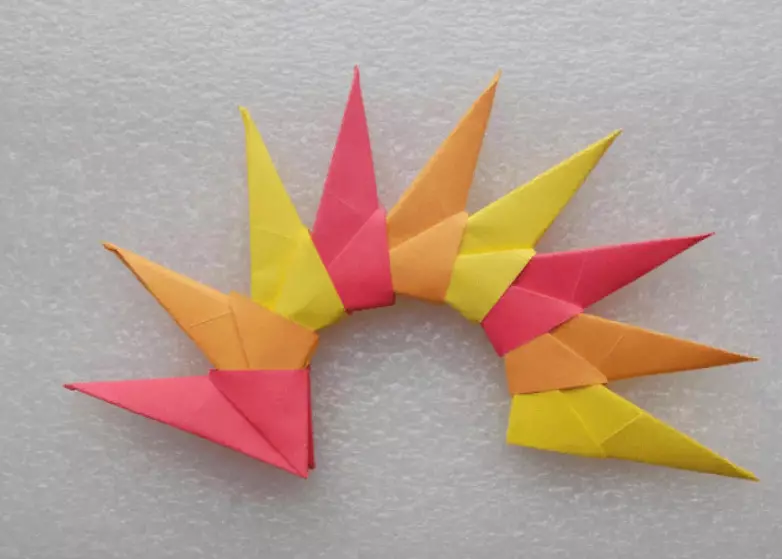
Next of the finished elements begin to form solar rays, you will need 5 such products. At the same time, the first rows are made of orange modules, the main part is assembled from yellow parts. For tops are used red elements.
When all the rays are ready, they are neatly connected to each other, inserting modules from each other into each other.
At the final stage, the central part of the sun is manufactured. To do this, you can use white paper. A round billet is cut out of the material and glued in the middle of the crafts. If desired, it will be possible to draw the eye, nose and mouth with a marker.

7.
Photos
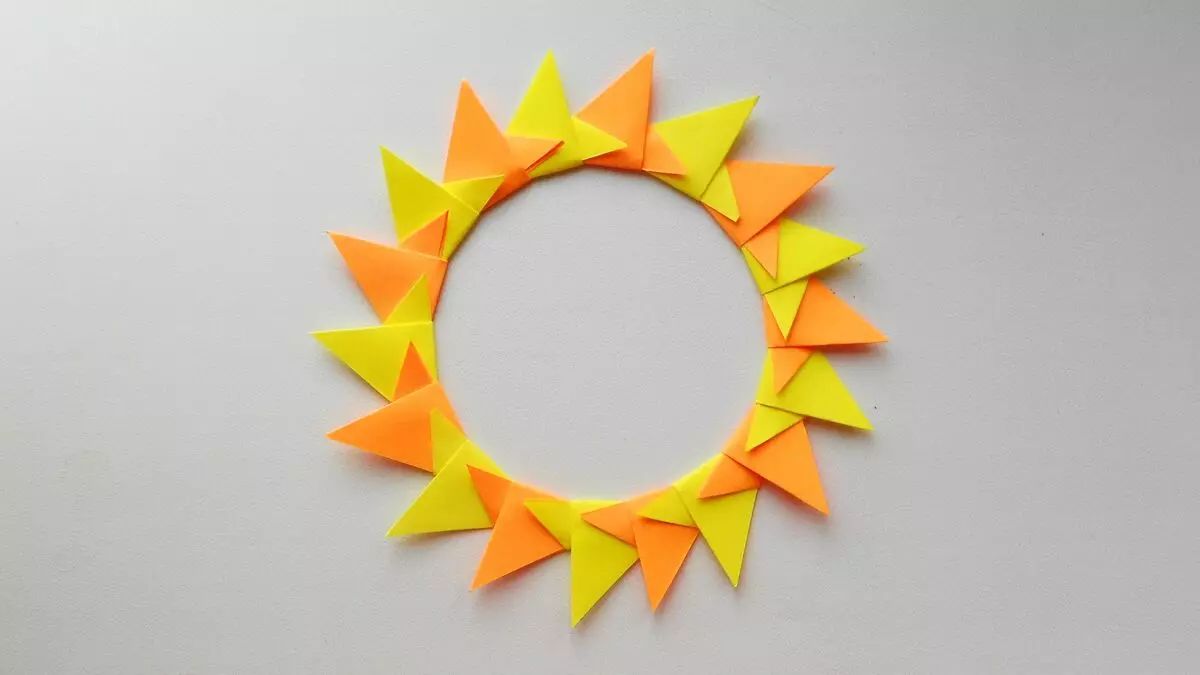
Such a modular craft can be made in another way.
First you need to prepare square small billets of different colors (red, orange, yellow).
After that, all these squares are neatly folded in half in two directions. Then the products are extensive back.
Corners are folded by the middle so that the result is the basic form "damn".
Next, two neighboring parts are folded to the center, as in the basic form "Air Snakes".
Paper blank turn over to the opposite direction. Top corner bend down.
Paper product gently fold the "mountain".
It will be necessary to make several such multi-colored modules.
When all items are prepared, start to form the sun. The corners of one element are inserted into the other pockets. All this is done until the circle clies.
Optionally, you can decorate the finished handicraft of various decorative details.
Other ideas
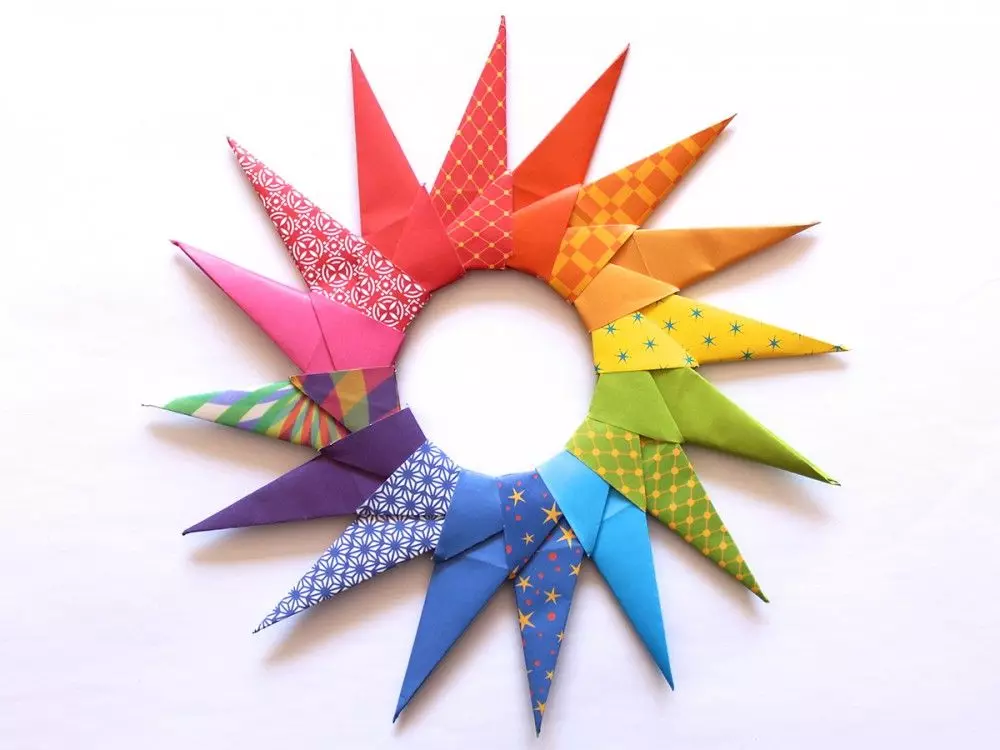
There are many other options for creating such an interesting paper craft.
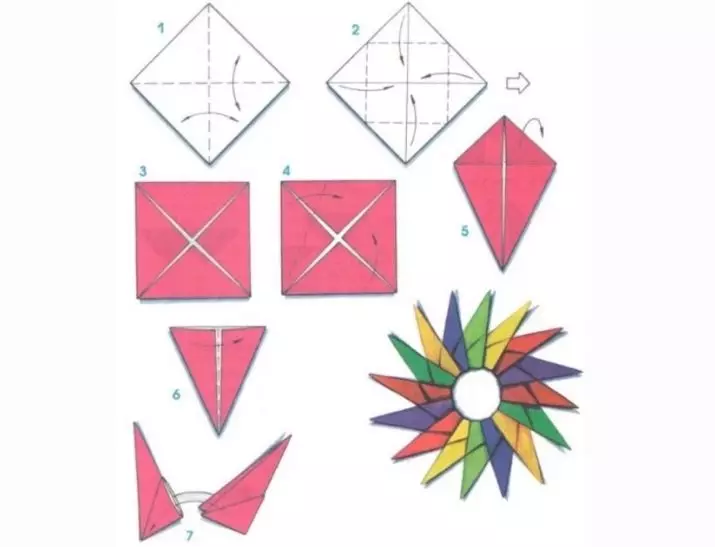
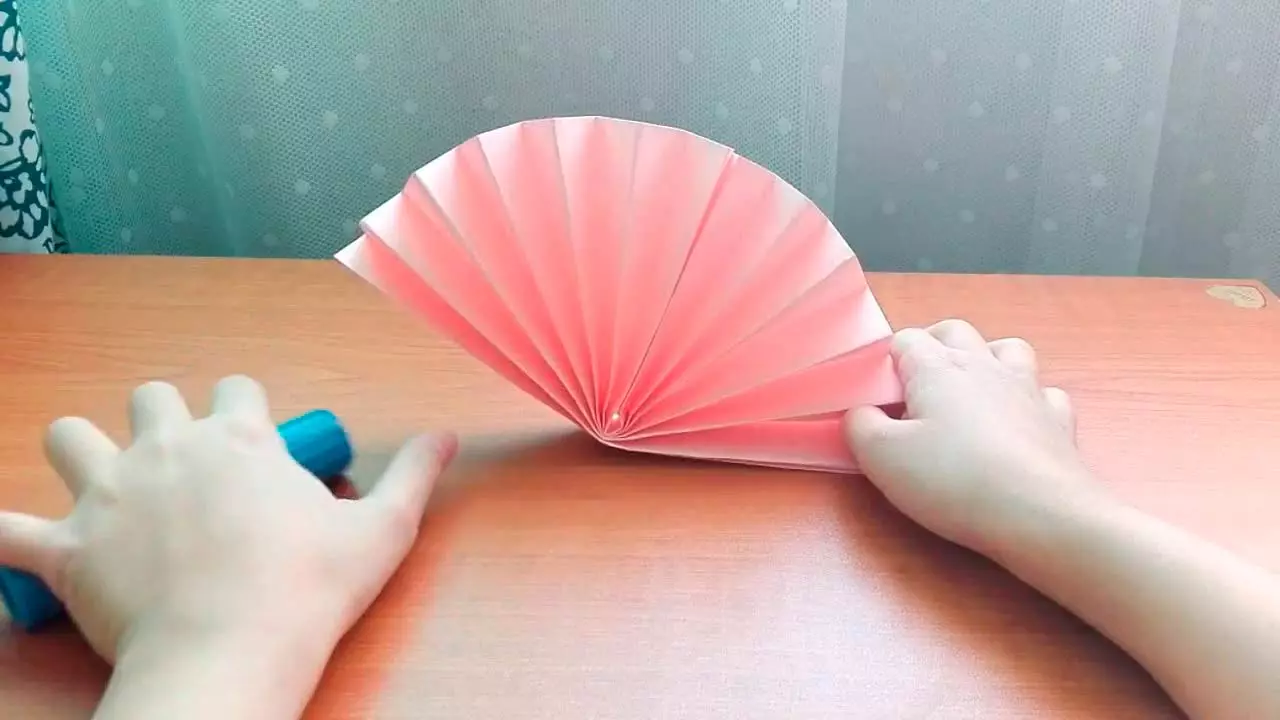
You need to prepare 4 sheets of paper, two yellow and two pink.
Then each such sheet is folded as a harmonic. At the same time, their edges are cut at an angle of 45 degrees.
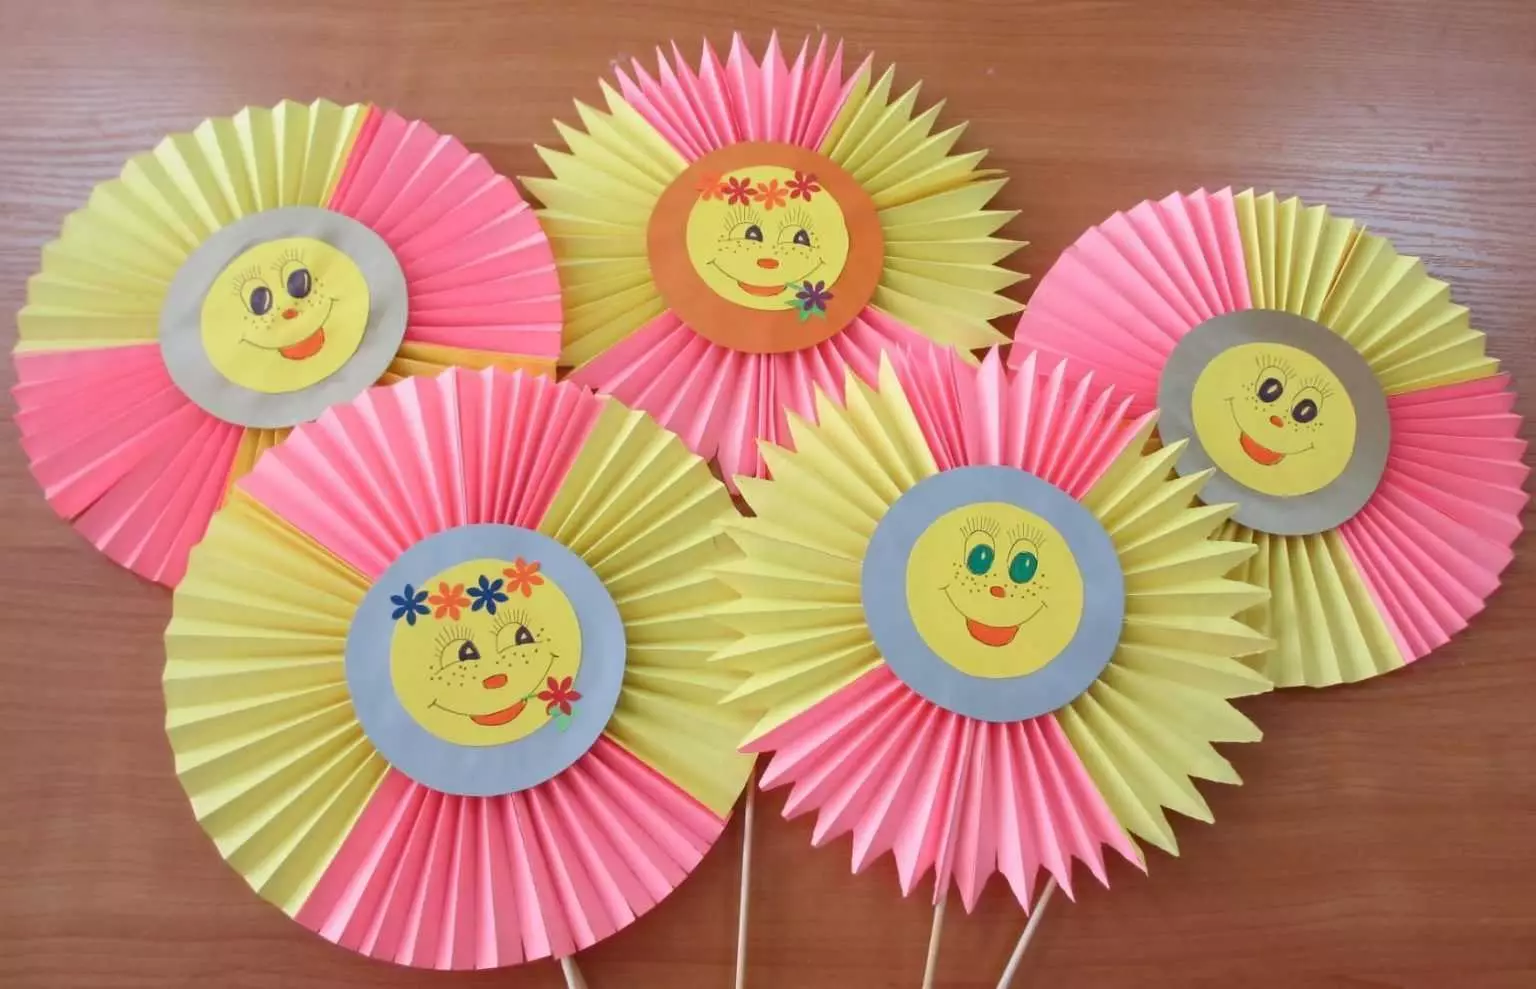
The obtained billets are connected. In the central part fasten the circle, carved from cardboard. This option can be perfectly approaching for children for 4-5 years, for beginners. Making such a craft will take quite a bit of time.
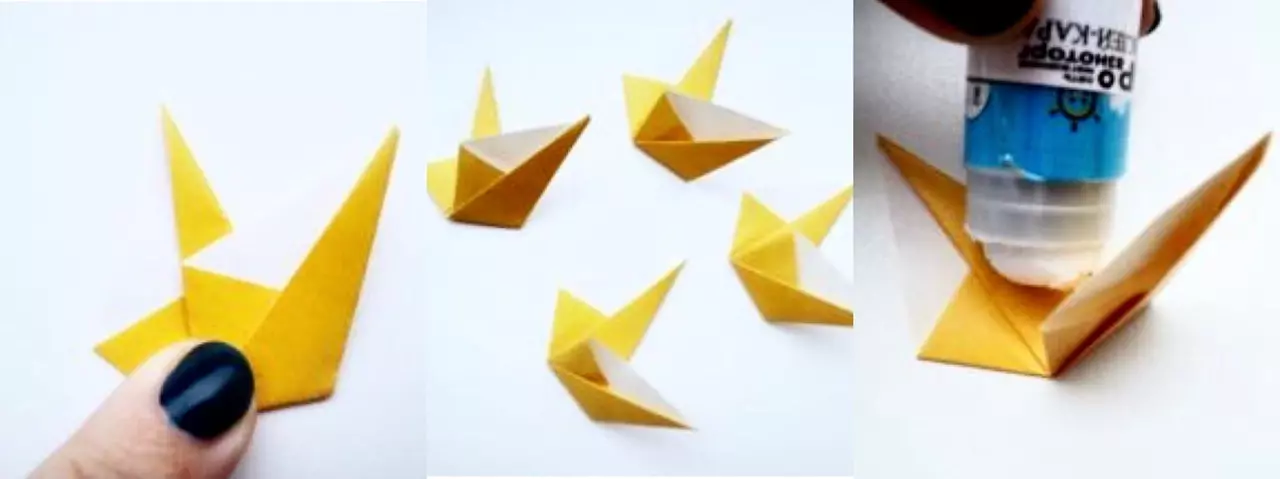
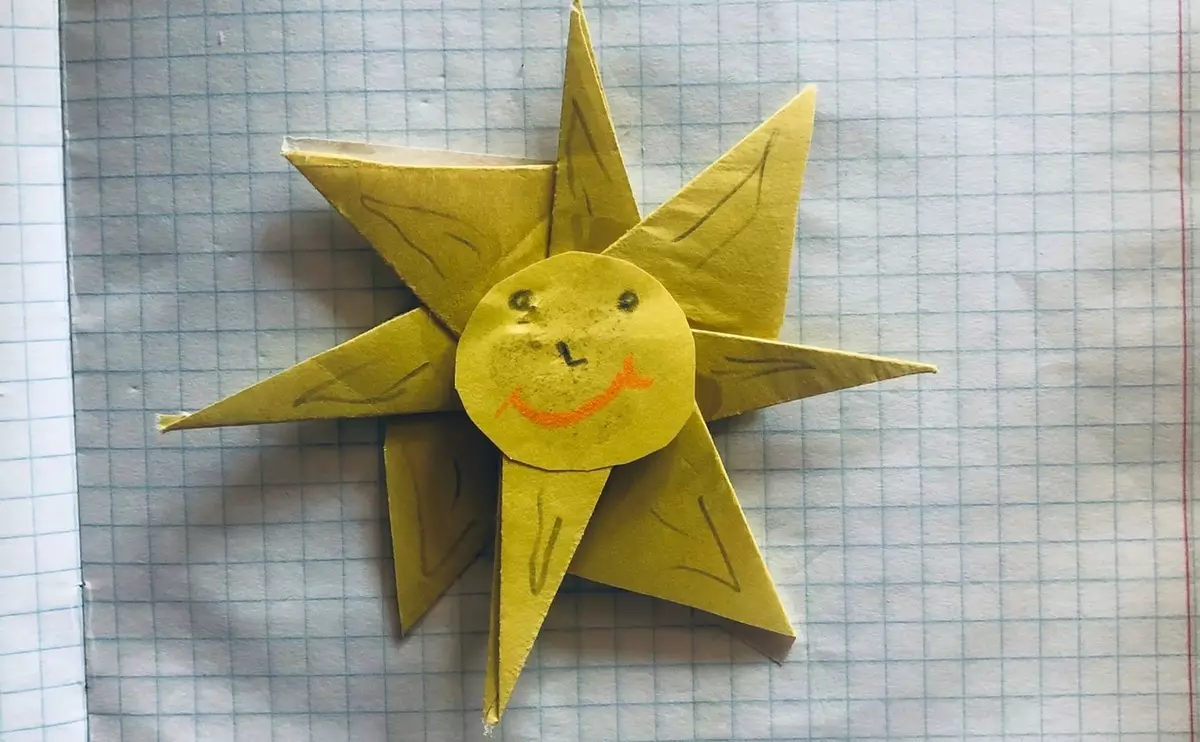
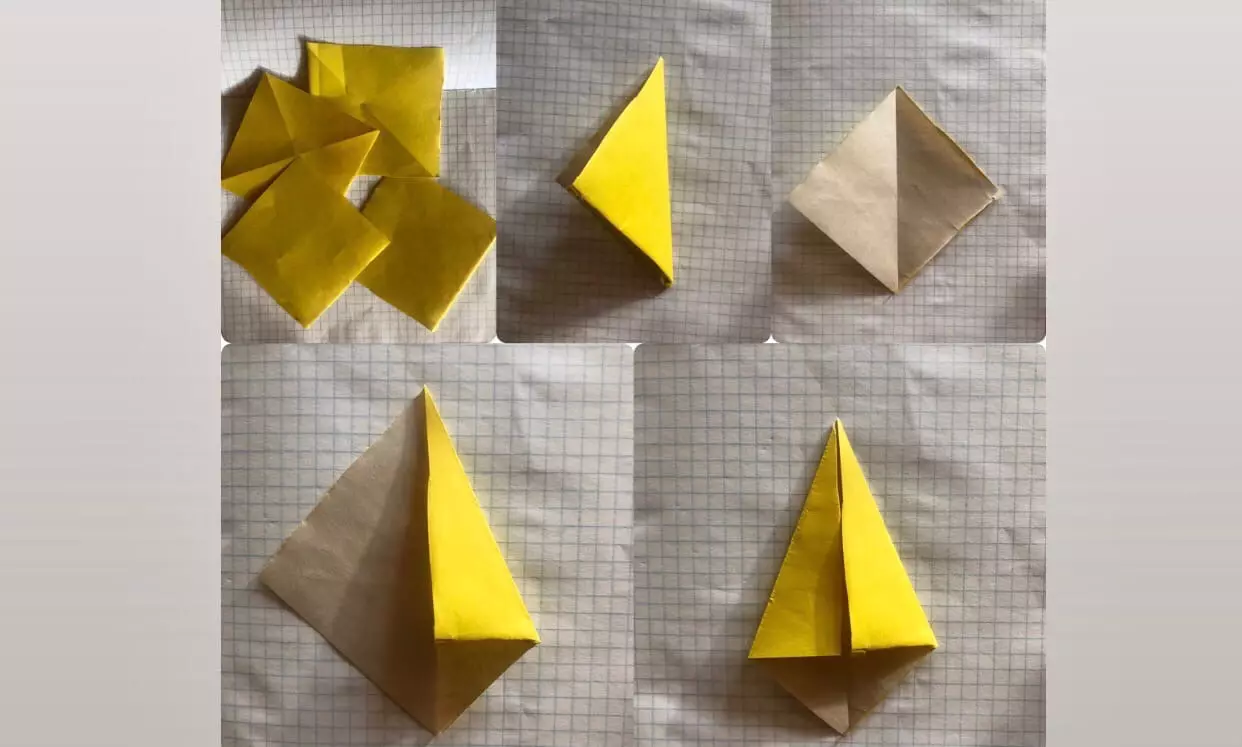
Consider another version of the manufacturer of the sun origami.
First you need to prepare one-sided paper, while one side should be yellow or orange, and the second is white. But it can be used and simple colored paper.
The 4 identical billets of the square shape are cut out of the paper base.
After that, the first square is taken, it is flexed in diagonal stripes. Then the workpiece is instilled back. One corner takes and bend to the place of bend, that is, to the center.
Then the opposite corner is then valid to the place of the main fold. As a result, the figure should turn out, similar to the wrong romb.
Next, it will be necessary to bend the item according to the main inflection.
Later, the element is bent in the center. After that, all the actions passed repeat and with all other paper blanks.
For the details could be secured securely, it is recommended to use glue. All obtained items are fixed together. Moreover, the material will have to be placed by the Vansel.
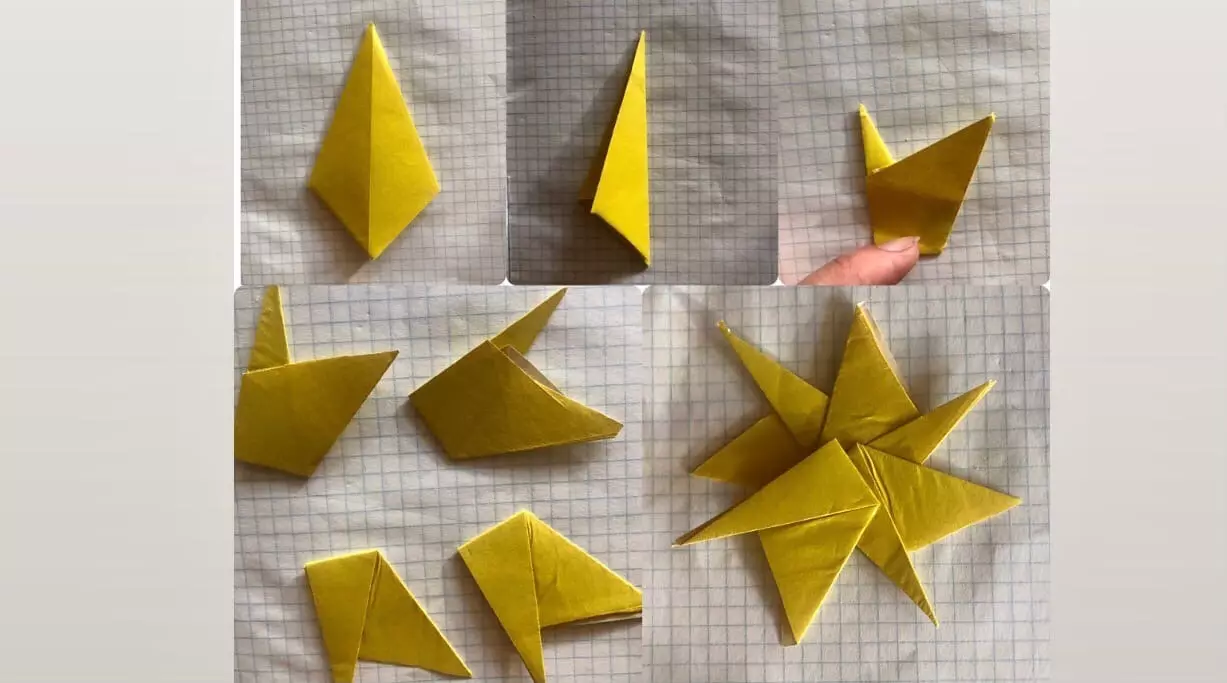
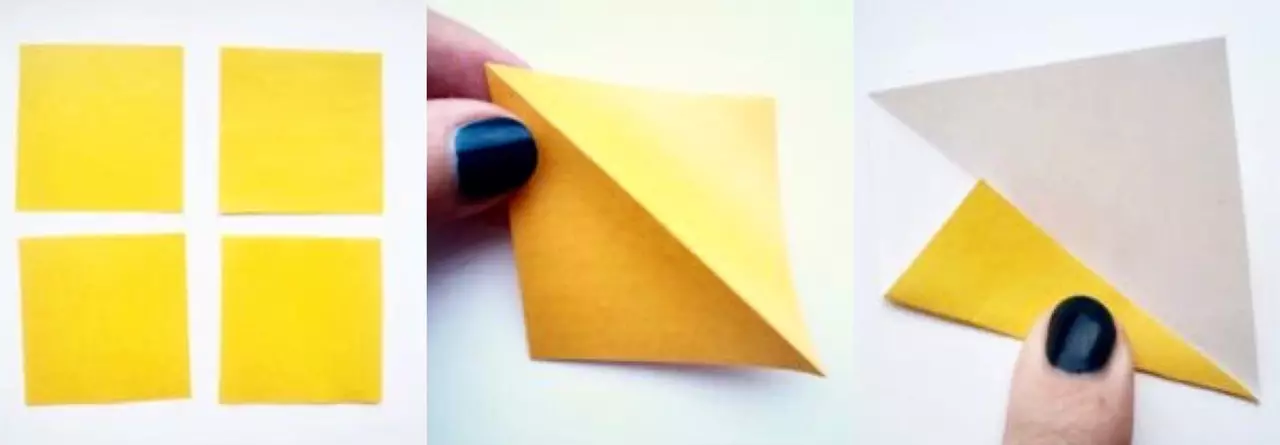
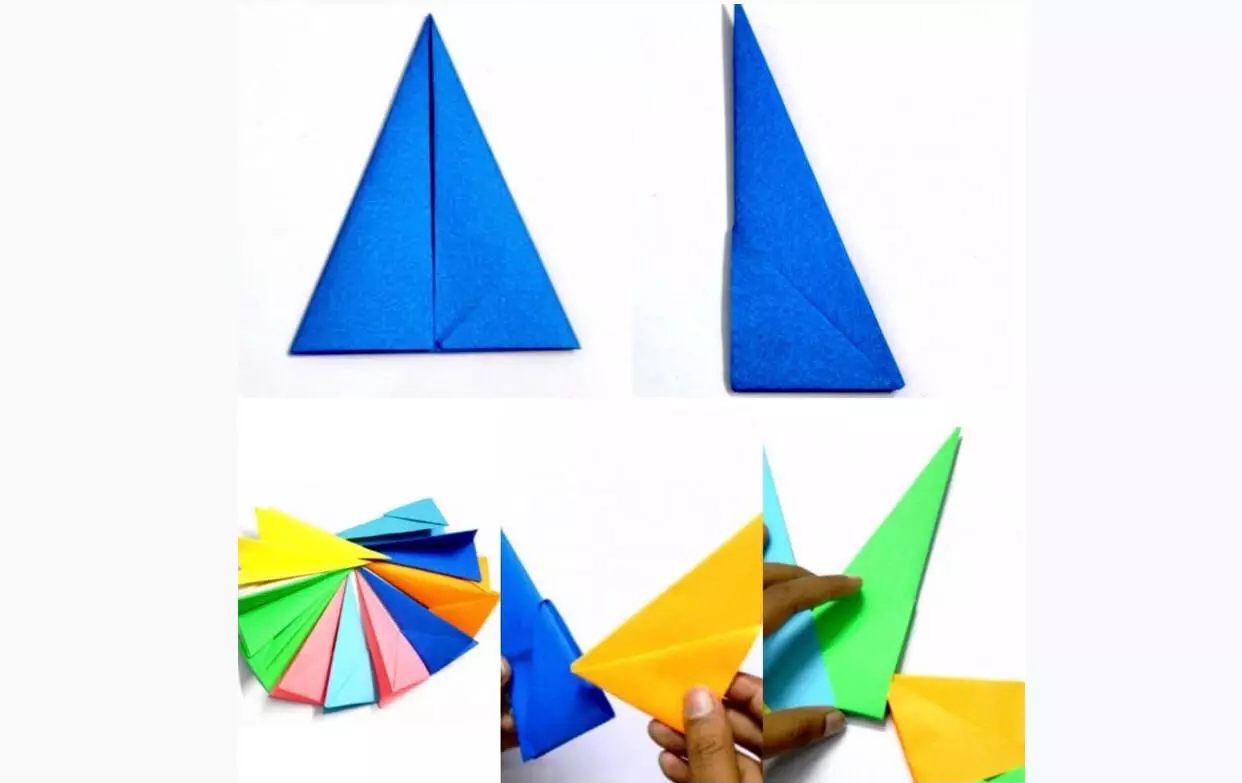
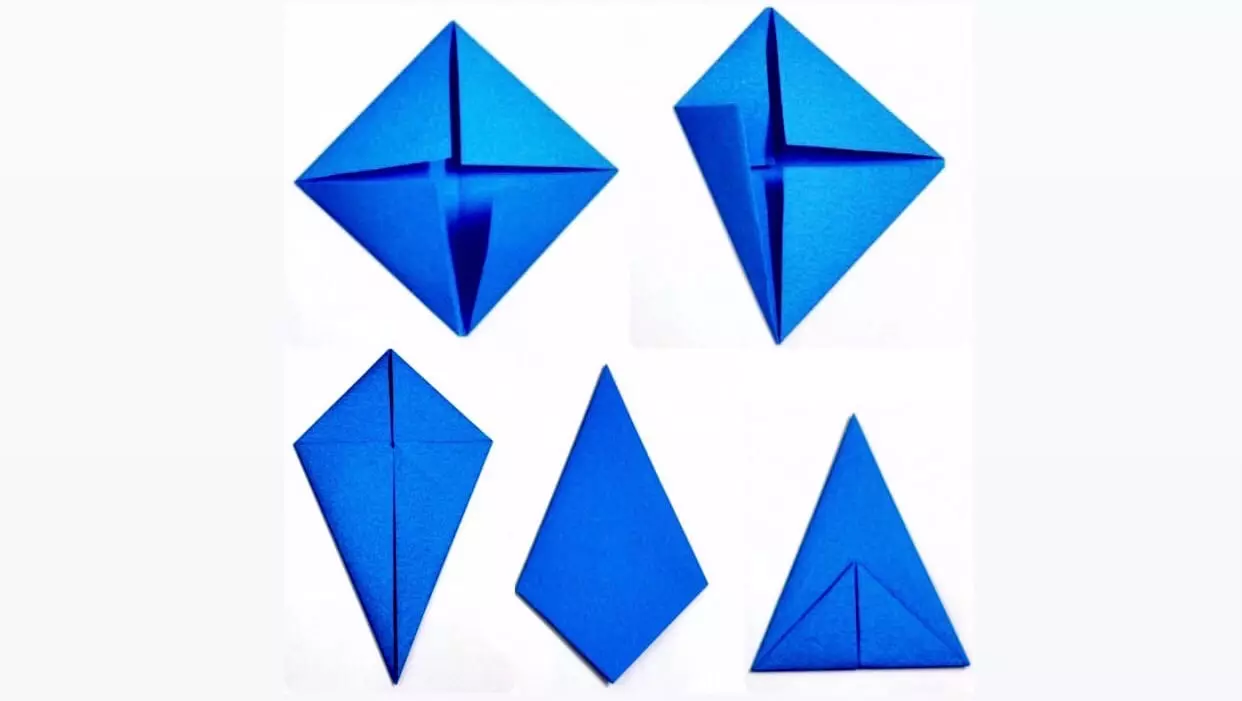
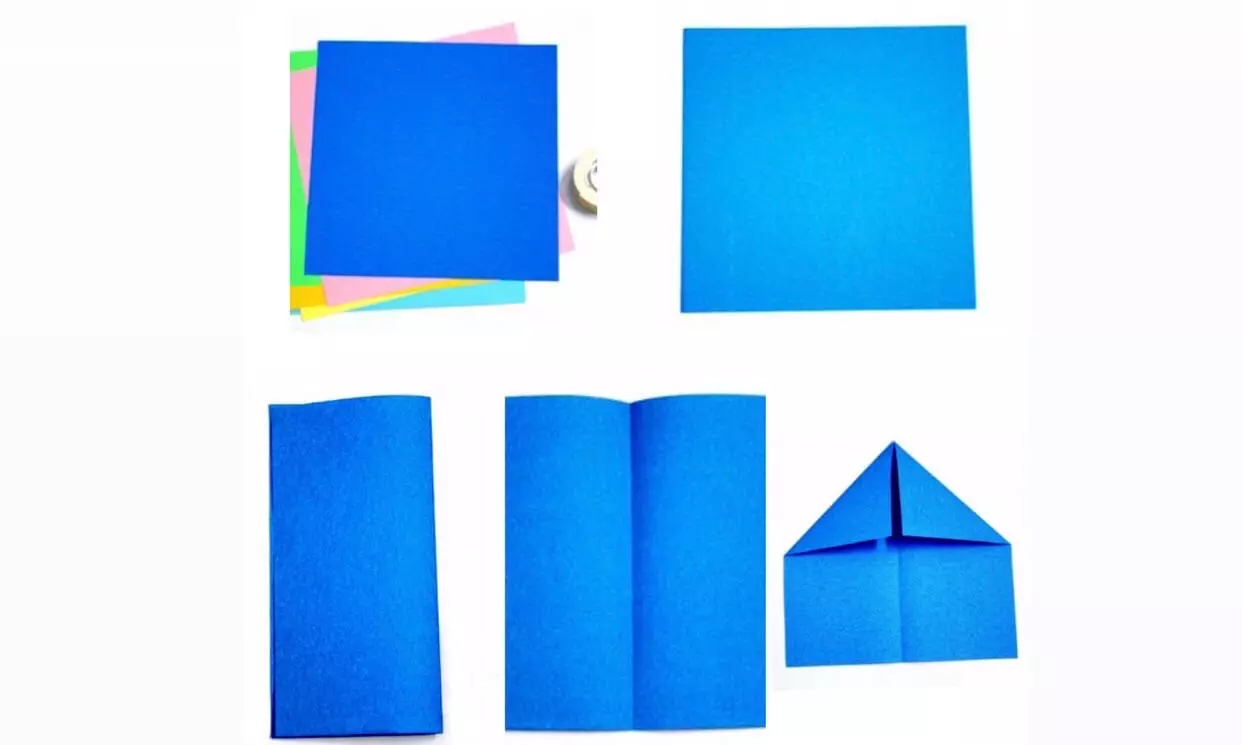
We will analyze another detailed step-by-step instruction of manufacturing such a craft.
To make the finished product it looks more interesting, you can use paper of different bright colors. Squares are cut out of the material. Each of them bends in the center.
After that, the workpiece unfolds back. By the middle of the inflection, the upper corners bended. The same actions are made with the bottom.
The left and right corners at the bottom bend once again, in the end the figure of rhombus should turn out.
The workpiece is turned over and placed as a tie.
The end of such a tie bend. Later all the product folds on the other side as a book.
Then the triangles made alternately insert into each other until the circle is formed.
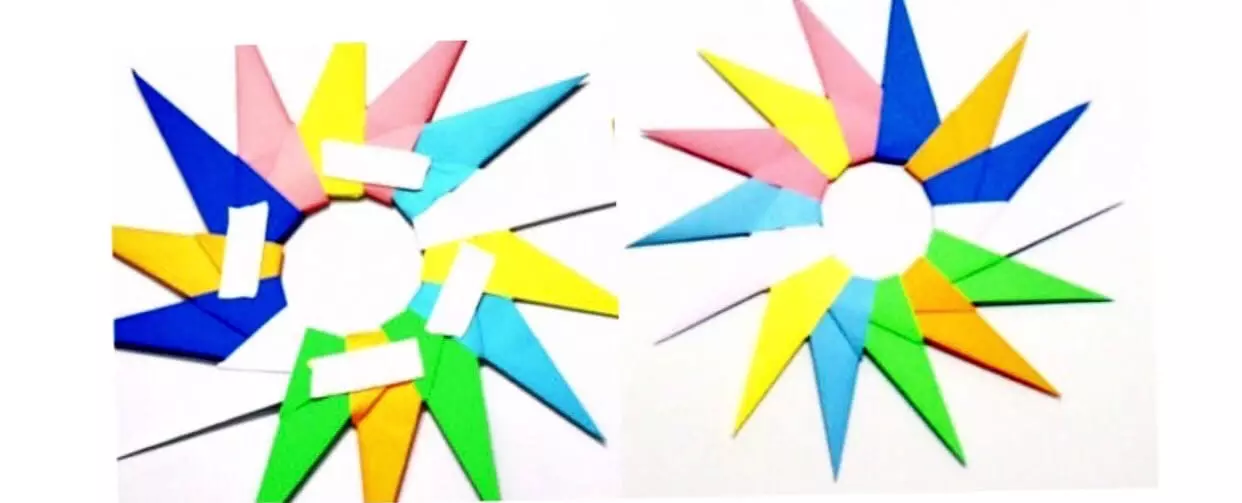
In order for the exercise in the future, it can be disclosed, all this can be fixed using a tape or glue.
More about how to make salt in the Origami technique, look in the video below.