
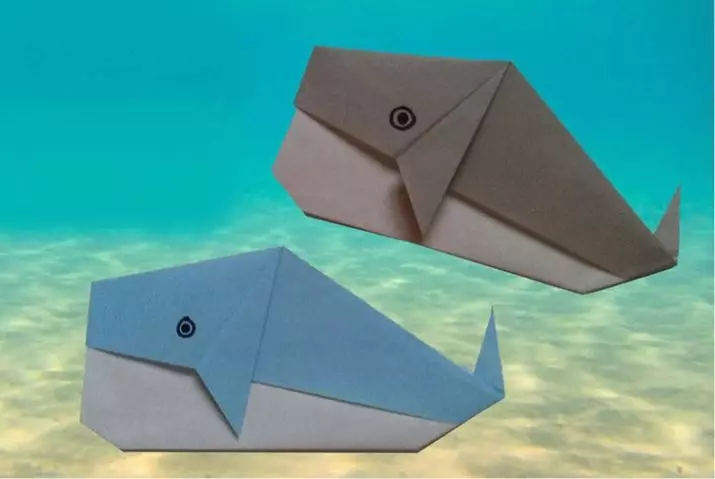
Origami technology allows you to make original and beautiful paper products with your own hands. Unusually looks such an exercise in the form of whale. Today we will talk about how you can make an independently decorative figure.
Simple models
It should be started with the easiest options that can be suitable for children.
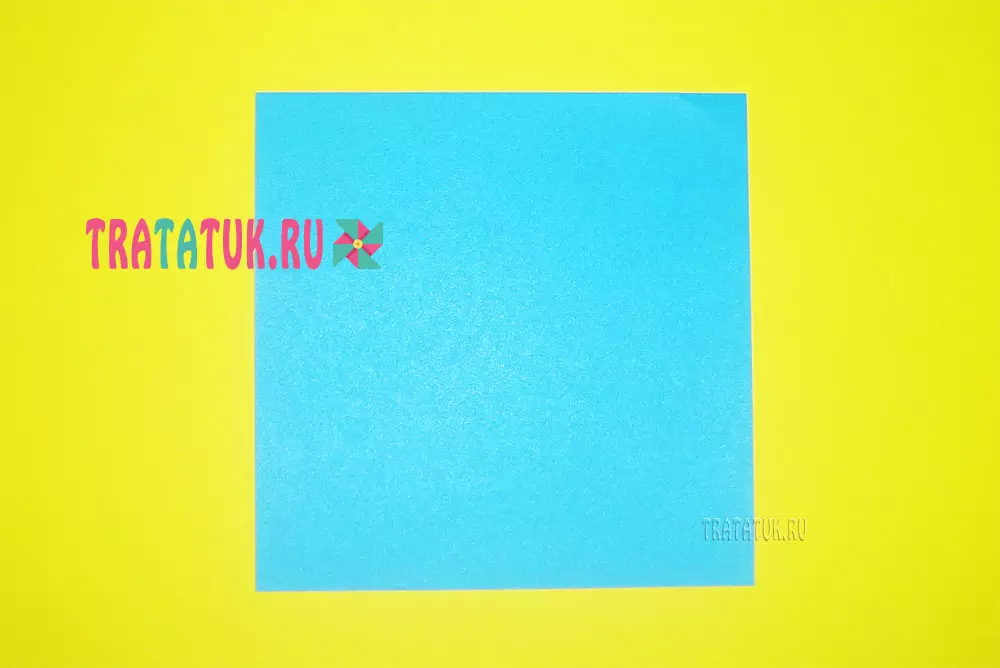
First prepare a sheet of paper square shape. Most often, such a basis is simply cut from the usual sheet of A4 format. After that, the material is put on top to yourself.
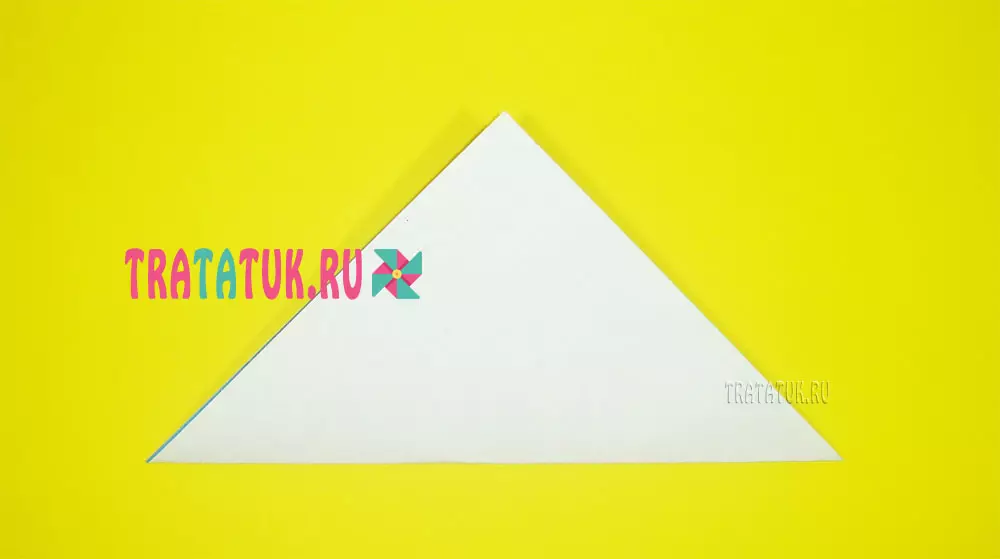
Next, the workpiece is twice the diagonal line from top to bottom. All this unfolds.
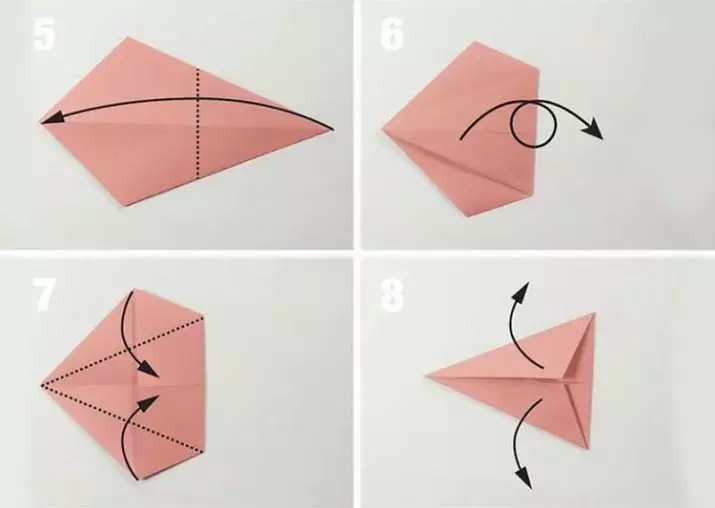
The parties that are adjacent to the right corner are addressed to the middle.
The corner on the left is folded to the edge of folded parts.
Later, the workpiece fold the "valley". Fold placed at the top.
The angle on the right gently wrap up. With the help of an external fold, the tail of whale is formed.
At the final stage, it should be drawn with a black felt-tip pen or an animal gel handle.
7.
Photos
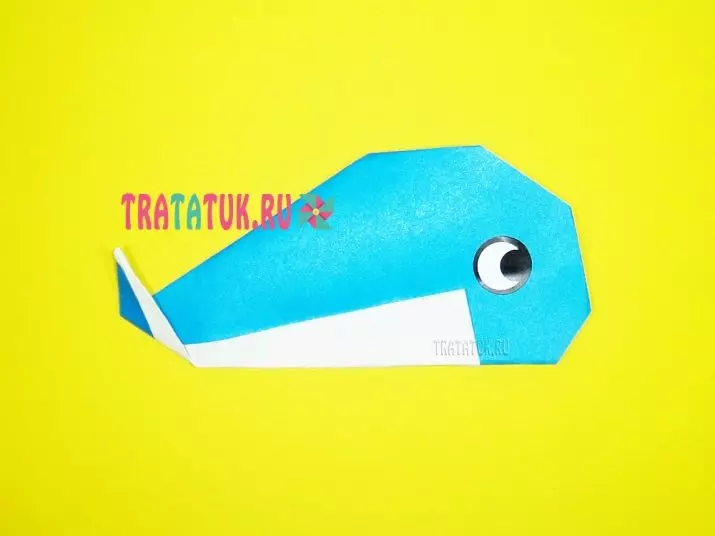
We will analyze another simple step-by-step master class of manufacturing such an Origami craft.
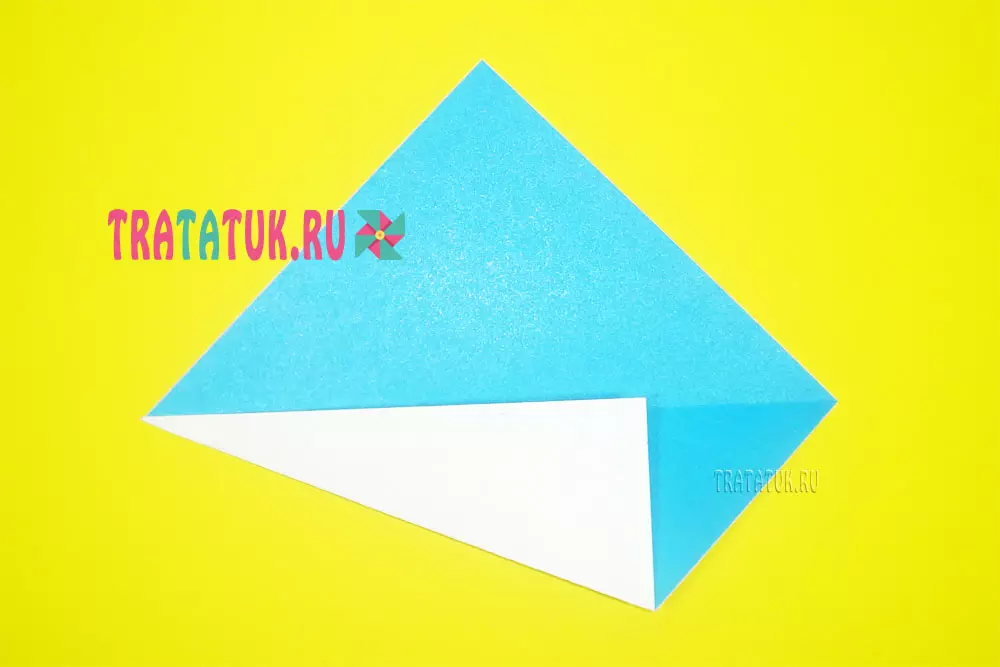
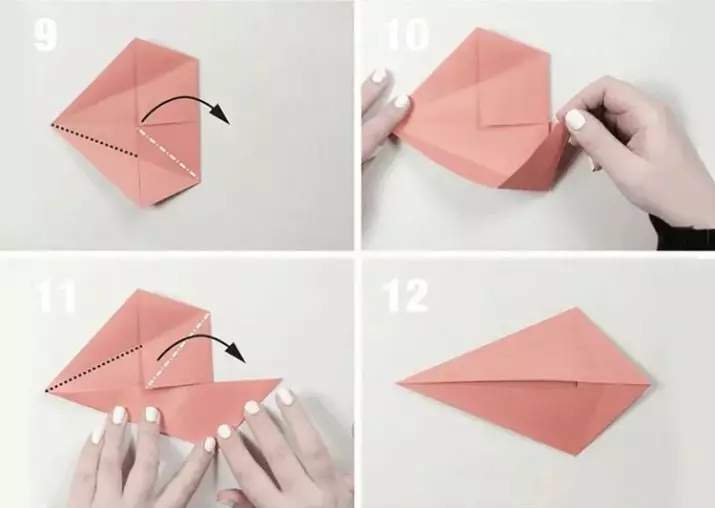
To begin with, prepare a square blank. At the same time, it is best to take one-sided paper, which one side is white, and the other is blue or blue.
After that, the square is neatly folded so that the triangle is in the end, that is, it will be necessary to combine opposite corners.
Then reveal the paper, the lower side is folded, while aligning it in the middle of it in the middle.
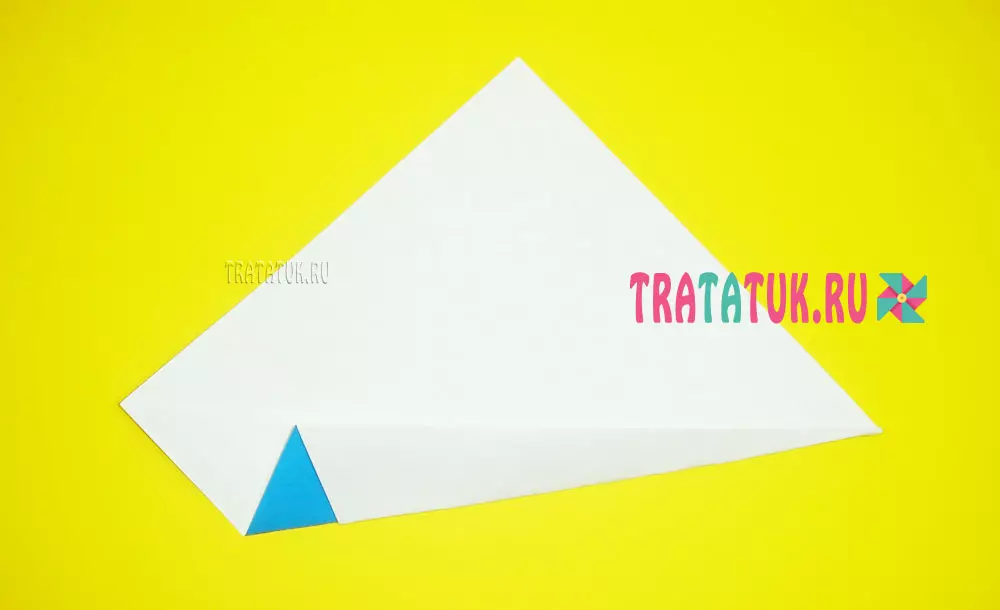
The material is turned over to the opposite direction. Then the lower edge bends.
The upper part is aligned on the central part, it also bends down.
Left from above form small bends of corners.
Paper blank turn over. China's tail is raised up. At the final stage, with the help of a dark felt-meter, the eyes of the Whale are drawn.
They can also be cut from black and white paper if desired, then glue the finished product.
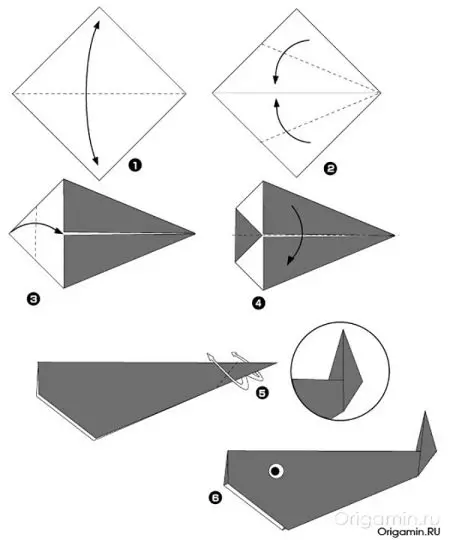
There is another simple way to create this craft with your own hands.
Square paper sheet is folded along the diagonal strip, and then unfold. We have a central line.
After that, the two sides of the square product are folded to the marked central line, as a result of which the basic figure "Air Snakes" should be obtained.
Corner tops downside down. The figure is twice along.
Next, the tail of whale is neatly rejected. According to the marked fold, the tail is turned.
After that, with the help of scissors, it will be necessary to cut the tail and dilute its halves in different directions.
At the final stage, the whale is drawn to the eyes with felt-tip pen or pencil. And you can also additionally decorate the paper craft.


Complete options
Now we will look at more complex schemes for creating China Origami.
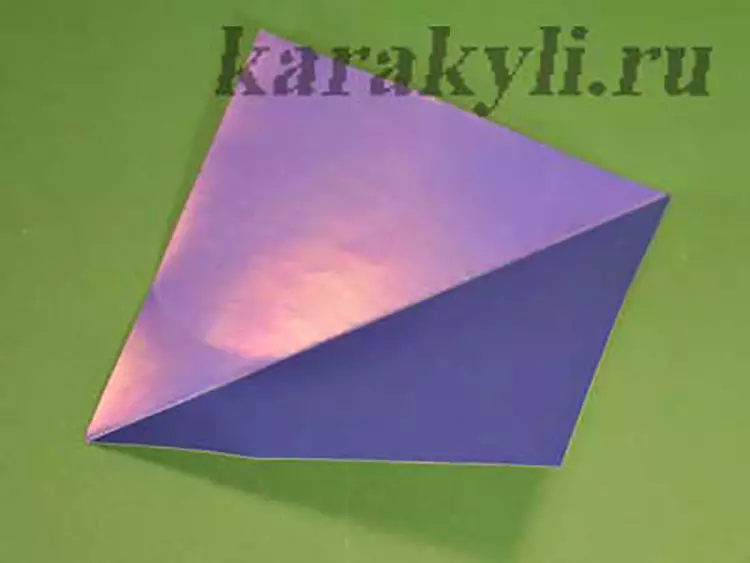
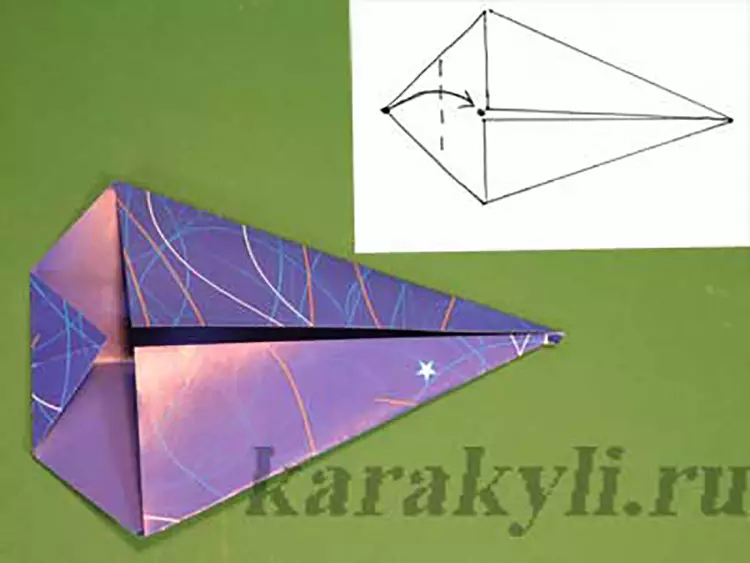
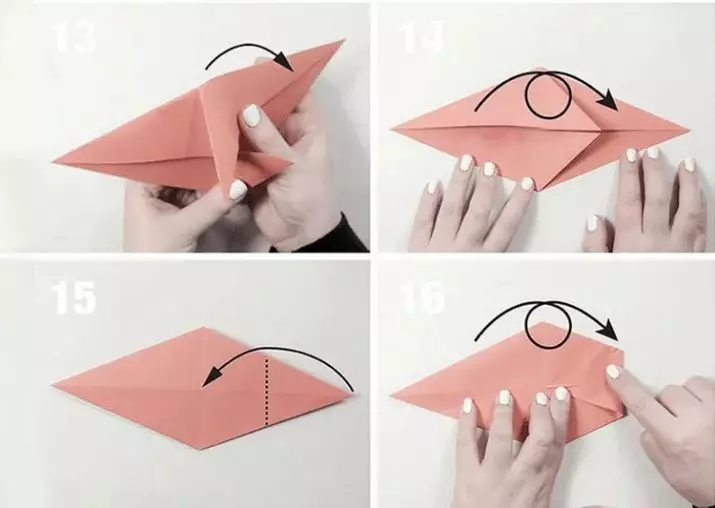
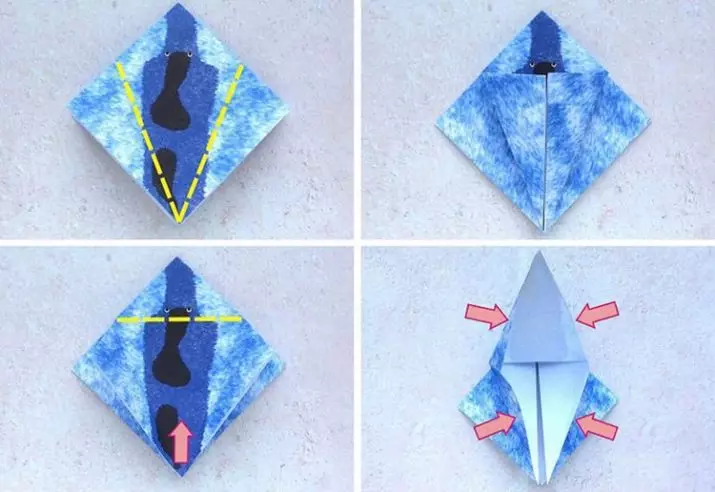
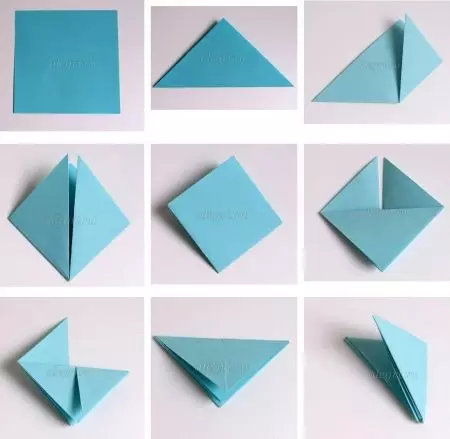
Prepare the paper base of the square shape. Its opposite angles are combined, and outlined diagonal lines.
After that, the figure is returned to the initial position.
The lower and upper corners are folded to the diagonal strip.
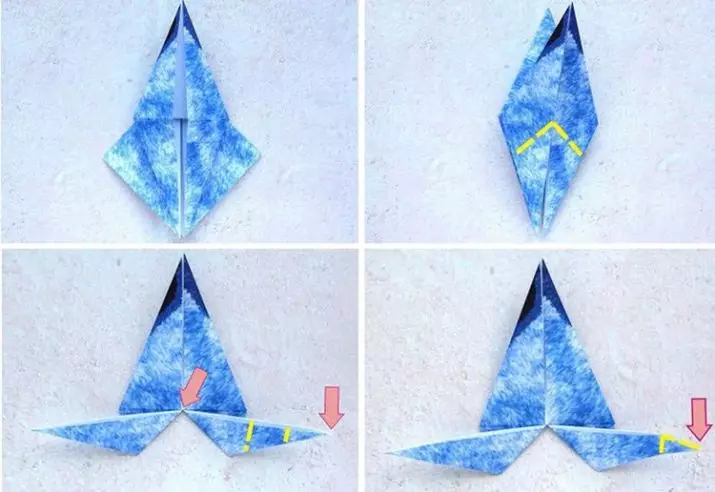
Then the product turn over the other side.

Next, the left and right corners are connected to each other.
The product turns over again.
The edges bend to the central strip. Paper blank is revealed.
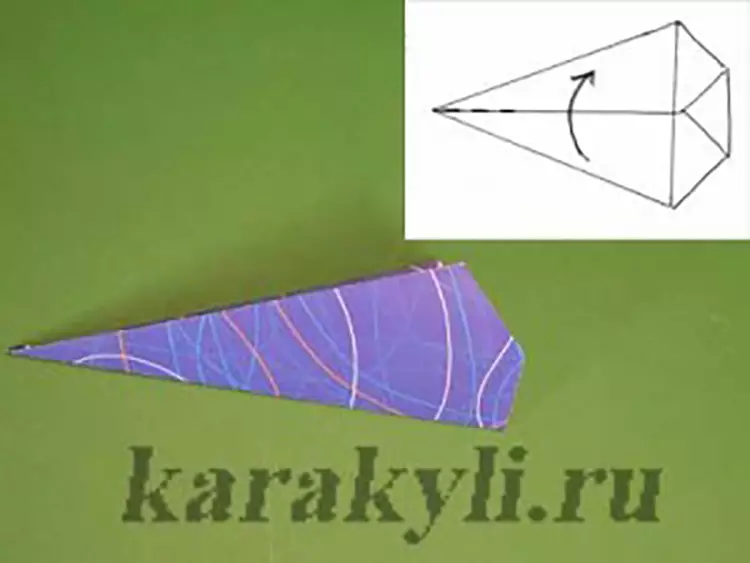
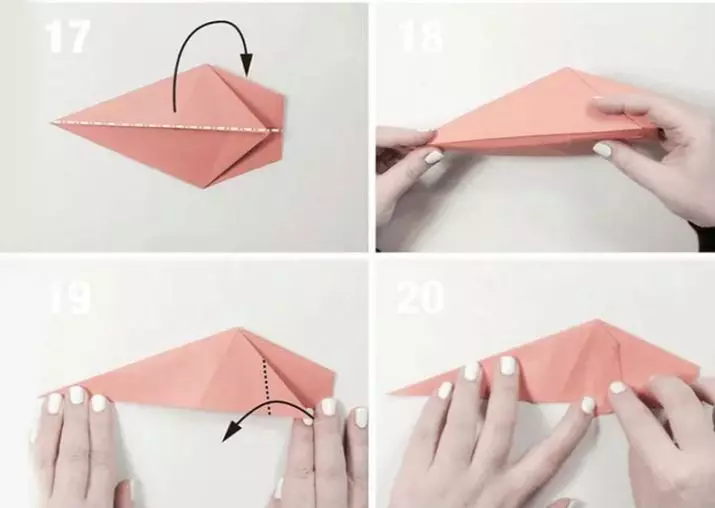
Inside frames formed pocket. After that, he is a little stretched.
Later, the pocket is flattened. The same actions are carried out with the second half.
The rear opens forward. As a result, the standard Fish form should be obtained.
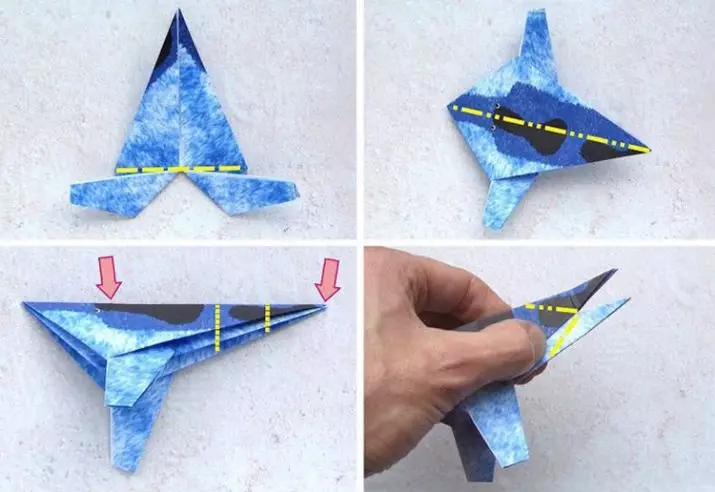
Then the paper blank turns over again. The corner on the right will be fused to the middle. The material is again placed by the front part.
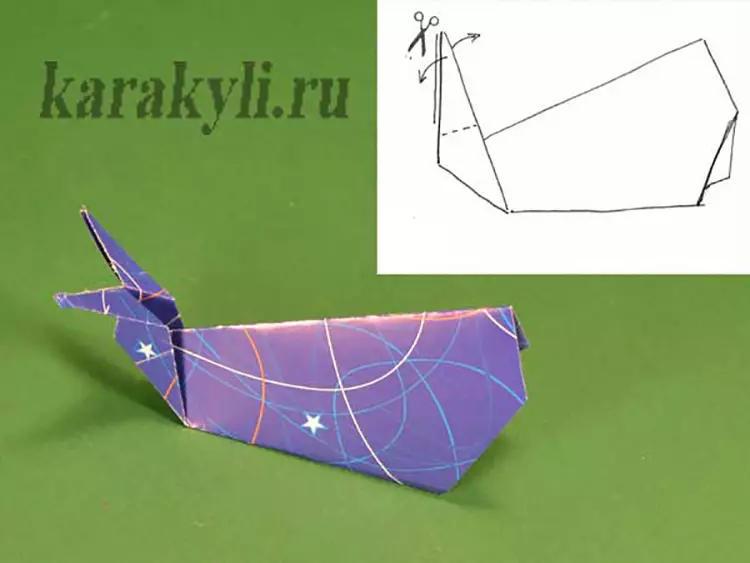
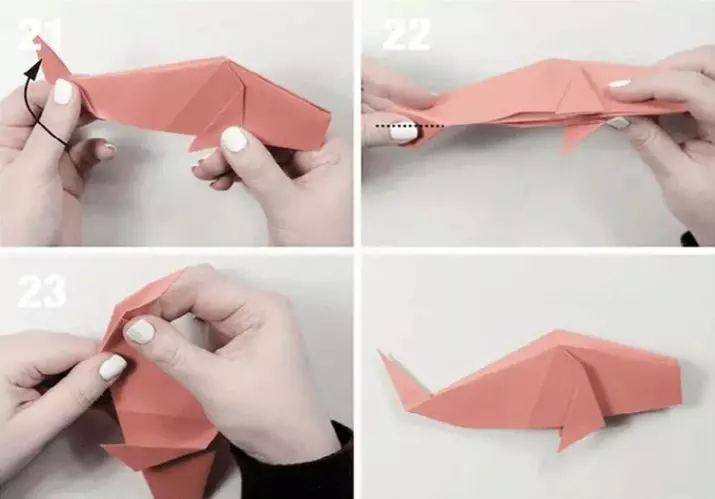
The product bends in half the "Mountain". The workpiece is placed the open edge forward.
On the front part of the left, the fold is made, it is created on the reverse side.
Next form the tail. To do this, part of the left is rejected upstairs. The same operation is carried out from themselves.
With the help of reverse folds, the tail of the animal is lifted.
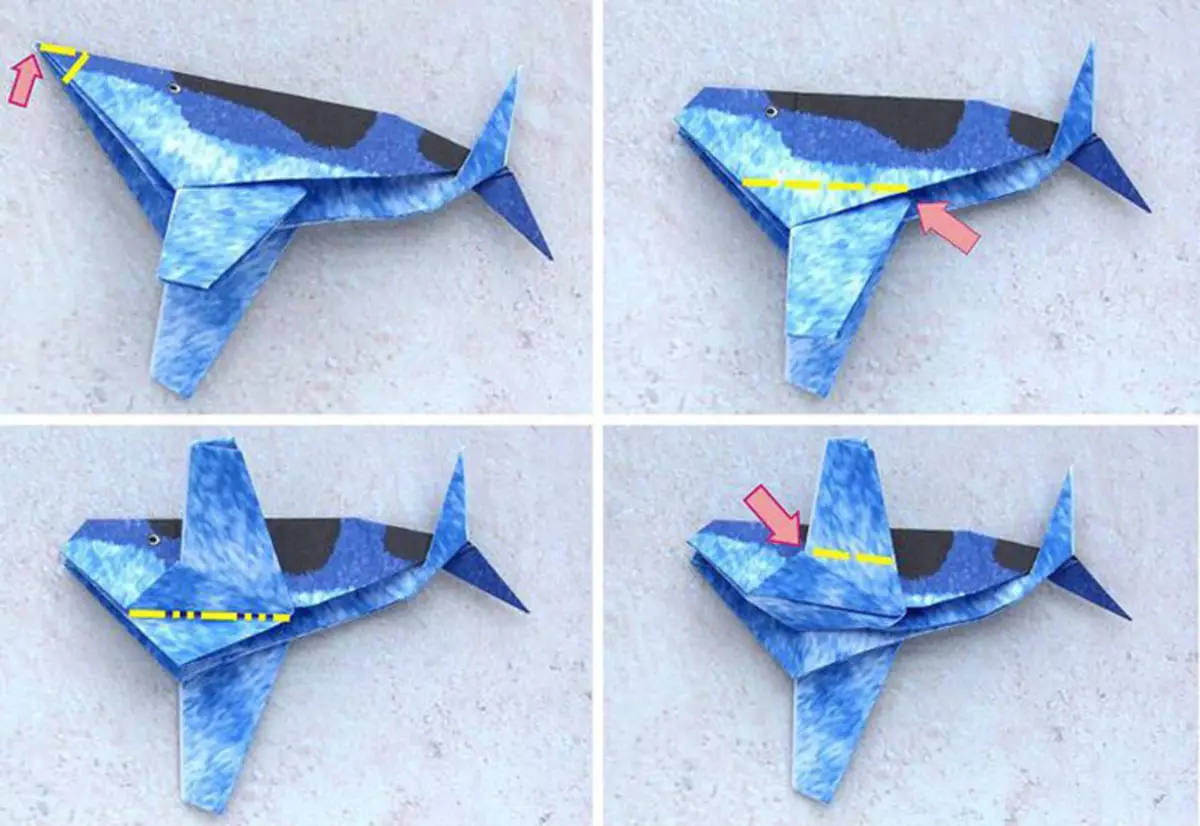
We will analyze another detailed instructions for the manufacture of such a whale.
At the initial stage, the base form "Double Square" is folded. Then go to a complicated figure "Bird".
Work starts with a nearby layer. The edges and left, and on the right bend to the central part.
Next, the resulting fold is neatly revealed. The end from the bottom of the figure rises, and the top corner bends down.
Side parts are pressed.
All covered steps also repeat on the back of the paper blank.
Material turn to themselves for a split part. Ends are bred to the sides.
The extreme points on the right are connected to each other. The fold line is well smoothed well. Then all this is revealed back. A small indent is made, and the second fold is formed.
The tip on the right is started into the inside of the material.
Large valve must be lowered to the bottom. The same manipulations are carried out from the opposite.
The material will need to be folded by the "Mountain".
The side of the right bends, and then revealed. Then this part will fold again, but already before the folds formed earlier.
The tip of the product is neatly pulled out.
The angle of below is the "valley". The corner from above is the "mountain".
Whale face fence inside. Further, the "Valley" fold is made in the lower part, the inflection is symmetrically formed in the other direction.
Formed fins descend down.
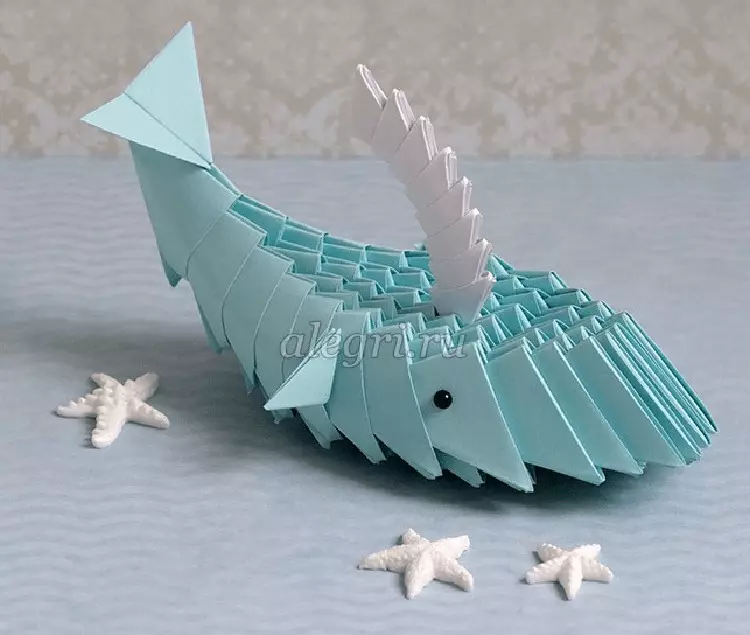
Creating modular origami
It also costs to consider in more detail how to make such a paper craft from individual modules.
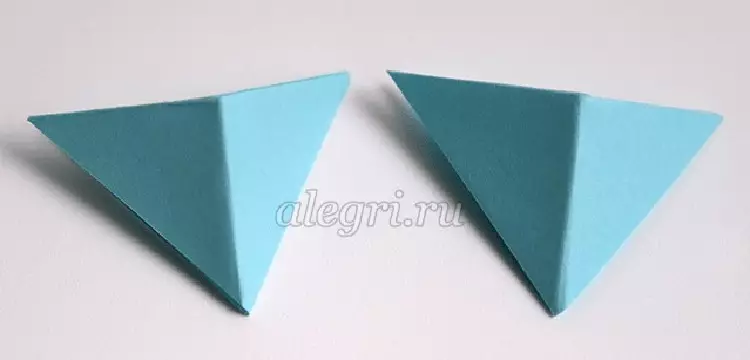
- At the initial stage, the modules themselves should be prepared. It will be necessary to make 56 blue large elements, 1 blue element is a bit smaller and 8 blue parts even less. And also better to immediately prepare the glue composition.
After all the necessary billets are prepared, proceed to the manufacture.
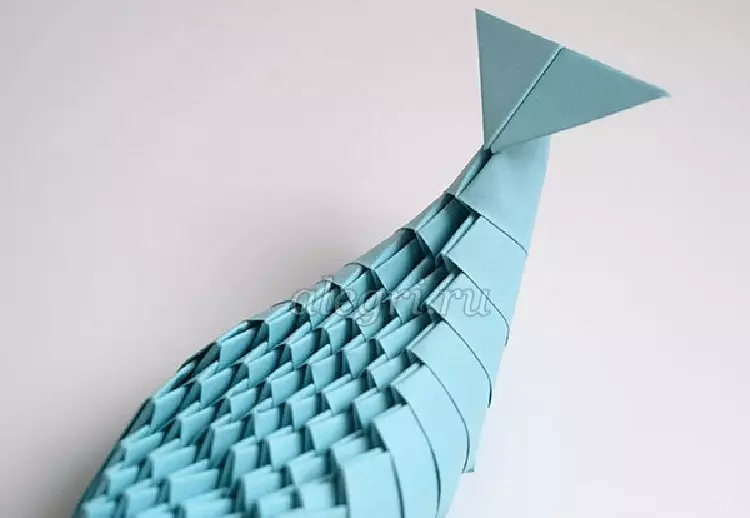
- First take large details. The first level of the product is formed from 4 elements, the second level is from 5, and the third level is from 6.
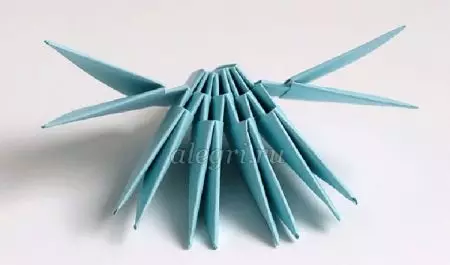
- The fourth tier is made of 7 modules.
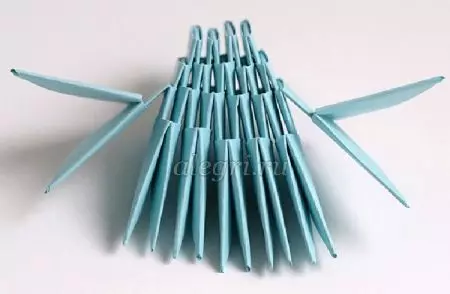
- For fifth rows, 6 elements are used. The sixth tier makes them 7 parts, the fifth - out of 6, the seventh - of the 6, eighth - out of 5, the ninth - of 4, the tenth - of 3, the two subsequent rows are from 2 and 1 module. So that all parts are securely fixed, you should additionally go them.
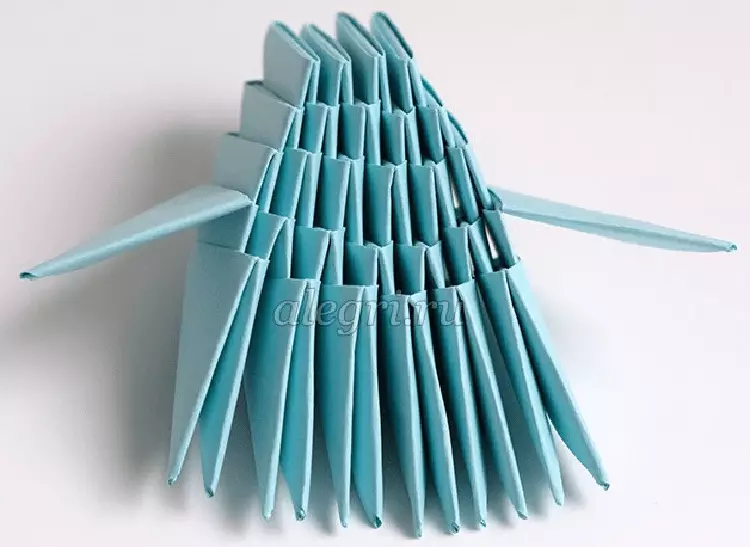
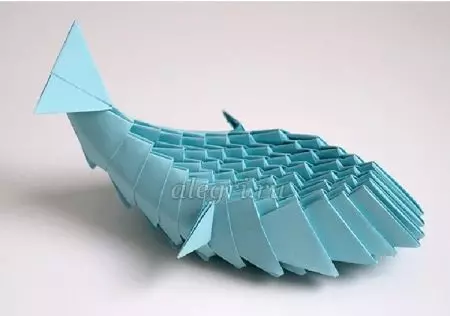
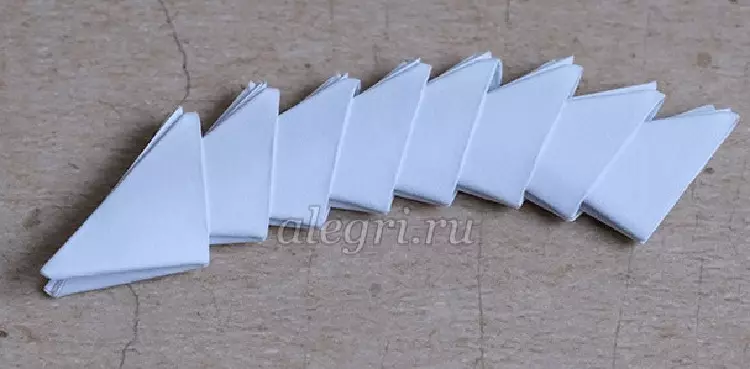
- Later you take a smaller module, it is cut in half. Details glue with each other. The resulting part is inserted into the tail of the animal.
If necessary, sticking elements can be broken a bit with scissors. You can also use glue.
- One small module is inserted between 8 and 7 tiers. At the same time it is necessary to leave one corner free.
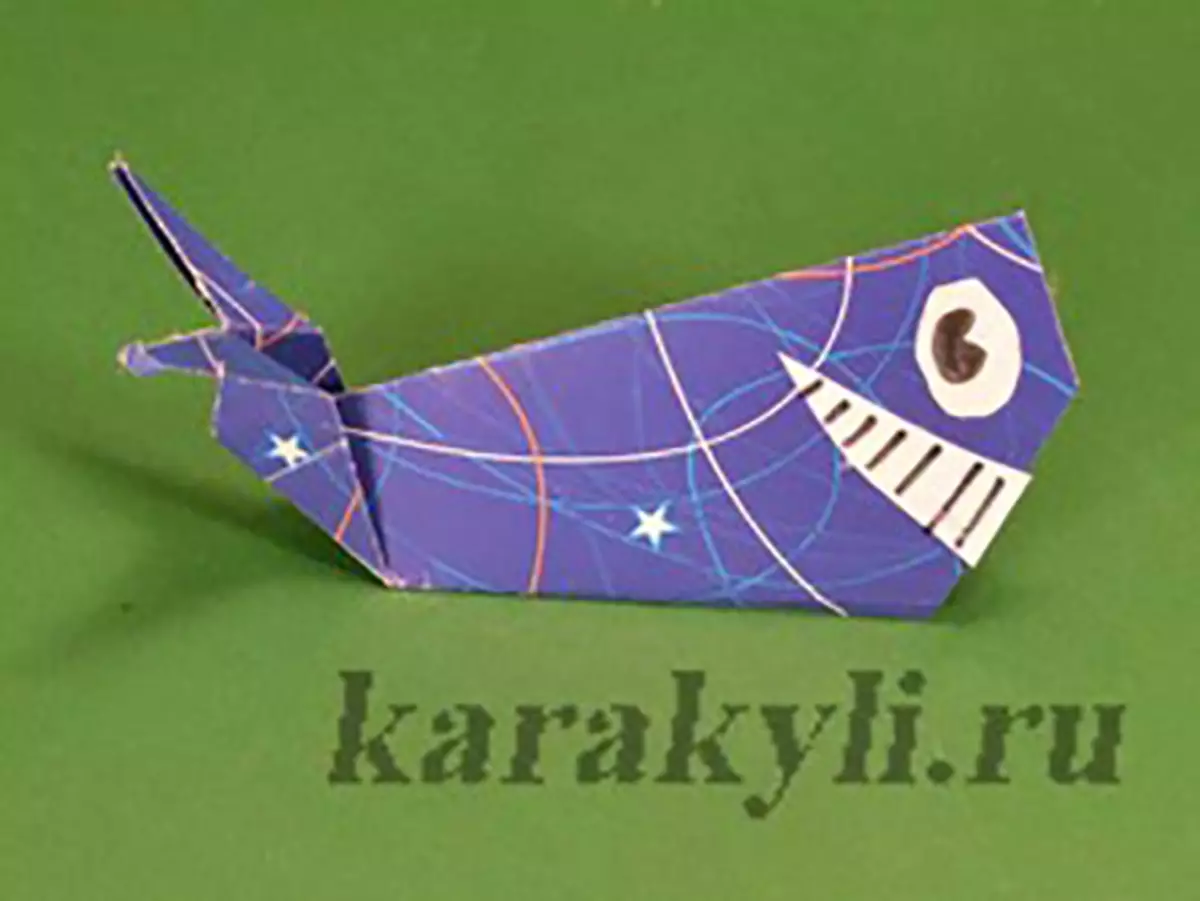
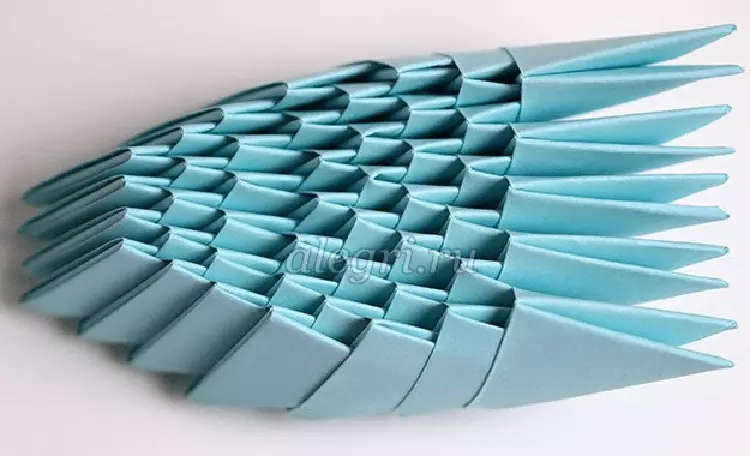
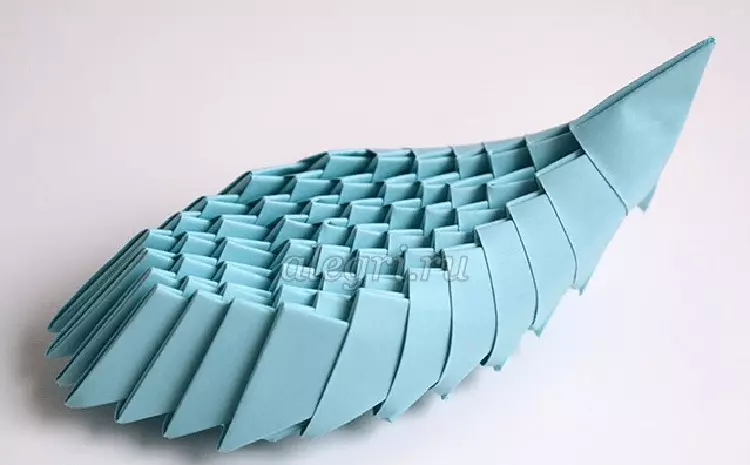
- After that, the eyes of China are drawn. They are often cut out of white and black paper.
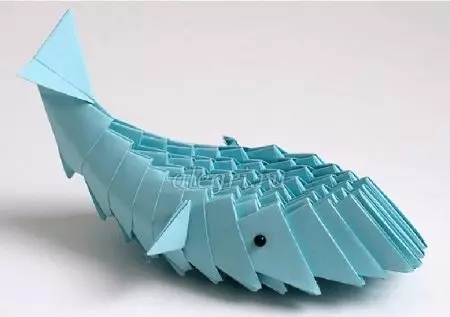
- Then peep white paper modules. They fold in the form of a snake. The finished part is neatly fixed between 5 and 4 levels in the craft.
The master class on the manufacture of whale can be found in the following video.