
If there are several sheets of white paper at hand, then it is quite possible to make crafts in the Origami style. The article tells about what figures are obtained from an ordinary album sheet. There are options that even kids will cope with. And there are some more complex figures for school-age children.
Ideas for the smallest
In the younger and medium group of kindergarten, you can offer the guys to make simple figures of animals from white paper A4. With such crafts, kids will easily cope with 3-4 years. Actual will be the topic of domestic or wild animals.
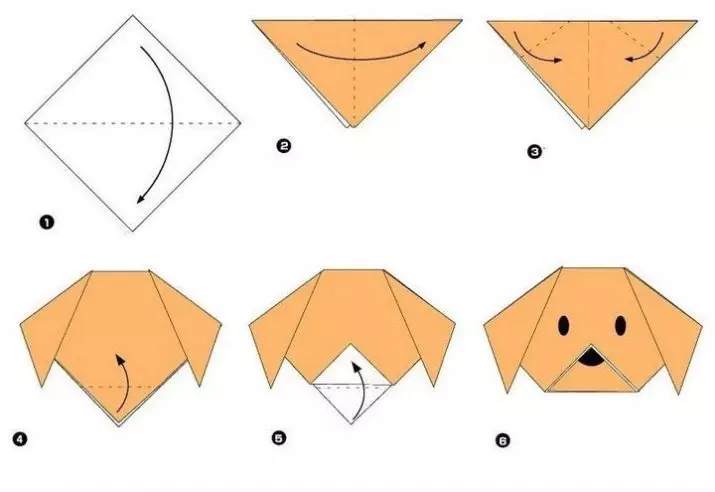
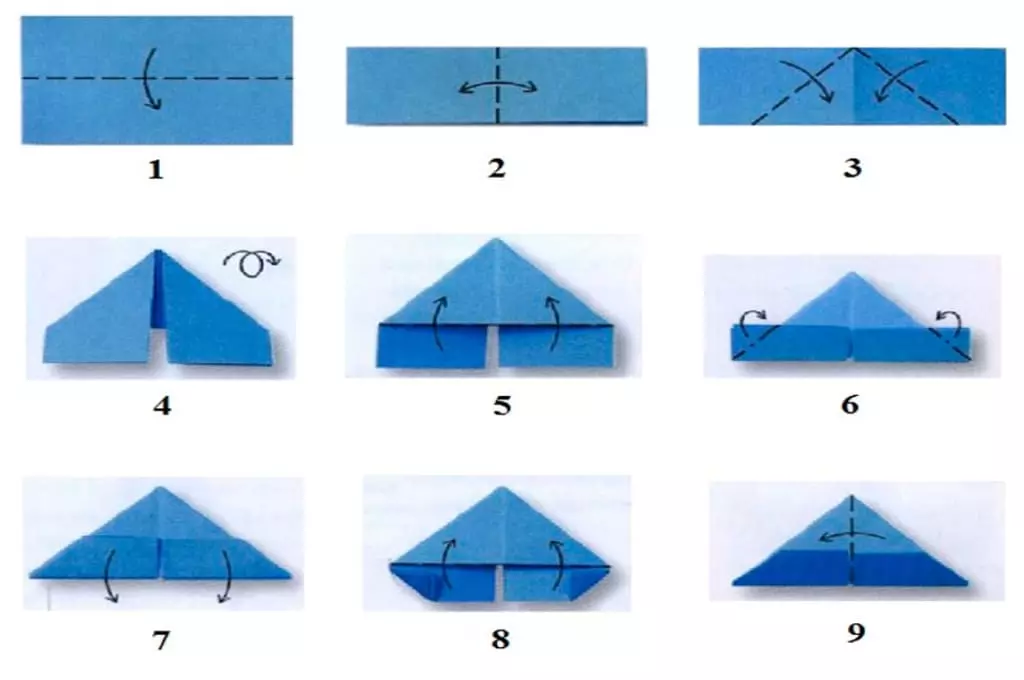
- Dog . It will take a square of white. It is folded in half across. Then you need to fold again in half and deploy. After that, you need to make ears a dog. The triangle is placed down. Side angles bend in the form of hanging ears. The lower corner is slightly lifted and flexing up. Flomasters need to draw eyes, nose dog. You can draw and specks.
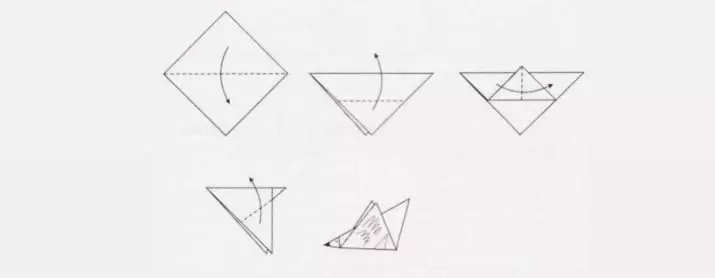
- Pigeon . Bend a white paper square in half. Place it on the table with edge to yourself. Each of the sharp corners located at the bottom, bend upside down. They should be slightly higher than the triangle fold line. After that, it is necessary to fold the future pigeon in half and turn it at a right angle clockwise. Sweet wings also bend upstairs. Bird need to draw eyes.
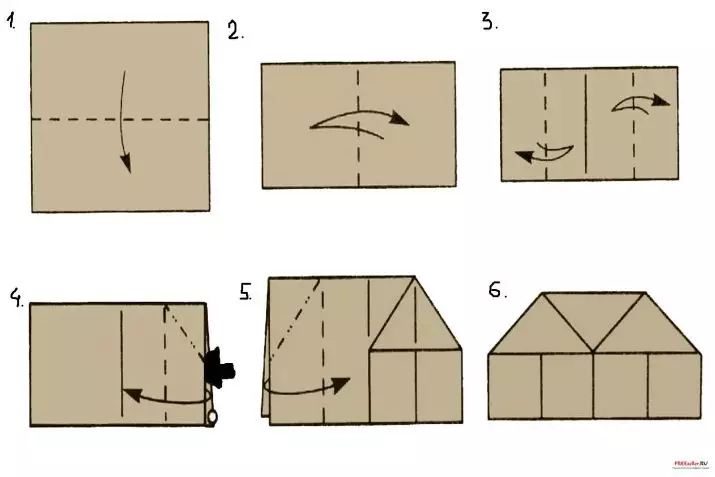
You can still do Cute Origami house. White square folded in half along and across. Expand. Two upper angle fold towards the center. This is a roof of a house. Pencils or markers draw a window, door, paint the roof.
Crafts for beginners
For children, 8-9 years old will fit the figures more complicated. Schoolchildren can make a crawl according to the scheme and decorate a postcard for mom.
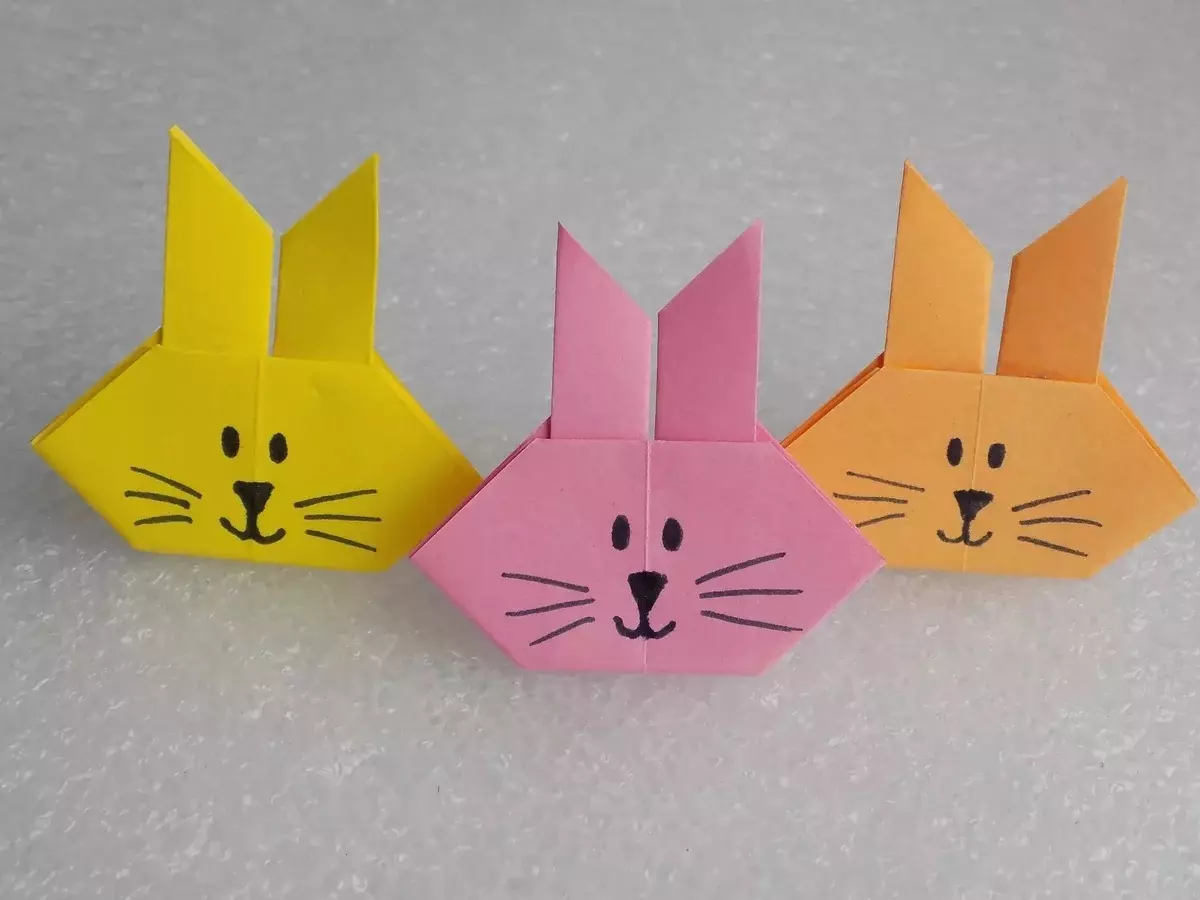
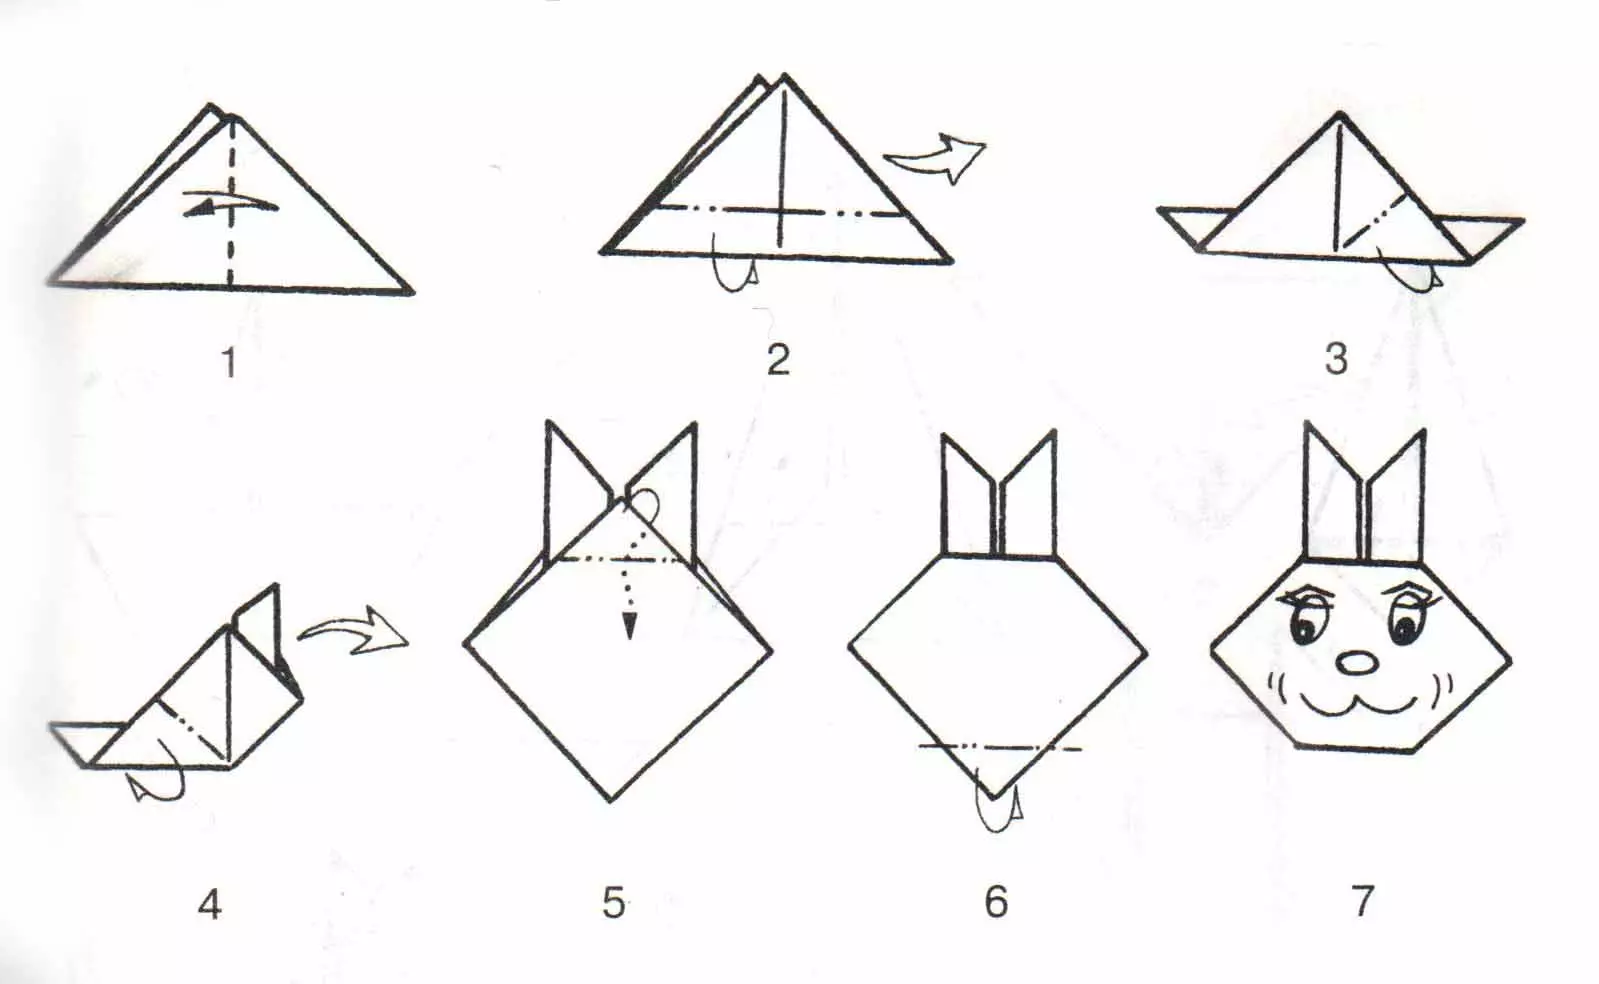
- Bunny . Make a hare is quite simple. White square must be bent in half. To bend and deploy another 1 time. The base of the triangle will bend a bit up. Turn over the other side to yourself and make ears, bending triangles on the sides. Ears wrap up. The edges on top and bottom to get a little to get a face. Draw your eyes, spout, roth haute.
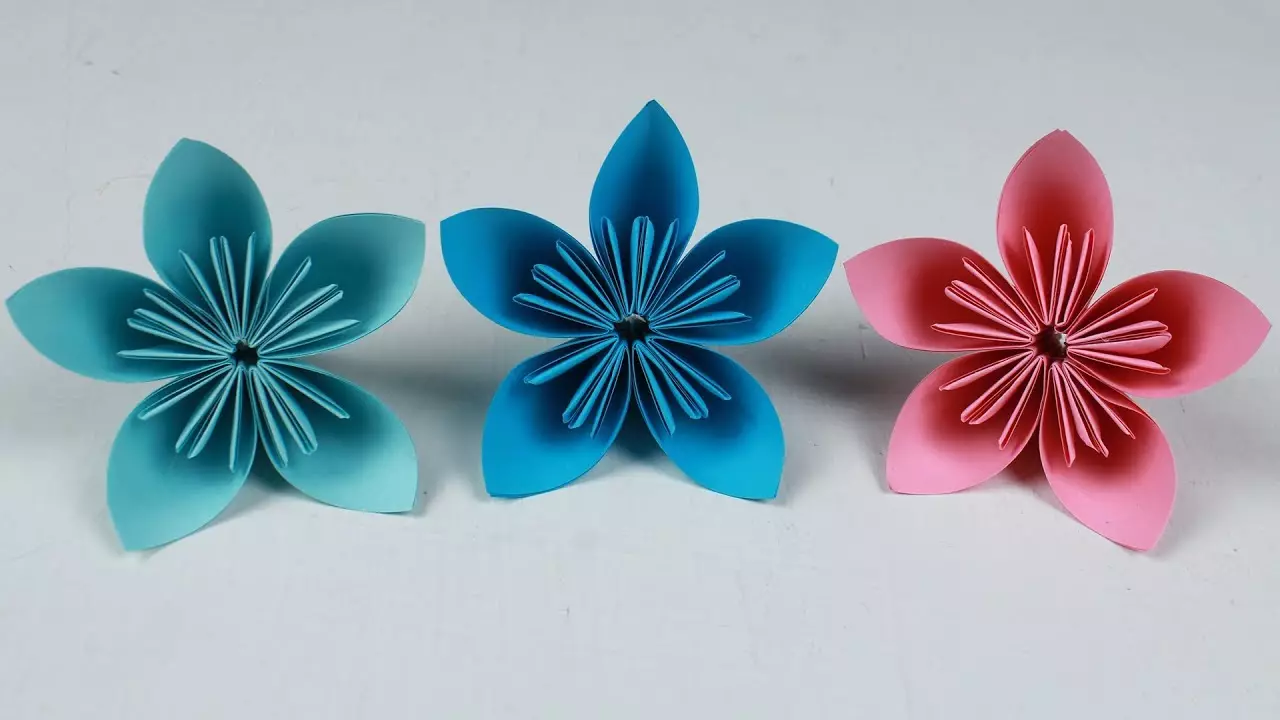
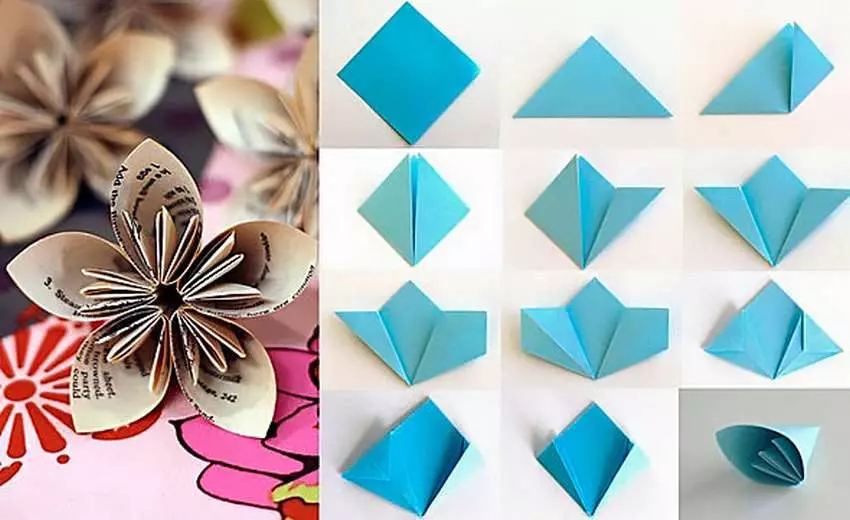
- Flower . It is necessary to cut blanks for petals - 5-6 the same in size of white squares. Quarts folded in half. Place a sharp angle up. Side angles bend to the center. After that, each of them is rejected in half. Further, the bent stalls must be deployed so that the lateral bend line is in the center. Acute corners sticking around the edges, bend down. The resulting triangles need to be folded in half along the fragment line. The resulting figure is collapsed as a cone. The edges are fixed with tape or glue.
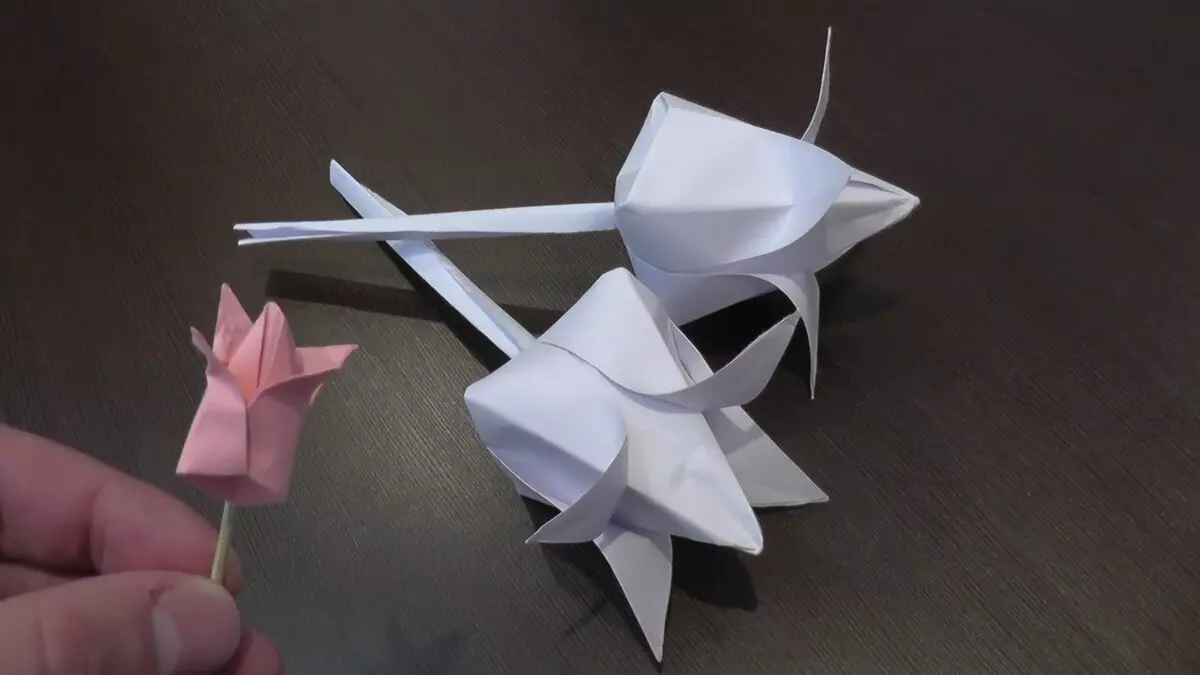
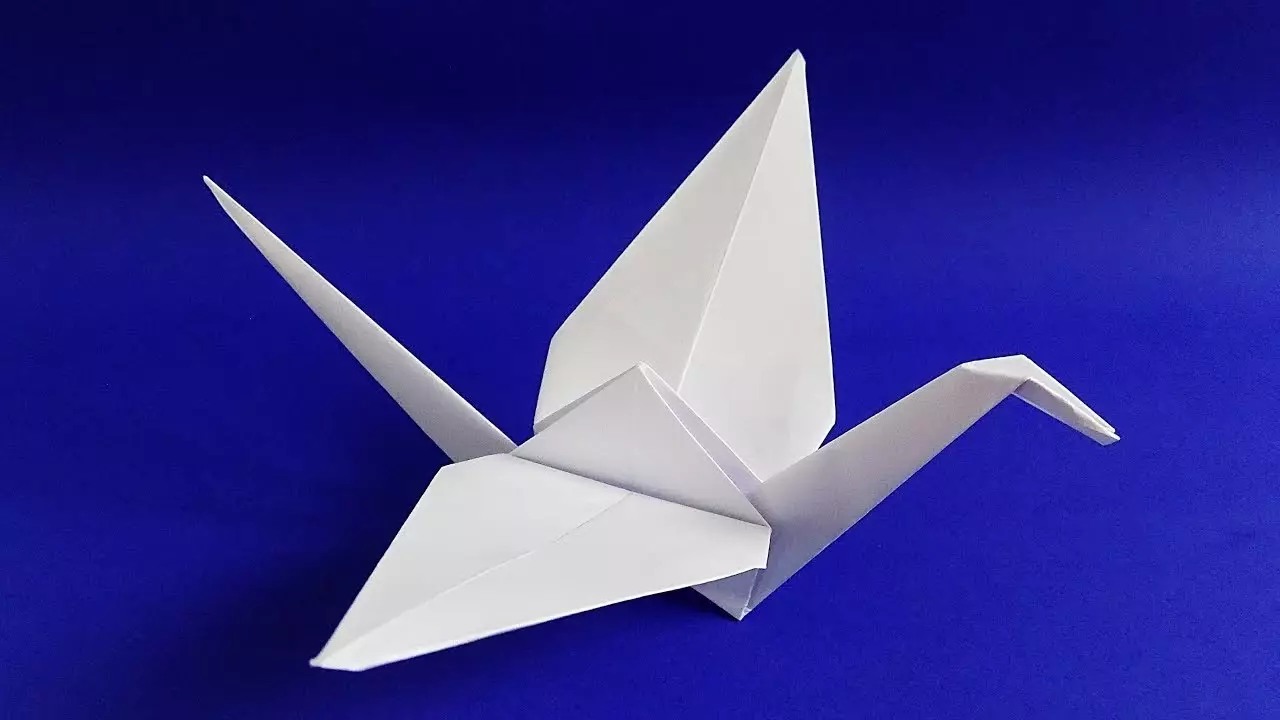
Teenagers 12-13 years old can be offered to make paper flowers. Below is a phased scheme of the manufacture of roses.
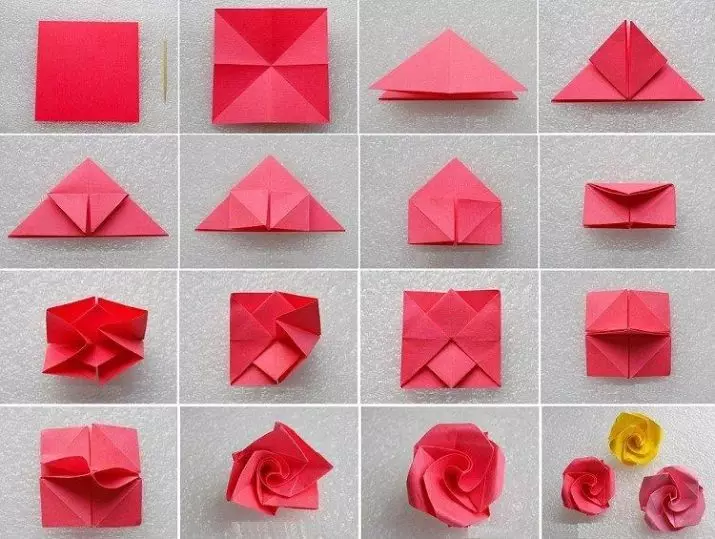
- Cut the square from the A4 sheet. Bend in half along and across. Then make flashes diagonally. Collapse rhombus.
- Left lower side Expand. After this rhombus flip. The second half of the workpiece deploy up. It turns out a figure in the form of the letter "g".
- Top to lower down, spin the edges. Petals need to carefully wrap each other.
- When the flower is ready, Its edges with a toothpick can be twisted a little . This will give rose similarity with a natural flower.
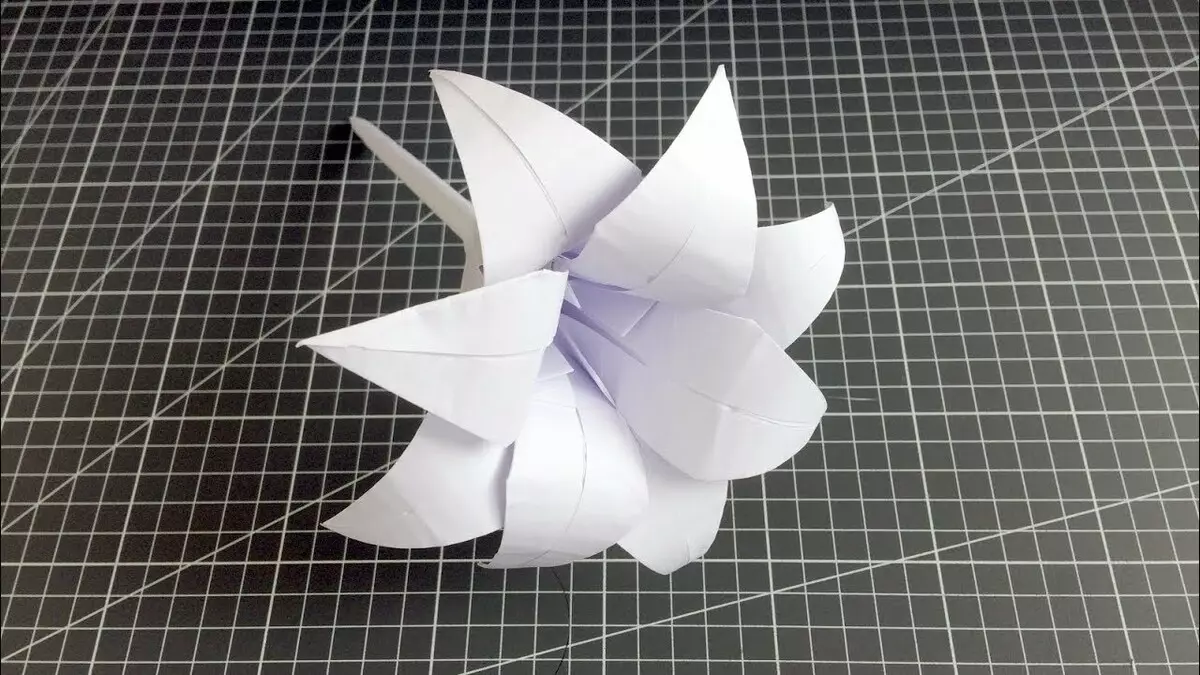
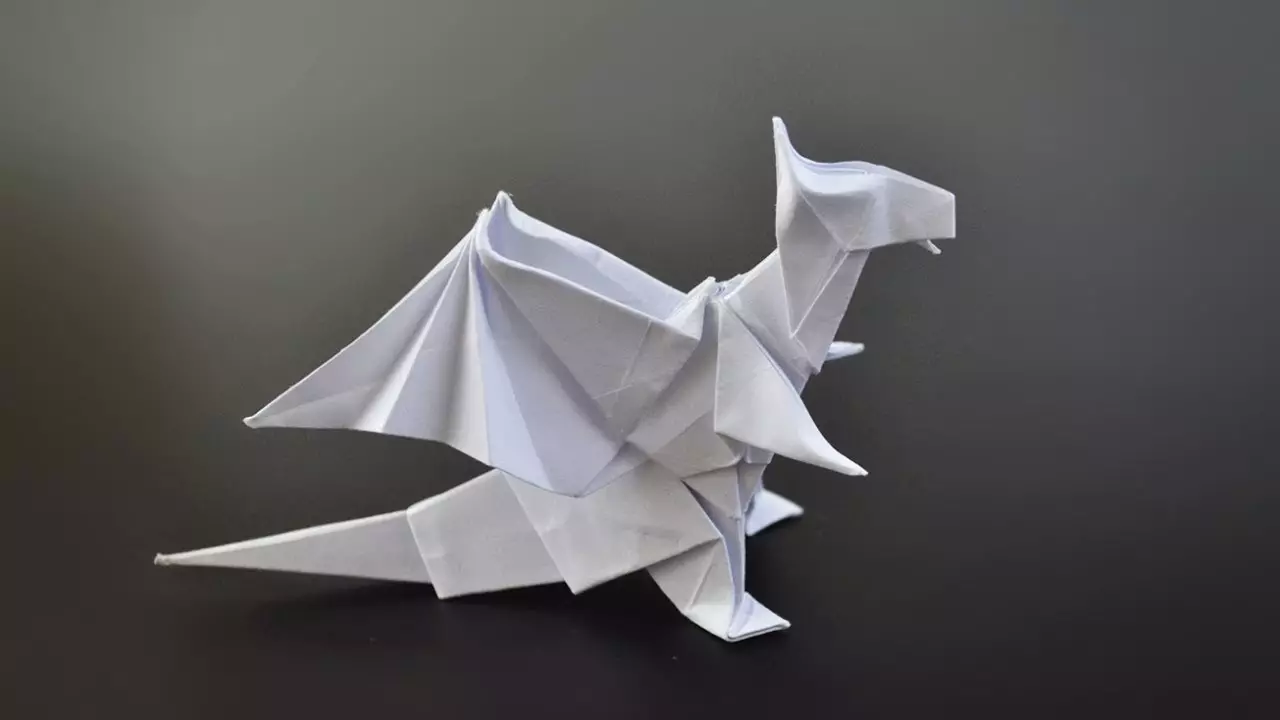
How to make complex figures?
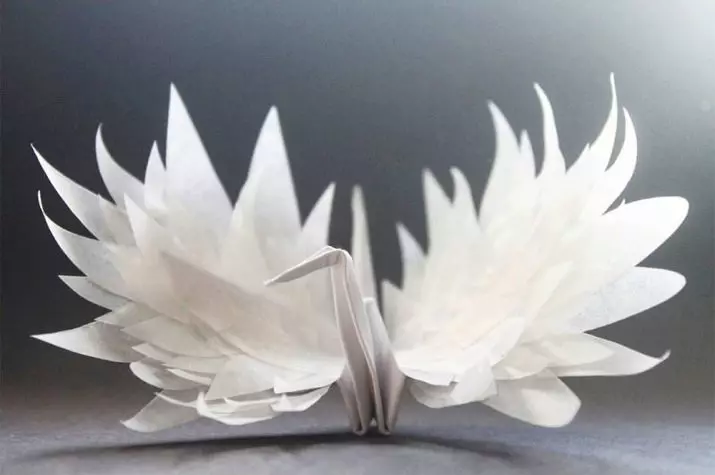
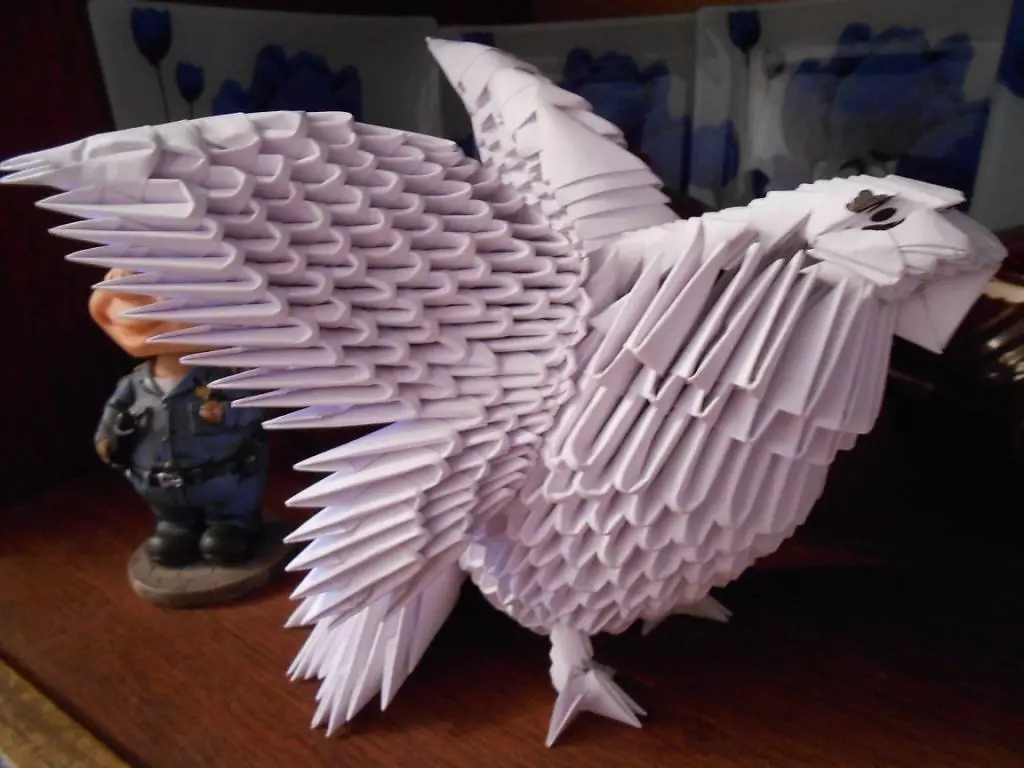
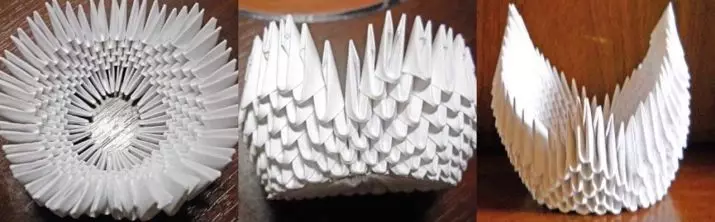
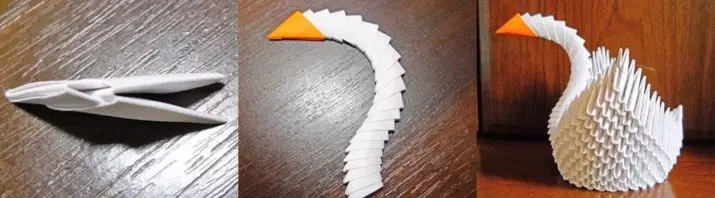
Those who have already mastered the lamp of the manufacture of paper figures, you can start making complex beautiful crafts. One of these will be swan, made in the Origami modular technique. Consider step by step instructions.
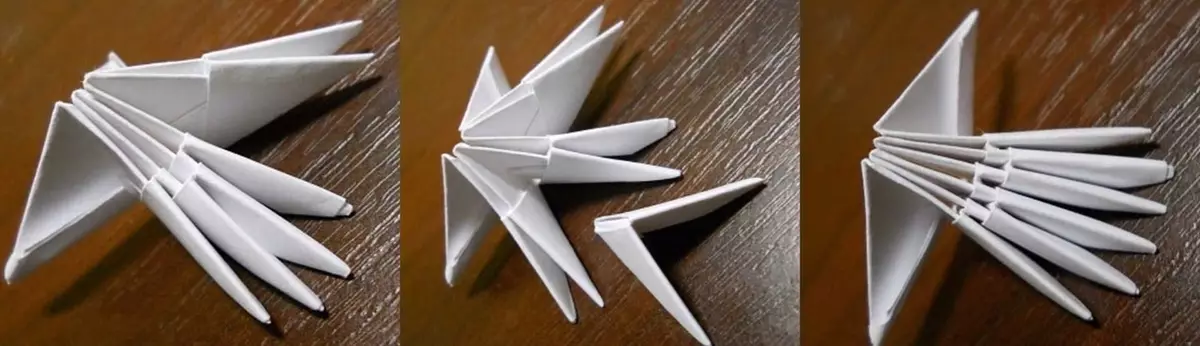
- To make a bulk bird with your own hands, you need to cut 16 rectangular blanks. The size of each of them should be 7.4 cm long and 5.3 cm in width. Next, we work with each module . The workpiece must be bent in half. Fold again in half and break. It turned out the fold line. After that, the sides need to be folded to the middle. The edges of the protruding strip from below should bend up. After that, you need to connect the edges of the resulting triangle with each other. It turns out the module. For the manufacture of a large swan need 459 blanks.
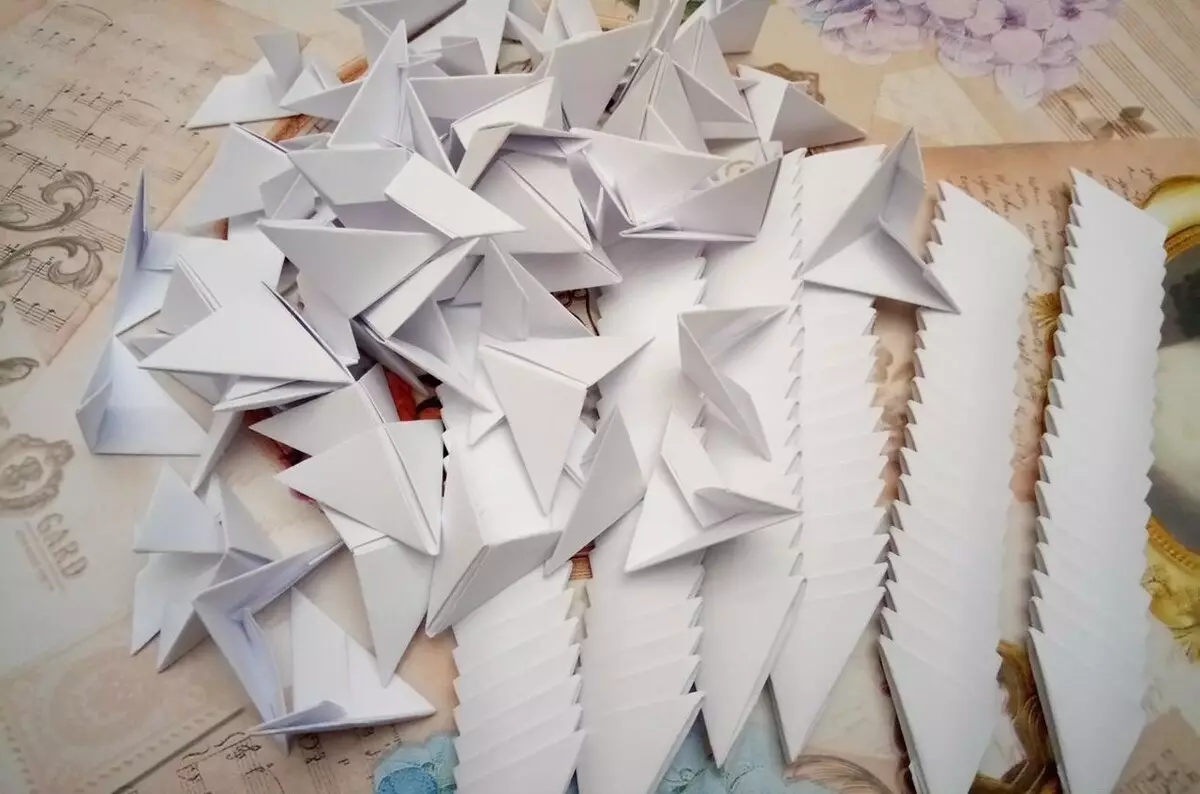
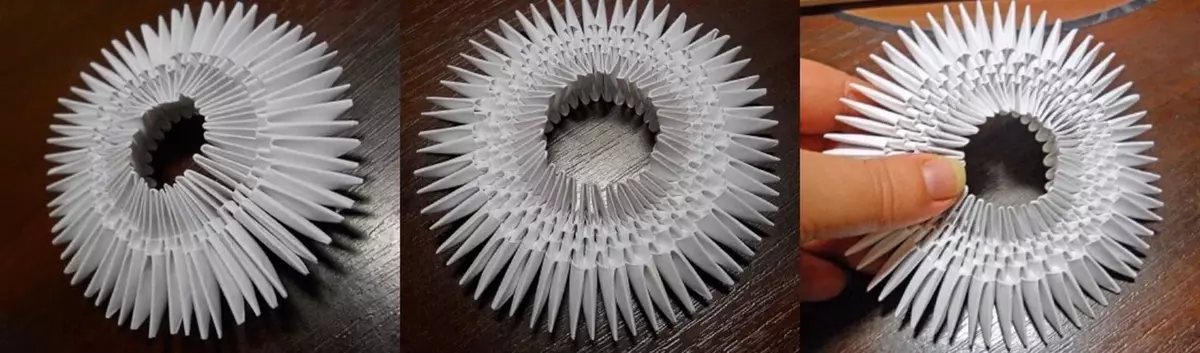
- The corner of the first two modules insert into the center of the third. Insert the next pair of modules to the center of the previous one. Then another 2 modules. You need to make 3 rows. Next, the blanks are connected by the same principle. It turns out a circle of 30 modules.
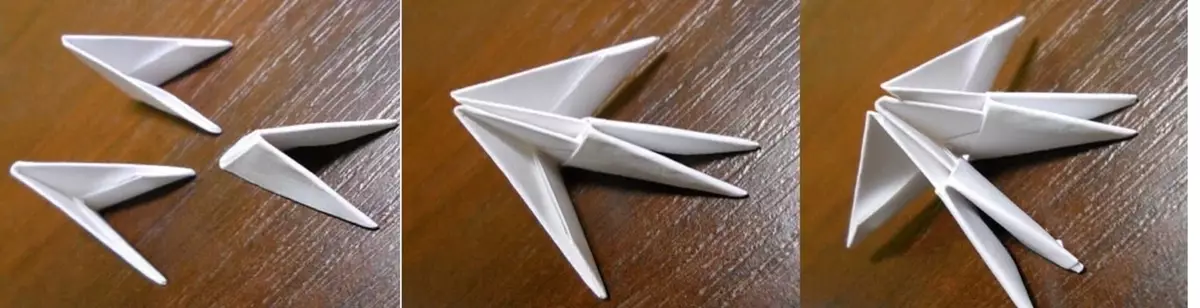
- After that, it is necessary to carefully turn the design. Now the edges bend up. It turns out a product in the form of a crown.
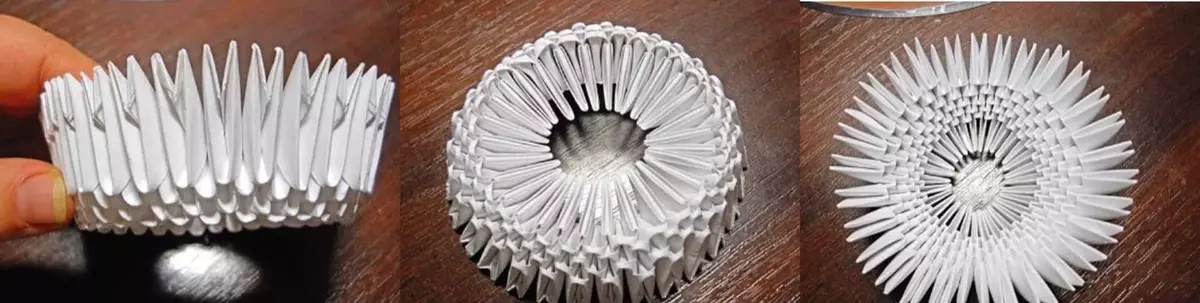
- Add 6 row of modules . After that you need to make wings. On 7 row 12 modular triangles are attached. On 8 row You need to skip 2 modules. This is a place for the neck. Under construction of 9 rows Wings of the Swan need to be reduced by 1 triangle. Wings do, reducing each row to 1 module. At the end of the wing, 1 module should remain. Get your tail. On each row, the number of modules also decreases.
- Next, you need to make a head out of 20 parts. One of the modules on the head you need to paint brown or red felt-tip . This is the future beak. Corners need to be glued. For the manufacture of bird neck modules should be positioned vertically, inserting the corners of one to another . Next, act in the same way. After that, you just need to attach the neck.
More about creating origami from white paper See in the video below.