
Foamiran is a relatively new material in Russia, which has already managed to conquer the love of many masters and needlewomen. From it you can make beautiful and realistic crafts that can become an interior decoration or an original gift. In this article, we will learn how to make flowers from Flavyran beginner masters.
Production rules
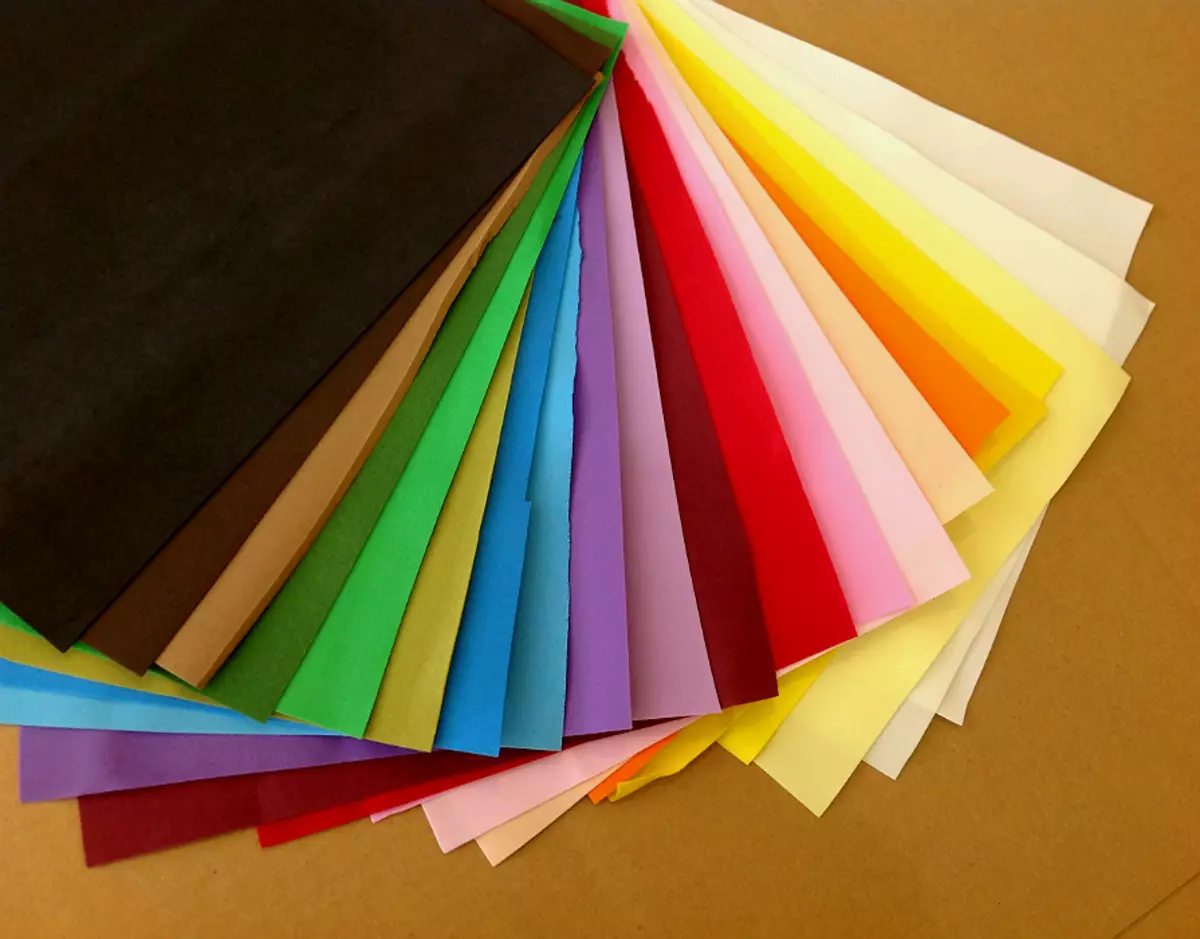
Foamiran is a modern velvety and malleable material that does not miss water and easily accepts the desired master shape if high temperatures affect high temperatures. At the same time, the phoamyran crafts are not "afraid" no heat or strong cold weather. Today, this material is available in the form of subtle sheets that can have different color.
Foamiran is not in vain steel such a popular and demanded material among needlewomen. It is very convenient and easy to work with him, because he is "obedient" and unpretentious. This is a wonderful solution for beginner masters, who have not come across such work before.
Many people start to get acquainted with creative activities, manufacturing charming flowers from Foamiran.
We will analyze the basic rules of work with Foamiran in the manufacture of decorative colors.
- For the manufacture of high-quality and beautiful flowers, it is desirable to use the material of Iranian production. Foamiran from Iran and China is on sale. The latter is cheaper, but has the best quality, so it is better to give preference to the Iranian product.
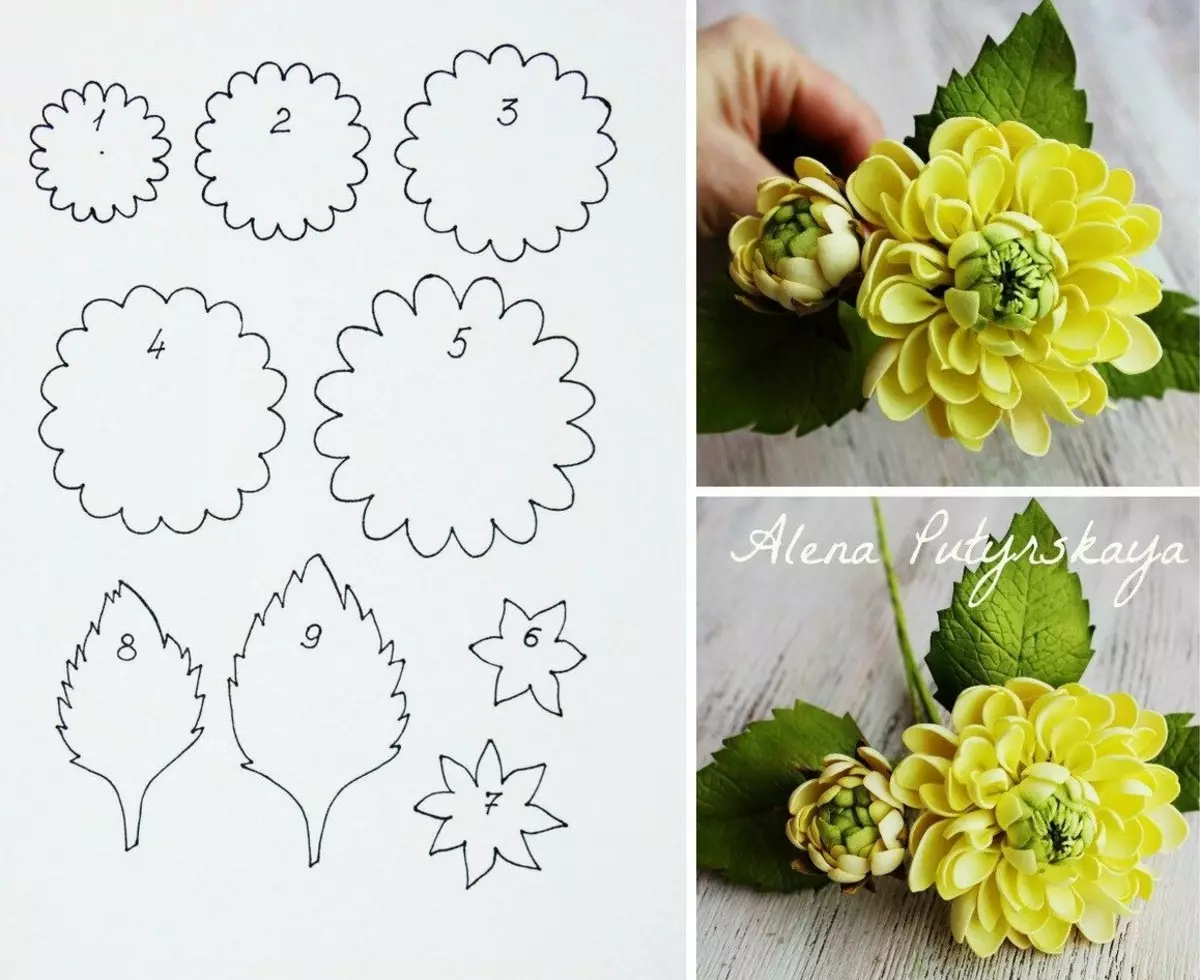
- Before starting work, it is very important to make a detailed scheme and templates of the future product. To neglect this phase, it is impossible, especially if the manufacture of artificial colors you do for the first time.
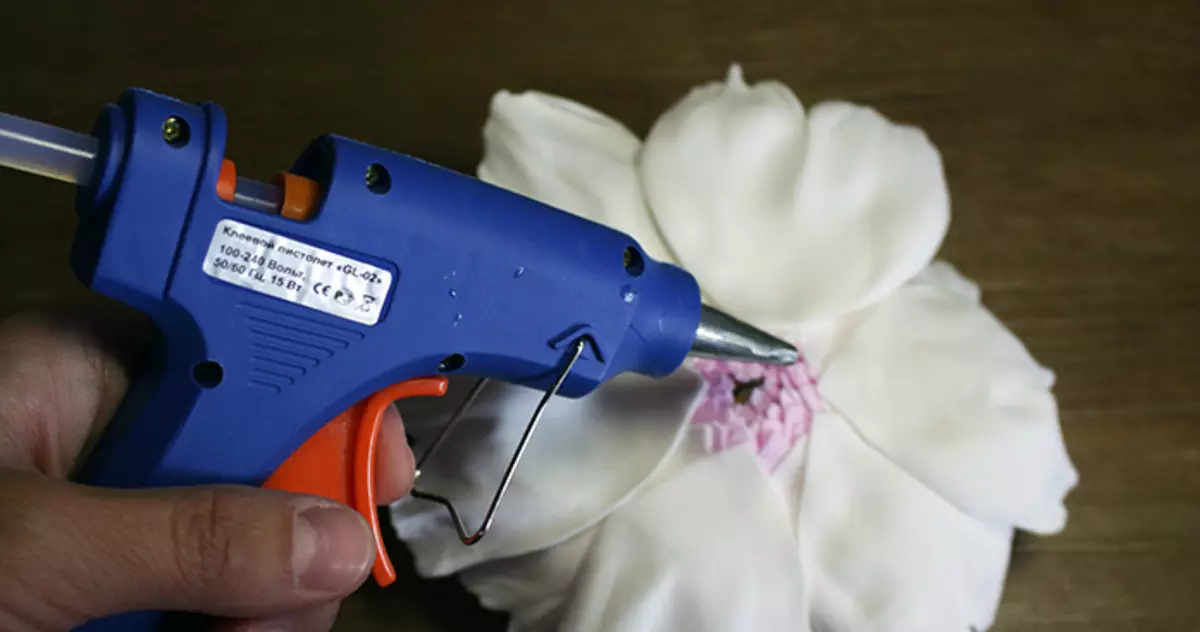
- To connect different elements of the crafts, it is necessary to use non-simple PVA glue, but "moment" or a special adhesive composition-gun. Classical stationery to securely secure the details from the Foamiran.
- Bonding different details of the phoamyrane colors, always wait until they snap, and only then go to the attachment of the following components. After using a high-quality adhesive solution, it is desirable to leave the product for about a day. Continue further work is only after the specified time.
- For the manufacture of colors it is better to use Foamiran, the thickness of which is no more than 1 mm. From such raw materials, crafts are obtained more realistic and gentle.
- Works on the independent production of colors from the phoamyran must be carried out carefully, neatly. Do not hurry. In a hurry you can damage the materials or make a craft less attractive. Take care and act deliberately.
If you follow these simple rules, even a novice wizard can get very beautiful and spectacular phoamyran flowers.
Tools and materials
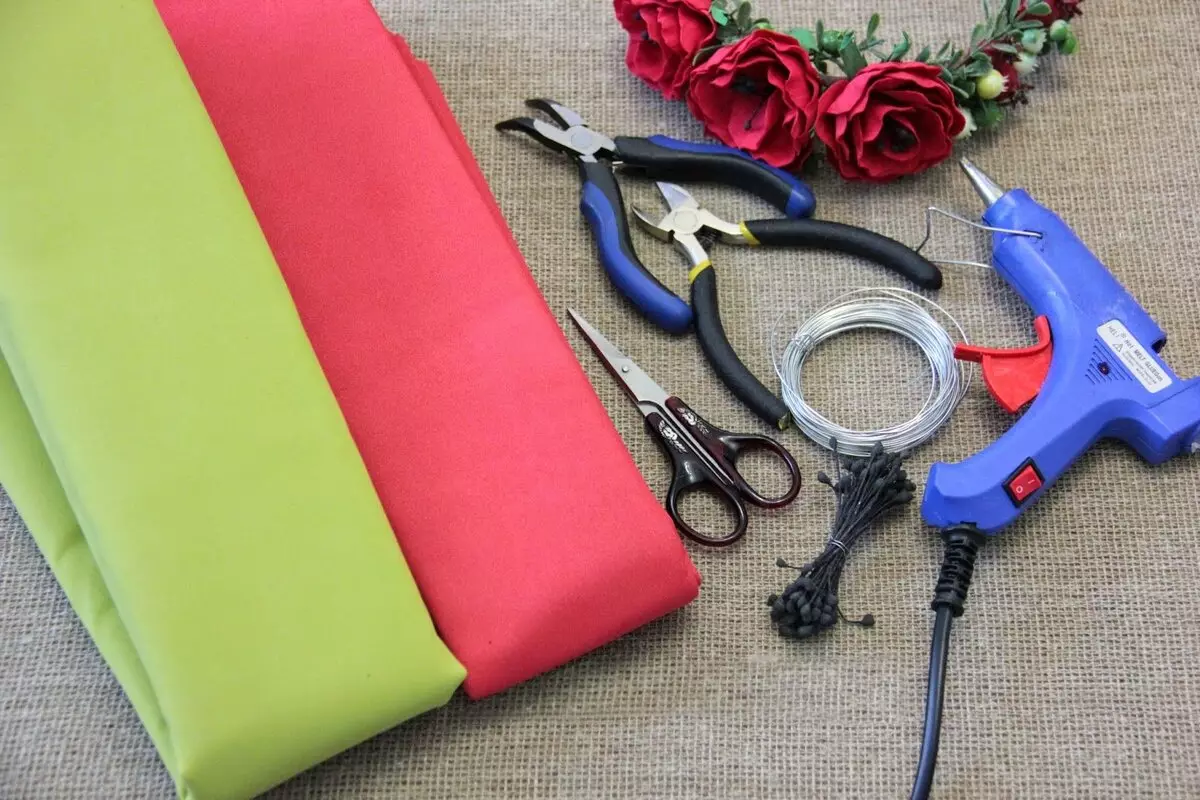
To make flowers from Foamyran with your own hands, the master must prepare a number of necessary tools and materials. Consider a list of important components:
- Several multicolored sheets of Foamiran (preferably buy Iranian material);
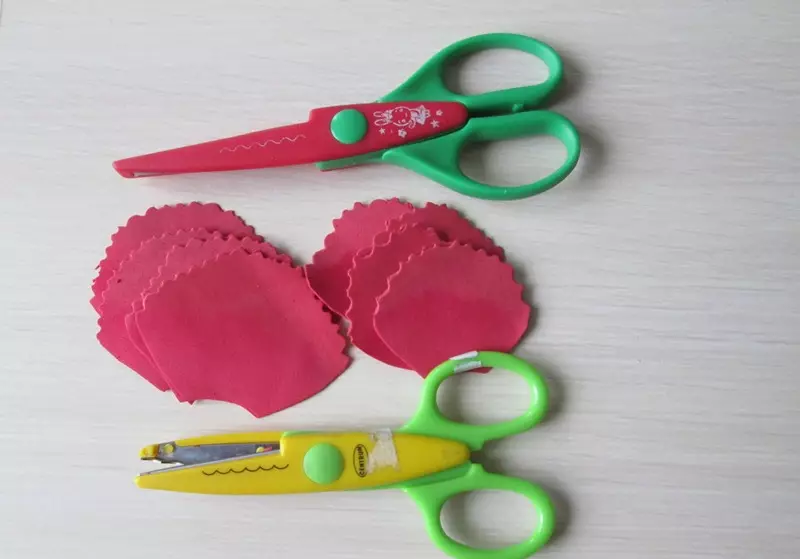
- high-quality curly type scissors;
- hole punch (may need to do small details);
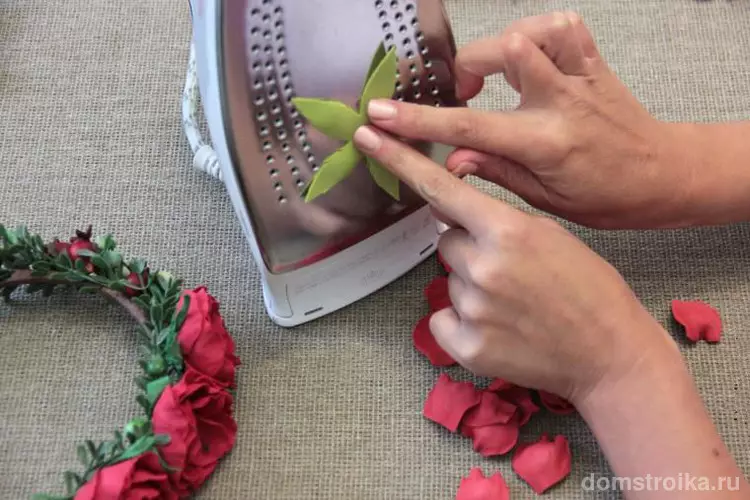
- Iron (will be needed to give the Foamiran a certain form);
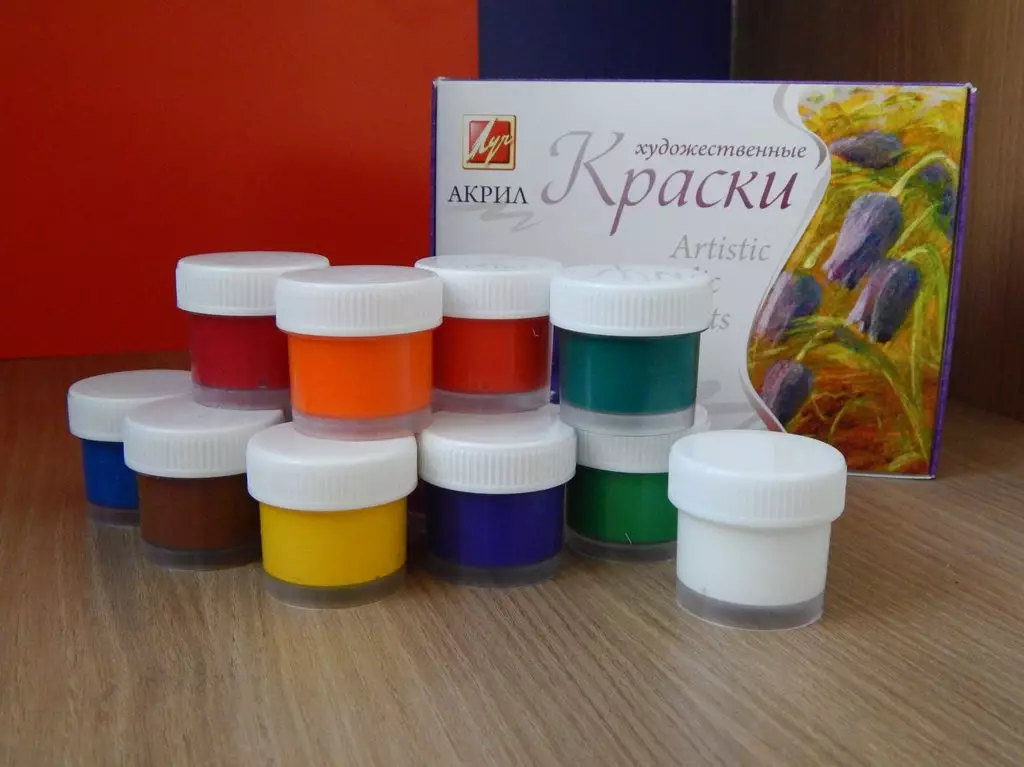
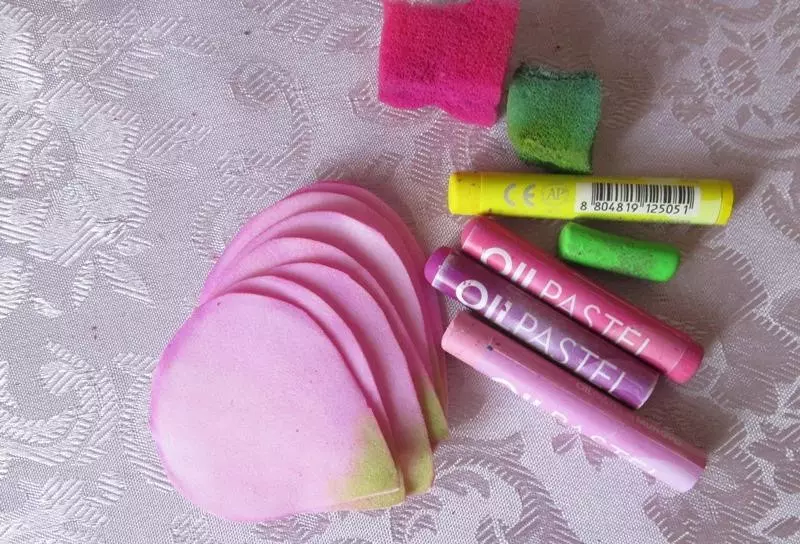
- acrylic paints (instead of them can use pastel crayons);
- Weiners and Molda (with their help, it will be possible to give the necessary shape and more natural form);
- sponges and brushes to apply a painting component;
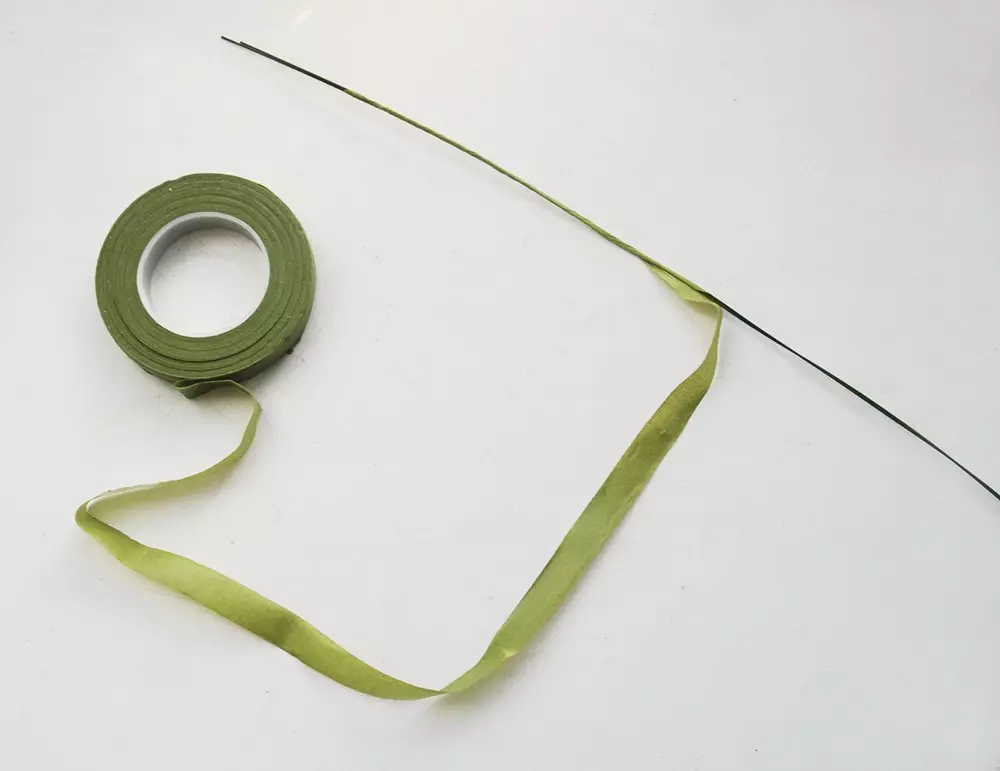
- Special wire for floristry, with which the master will be able to make stems for colors;
- Special Teip-ribbons.
Armed with all the necessary components, it is recommended to arrange them next to them in one place so that the master can easily take the necessary tool / material at the right moment. Thus, it will be possible to save time in search of the necessary position.
Simple schemes
With their own hands, a novice master has the ability to make a variety of phoamyrane flowers. Without having rich experience and knowledge, it is necessary to rely on the master class with a step-by-step description of the creative work. Consider several topical schemes for the manufacture of beautiful flowers from Foamiran.
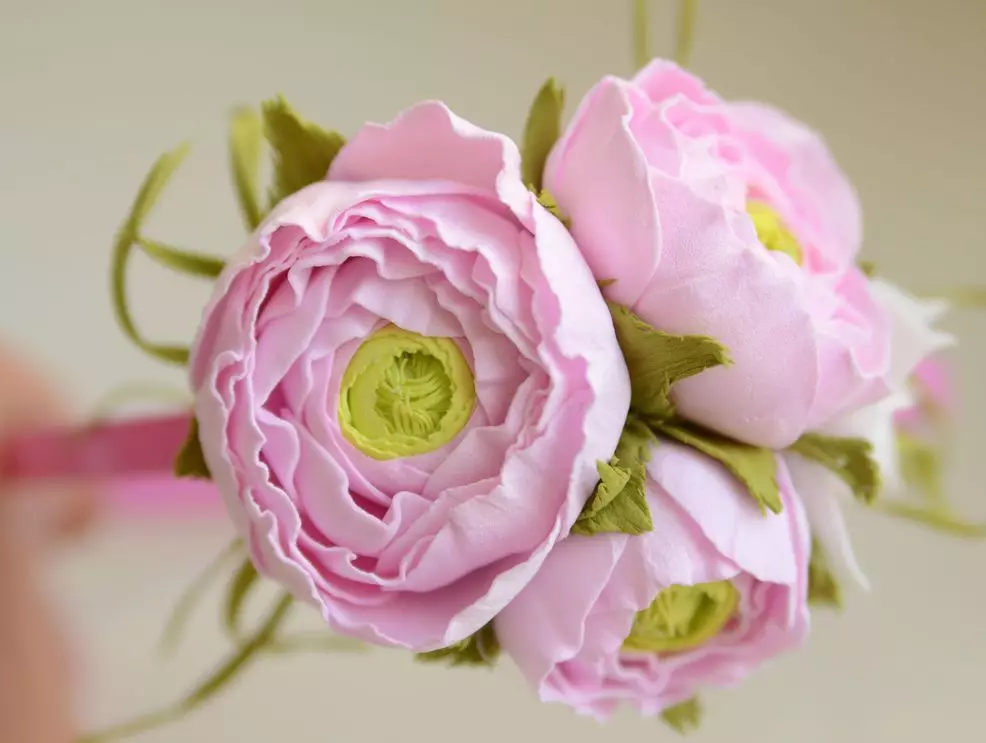
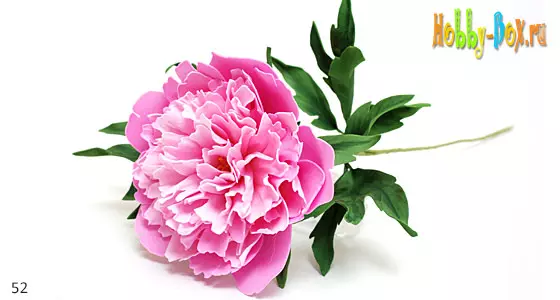
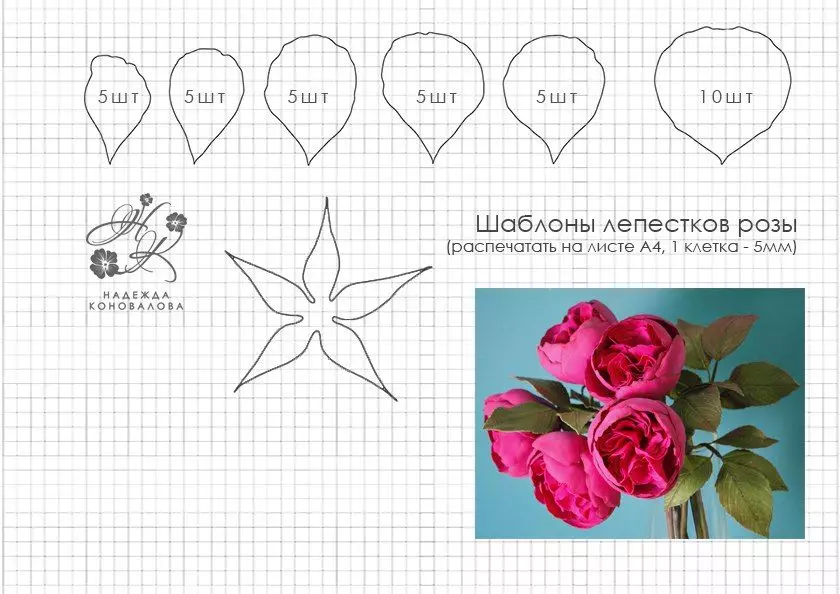
Peonies
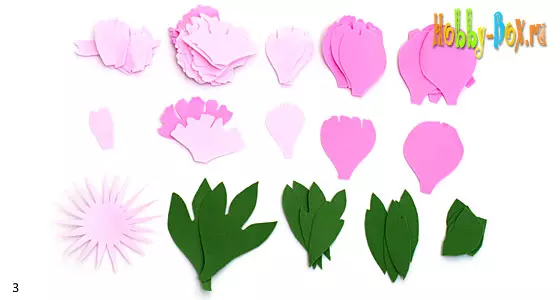
From Foamiran, it is possible to make very beautiful peonies. The first thing the master must prepare the necessary templates that will be needed to prepare the pattern. Using the diagrams of the necessary parts sketched or downloaded from the Internet, you can cut all the necessary workpieces.
Next, consider the action plan step by step.
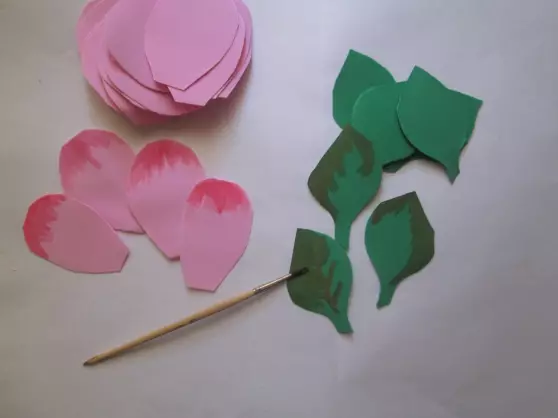
- Cut all blanks on patterns.
- Tonnize carved petals using gentle pink paint.
- Gently and thoroughly draw the structure of the leaves of future artificial colors. Use green paint for this.
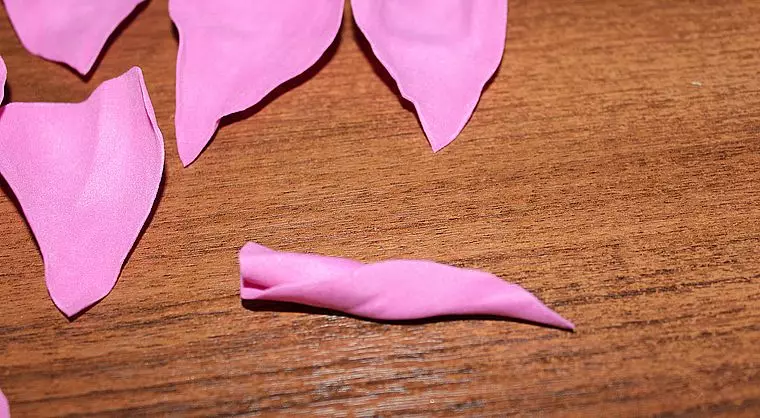
- So that the petals looked more realistic, take a few blanks (marked with, in and with in the diagram).
- Fold the petal into a small harmonica, twist, and then expand. Repeat this procedure for all elements marked A, B and C.
- Next, take the petals of the D & E. give them a neat concave form. To do this, it will be necessary to place a thumb in the central part of the details and gently stretch the Foamiran on the edges.
- Next you need to bend the sheet in half, the harmonica, and then deploy. Permissible slightly twisted the edges. Make so with each leaf.
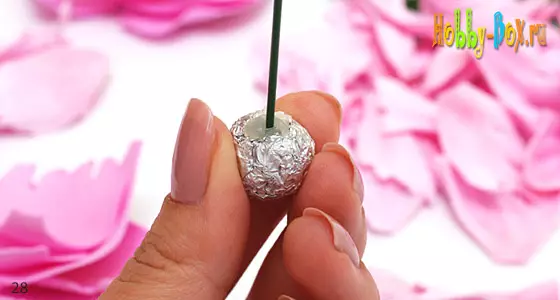
- Roll balls from a foil sheet. Do in them holes, fill the hot glue solution there, insert a dense wire - it will be stem.
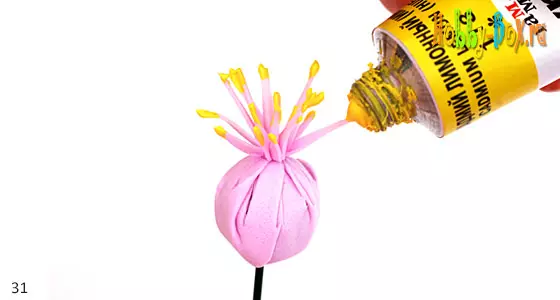
- It is necessary to wear a blank with a marker in the shape of a sun on a skeleton and tie the rays with a thread.
- The ends of the races can be painted in yellow so that they are more like the stamens.
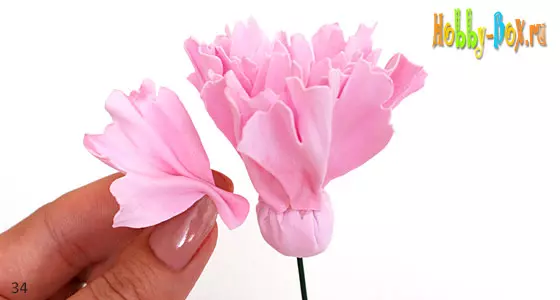
- Cut 10 petals (a) with the help of glue-gun. It should be fixed in a circle, fastening in a chess alignment.
- Enclose the petals in, then C, D, and E. Stick CHASELISTICS L and K.
- At all leaves, attach a thin wire. Create a foliage with each other, secure with a teep-tape, building elegant twigs.
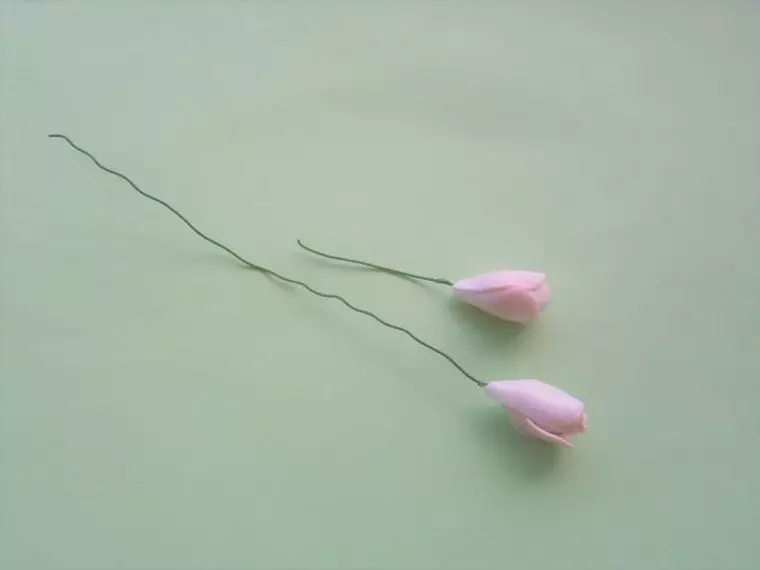
At the end of the work, attach the buds of charming peonies to the stalks.
Orchids
We will analyze in the stages, as with their own hands from Foamiran make chic orchids.
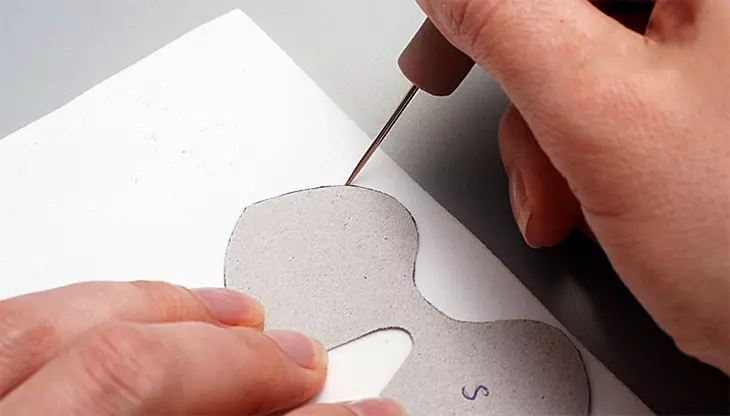
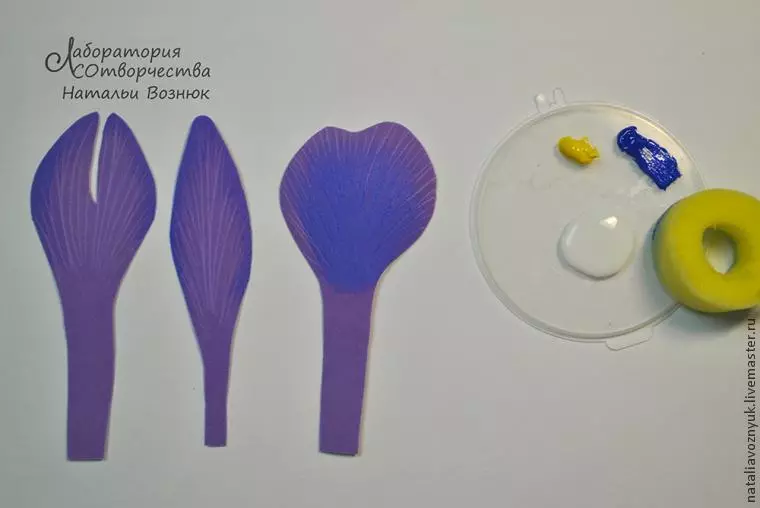
- The first stage will need to print templates for which you will then cut the billets of petals. Do it is necessary strictly by contour.
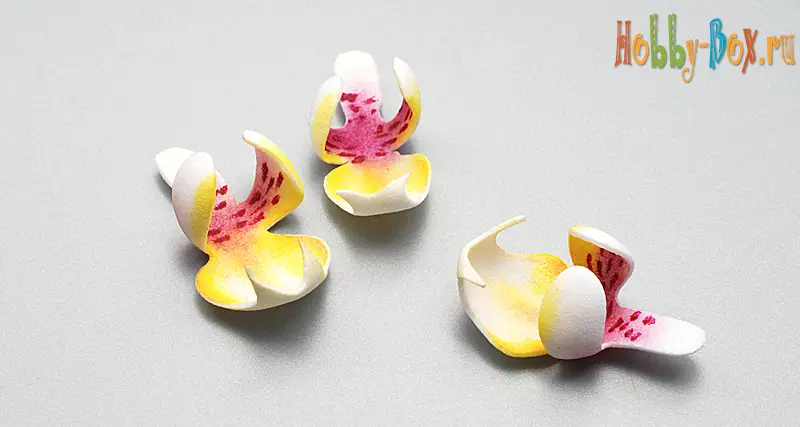
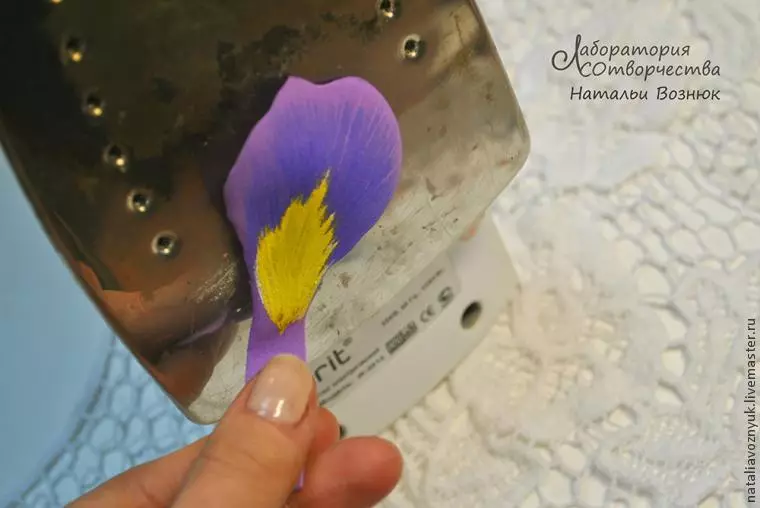
- Pour each of the petals in a saturated yellow and purple color. The upper half must have a fuchsia color, and the bottom on the edges will be yellow.
- After painting, add the petals to the spots.
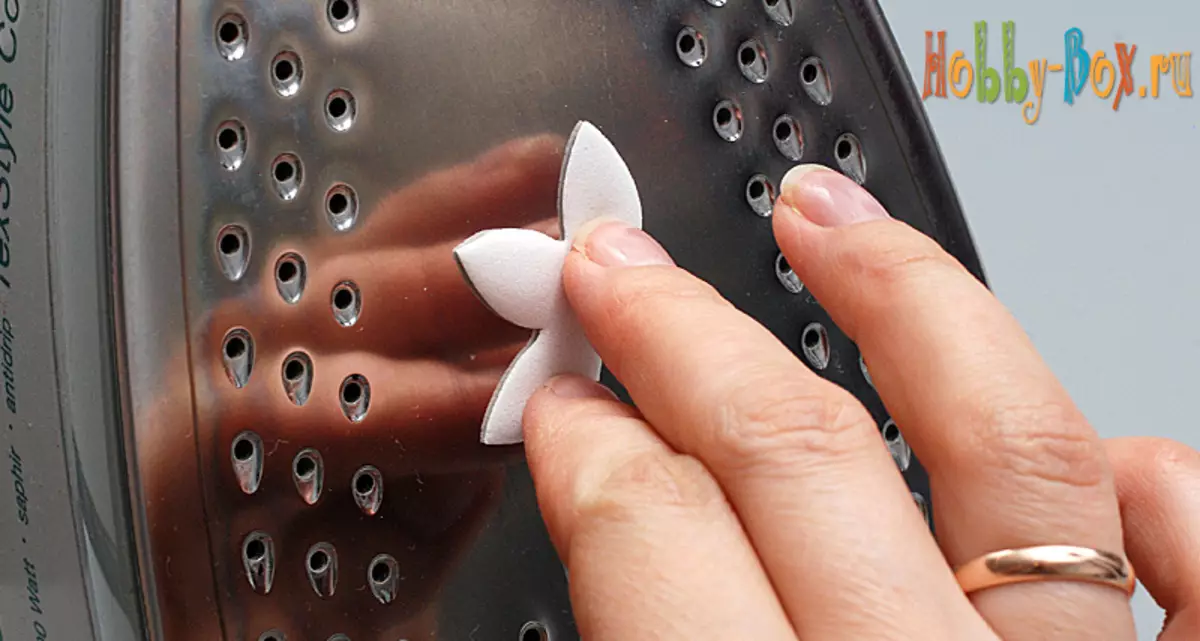
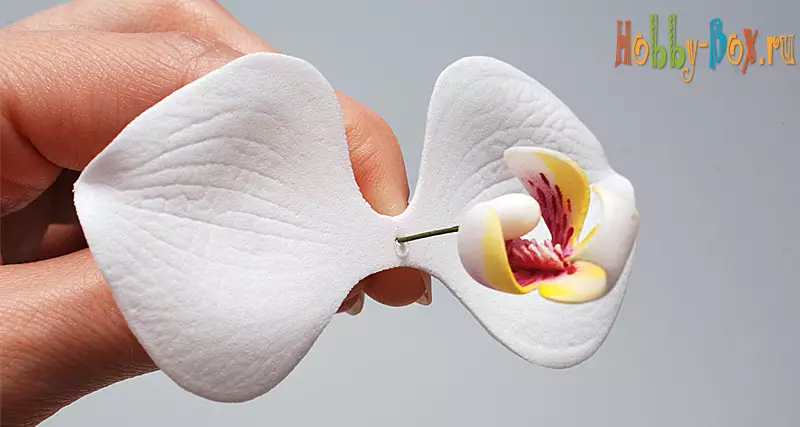
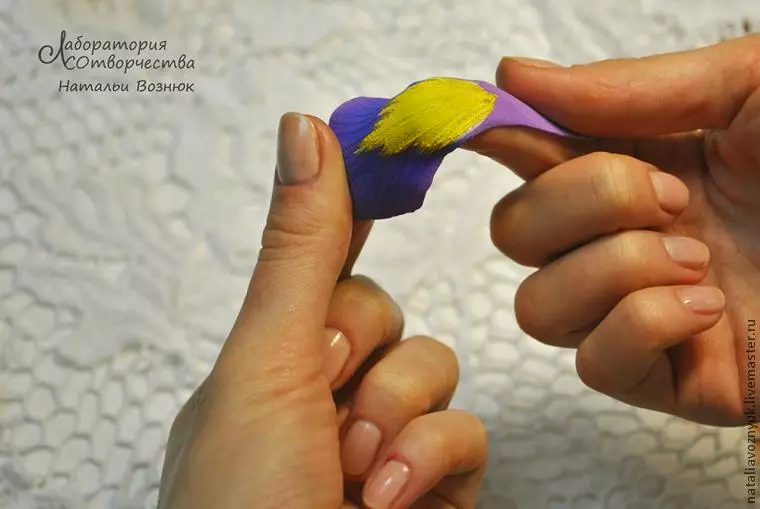
- Heat the workpiece on the iron, form the flowers. For the manufacture of residences, you do not need to wait too much - do the items while they are still warm. Take a hook or stupid tweezers, draw a streak, or apply them by imprint.
- The tips of the petals slightly sharpen. Next further prepare the cups.
- In order to properly prepare a "lip" for homemade orchids, it should be applied to its facial half to the surface of the iron, and then form a groove.
- Take a cotton wand. Clean the glue on it. Cut the head with a rat and start a wire. Slightly seal her tip, forming a small hook. Lubricate this part with adhesive makeup, grid into your cotton head.
- Stick to her the "lip" of the flower, and then side petals and cupid. As soon as the bud will be ready, all the other wadded heads need to paint into a golden color.
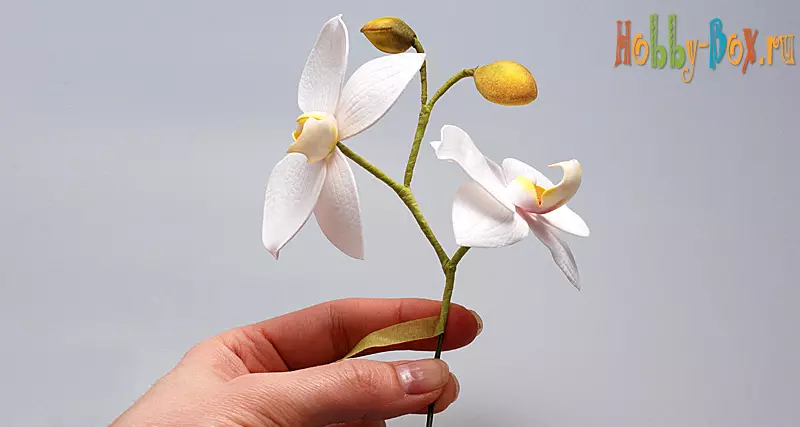
- Wrap a Tape ribbon wire. The upper half of the wire is made by light green material, and the bottom - dark green.
On this homemade orchid will be ready.
Macs
Consider a detailed MC on the manufacture of phoamyrane poppies.
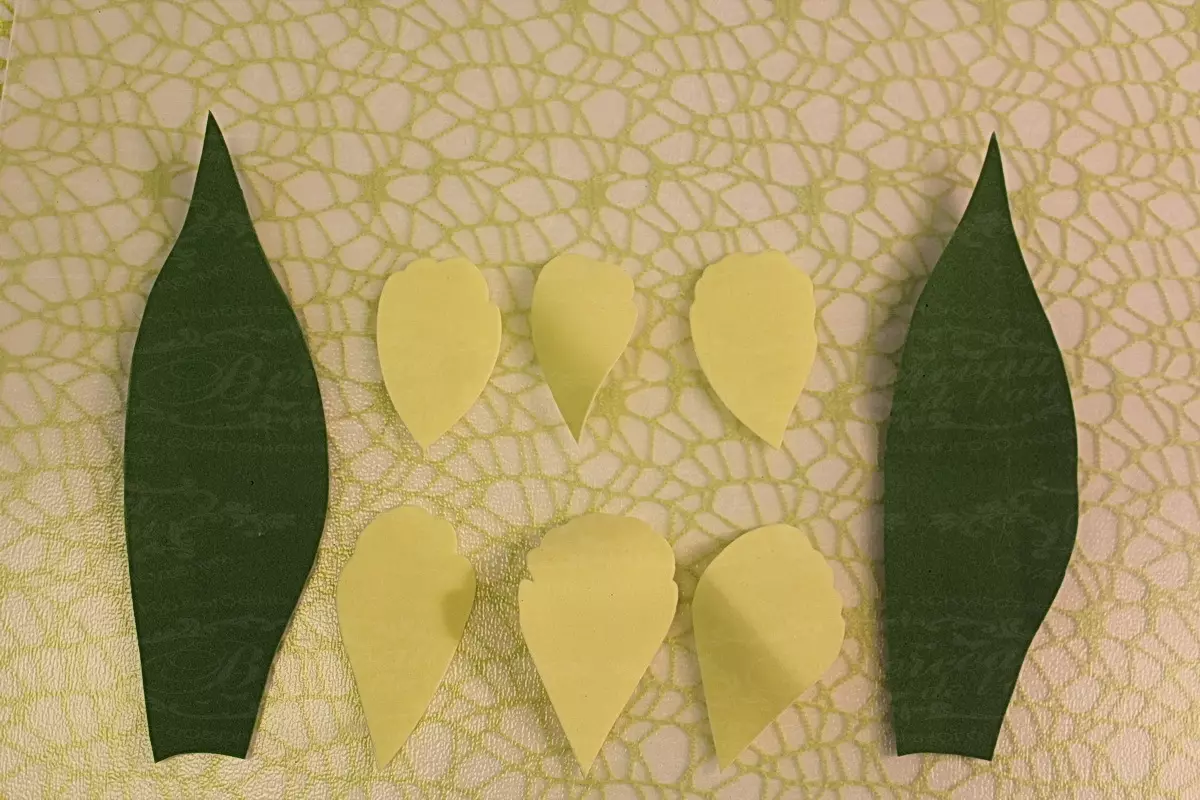
- As in the previous cases, draw the patterns of poppy petals on the cardboard sheet. Cut them. It is advisable to make several blanks having different forms. Thanks to this, the flower will come out more realistic.
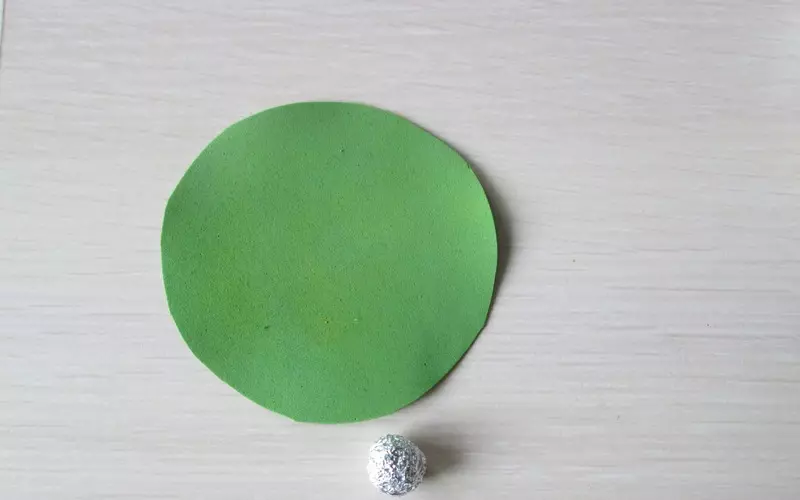
- Take the green shade foamifra. Cut the circle from it with a diameter of 6 cm.
- Gently insert the wire into the bead. Secure, twisting it. So you prepare the stem of the future flower.
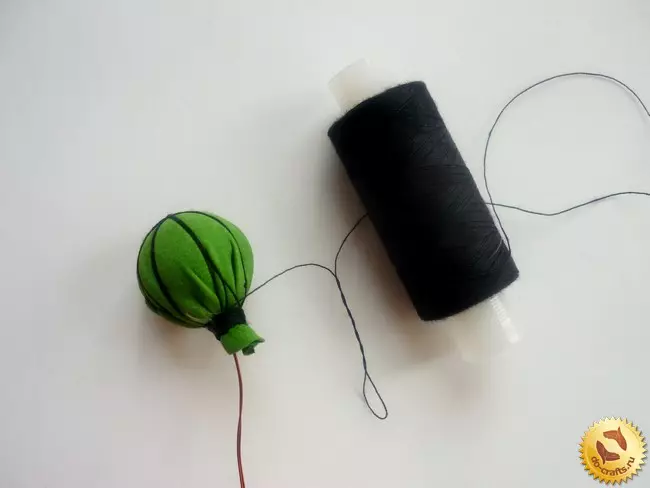
- Heat the green circle with an iron, wrap the bead into it. Secure the edges around the wire.
- Wrap the resulting ball with black threads.
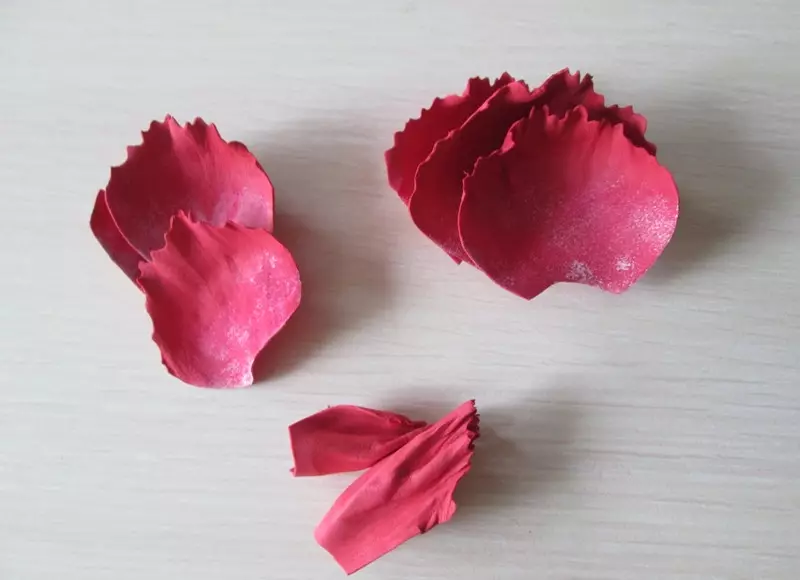
- Then carefully cut the red petals in templates.
- In order for petals to have a natural wavy relief, fold them by the type of harmonica and tighten by compressing your fingers.
- Stick scarlet petals to the prepared stalk. Enough and steam a series so that the product is pretty lush.
- Cut the leaf plates from green phoamyran. In order for these components to be as realistic as possible, an incision should be done around the edge and twist them between your fingers.
- Cut the head and fix the leaflets.
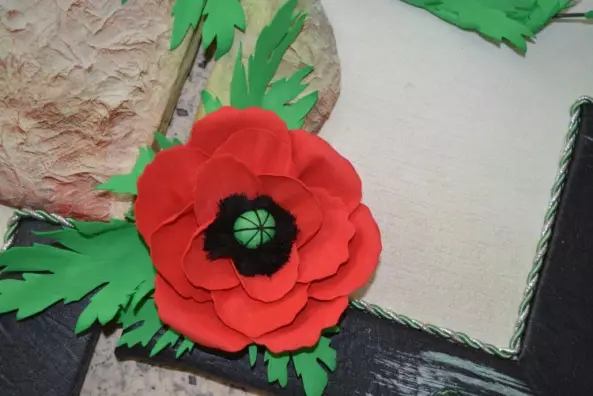
After these actions, the phoamyran poppy will be ready.
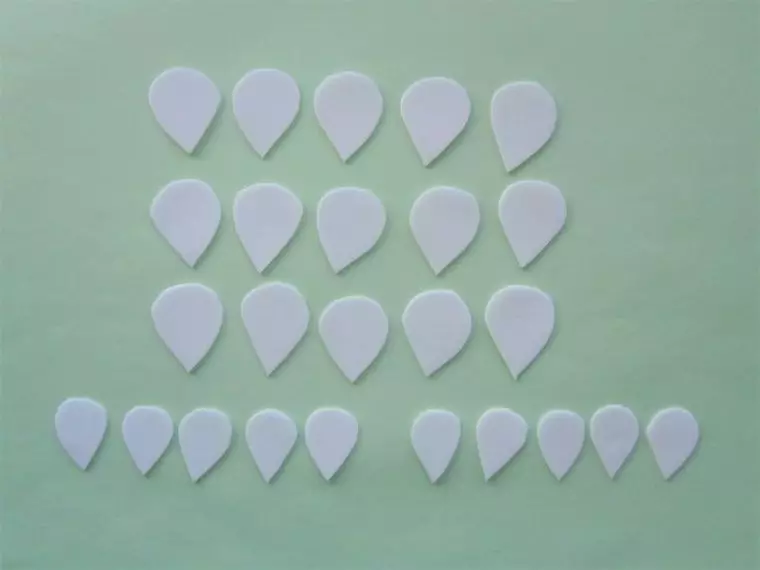
Tulips
Light in the manufacture turns out to be phoamirane tulips. Make such flowers can be a beginner master who has no rich experience.
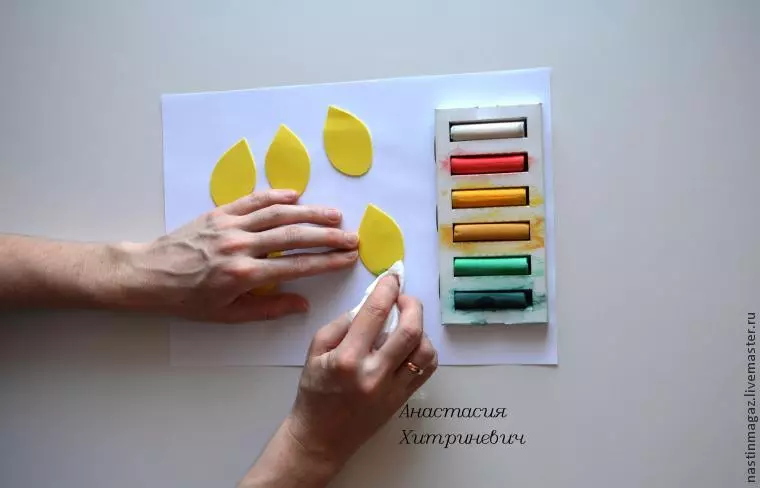
- At first, it is necessary to portray the tulip petal on the cardboard sheet, the height of which is 6 cm and width 3.5 cm in the center. Carefully cut the resulting pattern.
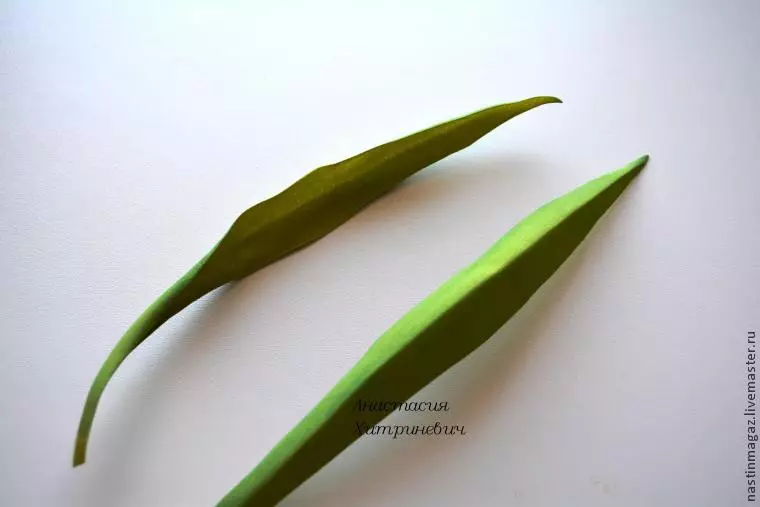
- Then depicting a leaflet with a length of 25 cm on a 25 cm long and 3.5 cm wide. The specified item also cut out.
- Circuit the petal pattern on the basis, using toothpick. Rush 6 petals.
- Then you need to circle a leaf pattern using toothpicks on a green material and cut it.
- Caution Tinging petals in the leaf of the future flower. Use the wet napkin together with the pastel in dry form.
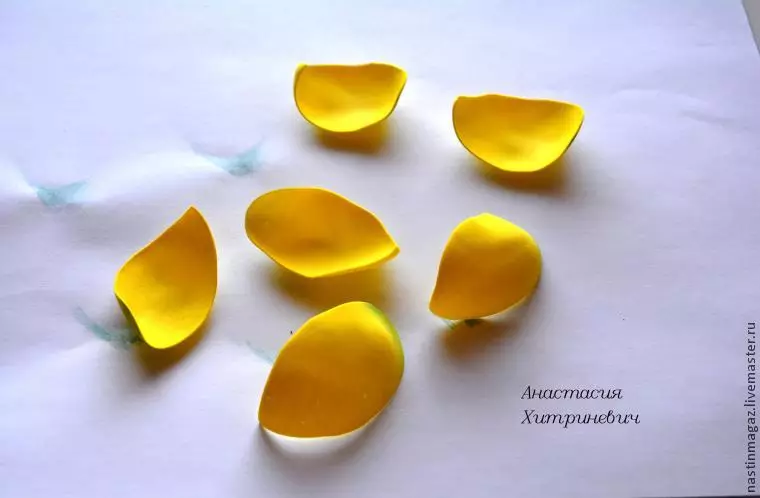
- Heat each of the leaves, placing them on the surface of the iron. Provide the components of the natural structure, pull and in length, and in width.
- Warrieve homemade tulip leaf, fold halfway along.
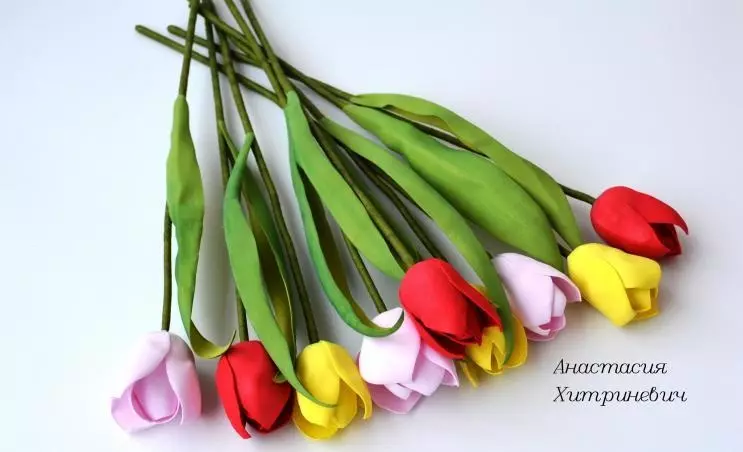
- Start 3 petals to the wire, completely closed it.
- Fix the 3 remaining petals, putting them in a checker order.
- Welcome a piece of wire for floristry into a sheet.
- Complete wire winding from Teip-ribbon, secure the leaflet.
- In the same way, you can make a whole bouquet of artificial tulips.
Romashki.
We will analyze how to properly make cute daisies from Foamyran.
- First cut out 30 snow-white petals of the future flower.
- From the strip of yellow leaf, ride a fringe.
- Heat tweezers, spend them for each of the workpieces.
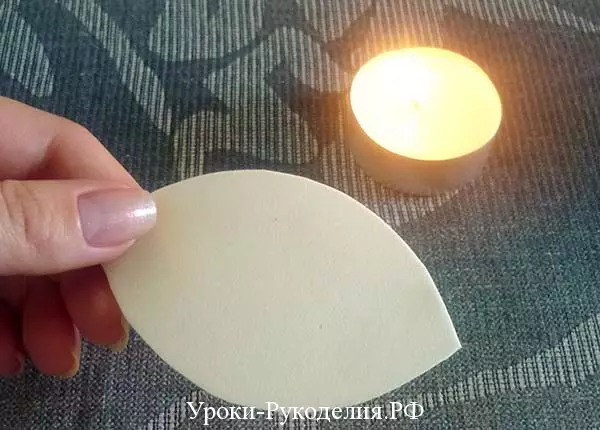
- Form a neat heart of a flower, warm over a candle flame or an iron.
- Stick white petals holding a chess order.
If there is a desire, cover the opposite side of the flower with a suitable snow-white material or separately make a cup for this.

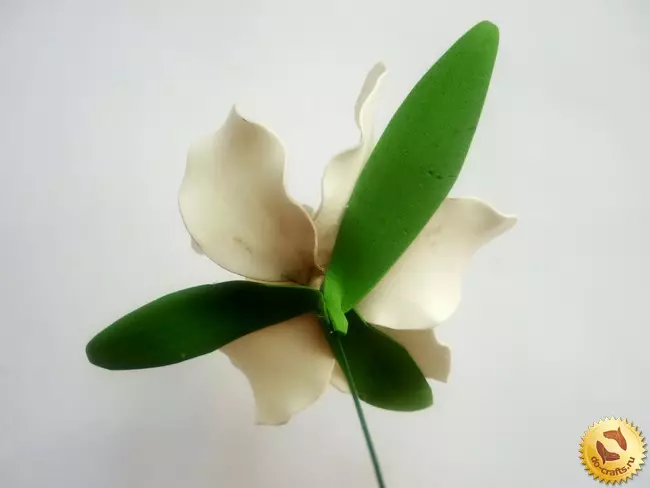
Lilies and Irisi
First, we'll figure it out how to make beauty-lily from Foamiran.
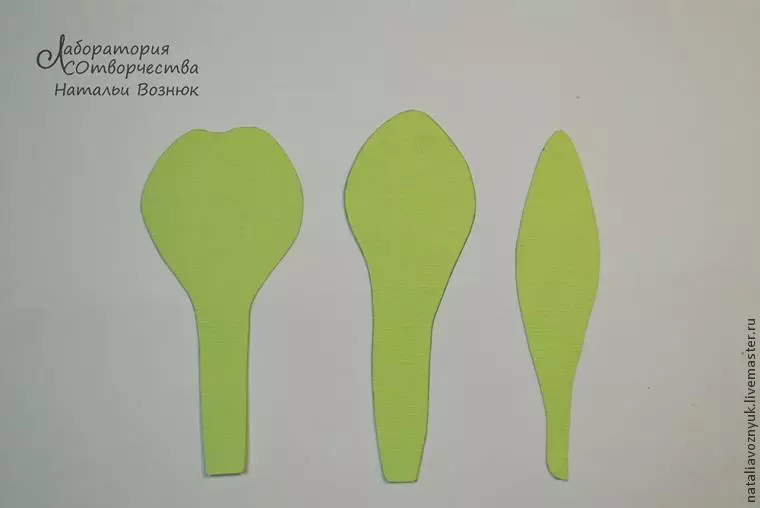
- Picture on the cardboard the contours of lily petals, the length of which is 6 cm. Cut the items.
- Attach the resulting pattern to the snow-white foamyran, circle and cut out with sharp scissors. There will be 6 pieces of such elements.
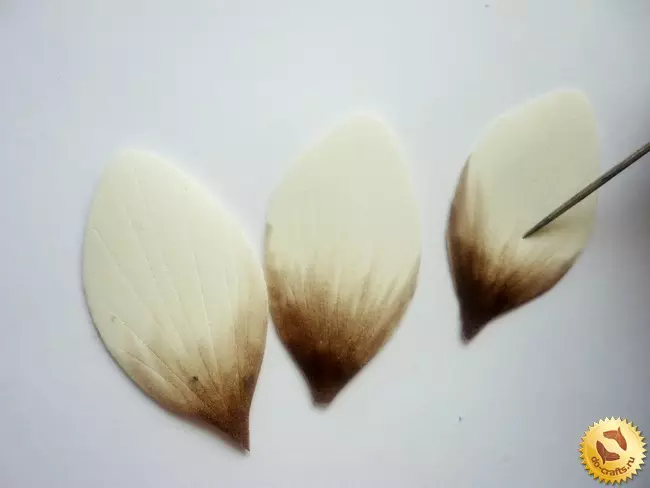
- Ting the petals from 2 sides. More naturally will look like a lilac or gentle pink light shade.
- Now the petals must be heated on the iron. While they still remain warm, do it strengthen, pressing the toothpicks. So the plant will turn out to be more textured and natural.
- Heat the petal edges so that it gets the bends of the wavy shape.
- Draw on each of the petals of the lower part and the point using a brown feltwall. Try to make these details as much as possible on the elements of the living plant.
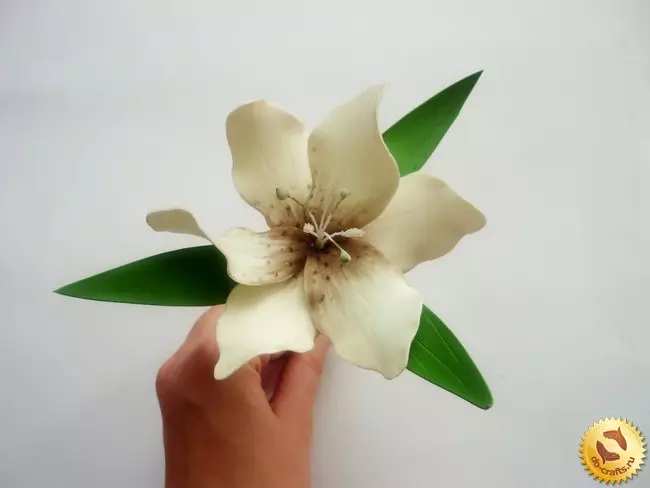
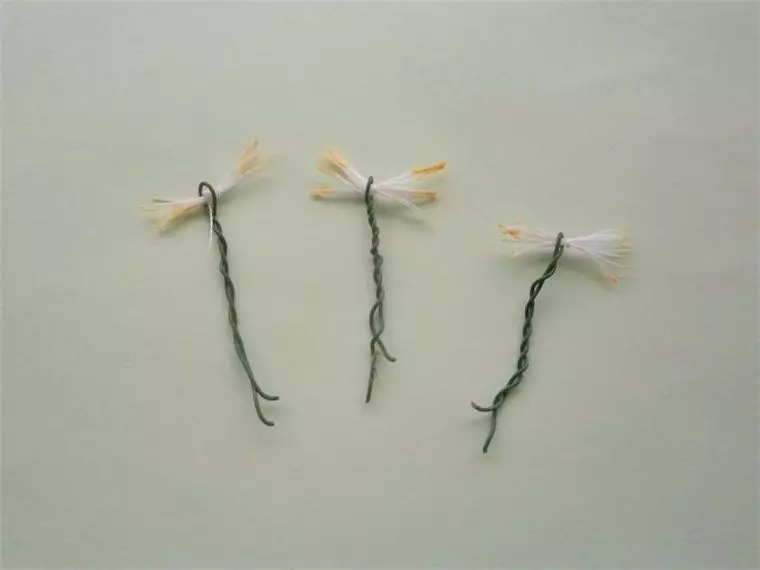
- Prepared stamens Lock on the wire with glue.
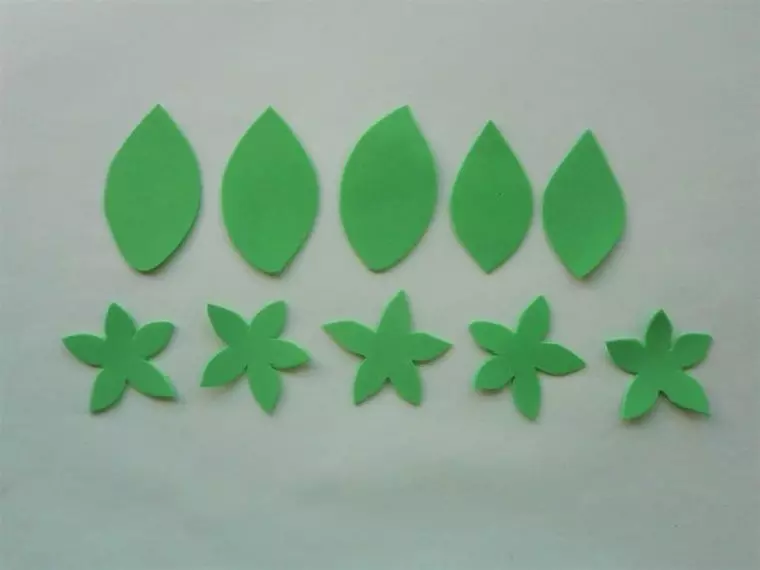
- On the green Foamiraner, draw 3 leafy of the oblong shape, then cut them out.
- Heated on an iron, give the petals of additional texture.
- Now you can collect a flower. Around the stamens first stir up 3 petals, and the remaining 3 should be glued nearby, sticking to the chess sequence.
- The final stage is gluing green leaves.
Irises are made like this.
- Make billets for a flower.
- We need to circulate templates using toothpick, then cut out, moving along the contours.
- For Iris, you need to make only 3 petals of each of the grids.
- Draw on the billets a bit of accommodation. For this convenient to use the toothpick.
- Talk petals. Use acrylic paint shade "ultramarin". Apply it with a sponge.
- The edges of the petals do relief.
- Apply the color further. Complete the petals of snow-white paint.
- When the first layer is dry, apply on top of it a saturated yellow acrylic paint.
- Attach the petals to the iron. Sull it on the back. Bend the elements in half, heating the leg. So you need to go with all the workpieces.
- Slit together 2 petal (folds of legs should "look" at each other).
- Connect 3 ready-made flower components.
- While creating all the components, glue a bud to a stalk, supplemented by Teip-ribbon.
Do not forget to fasten the leaves.

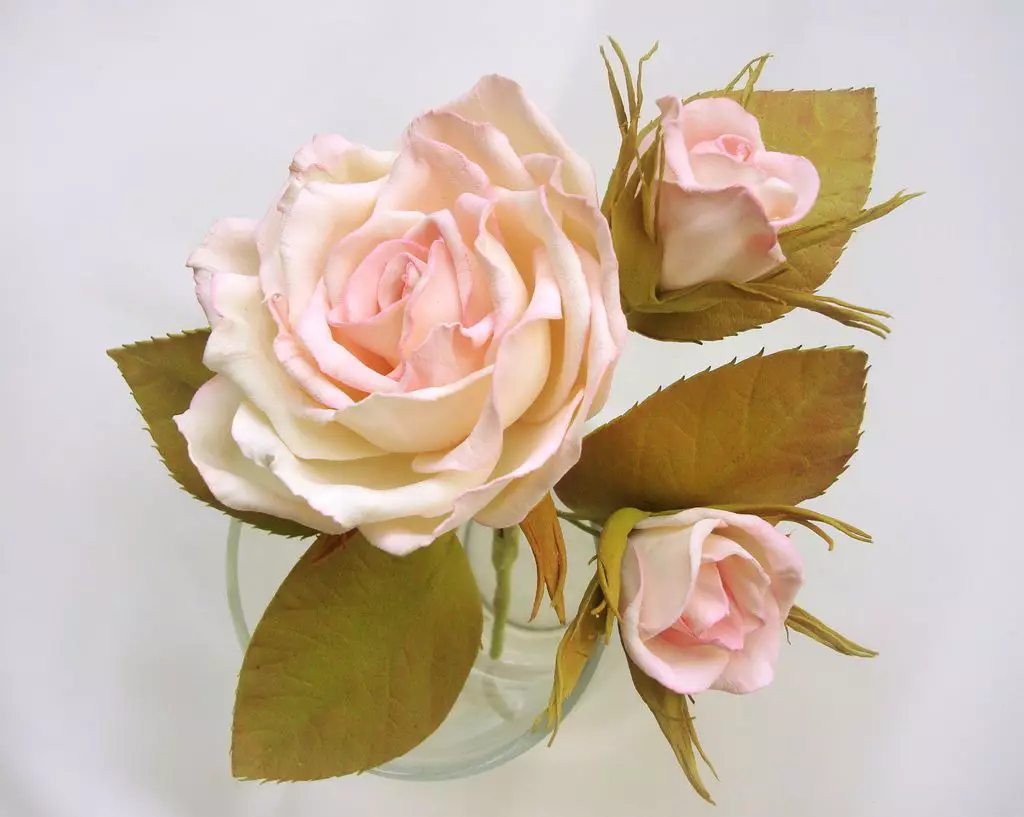
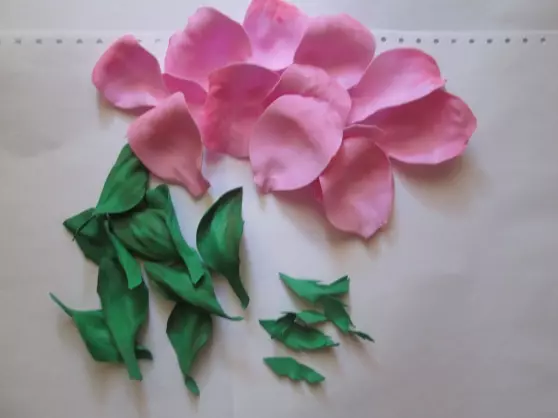
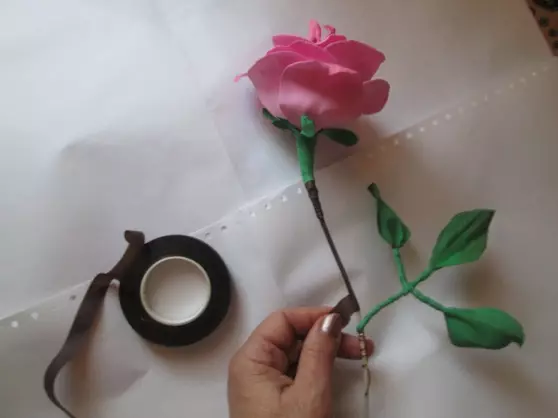
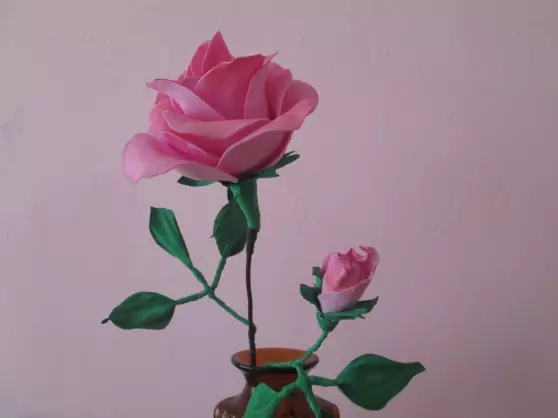
Roses
We will figure it out how to make gentle roses from militibly phoamyran.
- Slide from Foamiran 2 types of rose petals. They must have the same forms, but different sizes. Prepare 5 petals of each type.
- Each petal is carefully attached to the hot iron platform. Stretch the edges of the elements.
- Prepare a miniature circle from foil, attach to the wire.
- Get small petal around the ball around the ball.
- In a circle, attach the petal by creating a bud.
- Cut leaves from green phoamyran, attach them to the stalk.

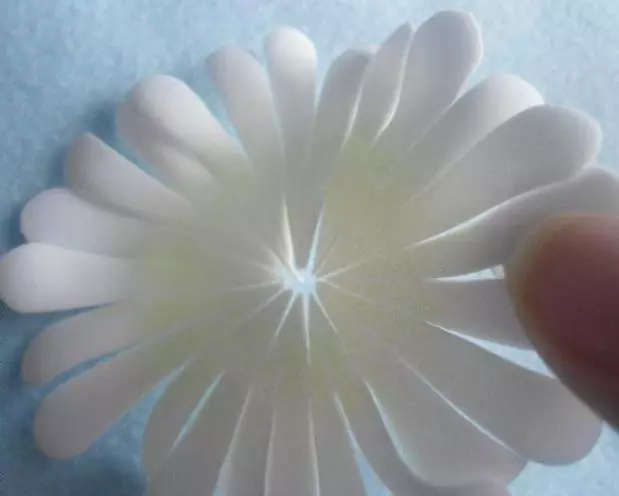
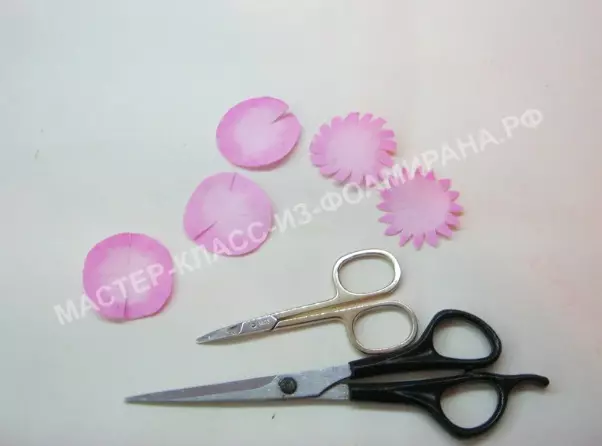
Margaritka
Simply, cute daisies are made from Foamiran.
- Cut patterns.
- Make them thin, sobrive the iron.
- Keep a mug from squares. Brush the edges with pink pastels.
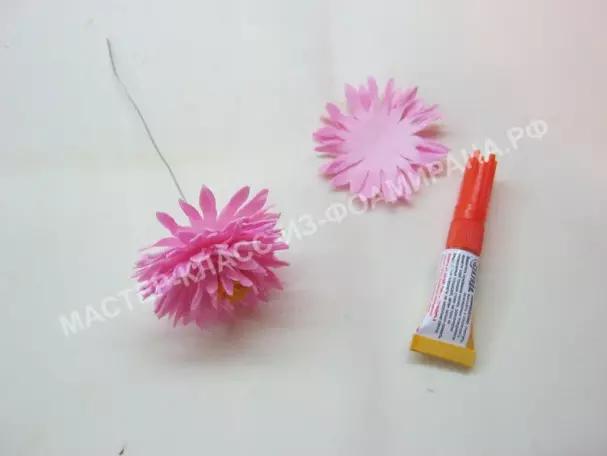
- Prepare petals. Each circle divide on 16 parts. Carefully assign them by making tips rounded.
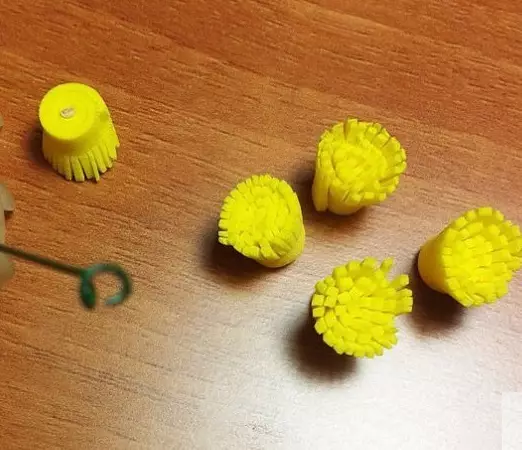
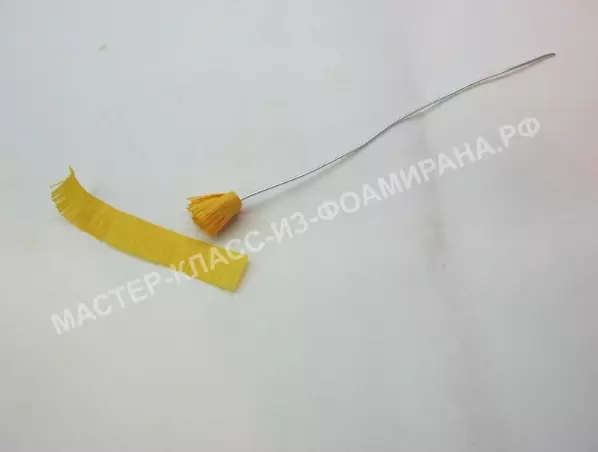
- On the yellow strip, depict the fringe.
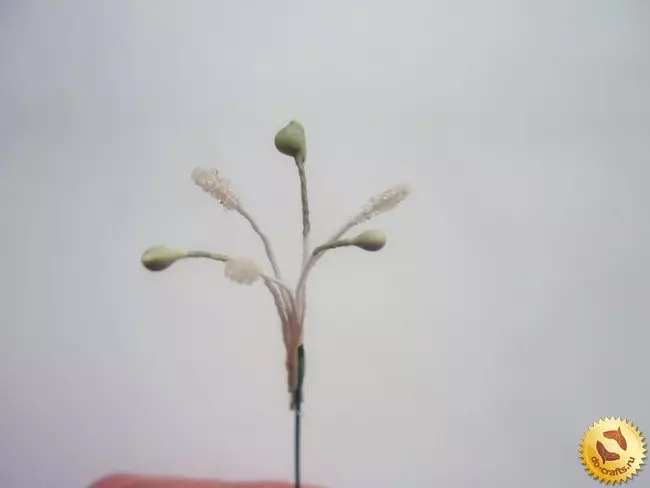
- Tip Wires Make a hook type. Build it with a fringe. Screw the strip of yellow to metal - so you make the core of the flower.
- Main spray glue, sprinkle with sand.
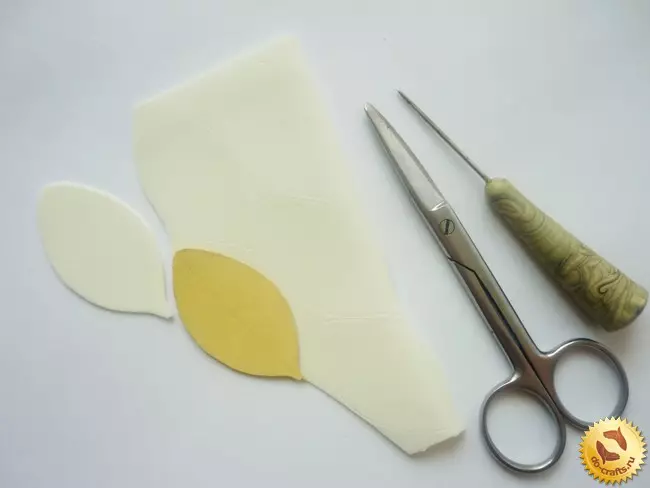
- Take rose petals on a wire. In the center of the circle, make a hole, moce the glue.
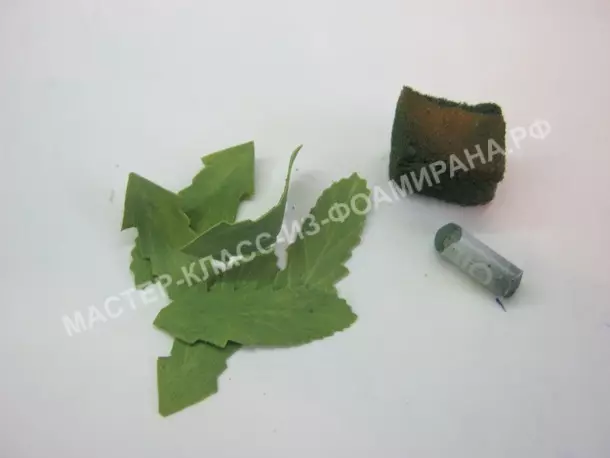
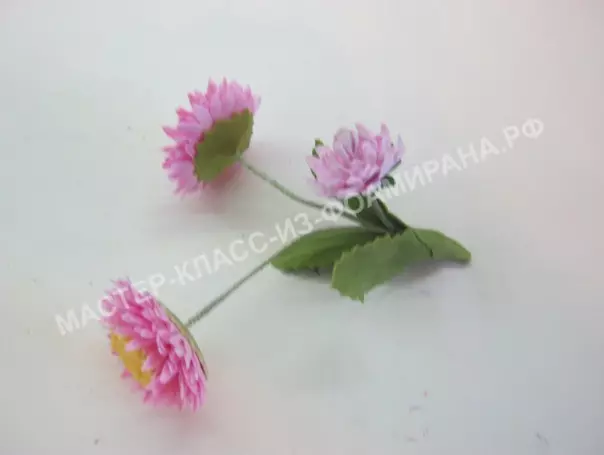
- Leaf plates Make out of green material. Priary of the workpiece using special scissors. Details must be obliged. Clean their pastel, draw the streak, wrap wire.
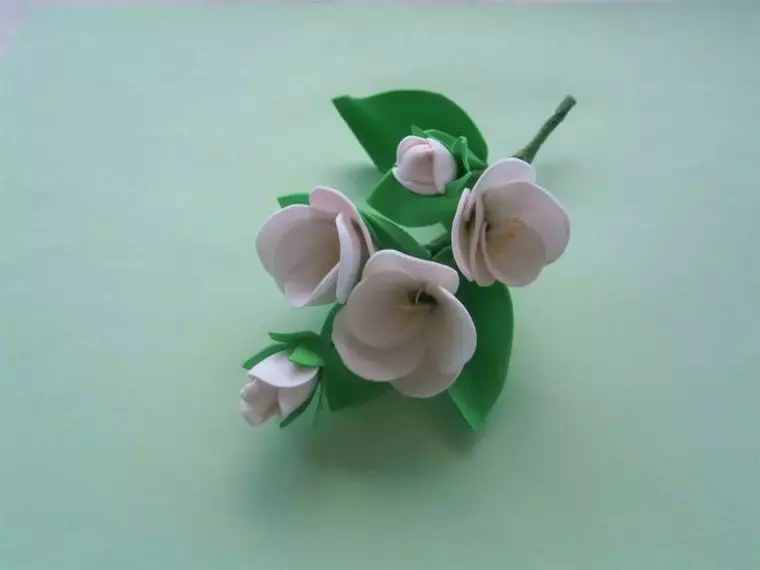
Flowers apple trees
Step by step will examine the process of manufacturing apple flowers from Foamiran.
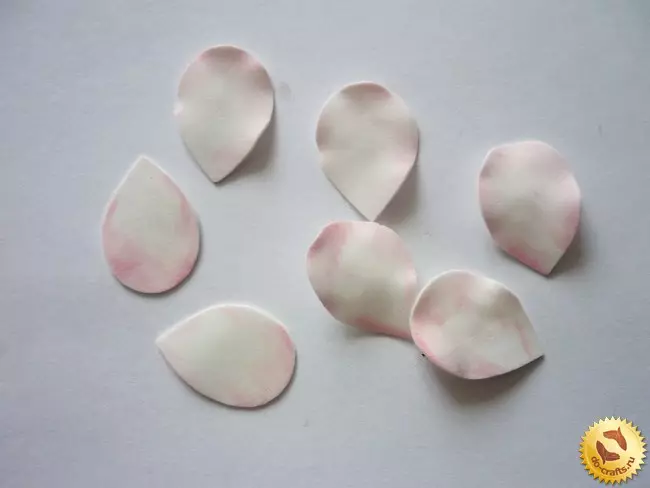
- Make billets of petals, bud, leaves and cups.
- Rent 15 pieces for flowers, 10 - for buds, 3 large sheets, 2 small, 5 green cups.
- Purify the right shape, toned them.
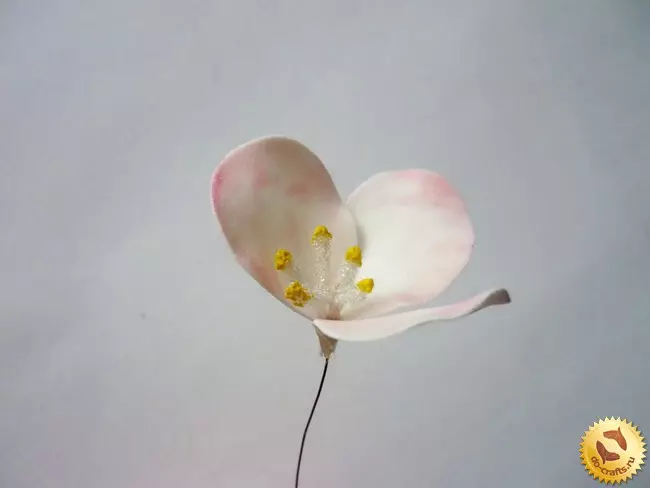
- Make stamens.
- At each of the stamens, attach 5 petals.
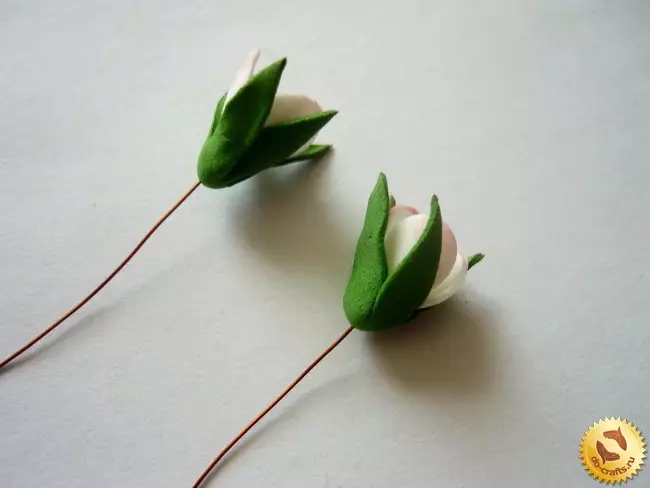
- To make buds, diverge the wire cuts to fold in half. Wrap the loops with foil material.
- Attach miniature petals to foil.
- Crerate a bud and a cup.
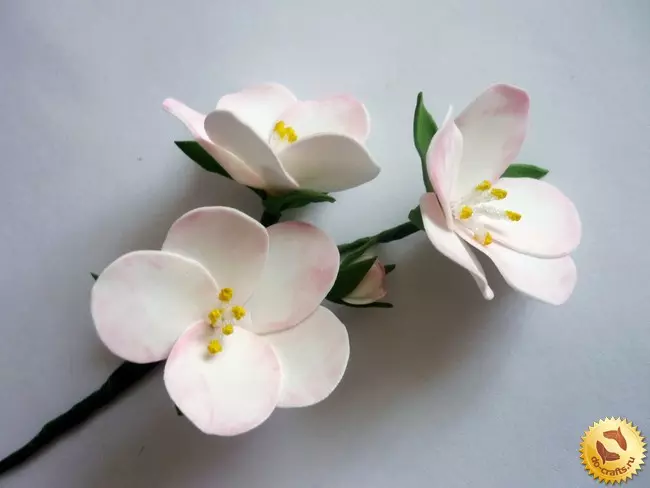
- Attach sheet plates to the composition.
At the maximum long stalk, attach the remaining components to prepare the inflorescence.
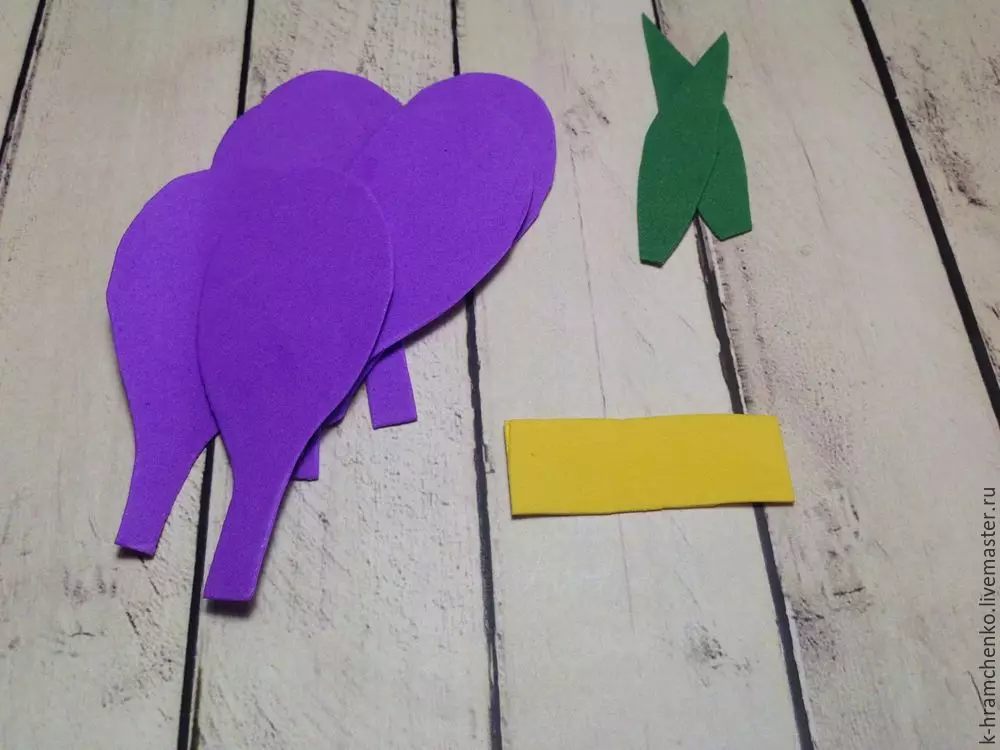
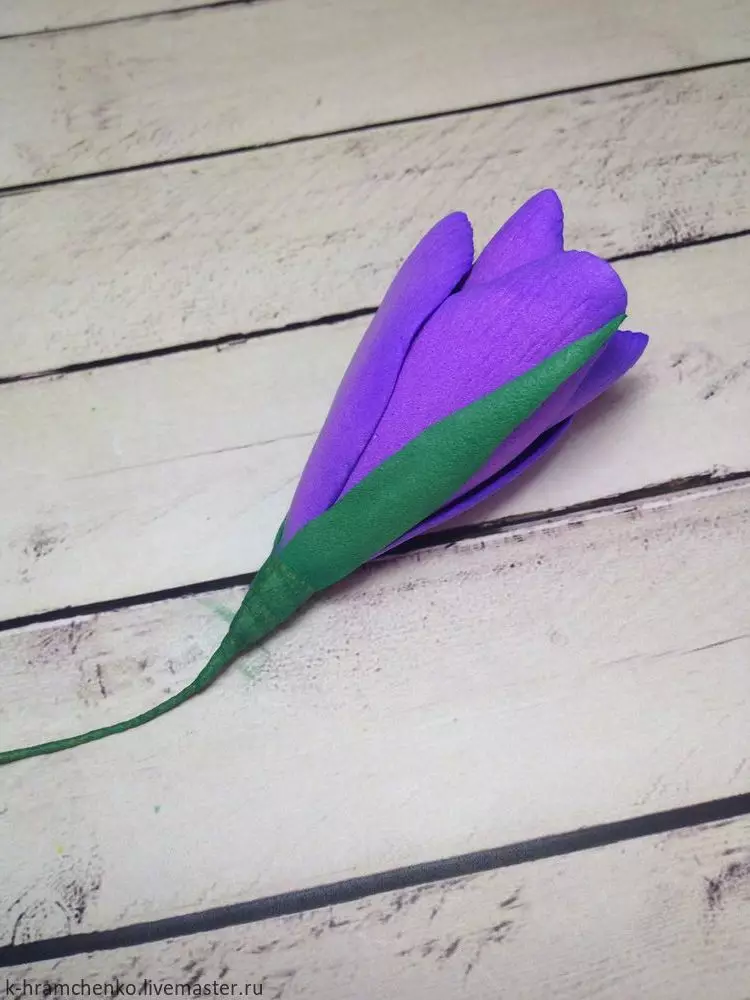
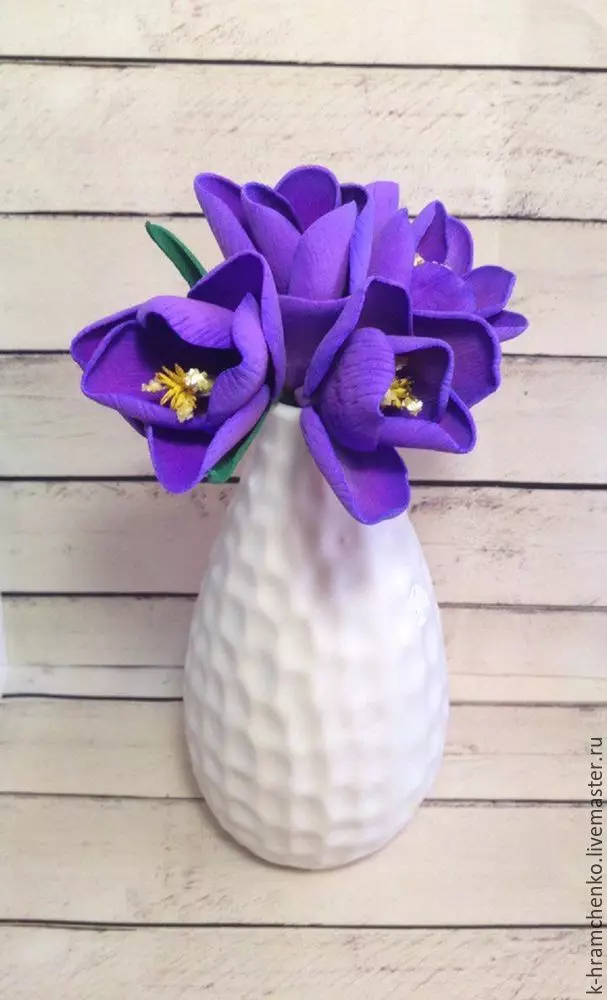
Crocuses
Crocuses are also easy to do.
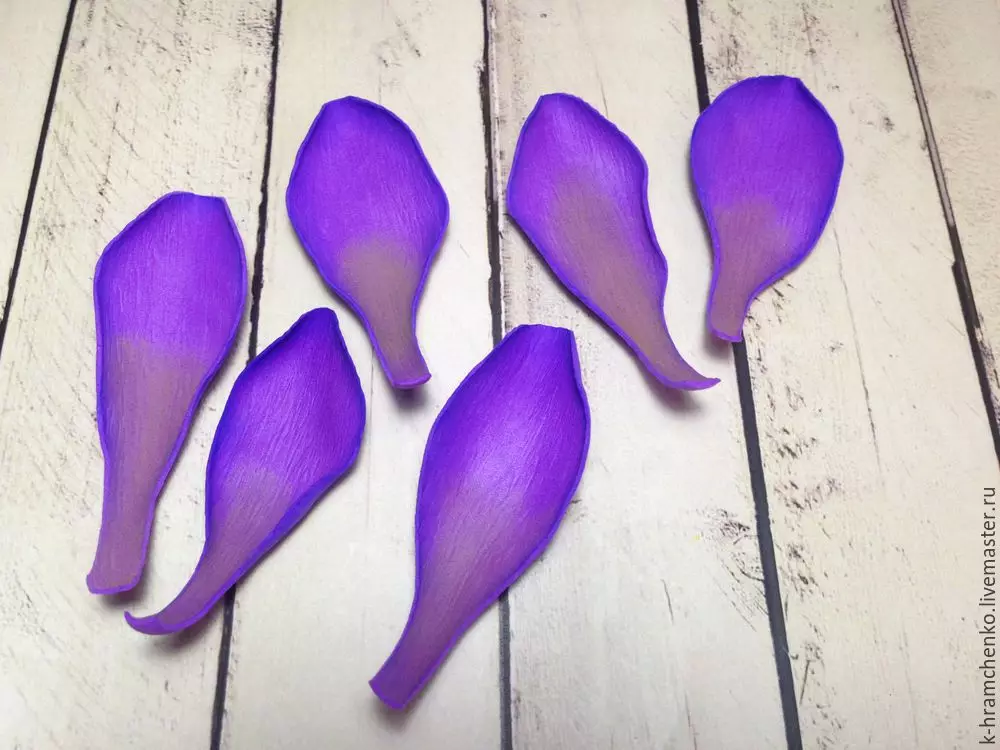
- Make blanks. Rush petals.
- Each component is warm on the iron, press to the corrugated paper sheet. Tonnate the outer half of the petals.
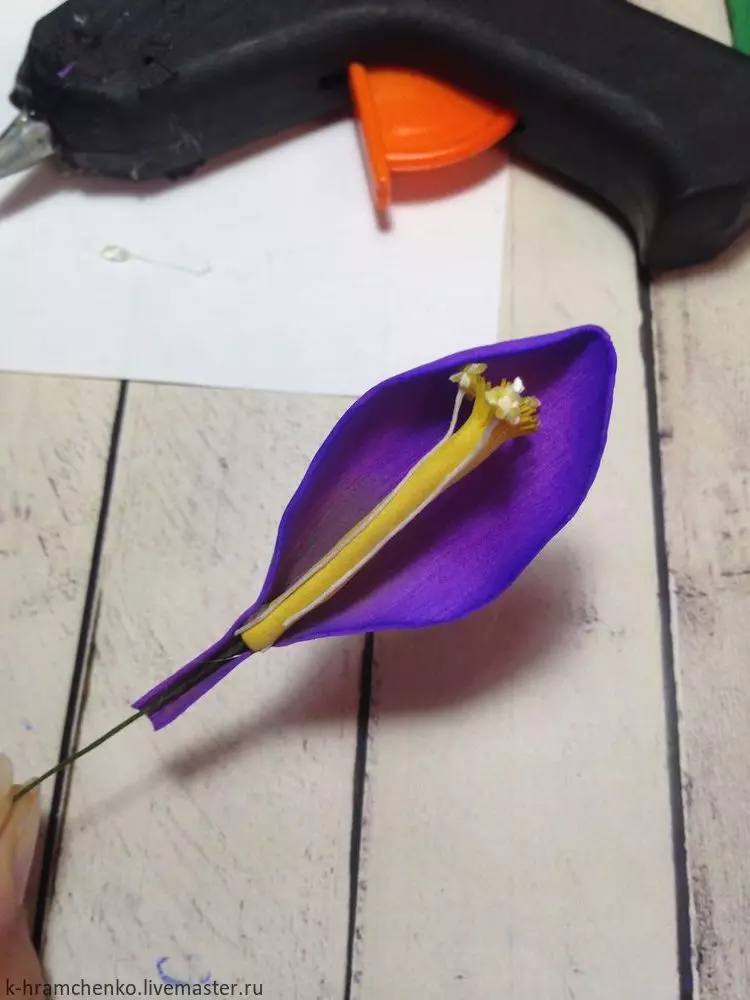
- From Foamiran Yellow Cut a rectangle 2 cm wide and 3.5 cm long. Make a fringe on one of the sides. Attach the yellow strip to the wire. To 1 pestlet should install 3 stamens. Collect bud.
- Take the steep wire with a green ribbon. From the green phoamyran, cut 2 strips, the width of which is 2.5 cm, length 13 cm. Cut them in half. All components bring to the iron, bend. So the leaf of the crocus will be ready.
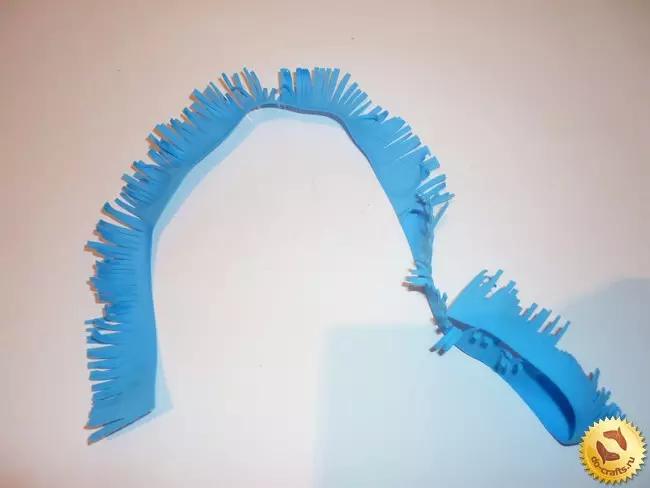
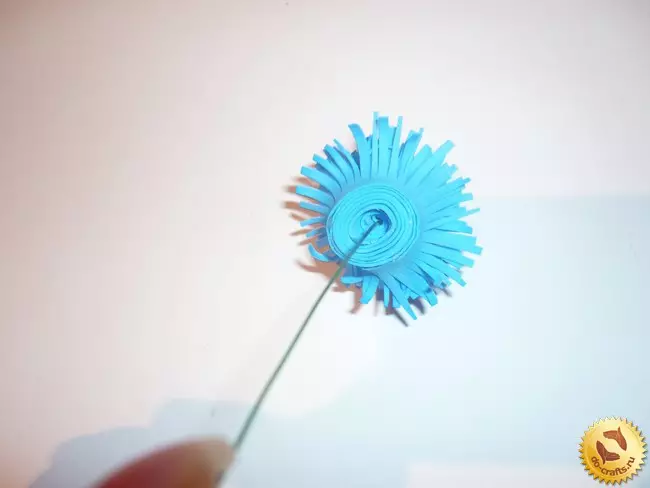
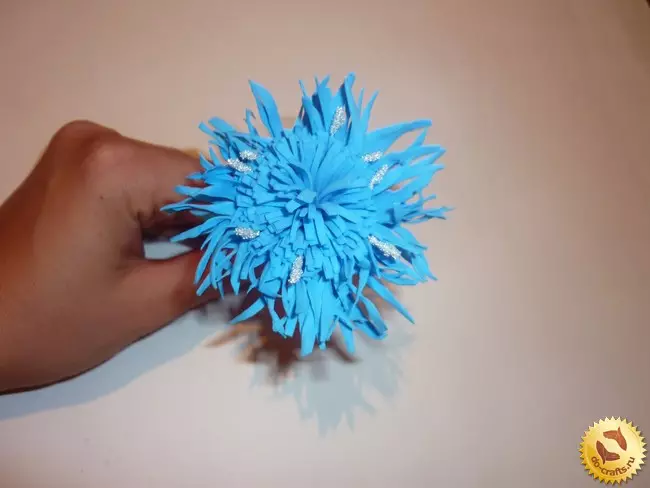
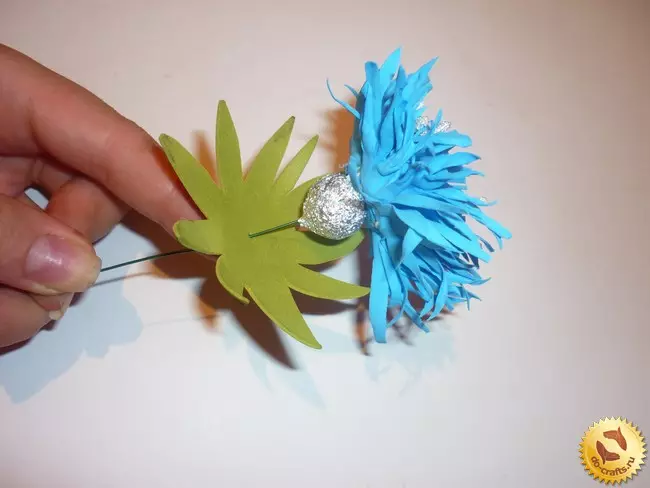
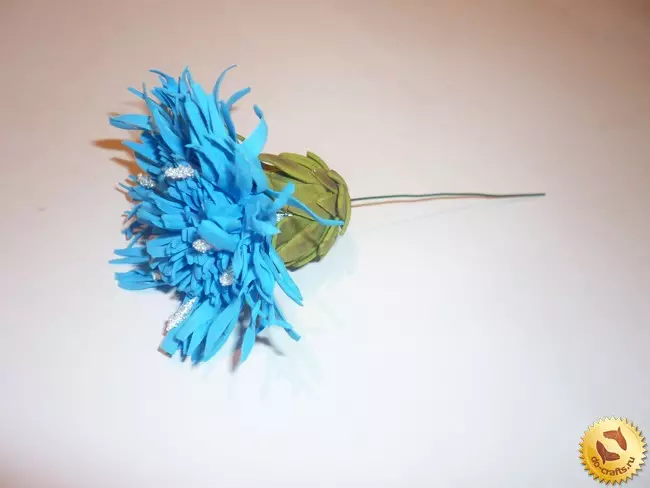
Vasilki
Sleeper blue cornflower from phoamyran is made as follows.
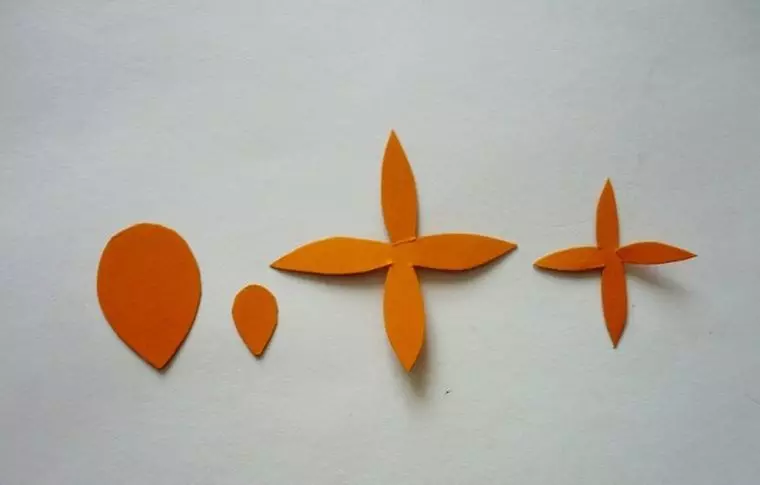
- Make blanks.
- Bend wire. At its tip, install the edge of the blue strip.
- Make 1 turn. Snow-white straws stick to blue teeth.
- Striped wrap around the wire. Lubricate glue.
- After that, you can collect all the details of the colors.
Sakura
Consider a step-by-step MK.
- Draw on a paper sheet of petals with dimensions of 2.5x2 and 1.5x1.2 cm, as well as 2 cups. You will need 15 large and 6 minor blanks.
- Cut petals. Take the color component of the pink shade.
- Attach ready-made stamens to the wire.
- Remember the green cups in your hands.
- Around the stamens alternately lock the large petals.
- Small components must be applied to the iron, and then glue on the wire without stamens.
- In the center of the Chashelistic, you need to pierce with wire, and then move to the bud.
- Wrap the stem ribbon. Collect all the flowers in a single branch.
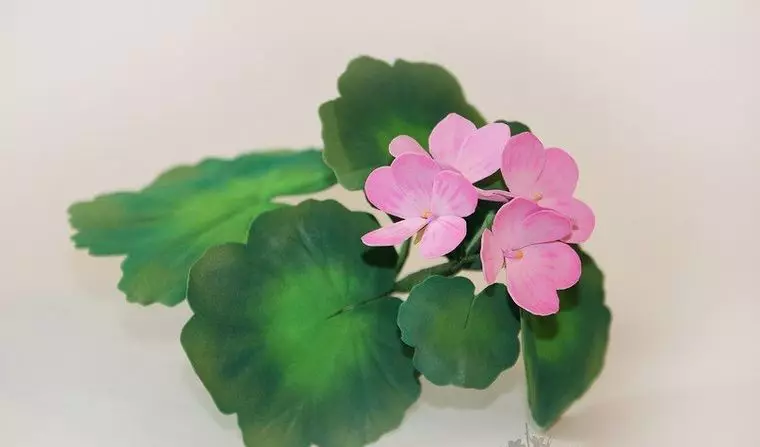
Geranium
This flower from the Foamiran is made a few steps.
- First, Foamiran cut the petals and leafy plates of the future craft. If there is a need for this, the workpiece must be toned.
- Attach each of the petals to the hot iron. Take the toothpick. Oyssay on the foliage of geraniums.
- Bend a leaf along the big strips, process it on the iron, and then remember through the fingers.
- Thread the edges of sheet plates. Such actions necessarily "revive them".
- Bend the wire at an angle. Leaves attach from the back.
- Take a thin wire and bend it in half. On the part where the loop is located, apply glue. Map detail into the semolina, let's dry. After that, the stamp will be ready.
- Gently wear petals on the finished tuchinka, carefully fix it with the help of adhesive composition.
- Chassels, treated with iron, place on the wire under the geranium bud.
- Form the inflorescence using several small flowers.
Each skelter turns through the adhesive tape of a green shade, attaching foliage to flowers.

Recommendations
Before you begin to independently make artificial colors from Foamyran, it makes sense to listen to some useful recommendations.
- If the Foamiran needs to paint, for this most often use stable acrylic paint or pastel. The material can also be successfully painted using gouache, watercolor, multi-colored sequins or watercolor. But it must be borne in mind that after painting the products become disposable - the dust will not succeed with them, because because of this, the coloring layer will flow.
- Bonding a variety of applications can be carried out not only with the help of adhesive composition, but also threads with needles. Carefully made stitches will be no less reliable as a fastener.
- It is possible not only to make a certain form of details from the phoamyran, not only with a hot iron, but also a lit candle. If you have chosen the second method, it is necessary to follow the safety instructions and act as carefully.
- Starting work without pre-prepared templates and schemas should not be, especially if you are a beginner master. However, these foundations can not only download from the Internet, but also sketch yourself - you can adjust the size and forms of future elements of homemade flowers.
- It is not recommended to use Foamiran, the thickness of which is less than 1 mm. From such a material will turn out not the most durable and durable products.
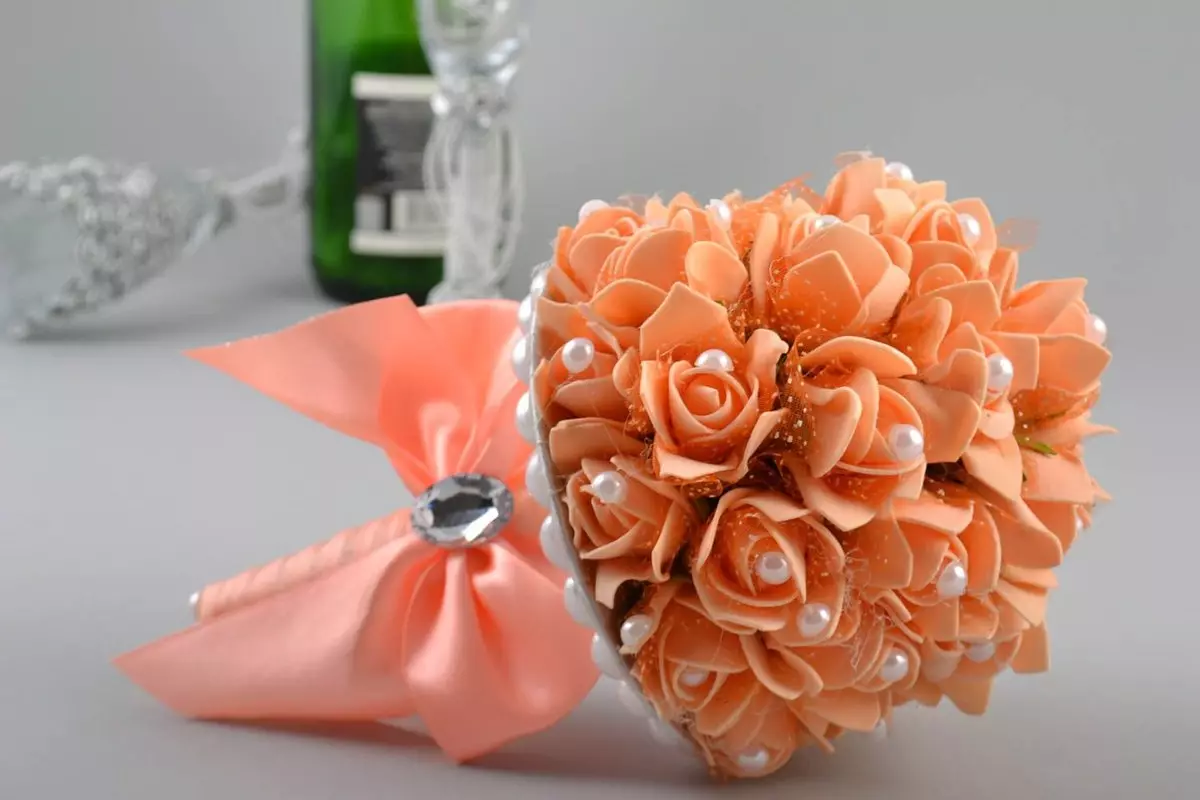
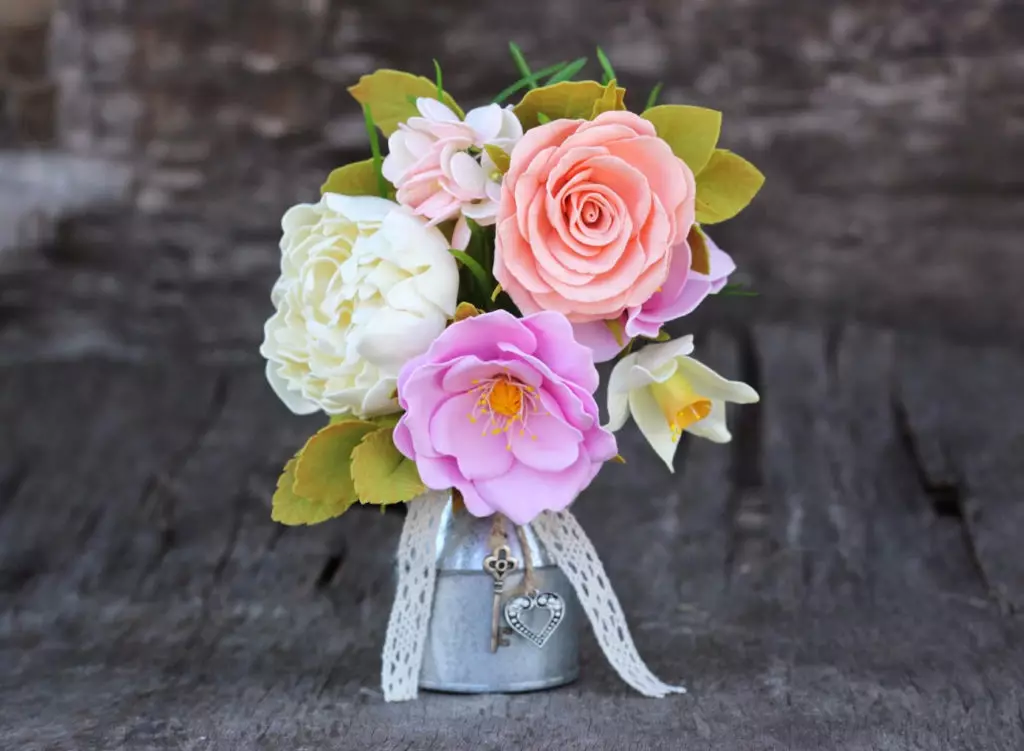
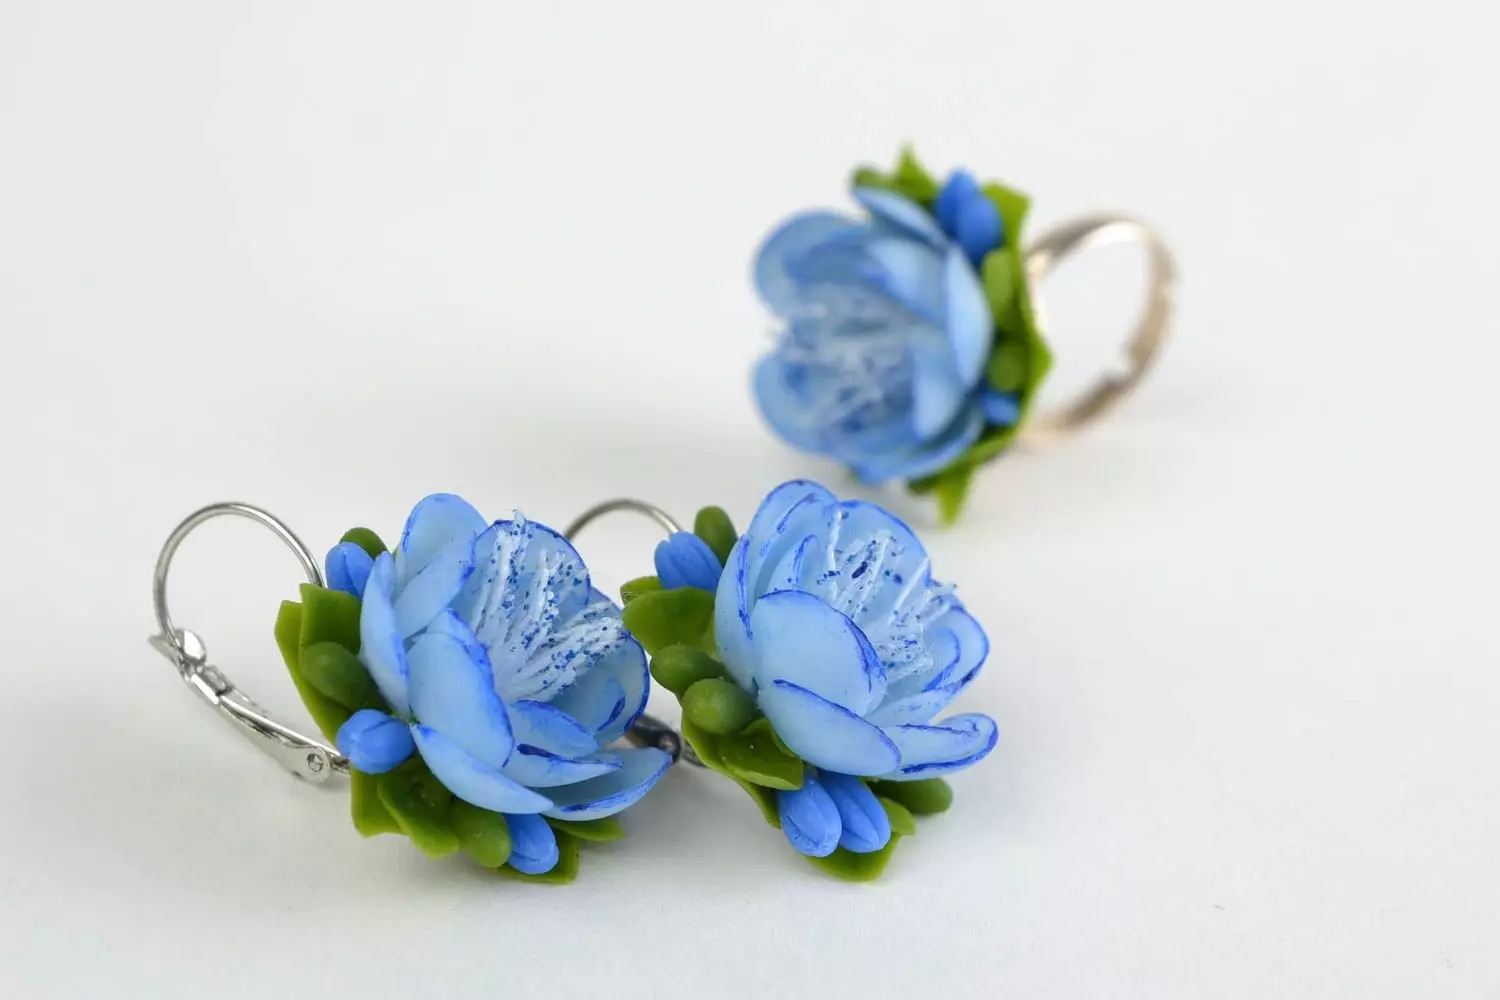
- Foamiramic colors can decorate a variety of items. For example, it can be photo frames for placing on a wall or a table, earrings and necklaces, panels and paintings, clothes and shoes, hairpins and rims, interior items. With such interesting additions, many things are gaining more interesting and attractive. The main thing is to make a phoamyran flower for all the rules - then it will be wonderful.
- To give the Foamyran, one or another should be as long as it remains warm. Do not wait too much time. Cold material to handle is useless.
Master class on the manufacture of colors from Foamiran, see the following video.