
Teacher's Day for many - a bright and joyful holiday. School is an integral part of our life. Everyone passed through her walls, then drove their children there, grandchildren. That is why on this day everyone wants to congratulate, thank the teachers, and the postcard made by the hands of students is the best and most sincere gift.

Simple paper options
Teachers spend a lot of time with our children, sometimes much more than parents. After all, the older class, the more difficult the program, and more hours the child spends on the walls of the educational institution. In 1994, on October 5, in our country was officially recognized as the Teacher's Day.
Over the years, certain traditions have developed - bouquets, congratulations, concerts from students and, of course, souvenirs - postcards made by their own hands. What exactly depends on the age of the child and his skills.
Parents' help in this case is simply invaluable. With their participation, even an elementary school student will be able to make a beautiful greeting card-congratulation not only for teachers, but also for birthday, New Year and any other holiday.

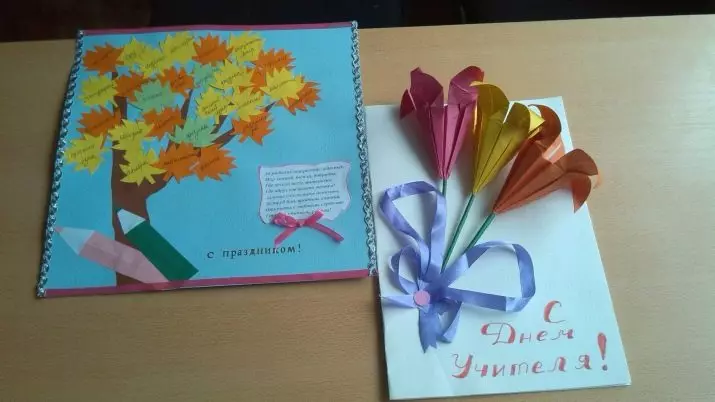
Postcard-drawing
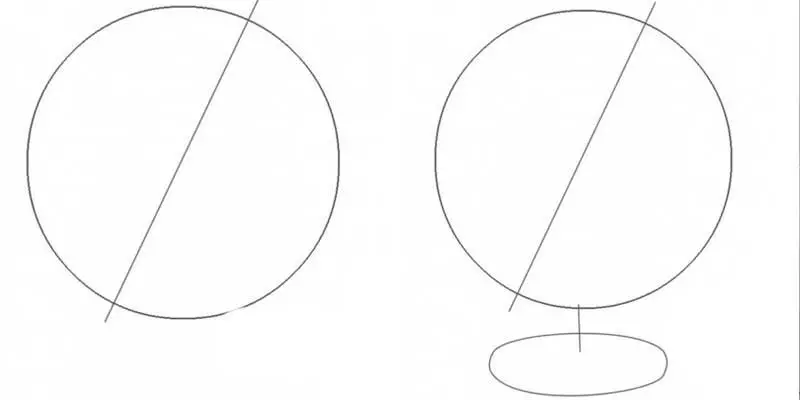
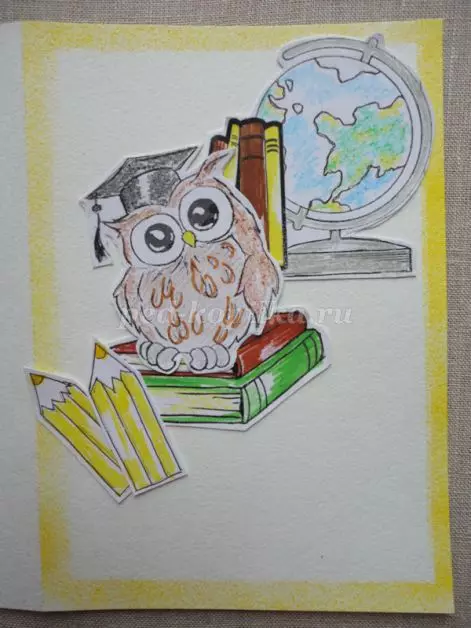
It is difficult to find a child who does not like to draw. Teens are already drawn much less, but small children adore pencils, markers, paints. Therefore, send the child's passion to creation and help him make a greeting card greeting with a globe and flowers. Entertainment, beautiful and topic.
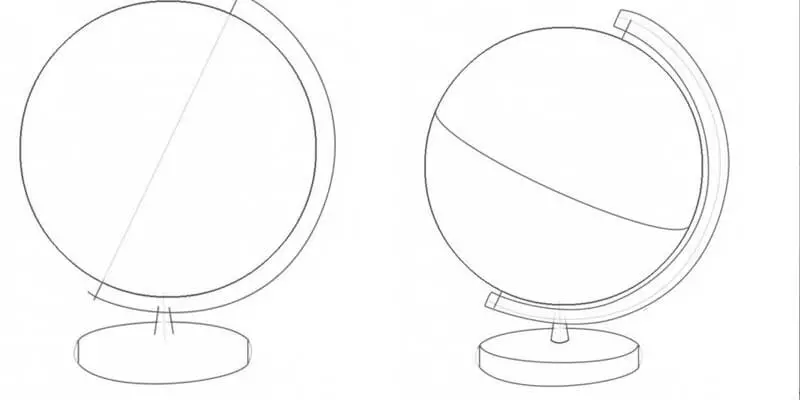
- With the help of a circulation, it is necessary to draw a circle on a sheet of thick paper - it will be a globe.
- Now the stand turn is to draw an oval under the circle by connecting it with a circle.
- Through the center of the globe, you need to draw a line, this is the land axis (by the way, here is a great reason to tell the baby what is a globe).
- The edges of the line are connected by a double half-door.
- The globe itself is ready, now you can proceed to the drawing of the continents - it does not necessarily seek the exact image, the mainland can be depicted as imitation and sign for a more accurate definition. Let the child draw them as it can, thanks to this, the postcard will become even more soul.
- After the continents are drawn, the oceans will remain.
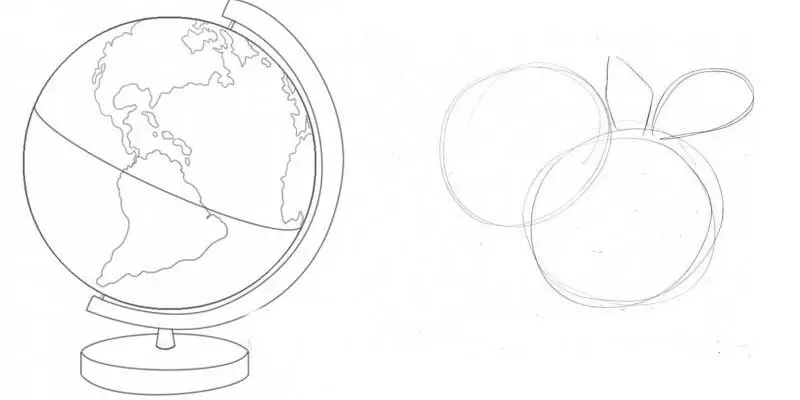
Globe is ready, now it's about flowers that will be located next to him.
- It will again need a circulation - it is necessary to draw two circles with it, and one must overlap each other. Inside each draw a few additional circles, each less than the previous one. With their help, it is much easier to draw numerous rows of petals.
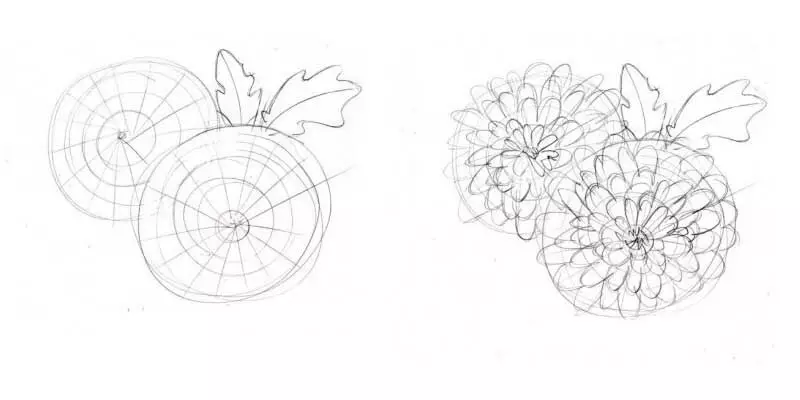
- You can start drawing petals from both the center and from the outskirts. It is more correct to do this from the center, then the inner petals will not be blocked by external. If you start drawing from the outer edge, then each inner row will fall on the already drawn, and the lines will be shifted. During drawing, it is necessary to remember that the petals in the center are the shortest, and the external is the longest.
- After the ball of chrysanthemum flower is drawn, you need to paint several leaves to it.
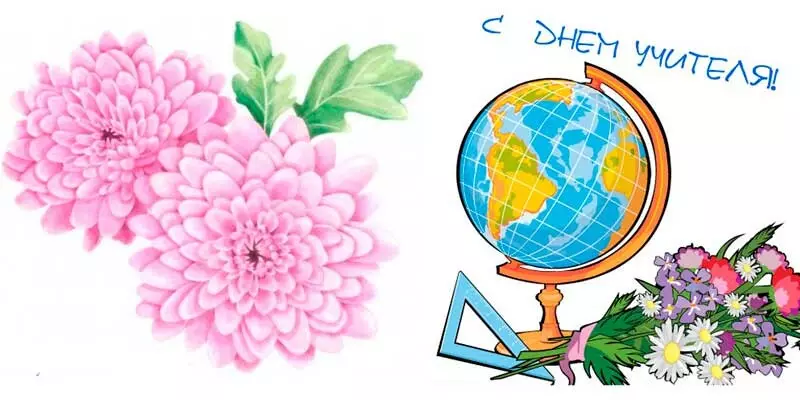
To the picture received a complete view, it will remain to draw pencils, a ruler or triangle, a bouquet of flowers near the globe - here you can give the will of fantasy. But the main thing is to write the name of the holiday "Happy Teacher's Day!".
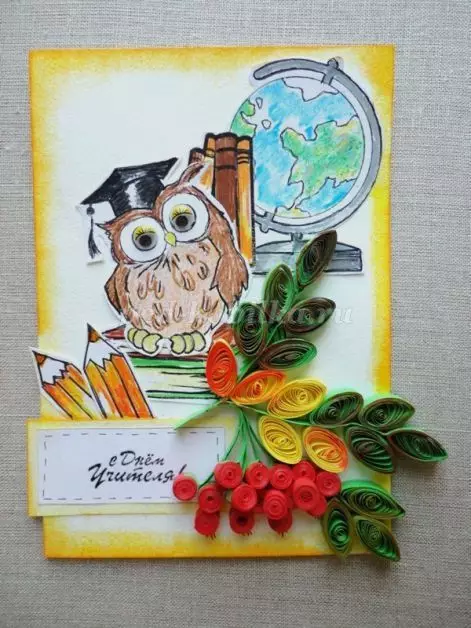
The proposed option is not the only one. Instead of the globe, you can draw owl, because this is a symbol of wisdom. And to make it it was easier, the diagram of its drawing is proposed below, as well as several other schemes, with the help of which the child can learn how to draw a lot of items, such as a book. It is easy to draw it.
- The first vertical line is carried out.
- Then, with each side draw rectangles-cover.
- After that, you need to draw pages, and therefore add several rectangles.
- Now it remains to draw a semicircle below, as it happens when a fat open book lies on the table.
It will remain to arrange a thick line cover, paint the drawing. You can toned pages and write congratulations on them, arrange the field around the book with small images of school supplies.

Applique
An excellent gift of the teacher of junior classes is an application made by the hands of his disciples. For example, a medal socket with an inscription and thematic image in the center. Each drawing can symbolize the subject that teacher teaches. For example, a soccer ball on the medals for physical education teacher, zigzag lightning for a teacher in physics, a chemistry flask, a microscope for biology, etc.
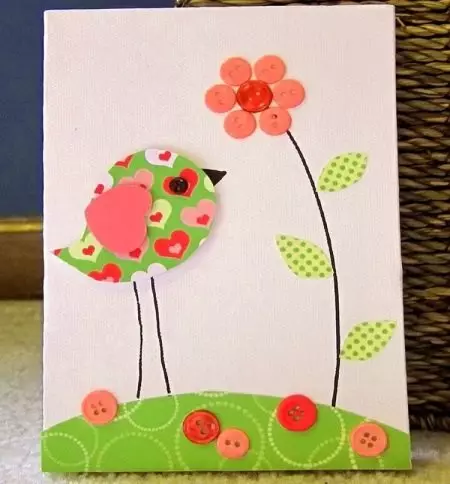
Merry Applique "Bird, Buttons, Flower" - just for young students. Buttons need to take the most ordinary, small, with through holes - those that are sewn into the shirt. The main thing is that they were multicolored, and the brighter, the better.
- As the basis, you can take a tight paper sheet for crafts, color cardboard.
- Now you need to draw and cut the bird. In this option, it looks like a droplet. It is worth allowing the child to paint it yourself and cut it, because this form is invented specifically for it - a completely simple geometric pattern. And if the line went somewhere that, it's not a trouble - "I will master the road," and the hands of the kid will gradually become more confident.
- Next, you need to draw and cut the wing in the form of a heart.
- Of the finished parts lay out the composition on the sheet, instead of flower petals and bird eyes will be butt, after which everyone is glued.
Flower stem, paws, beak birds draw felt-tip pen.
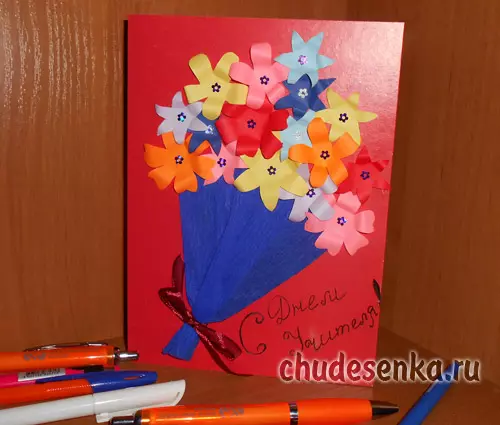
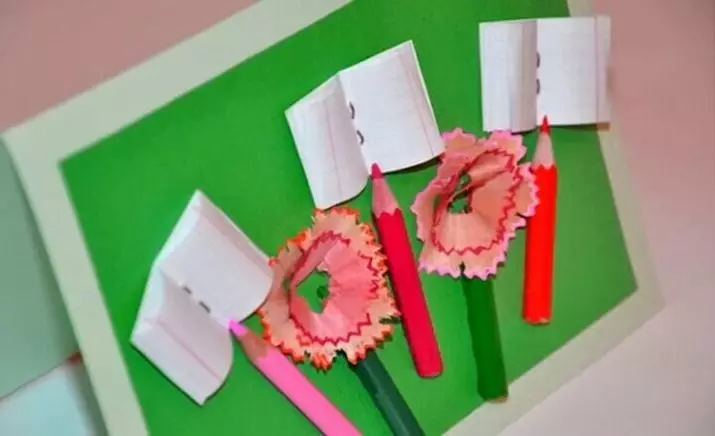
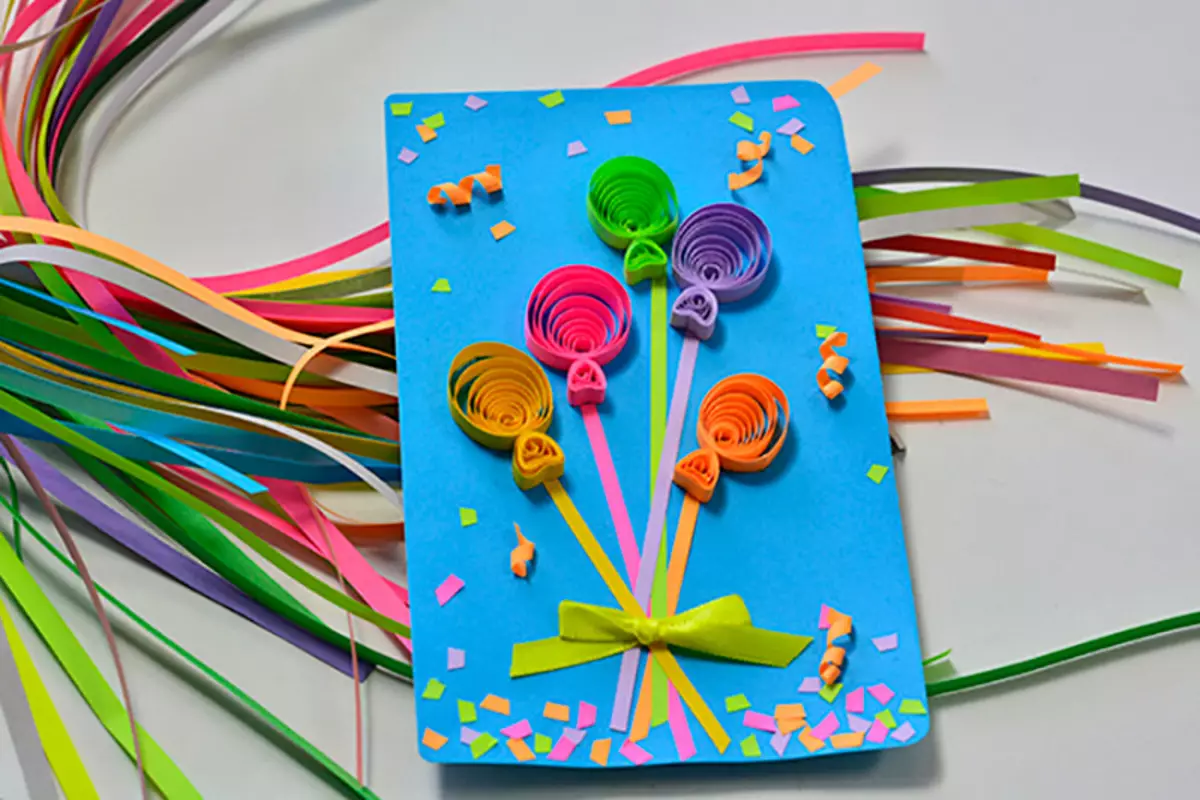
For the next appliqués use pencils and chips from sharpened pencils. Everything is simple:
- on a sheet of paper stick vertically several pencils;
- Flower buds are folded from chips and glued to the tips of several pencils;
- For the remaining gluing pieces of paper, rolled in the form of books and notebooks.
These are funny and affordable postcards can be done with small children who will be delighted with such work. Surely the teacher will be touched to the depths of the soul with such works by their pupils.
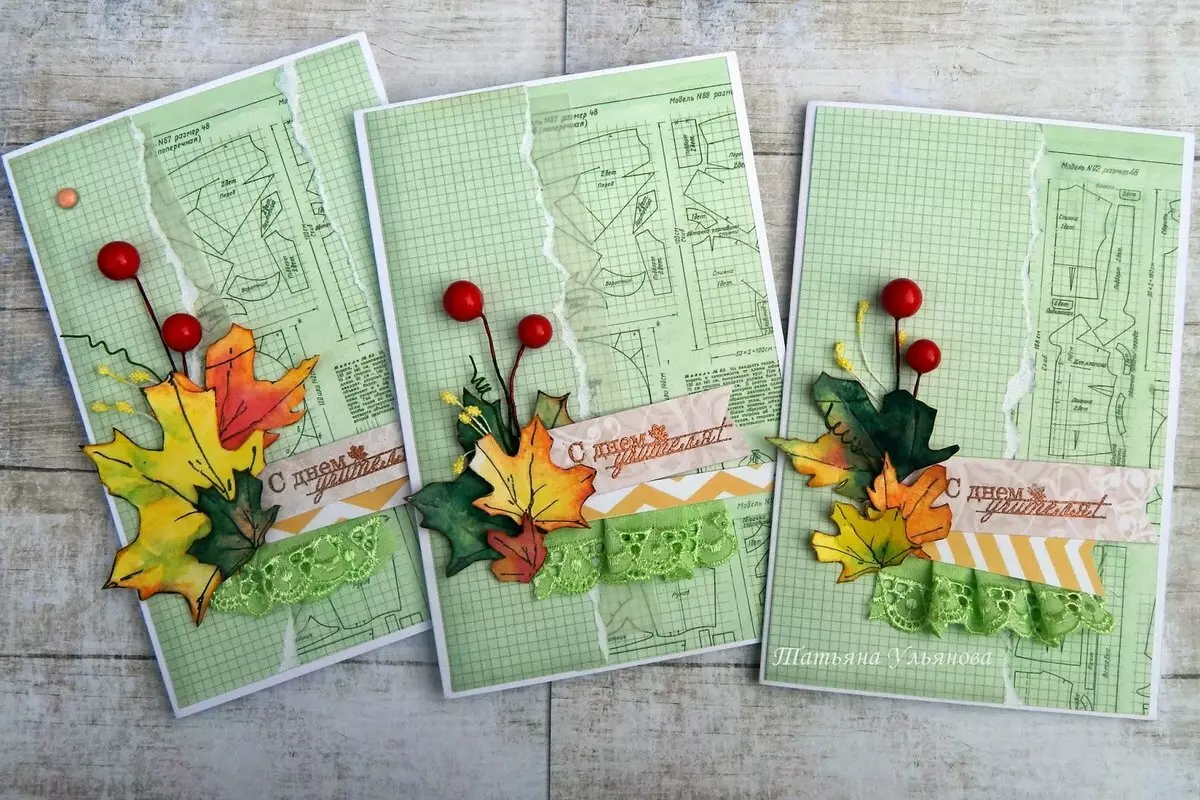
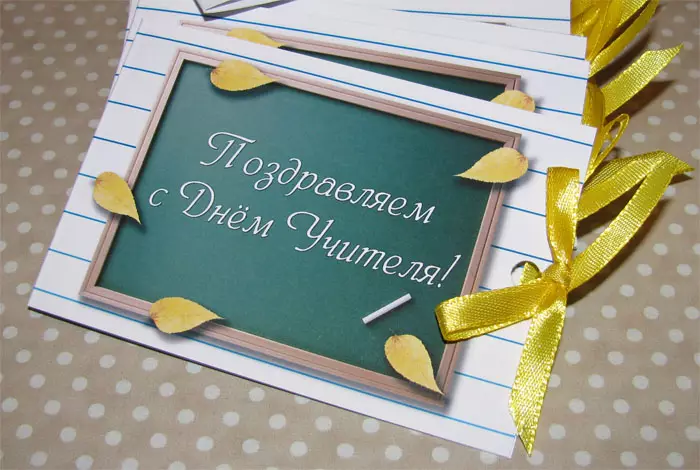
Postcards in the technique of scrapbooking
The next handicap is already harder - it is made in the scrapbooking technique. The proposed master class is devoted to the manufacture of two chocolate cards. As a rule, such a souvenir gives women to teachers, and what could be better than to do for their teacher chocolate.
Necessary materials:
- scissors, simple pencil, glue;
- bilateral scotch, satin ribbons;
- Cardboard or paper for watercolor, paper for scrapbooking.
Chocolate for a small tile at 90
- Chocolate pattern cut out of paper for watercolor.
- Then the stupid side of the scissors "clarify" the fold lines indicated by the dotted line.
- Make bends on the outlined lines and get a harvesting of a chocolate.
- From the outside of the workpiece sticks to the folding line of a satin tape 50-55 cm - it is possible to do it with glue or bilateral scotch.
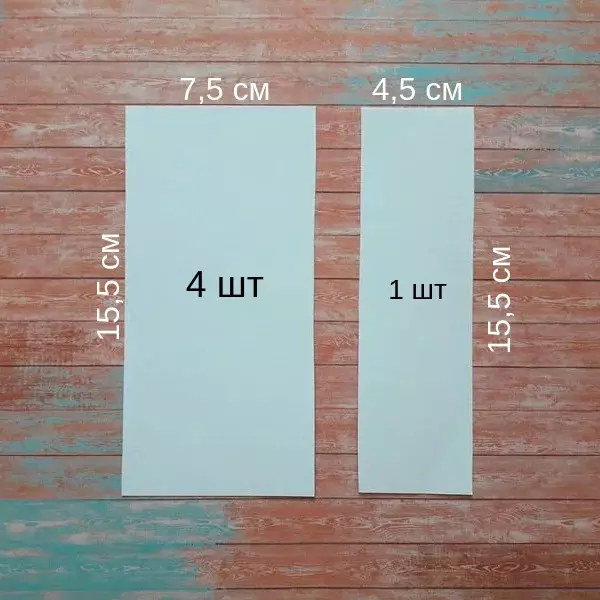
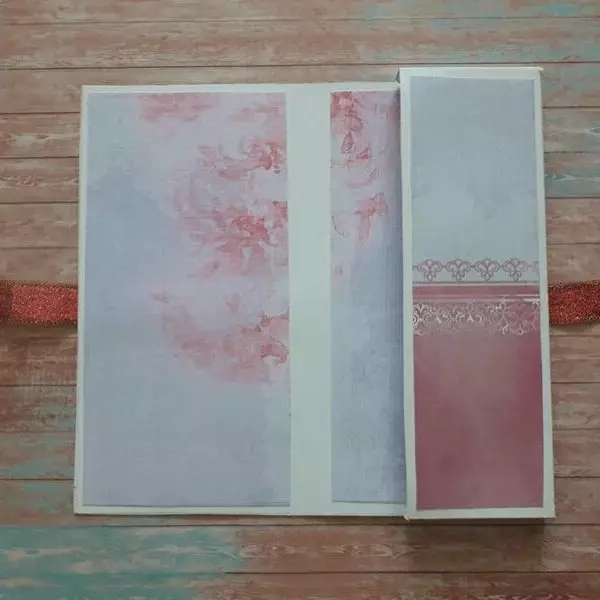
- Now turn scrap-paper is the parts for the decor: 4 wide and 1 narrow strips.
- Two wide strips and narrow glue to the outer side of the chocolate, the remaining wide strips are glued to the inner part.
- Now they declared "pockets" - glue it.
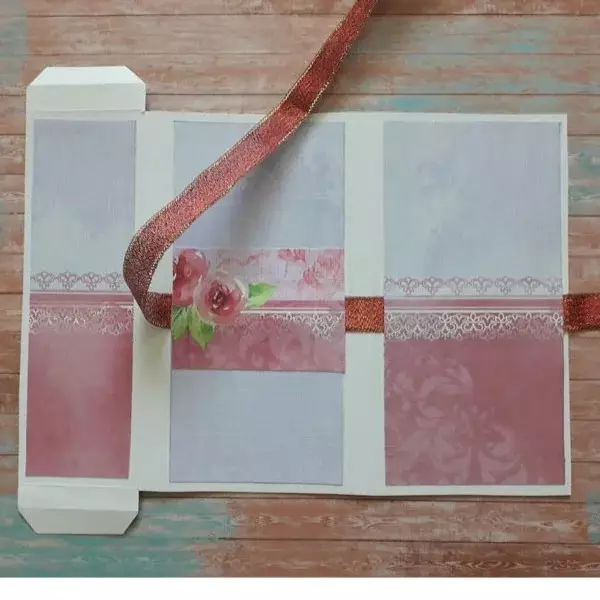

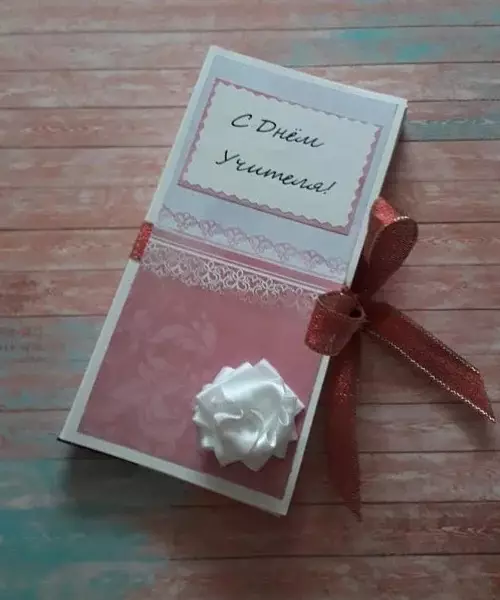
The basis of the chocolate is ready, the time of decorating the product comes. There are no restrictions for fantasy - options are infinite set. You can use rhinestones, minor decorative elements. In this case, a flower rose made of satin ribbon. The inscription is printed on the printer and carved with figured scissors, after which it is pasted on scrap paper and then together with it passed to a postcard.
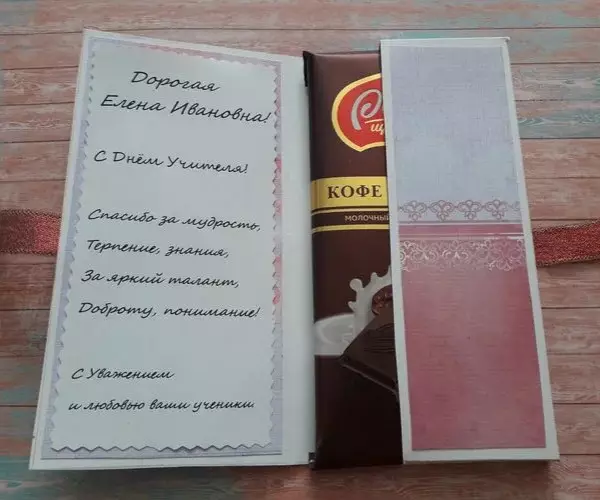
On the folding side from the inside it is necessary to write from the hands or stick printed congratulations. Chocolates are inserted into pockets, and a magnificent souvenir is ready.
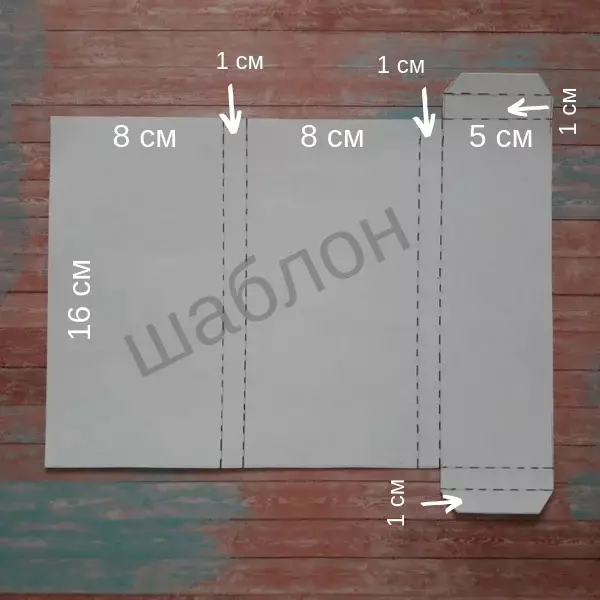
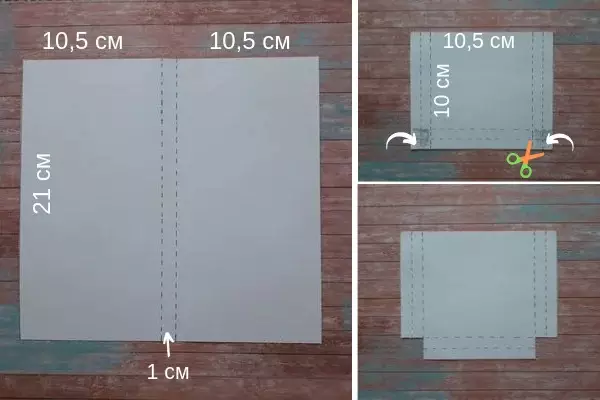
Chocolate for a large chocolate tile (200 g).
- Two templates are cut - their dimensions are given in the photo.
- Those forms that are indicated by arrows, you need to cut.
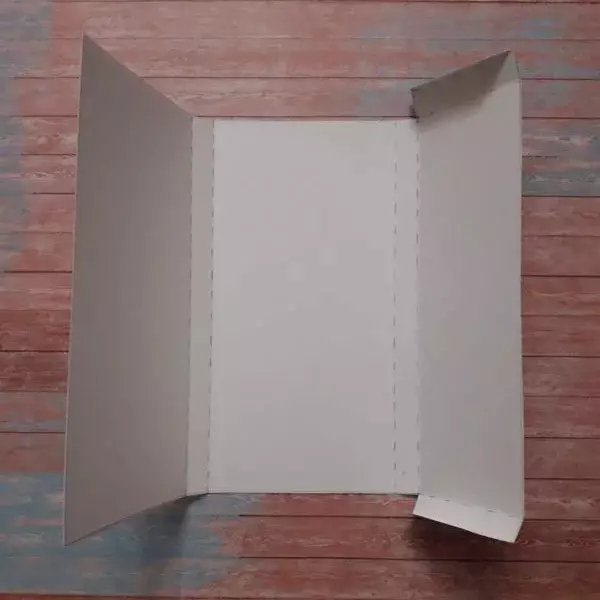
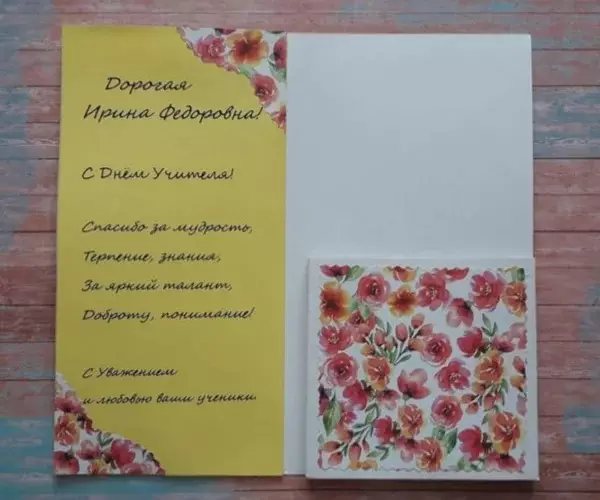
- After that, there is scrap-paper in the course - it is covered by the outer side of the chocolate and pocket.
- On the inside of the postcard you need to make a congratulation inscription.
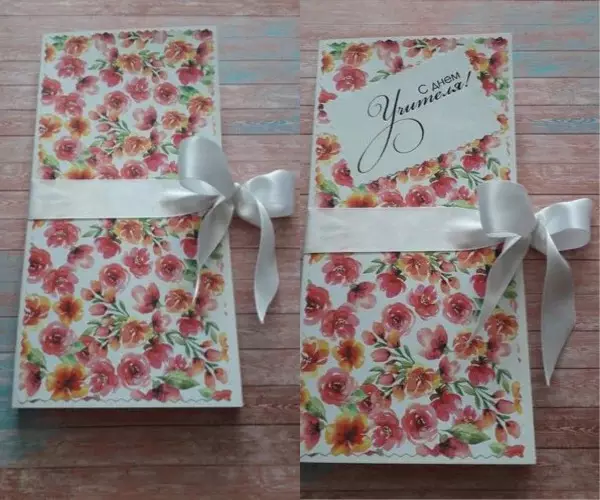
- Then the chocolate is inserted into the pocket, and the postcard itself is decorated with a satin braid.
As a result, a wonderful gift-souvenir is obtained. The very idea of universal - such a gift can be done according to any occasion of mom, sister, girlfriend, etc.

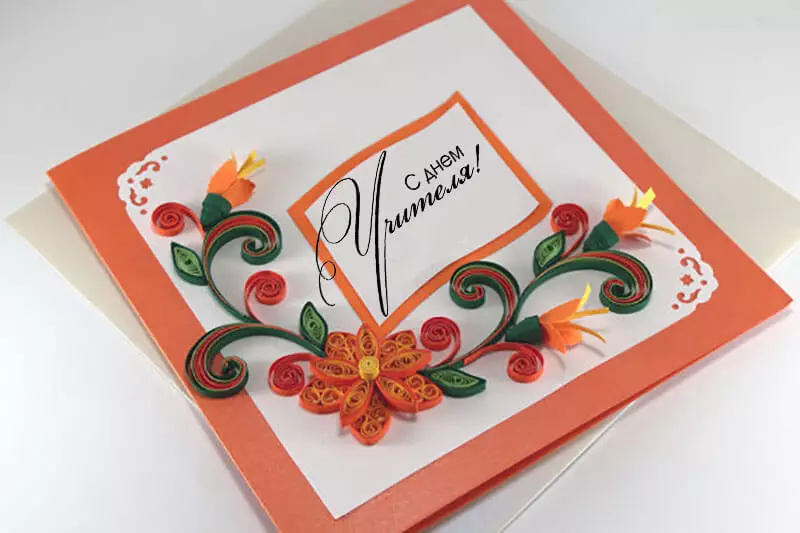
Quilling Ideas
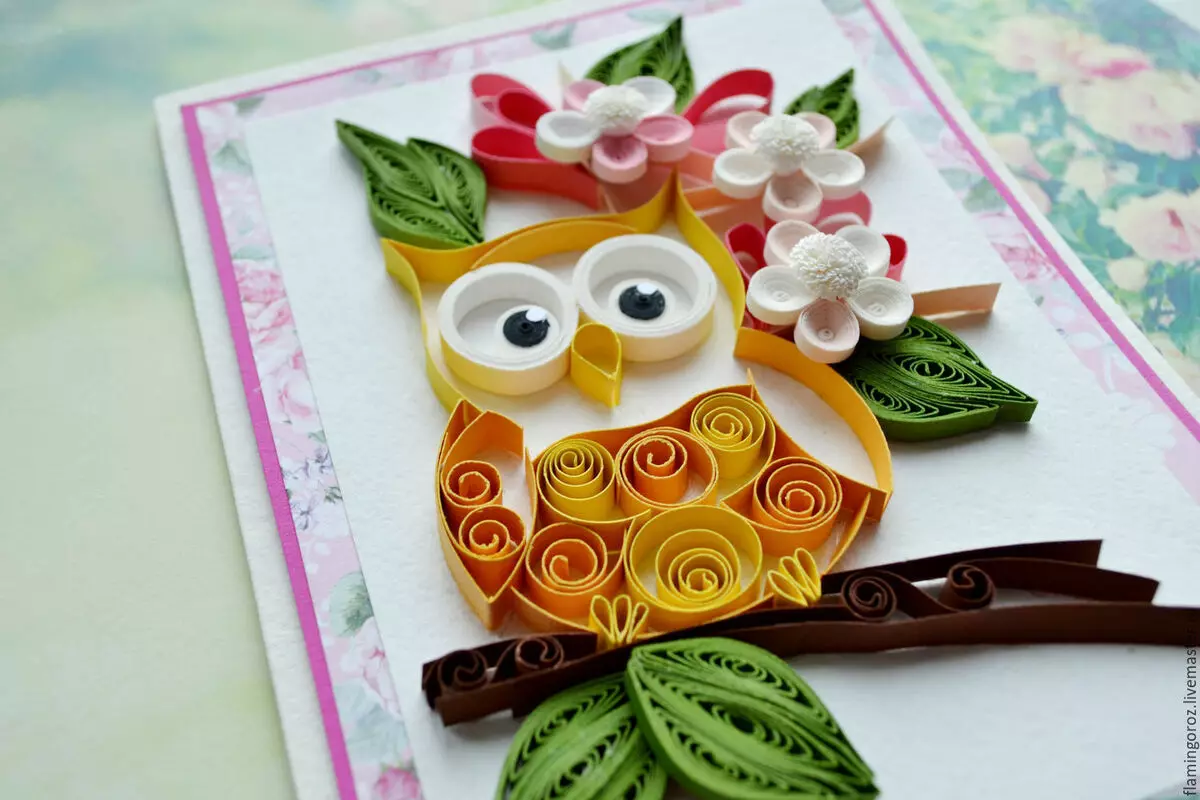
Very beautiful homemade postcards create quilling techniques, which means the manufacture of various compositions from the twisted spiral paper strips. Create your own hands and give a bright volumetric composition to your favorite teacher - which may be more interesting and more exciting ...
There are many options for such crafts, especially interesting postcards are obtained with flowers, because multi-colored quilling paper gives the widest space for creativity and fantasy.
Bell
For the manufacture of postcards in a quilling style, you can take an ordinary colorful paper for creativity and cut it on a strip of 1 or 1.5 mm wide. However, you can buy finished paper for queening, already sliced. If you use the A4 office paper, then the length of each petal will need 4 strips glued together into one long strip.
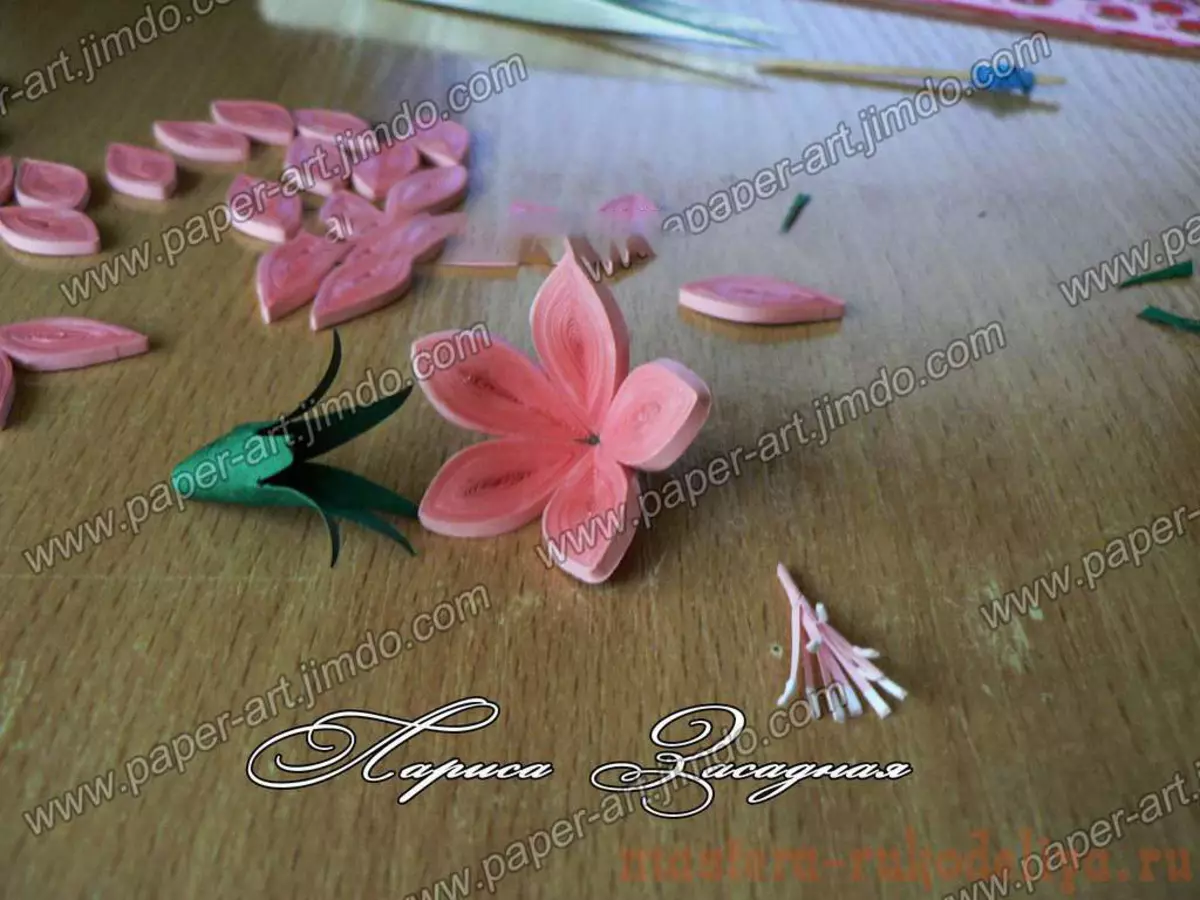
- After the glued bands dried, they are twisted using a special tool in tight spirals, which are then dissolved to a diameter of 1.5 cm.
- After that, they need to give the outline of petals into a slightly incorrect diamond form.
- Each petal is flooded with a droplet of PVA glue and is left to dry (the glue creates a transparent coating that does not allow the petal to crumble).
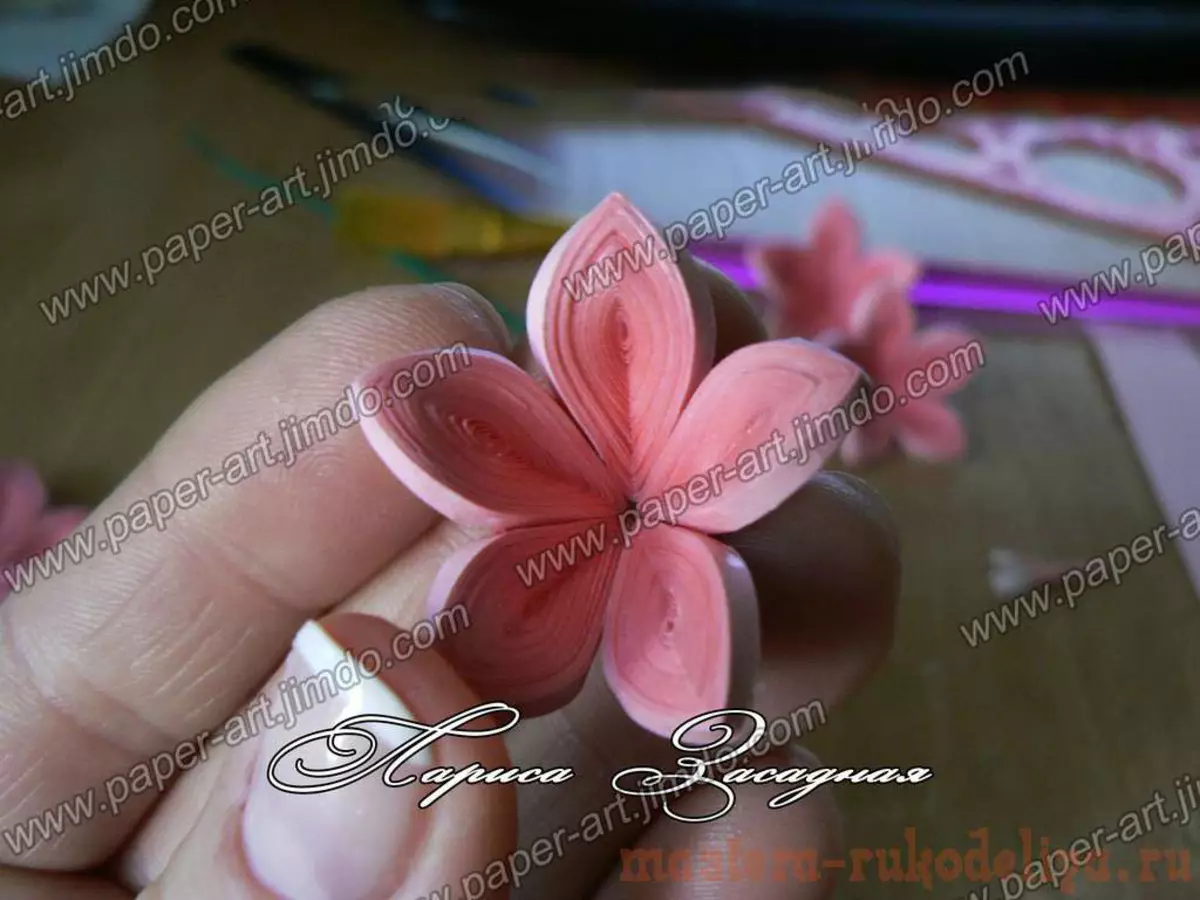
- The truncated petals give the final form, bending them almost in half and bending the tip.
- Five petals glue together, turning the cursed side down - so they smoothly lie down, their parties are tightly in contact. After they are dry, you can glue the remaining parties without fears.
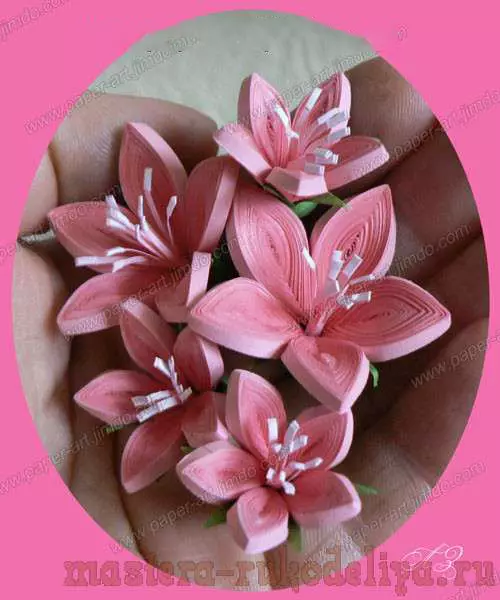
- As a result, the next blanks are obtained, they need a sufficient amount to create a composition.
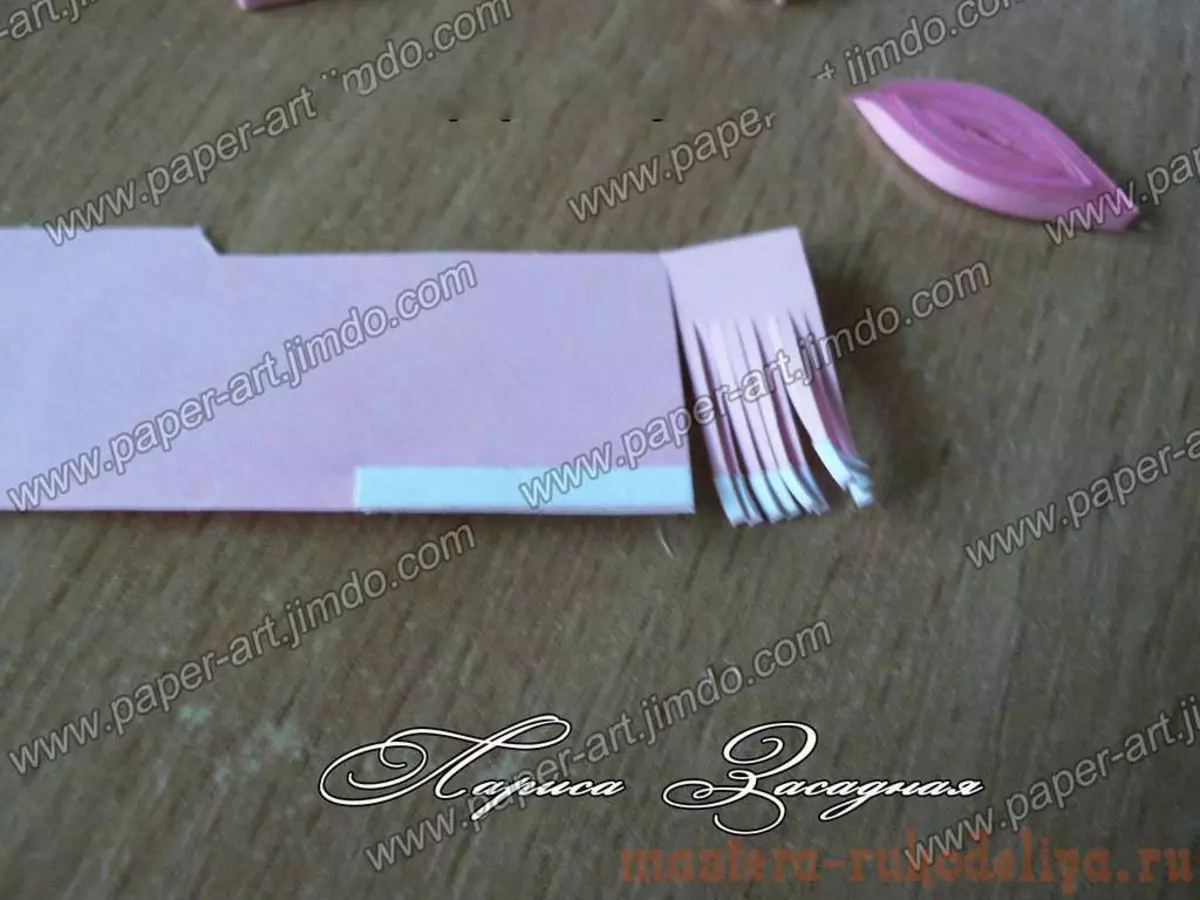
- Now you need to make stamens - they are made from the same paper, only wider bands 200 mm.
- To the pink strip you need to glue a narrow white strip, then it is cut by noodles, twisted and insert into the flower.
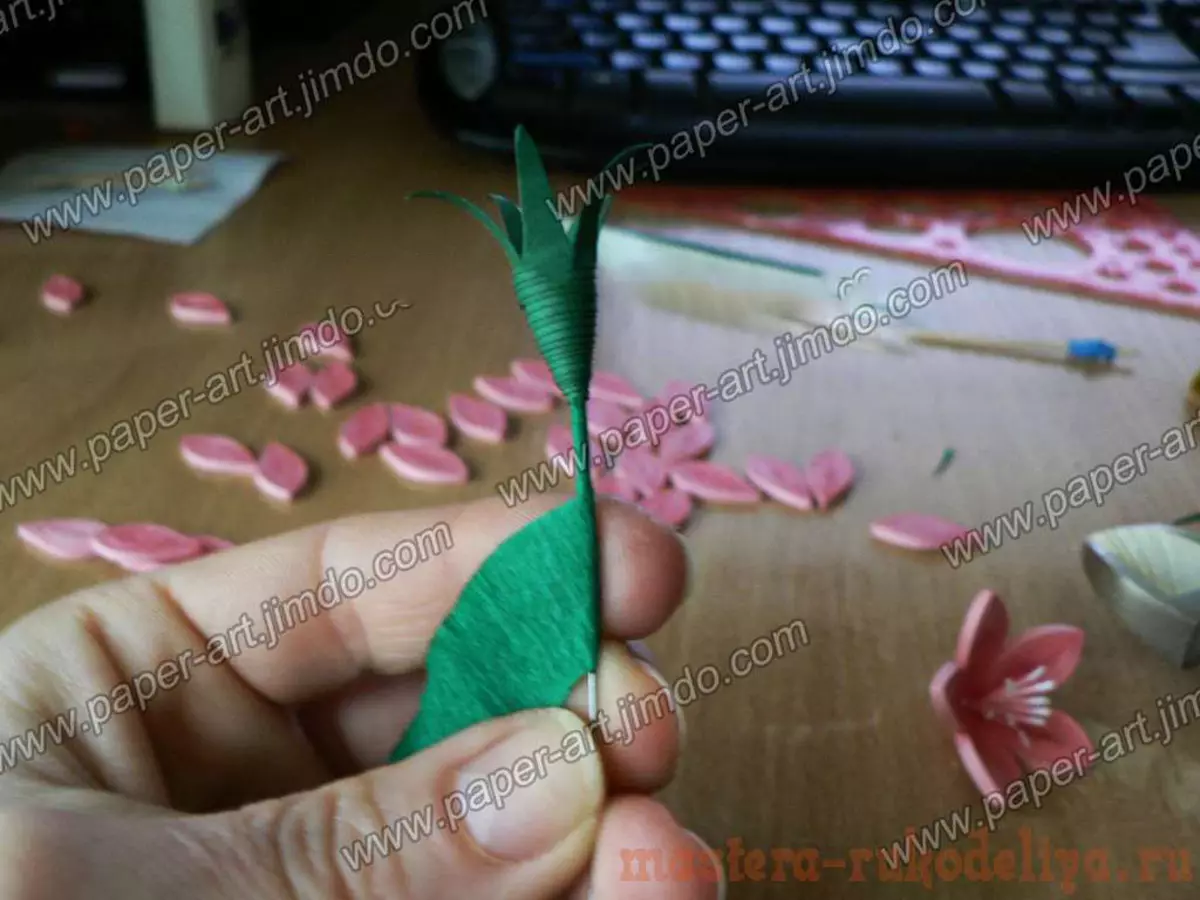
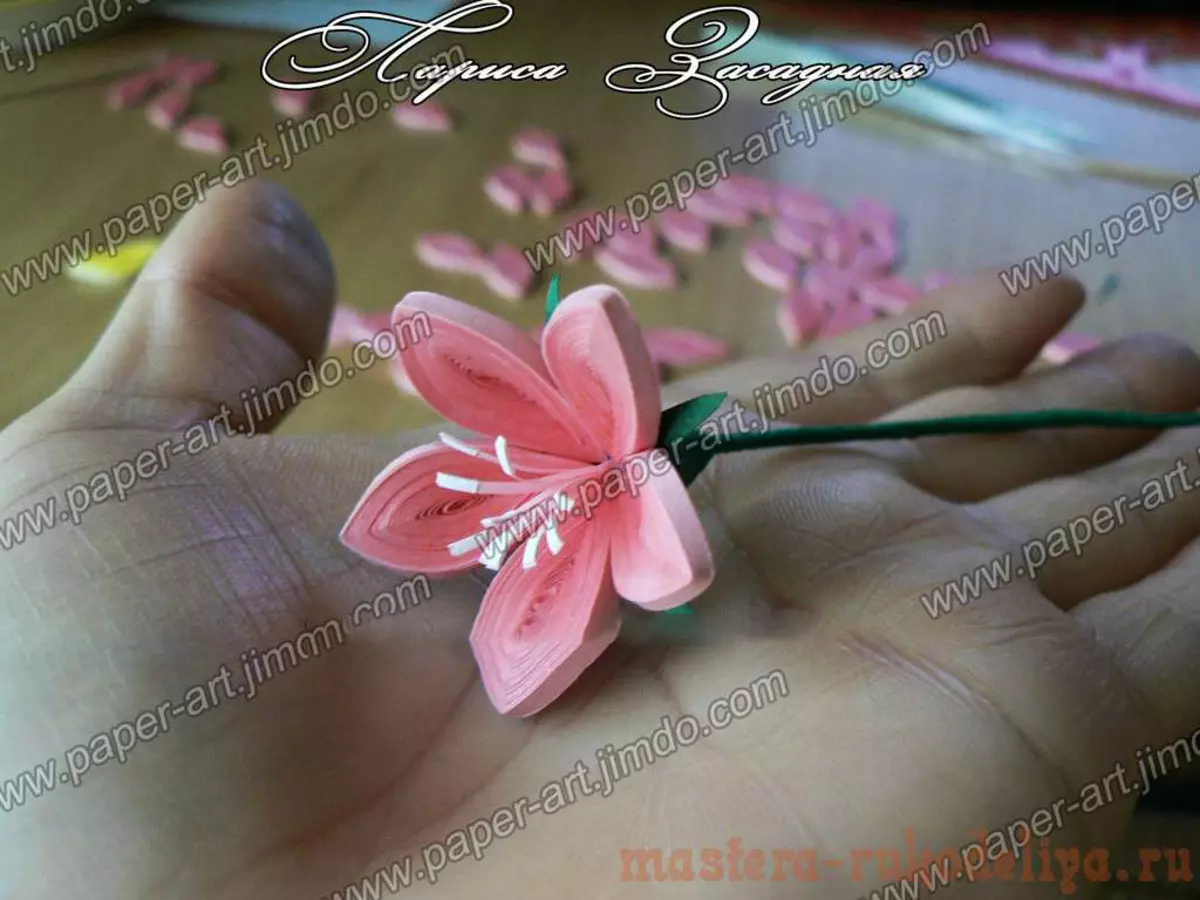
- A cup of green paper makes a cup and fasten it on a wire, fixing the drop of hot glue to sit tightly on the stalk.
- The wire-skeleton itself is wrapped with corrugated paper, fixing it with glue at the beginning and at the end.
After that, it remains to assemble the composition and place it in the frame on the base of thick paper.
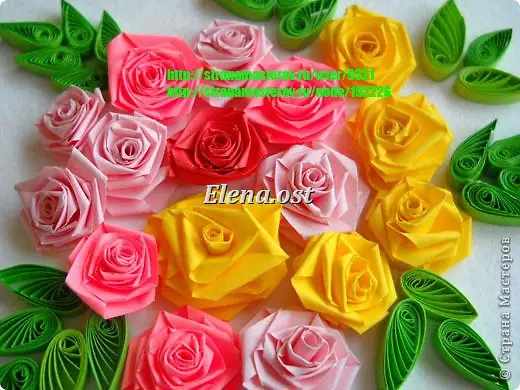
Roses
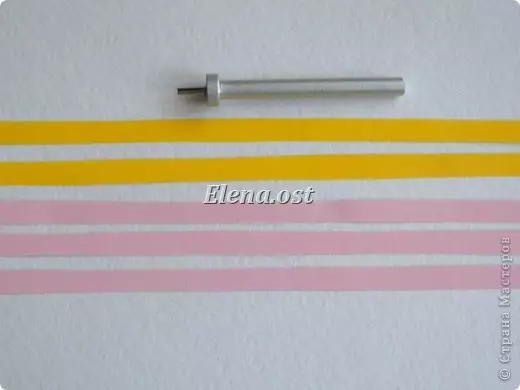
For the manufacture of roses you will need paper strips of colored paper with a size of 6 x 290 mm, a tool for queening.
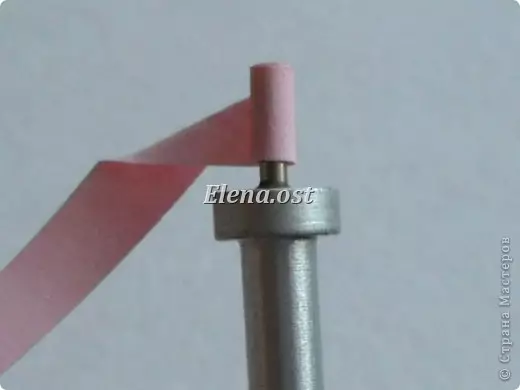
- To begin with, several turns are made in order to obtain a dense roll.
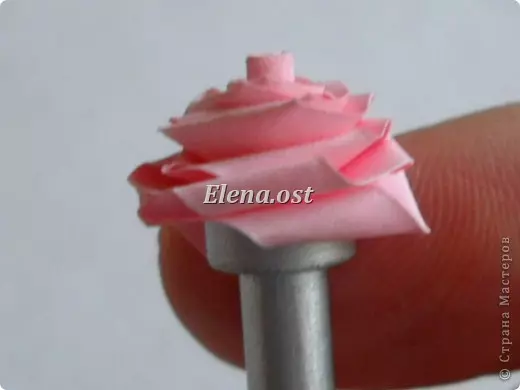
- After that, they make a fold and again the turn, then again the fold-turn, while holding the workpiece with your finger, and so to the end.
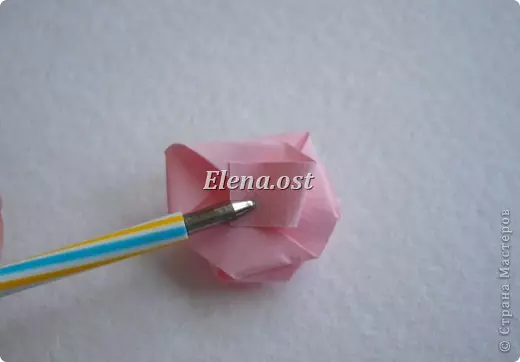
- When the bud is ready, it is removed from the needle, they fix the leap droplet, put under a lightweight press so that he does not break down while the glue grabs, and do the following.
- All boutons are fulfilled, it remains to make several green leaves already on the familiar technology (petals of bells).
Details are ready, it remains to assemble the composition and arrange it with a postcard, not forgetting about the inscription and congratulations.
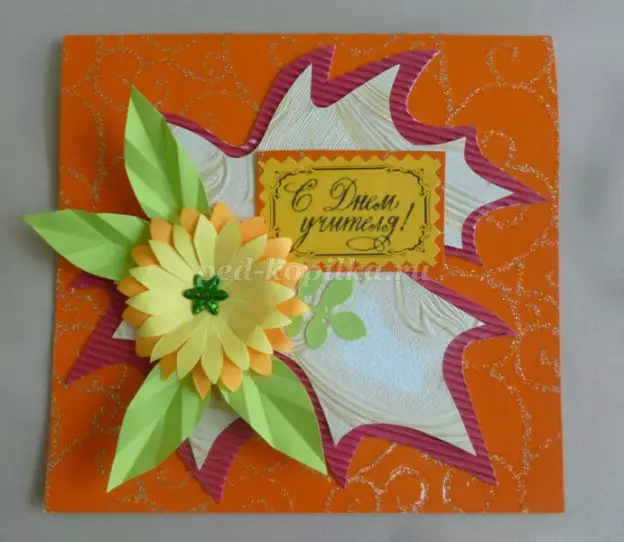
School supplies
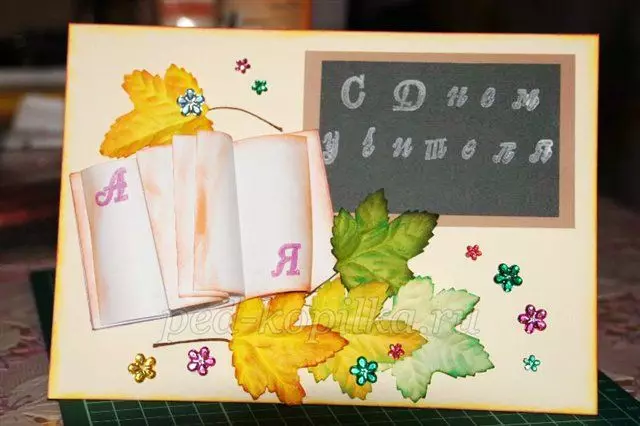
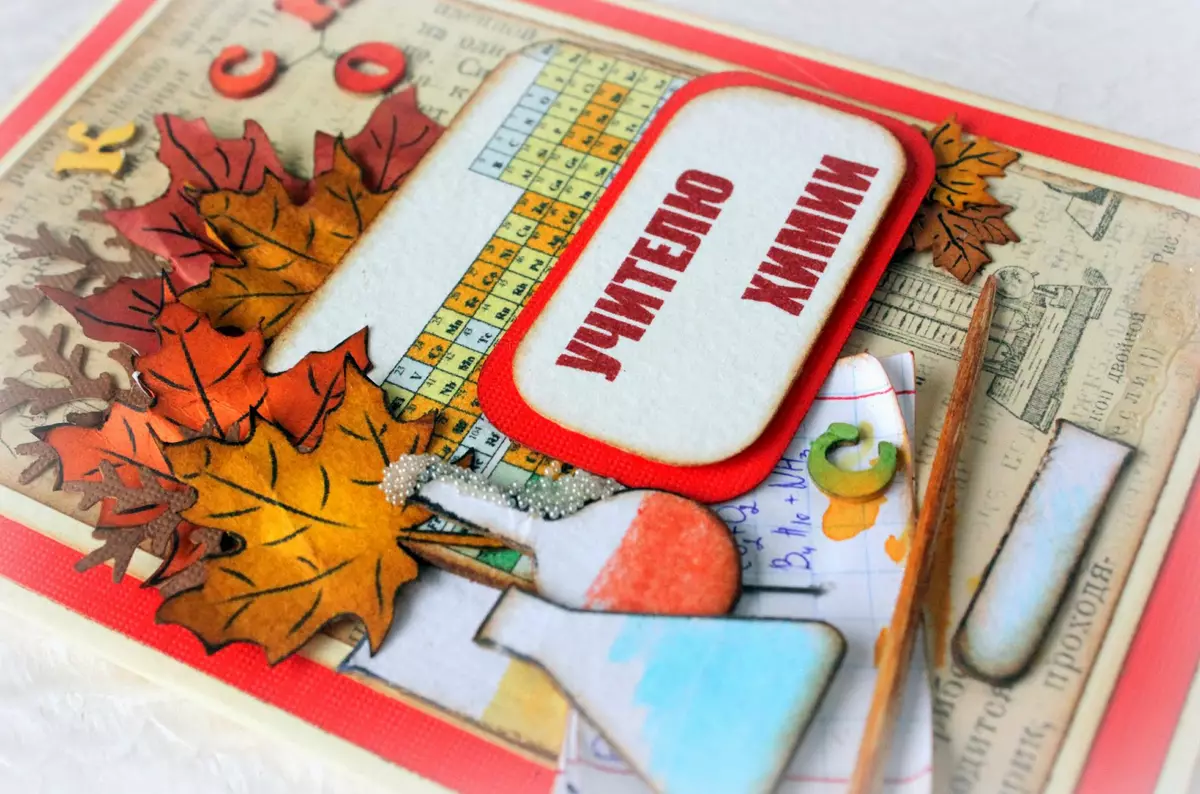
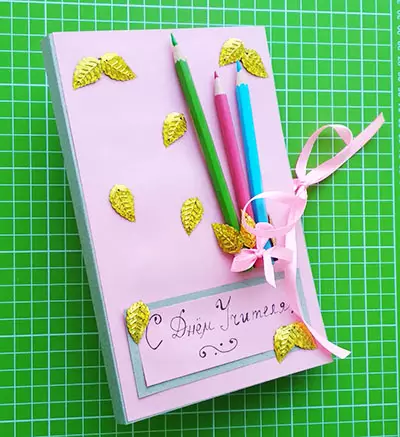
For a diversity, you can make an unusual postcard for the day of the teacher's teacher from a fine cardboard for creativity, issuing it as a visual manual - using a pencil, triangle, transport, line, eraser, carved by a globe and so on.
Master class on step by step. It was decided in advance that the postcard will be performed in 3D technique - volumetric.
- To create a volume on cut from cardboard, the billet make a fold.
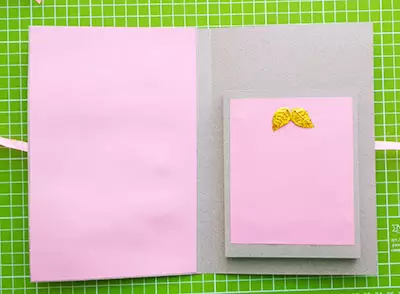
- Inside the future postcard glit pocket.
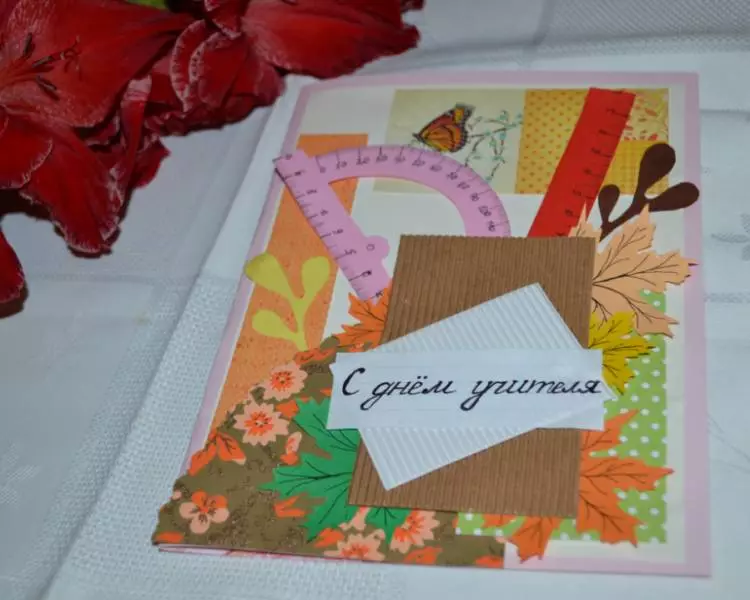
- After that, decorate the inner field with colored paper, cut by maple leaves, are glued with a tape for risks.
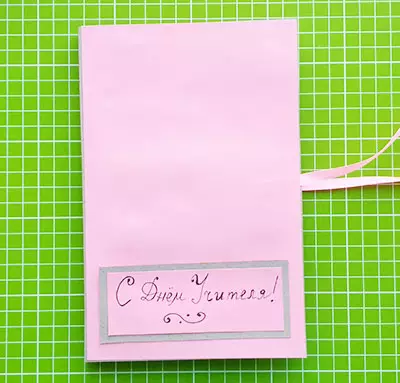
- The outer side also needs scenery. It can be saved with pink or blue paper, depending on who the postcard is intended.
It is necessary to print an inscription on the printer, cutting it with curly scissors and paste. If there is an opportunity to make an inscription from hand with a beautiful handwriting, it will be even better. After that, it will stay to decorate the front side of the postcard with school supplies.
Volumetric crafts
If we talk about the surround crafts in the form of cards, then a very detailed master class is offered to make cards with a teacher at your own hands.
Necessary materials:
- Colored paper and cardboard for creativity;
- Colored and simple pencils, marker, glue, line.
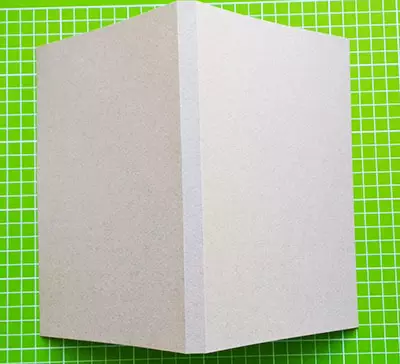
How to make a 3D-postcard stages.
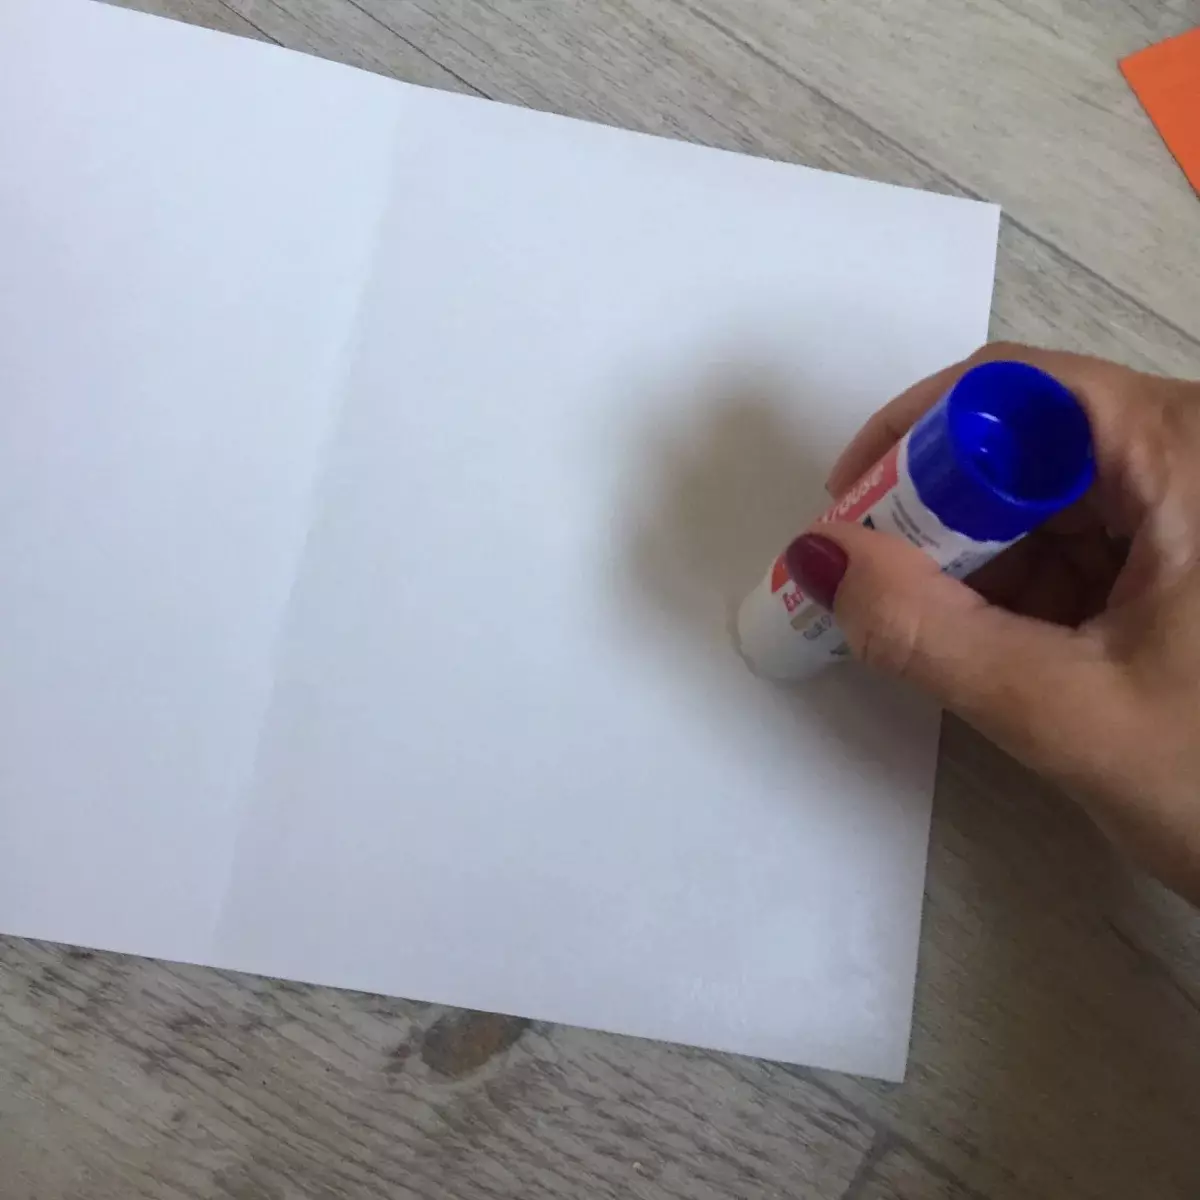
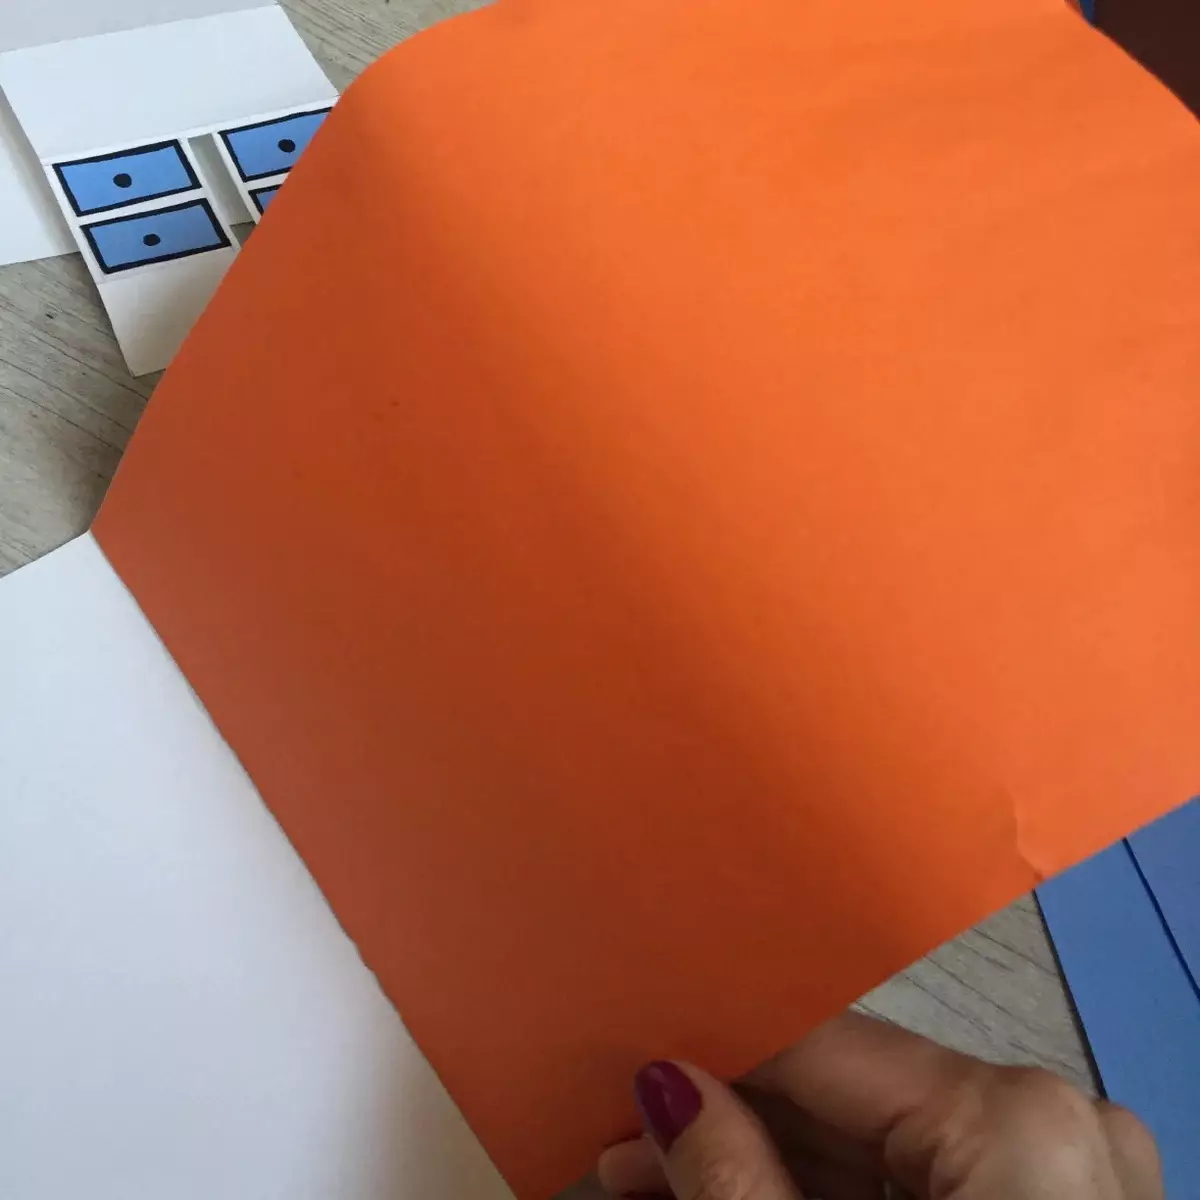
- White cardboard sheet bend in half, one side is smeared with glue, after which they stick the colored paper and cut off half.
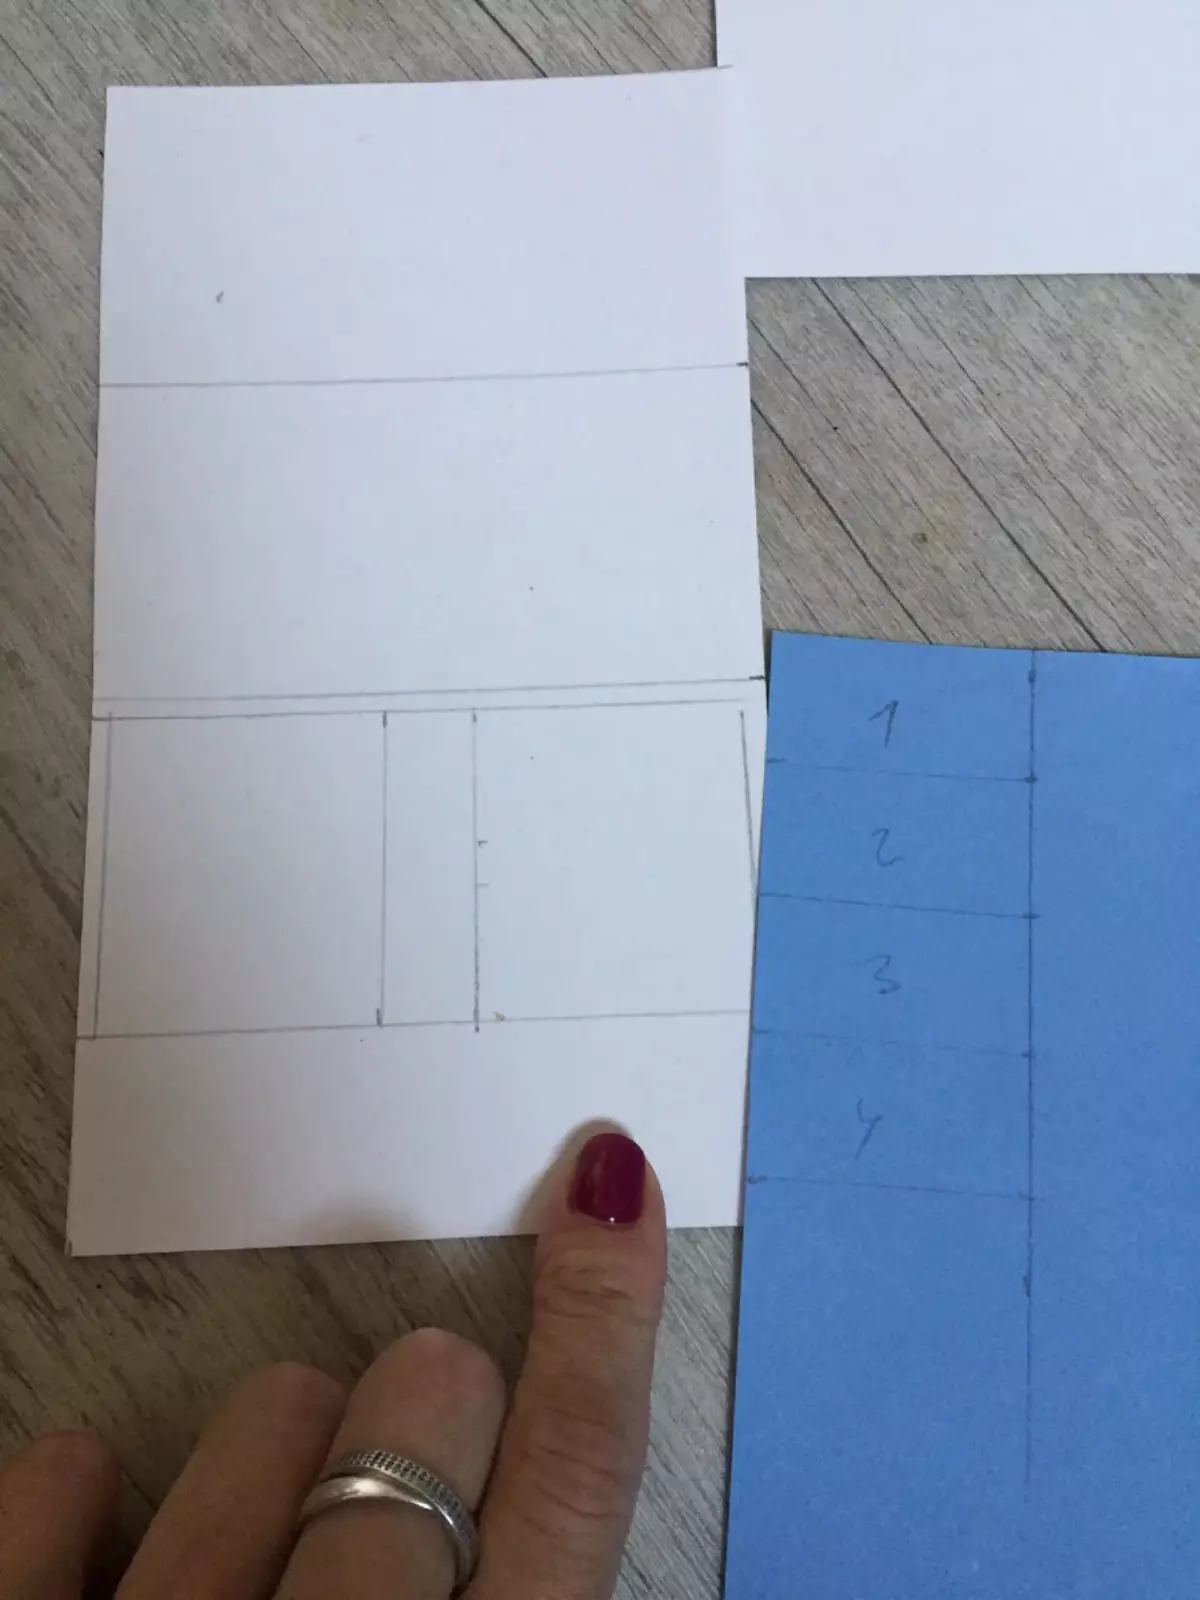
- Now it is necessary to make a bulk table with a height of 100 mm, drawing up the paper on the segments - 30, 50, 50, 50 mm.
- Before a 30-mm segment, one more markup is made - 3 and 4 cm with the right and left sides, leaving in the middle of about 100 mm.
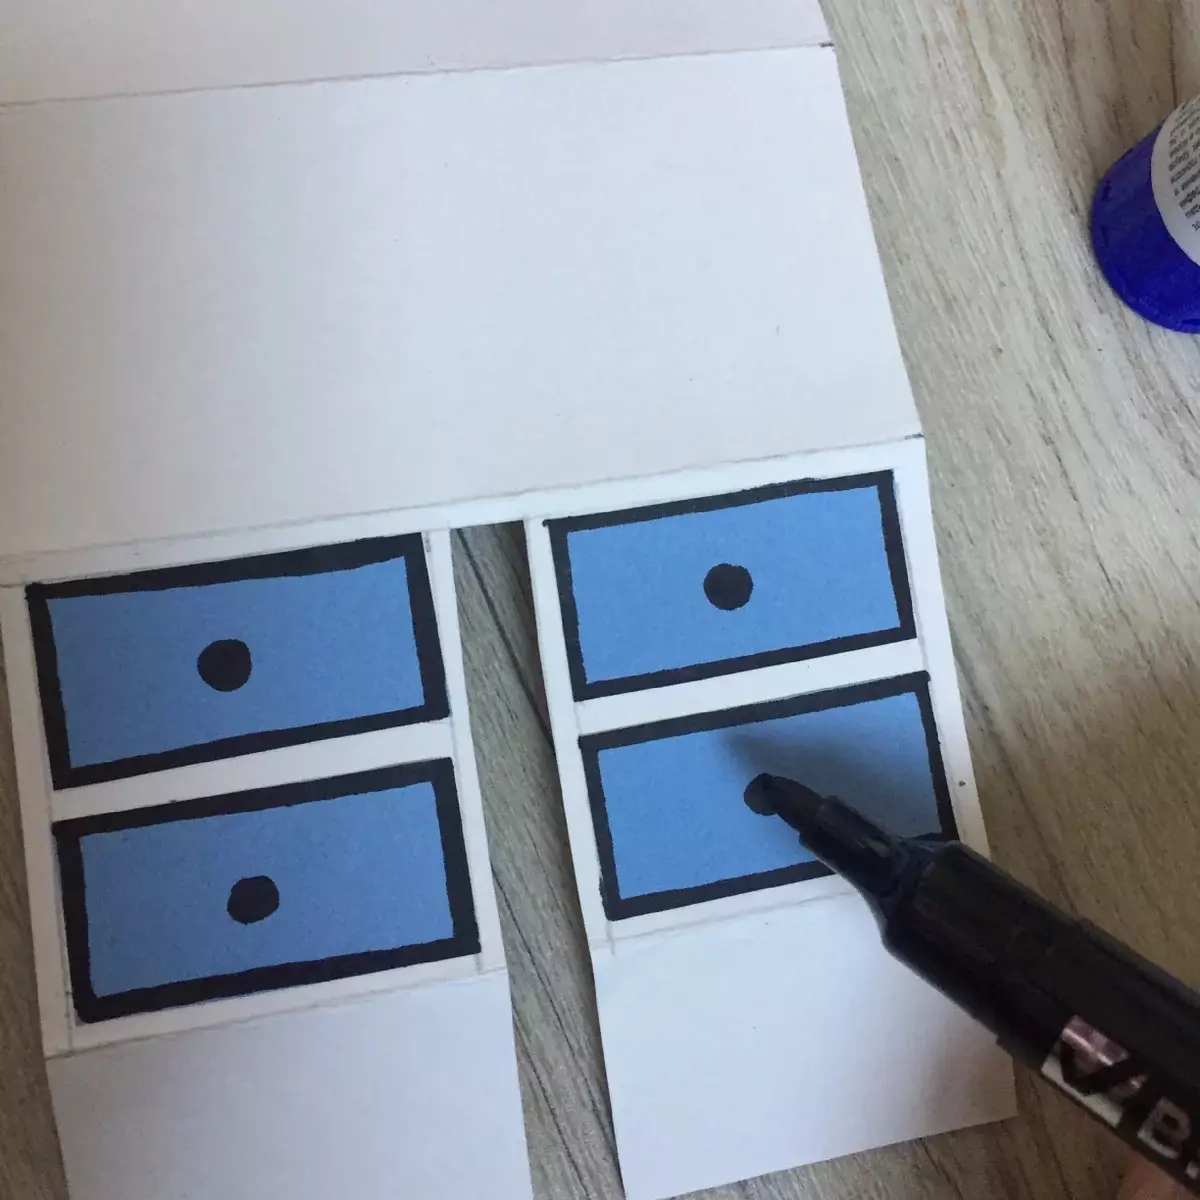
- For drawers, it is necessary to cut 4 small segments of 40x20 mm format and glue the workpiece.
- The time of fine creativity came - it is necessary to draw the handles, designate the boxes of the stroke and cut the middle part between the boxes.
- All parts of the table bend inside, lubricate the extreme upper and lower plane of the table with glue, leaving dry square with drawers and above them.
- Then the table is glued into the bent at an angle of 90º postcard.
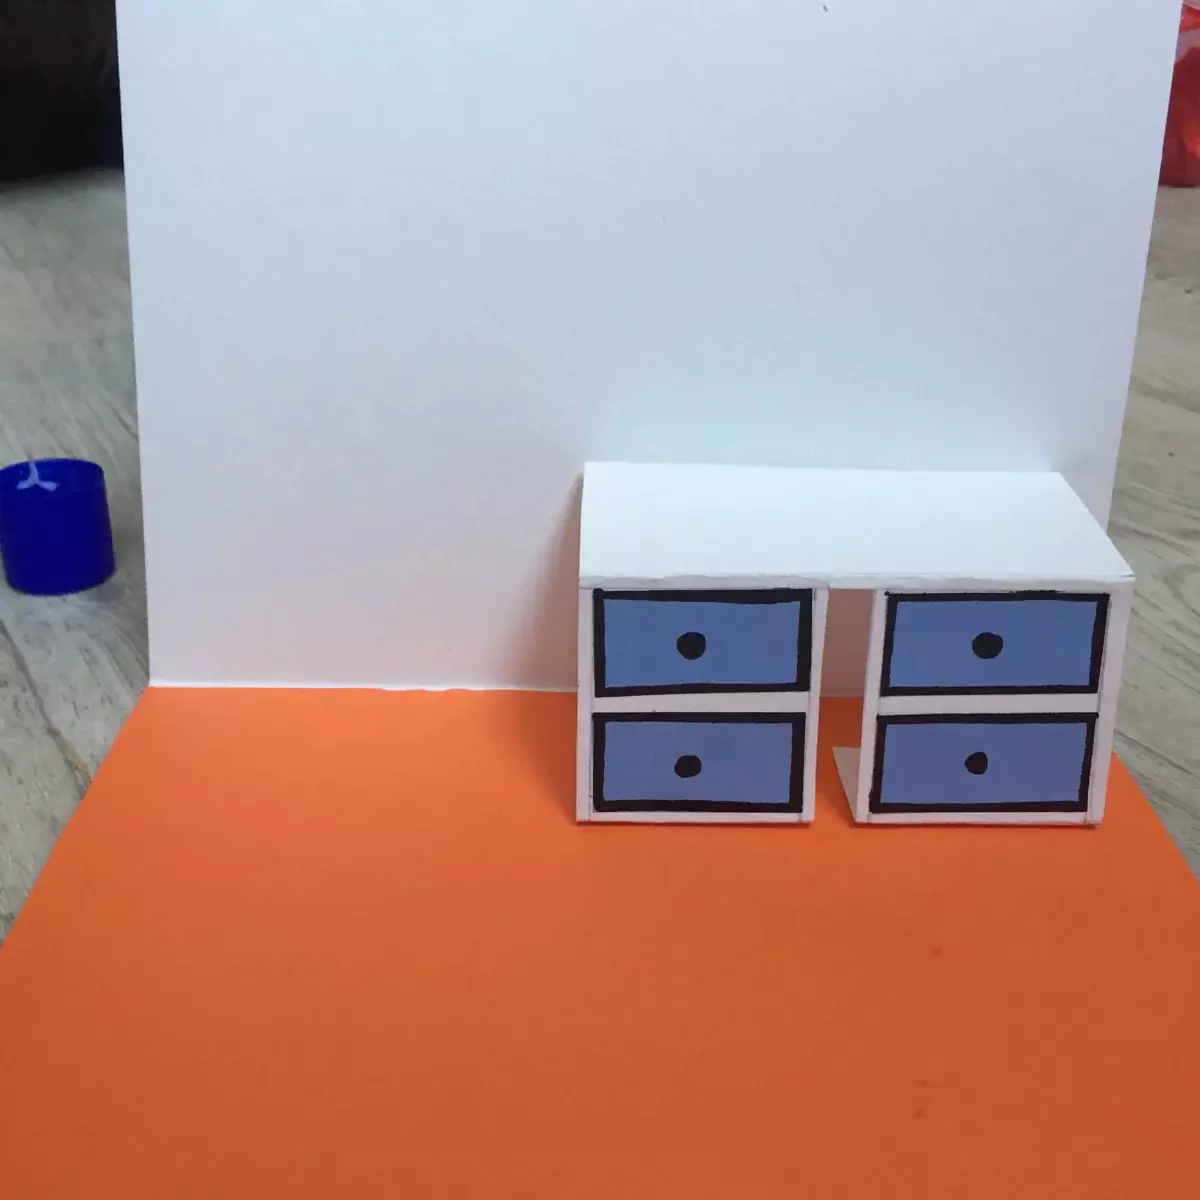
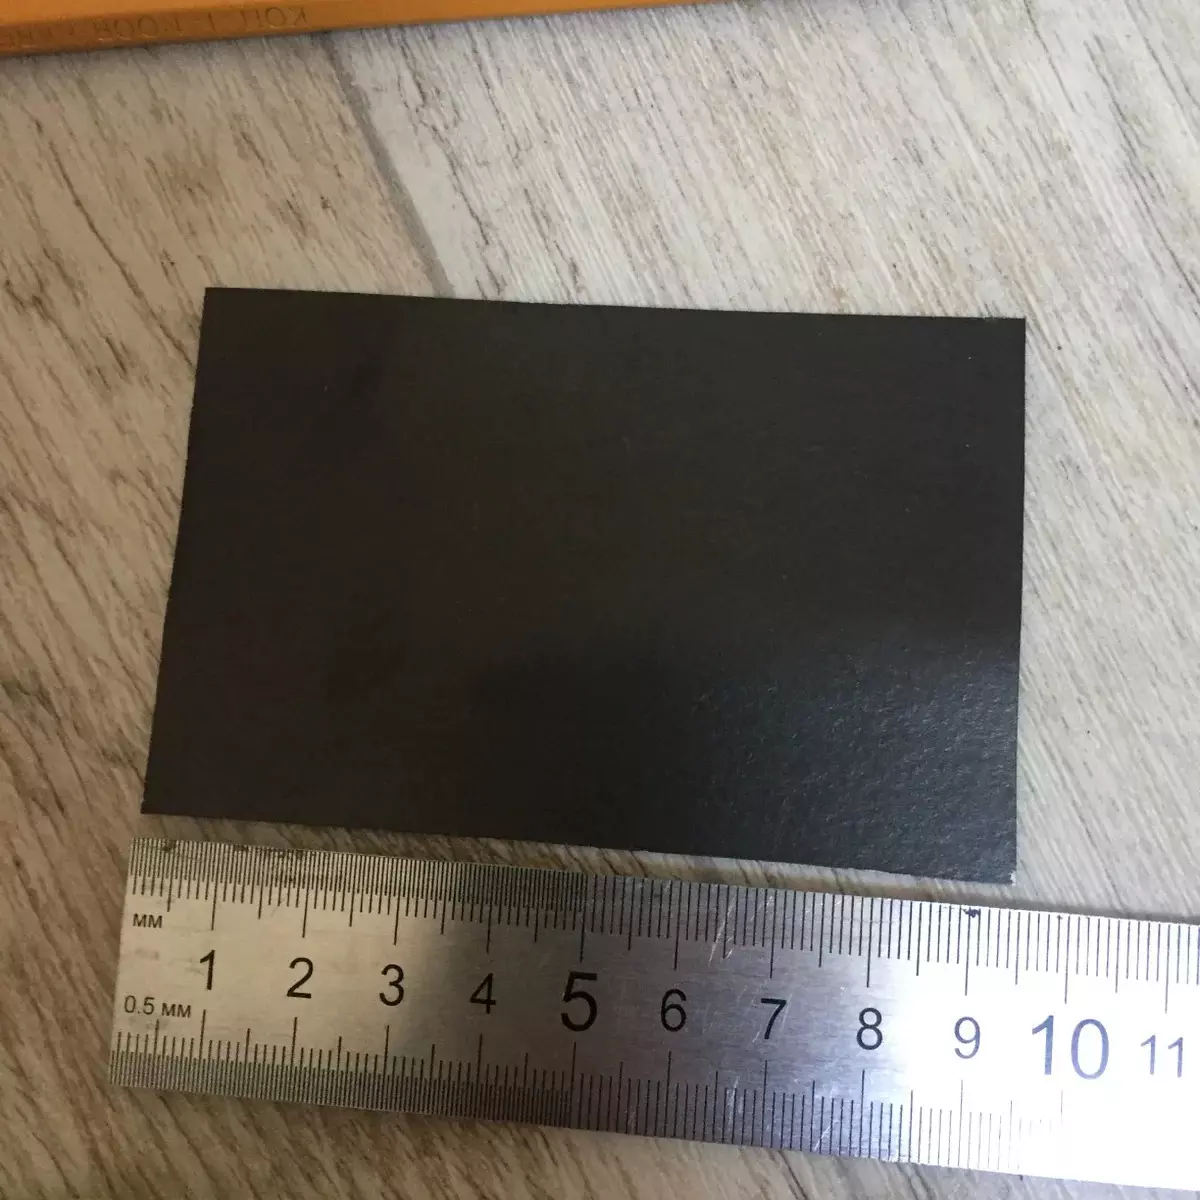
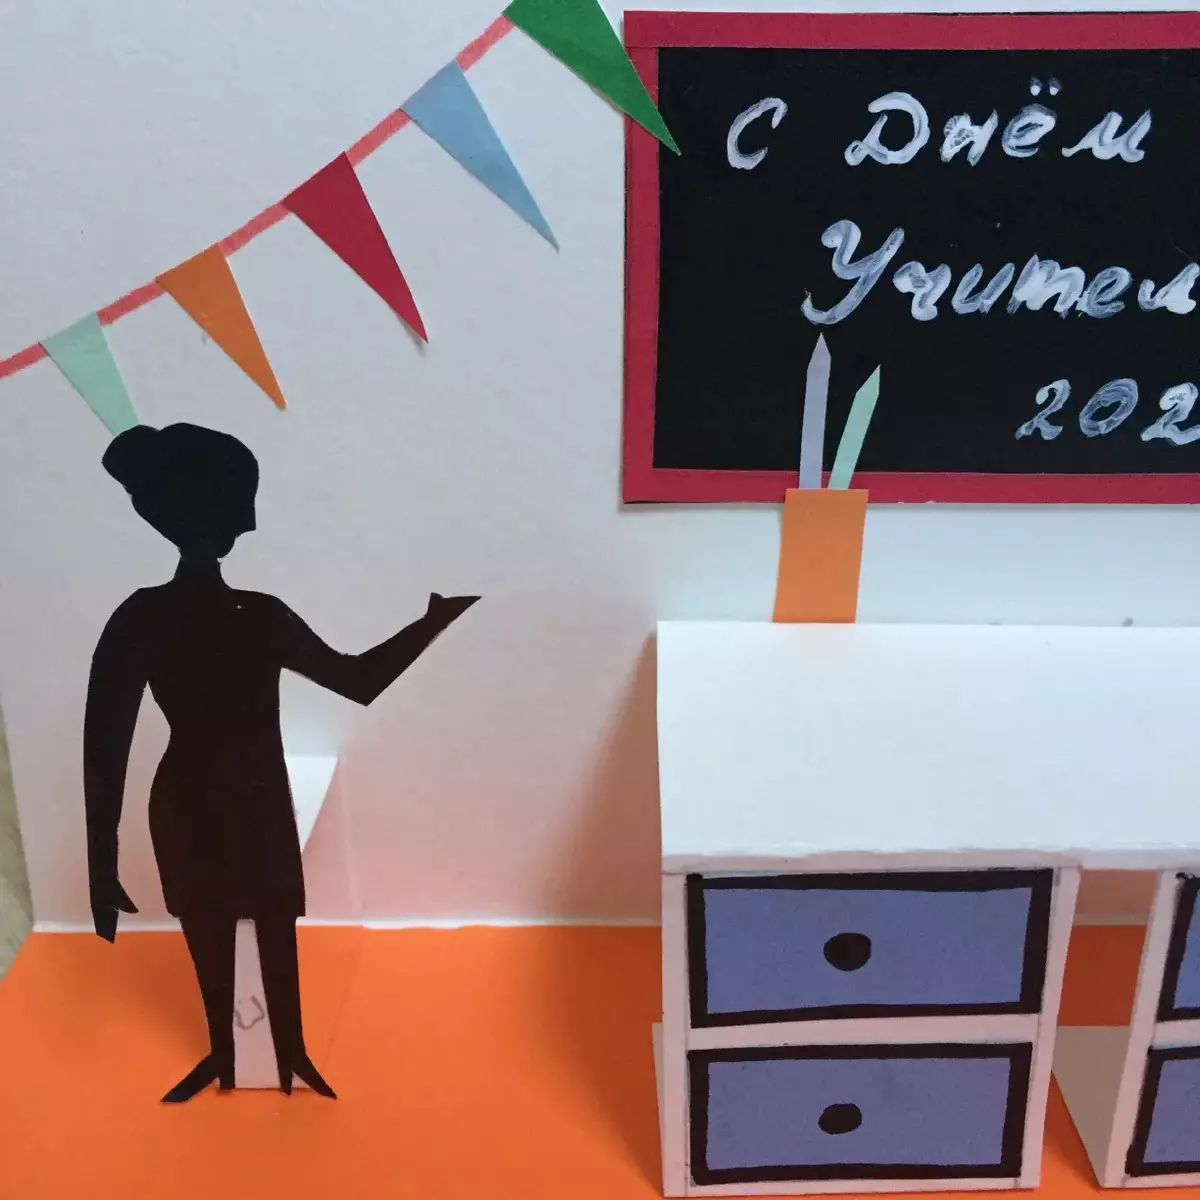
It is time for school boards with dimensions of 9.5x6 cm.
- The board is cut out of black paper, in the edges are covered with thin strips of colored paper, it is written on it the name of the holiday.
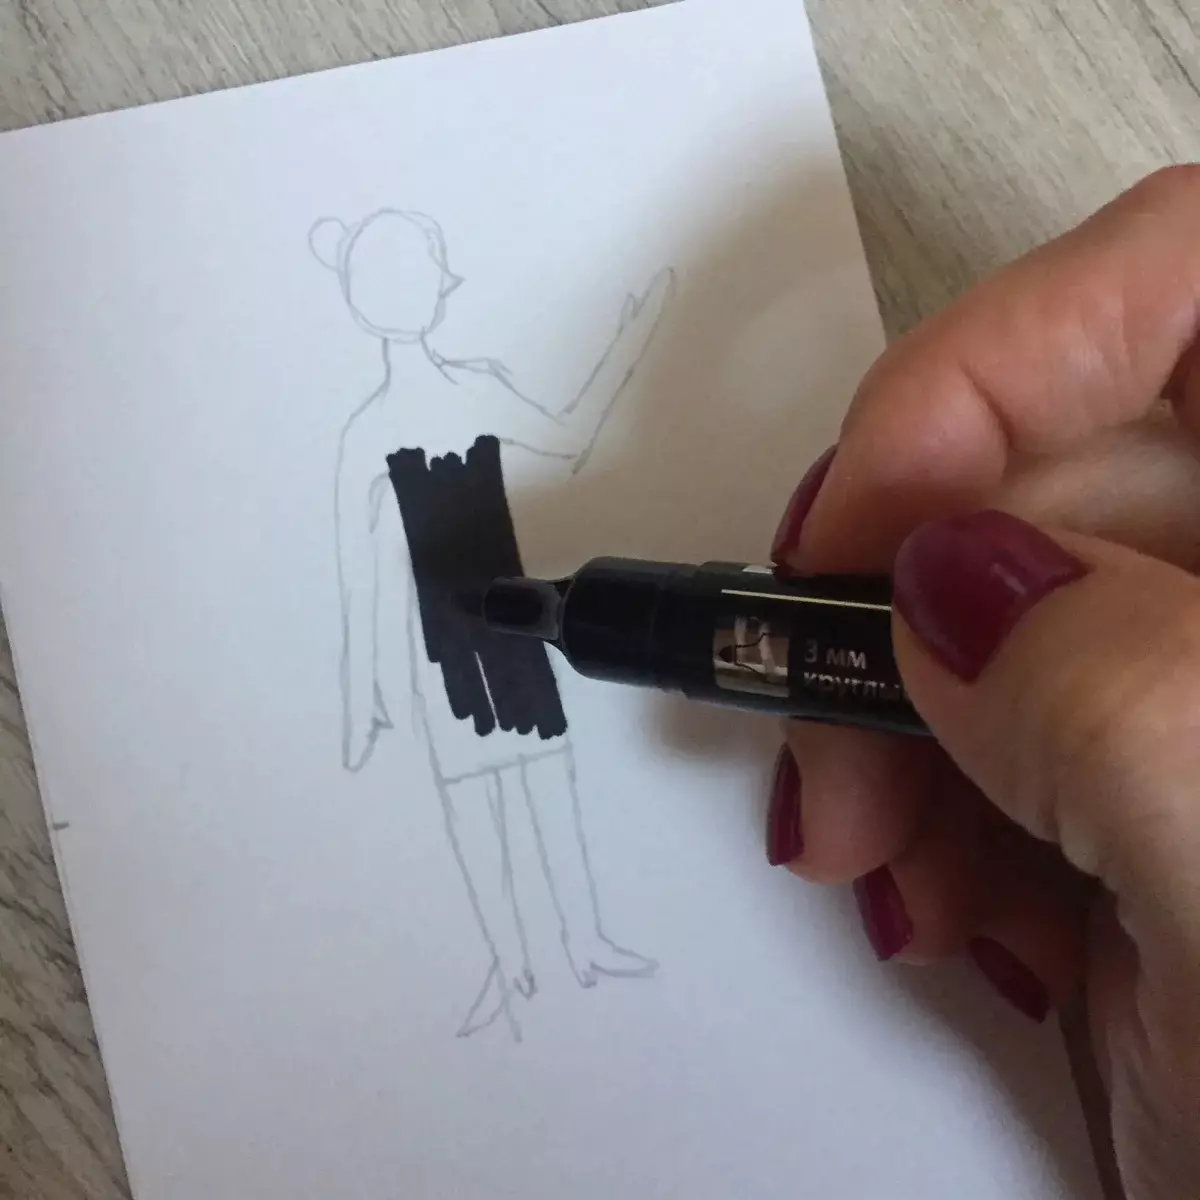
- The inscription dries, it's time to draw the teacher - they make it on a separate sheet of paper, painted the figure and cut it out.
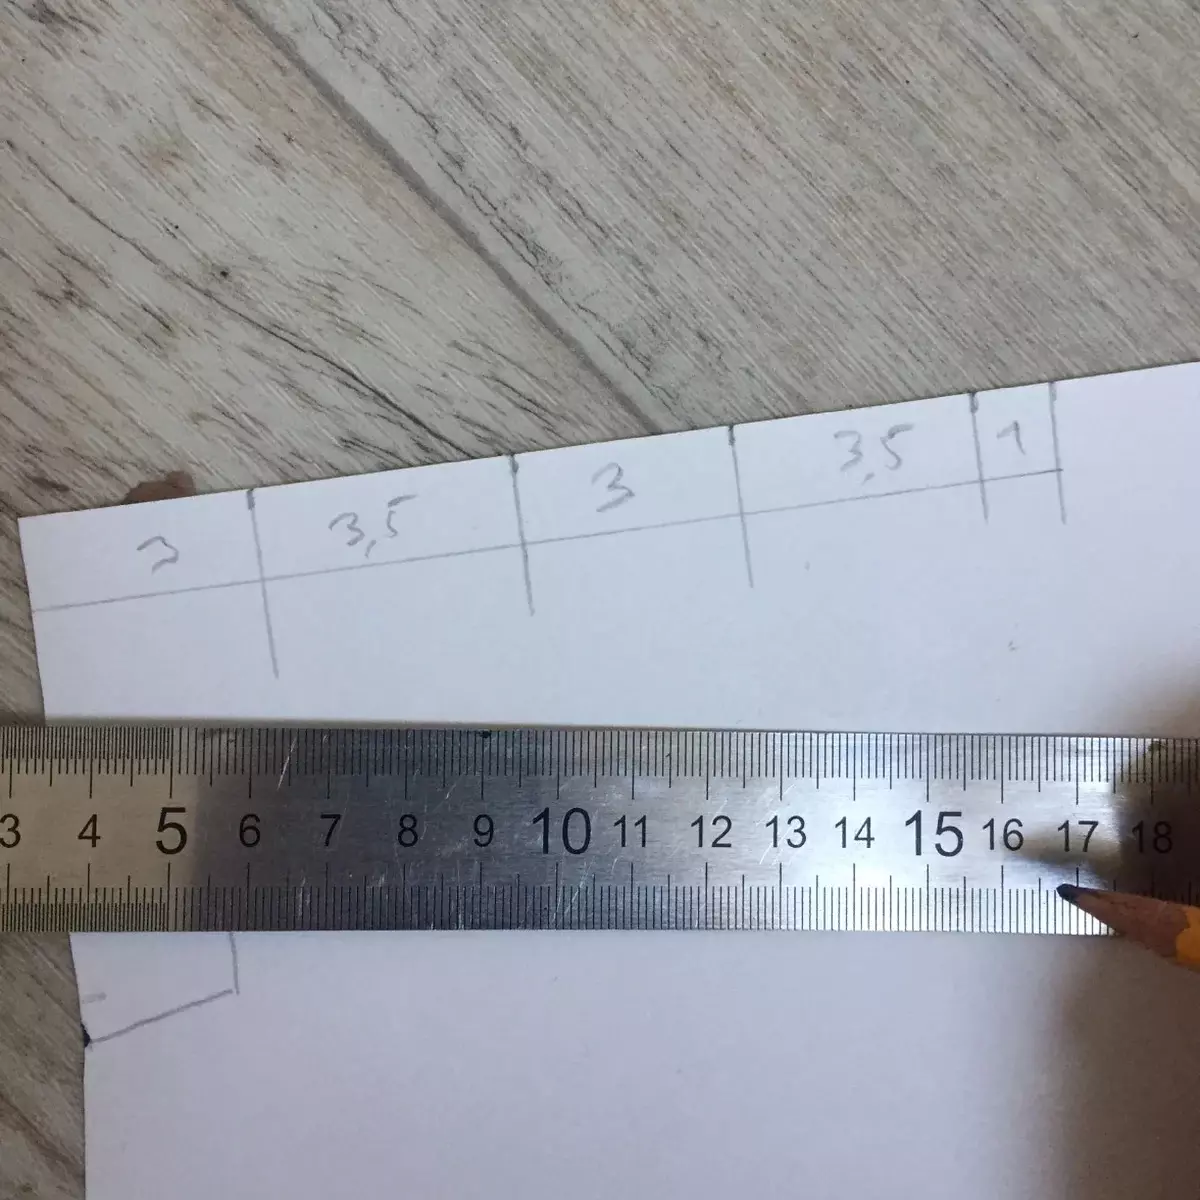
- Then it will take a strip of 100 mm wide - its length consists of segments 30, 35, 30, 35, 10 mm.
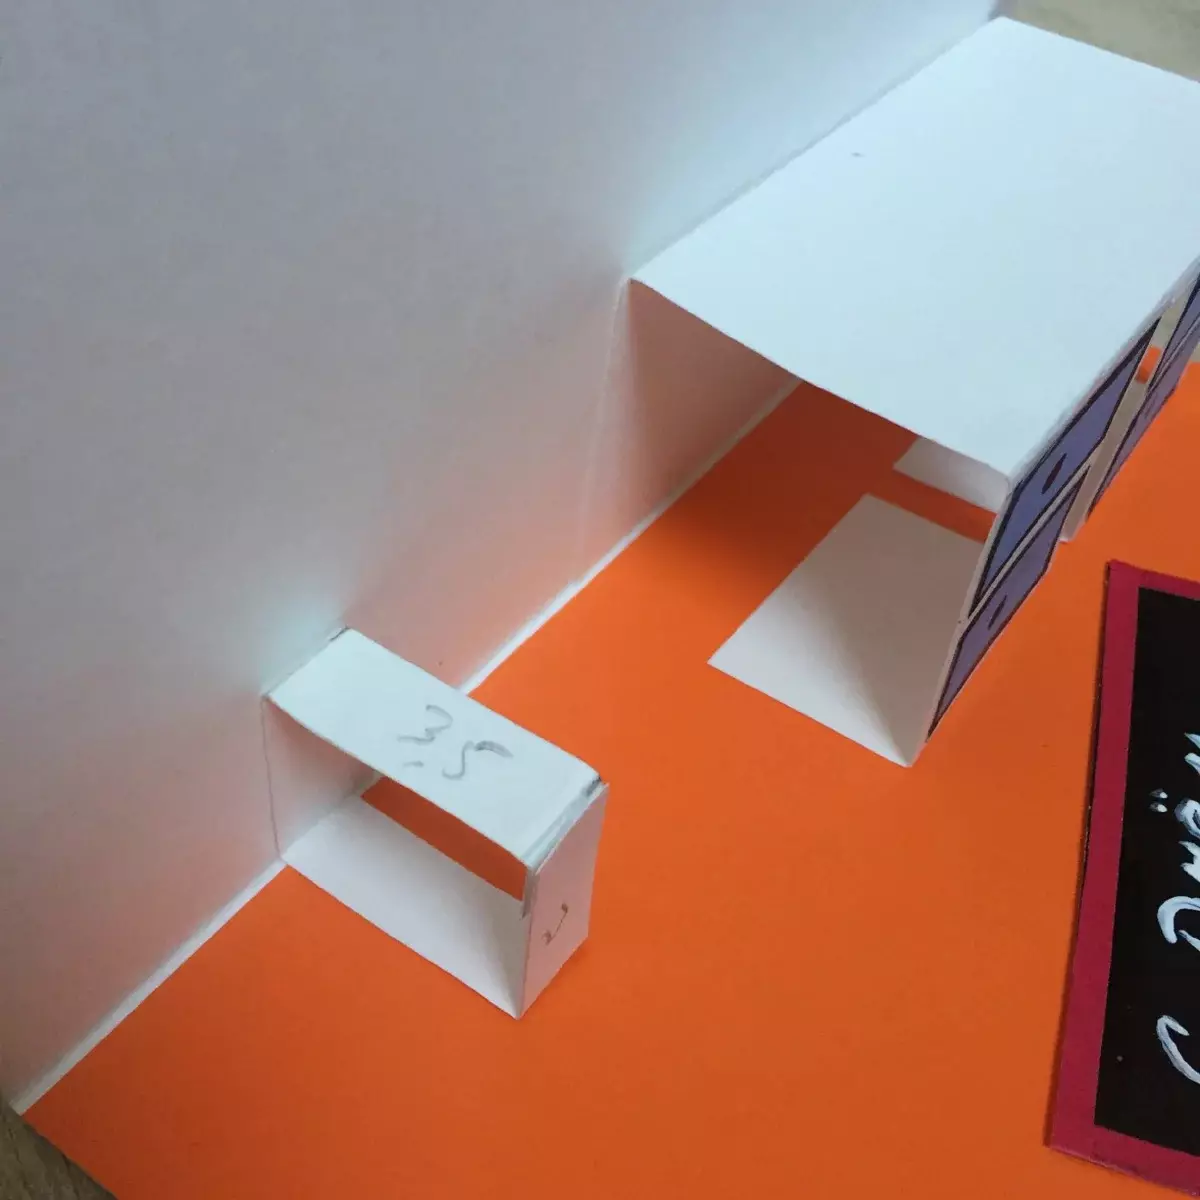
- The strip is bent into the applied markup, after which they glue into a rectangle, lubricating the slide of the extreme centimeter piece.
- The resulting form is glued into the open card open at the right angle.
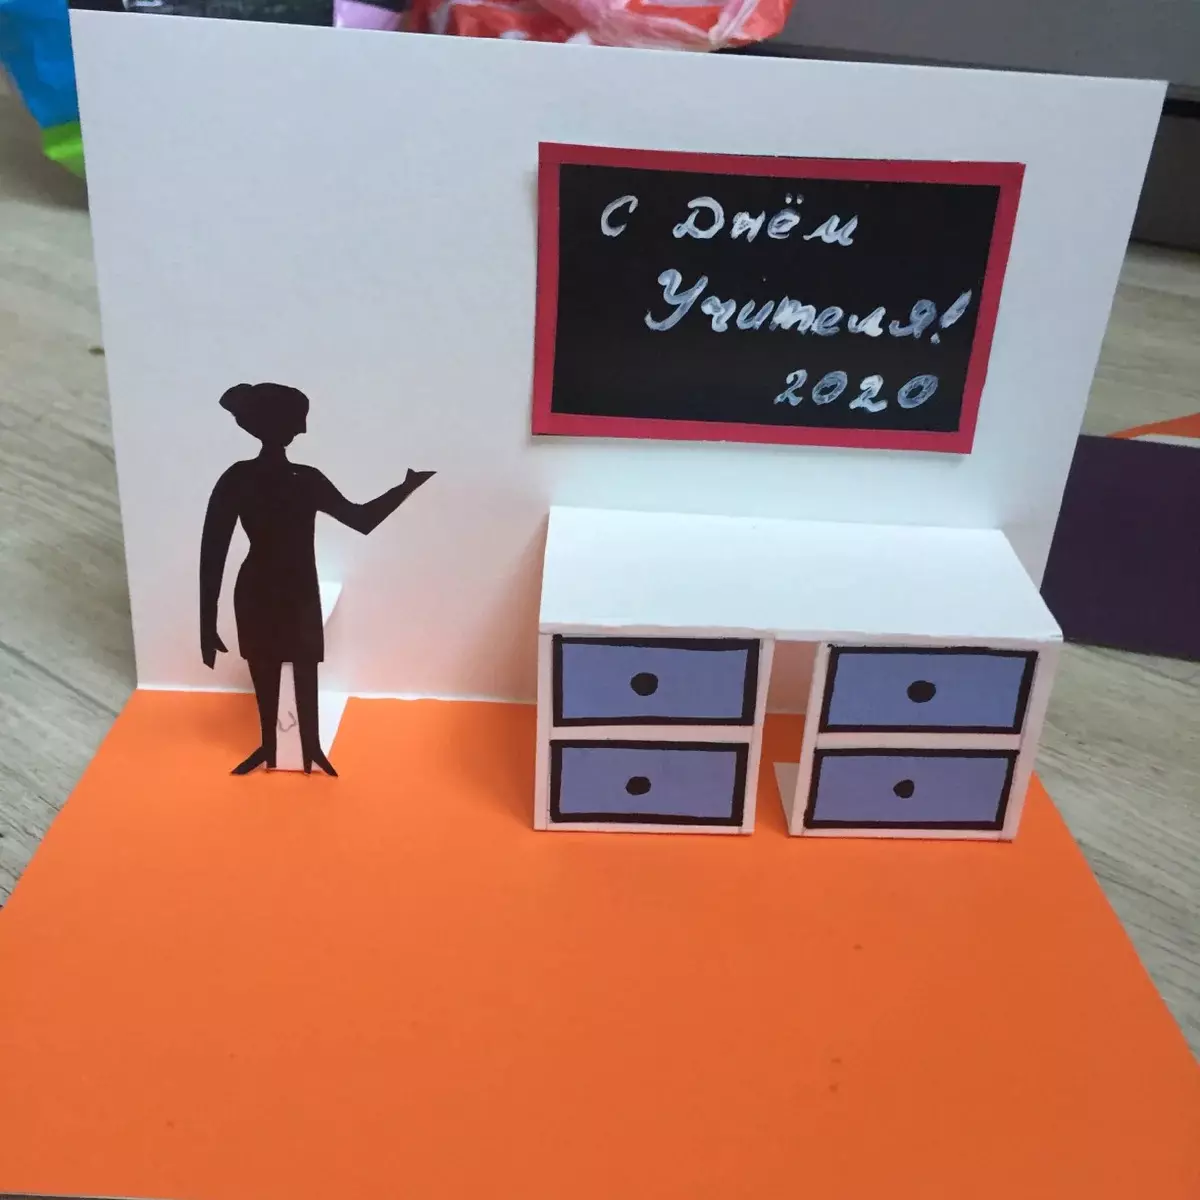
- To this base, the teacher's figurine is glued.
- The dried school board is glued into a white space above the table.
- The wall is decorated, pre-cut, multicolored flags.
We will optionally add a few small details - imitate a pencil with pencils on the table, glue a few sheets of paper with numbers on the table, add a field for congratulations
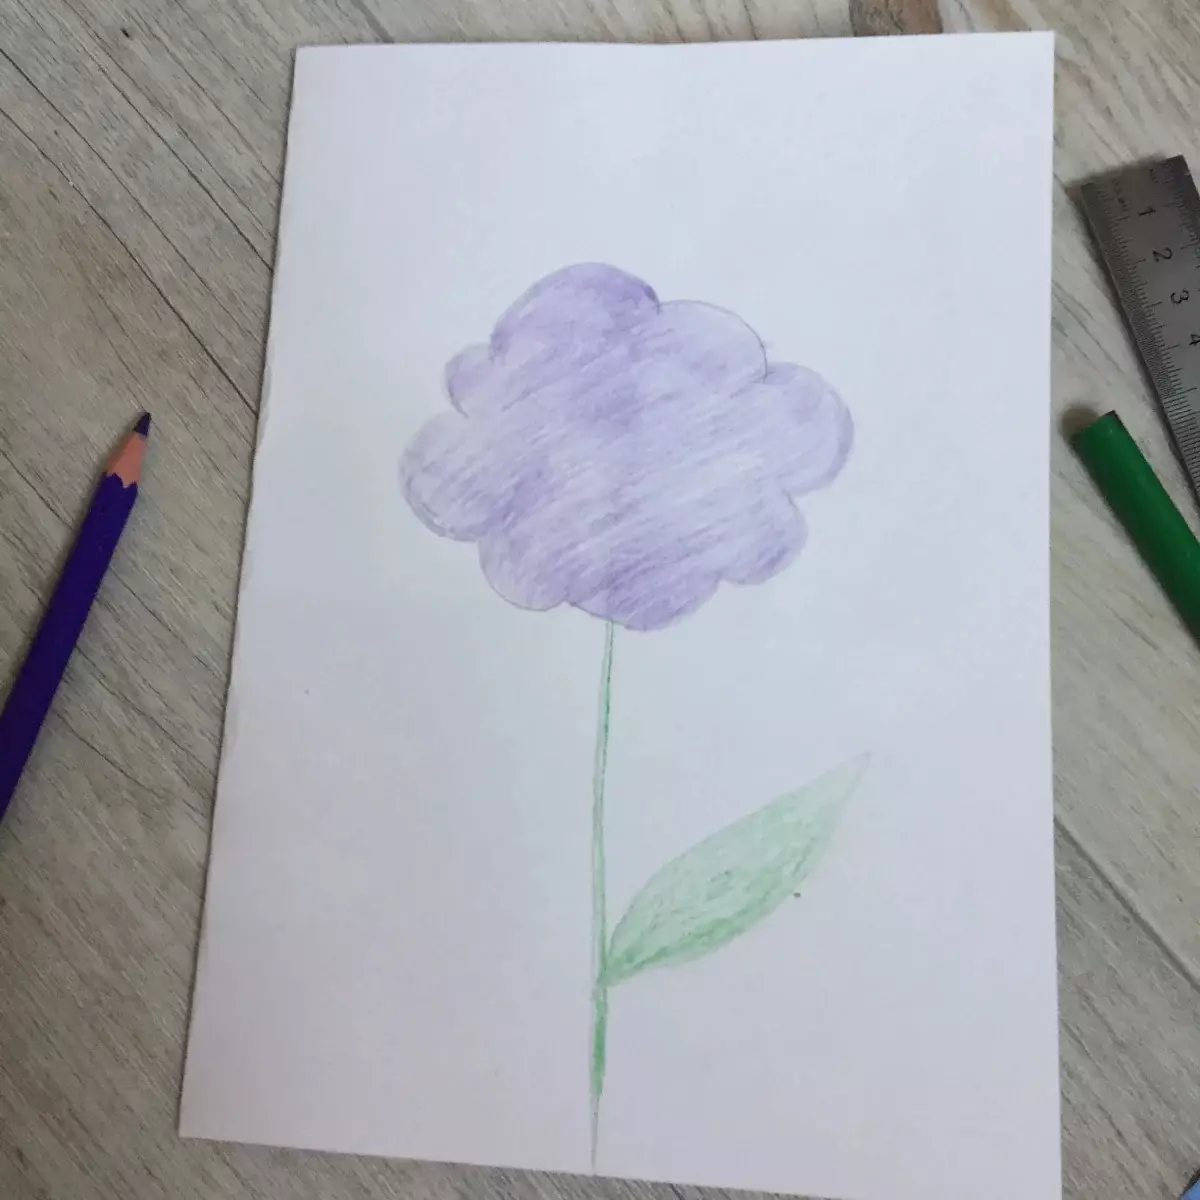
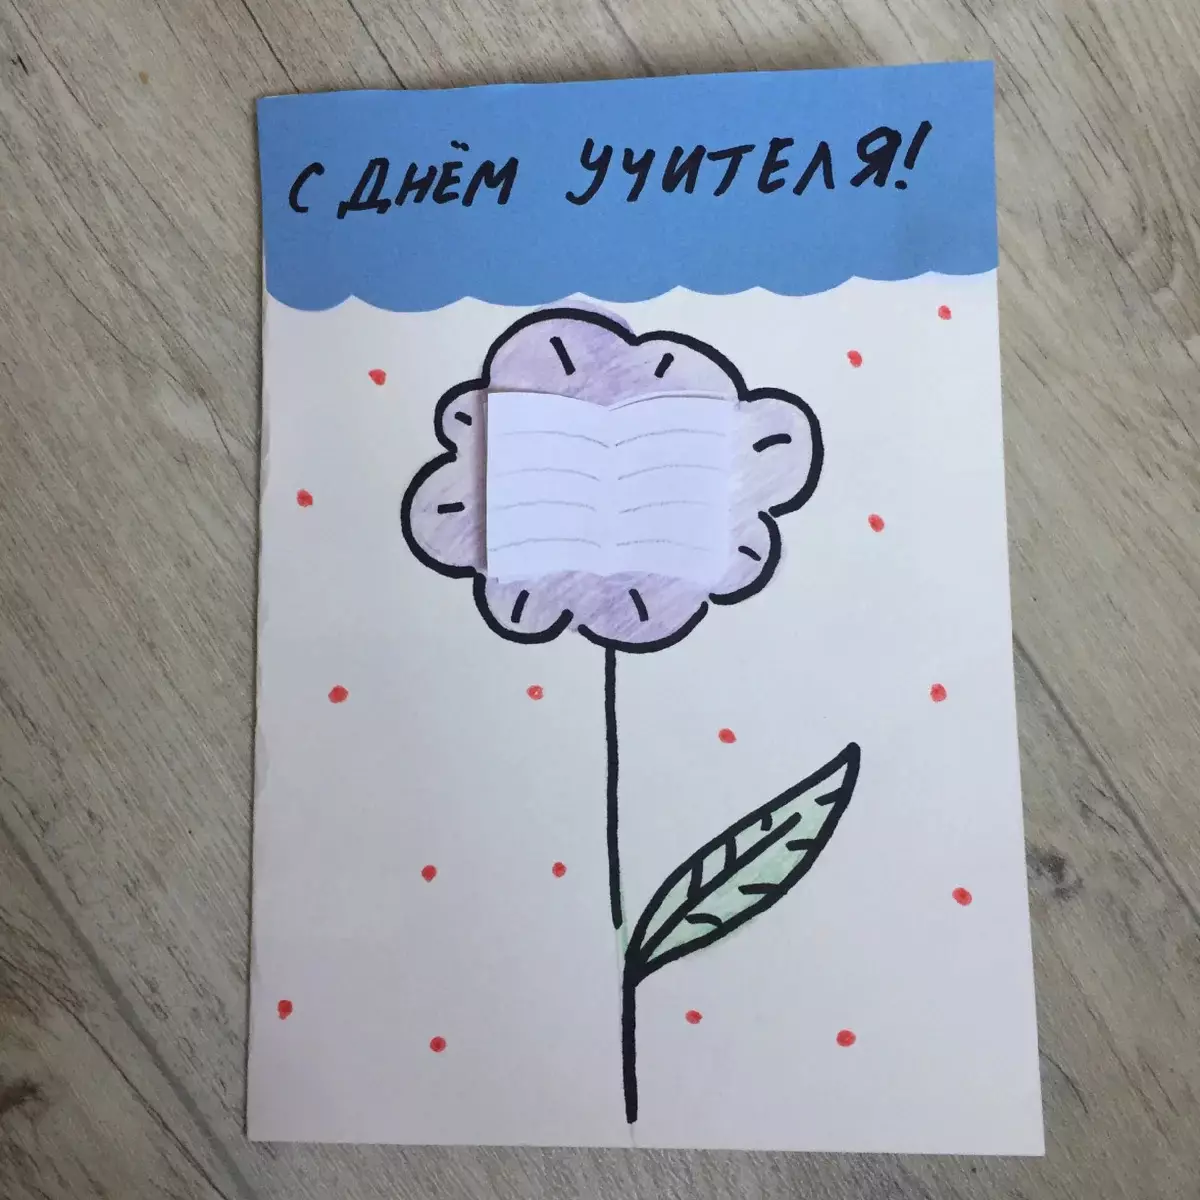
Cover design.
- On it draw flowers.
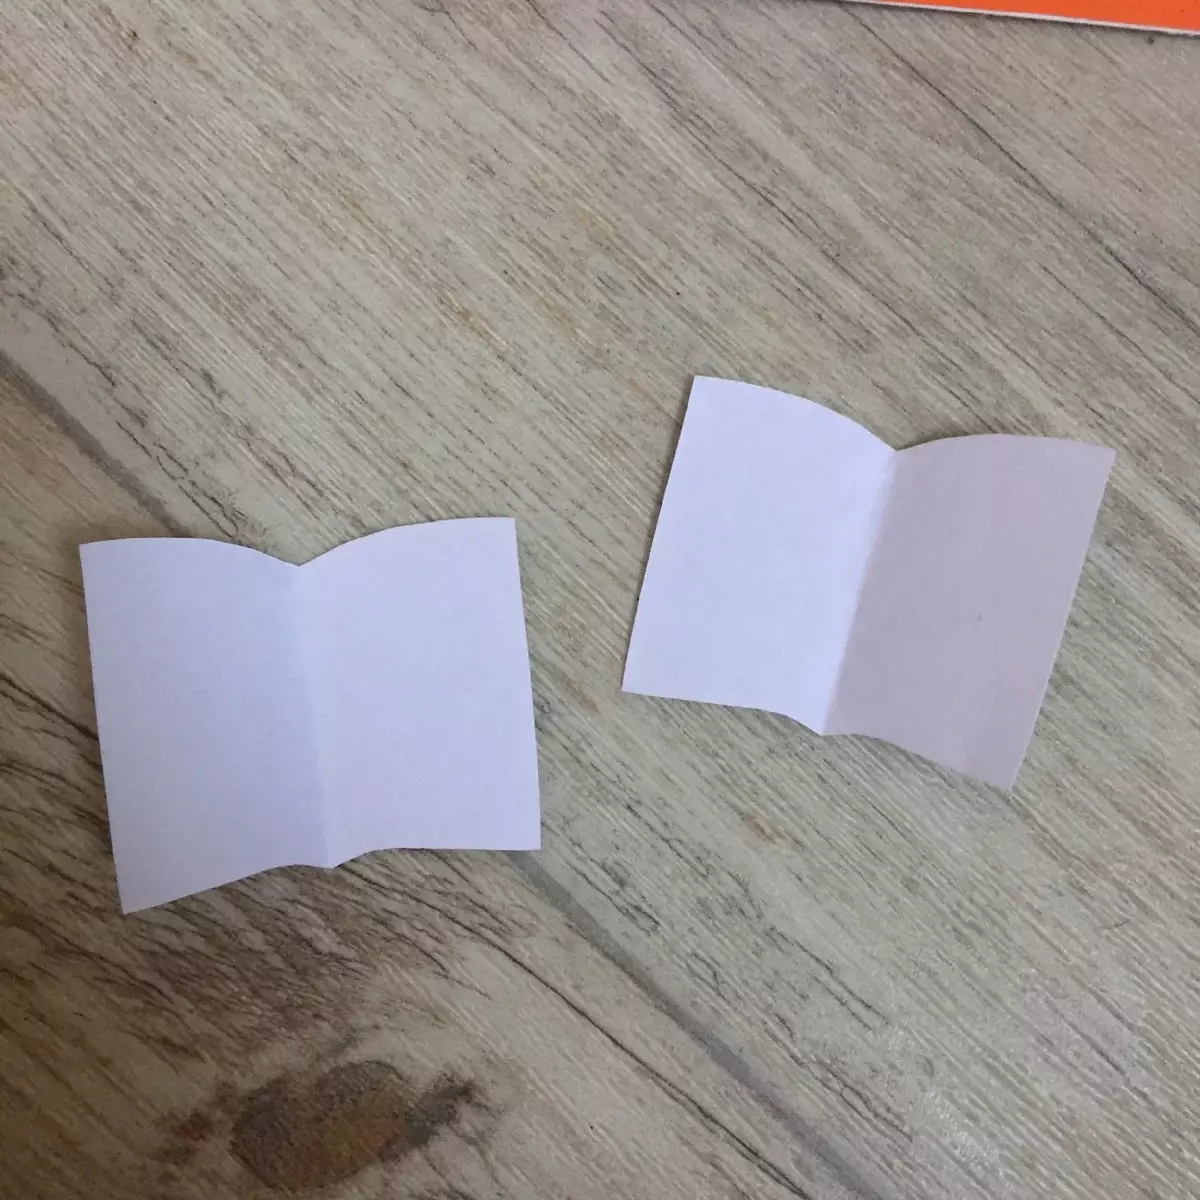
- From thin paper, small rectangles are cut out, imitating notebook sheets. For this, there are thin paper several times, then from the fold draw a half of the notebooks and cut out. As a result, deployed notebooks or books are obtained.
- The flower center is glued with a thin strip, to which several leaflets are glued. As a result, they can be flipped.
The flower should be painted to add brightness. Make a congratulatory inscription on the inclined field - a bulk card ready.
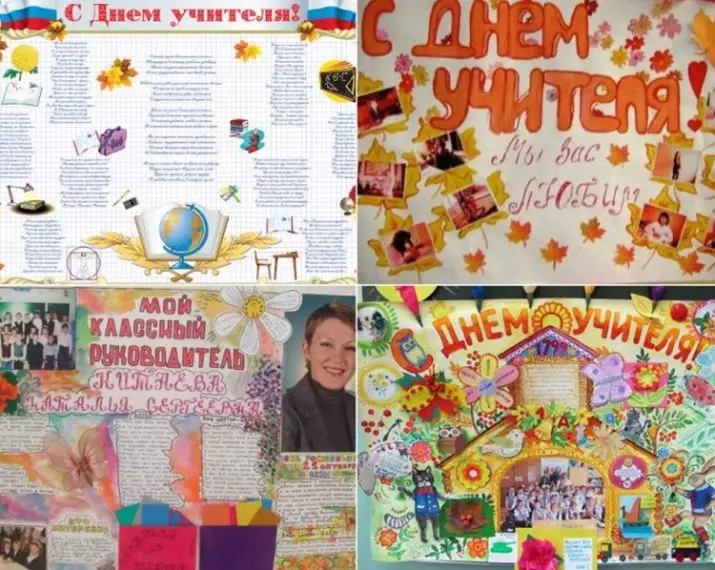
Big greeting cards posters
Instead of a postcard, you can make a large poster in the form of wall newspaper. This option is popular with students, especially in the guys from senior classes. This is quite logical explanations - pure white watman gives unlimited opportunities for the implementation of ideas and abilities. Everyone will be able to write their own poems or thoughts in prose, add a picture or photo, place the wishes to the teacher in the exclusive version.
- For example, you can perform a poster in the form of a comics with captured moments of the class and the teacher, add thematic cuts from the media there.
- For subject teachers, you can use themes and pictures from lessons, add pictures and suitable images.
- Any poster is not required to maintain the original shape - it can be performed in the form of a sheet, magazine, etc.
The chip is that each student takes part in the manufacture of a poster-postcard - let each of them leave a drawing or wishes inscription, a small poem. In a word, everyone must make something. The result is an unusual and unique collage.


There are several uncomplicated rules for this.
- We need a pre-thoughtful sketch and plan of the future collage - jokes, jokes from school everyday life, texts, pictures, photos, horoscopes, etc.
- It will take 1 or 2 clean watman sheets, glue, paints, pencils or markers.
- Be sure to need a colorfully decorated heading, after which the composition of the cooked elements is folded on the pure field. All that is needed is glued, which should be written - written, draws, paint.
After that, it remains to make the final strokes - the voids are toned, glued or somehow they fasten the treats in the form of candies, small and large chocolates, decorate decorative elements. At the right time, you install a ready-made festive poster postcard at the selected place.
As you can see, the independent making of the postcard for the Day of the Teacher is a matter of quite simple, pleasant and grateful.
About how to make a postcard for a teacher's day with your own hands, see the next video.