
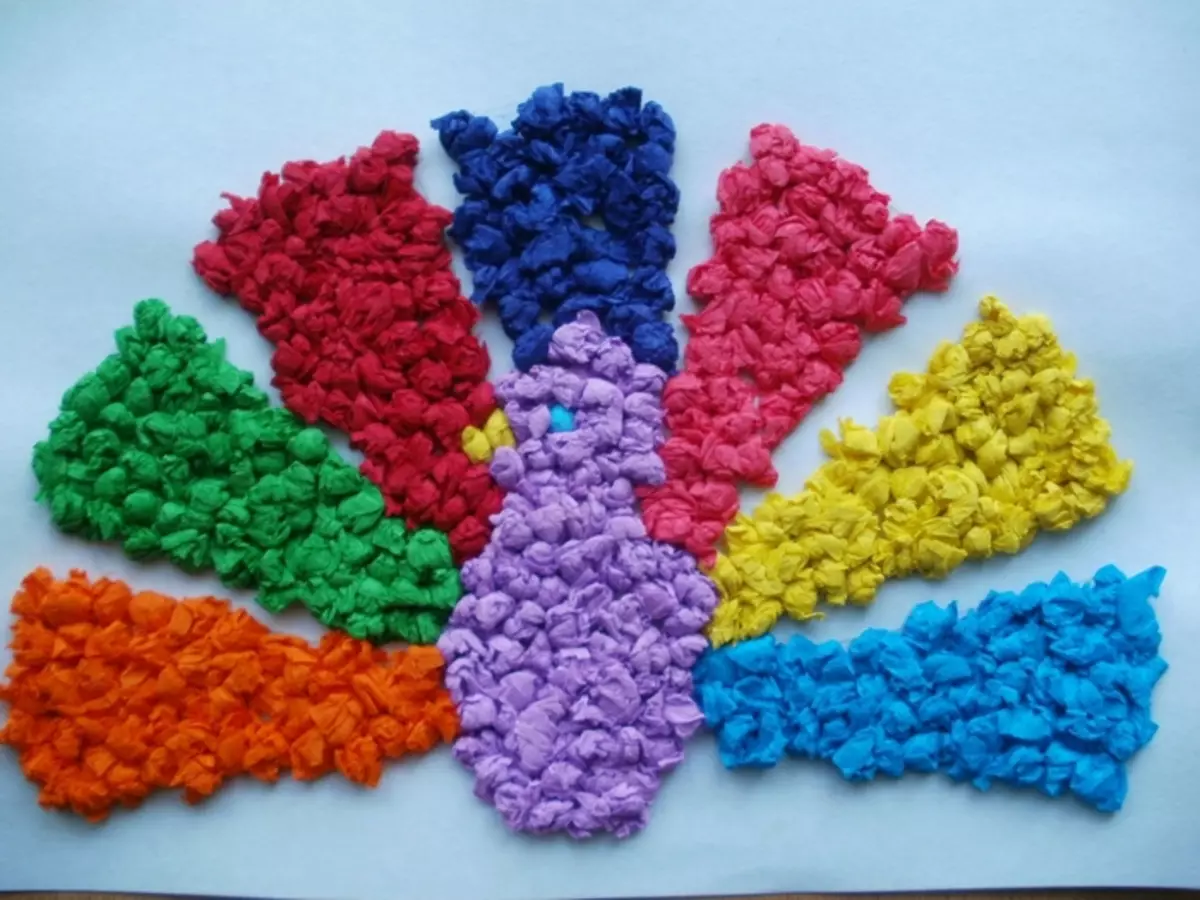
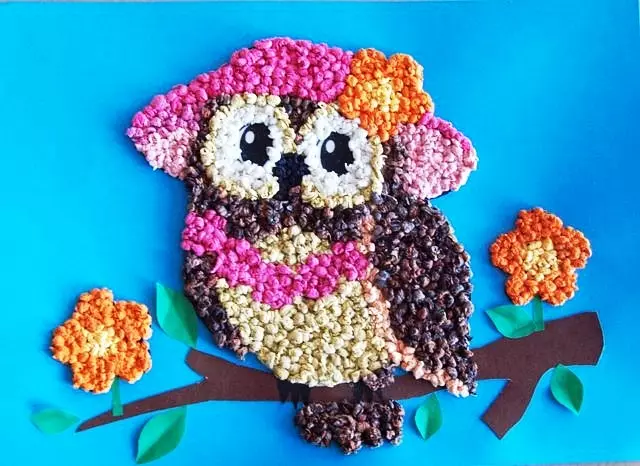
Beautiful and original crafts can be made of various materials. Many cool things are obtained from ordinary napkins. It is easy to work with them, but you can make very attractive products. In today's article, we learn what crafts is possible to make out of the napkins.
How to make flowers?
Napkins can serve as an excellent basis for making beautiful colors. Interesting and attractive crafts will be available for the manufacture of young masters of various ages. Children 2, 3, 4, 5, 6 or 7 years old will easily cope with all creative procedures. The main thing is to stick to simple step-by-step instructions and avoid excessively athletes. Below will look at several curious master classes on the independent manufacture of spectacular flower compositions in various techniques.
Appliques
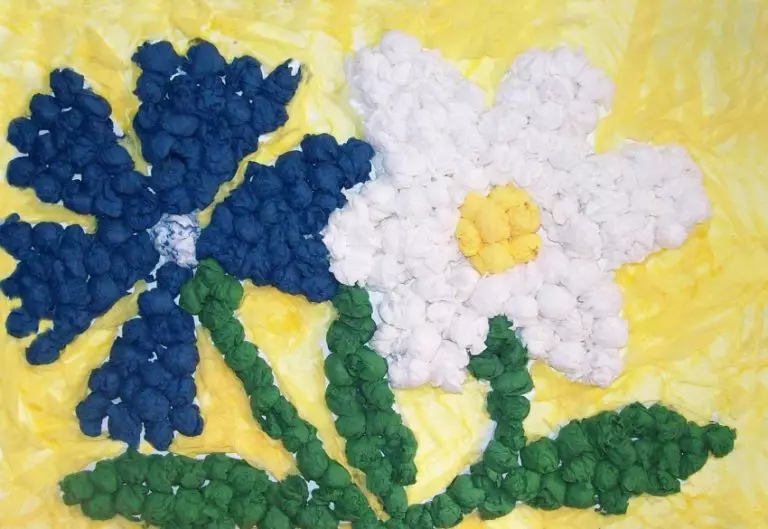
There are a lot of different techniques for the manufacture of beautiful crafts in the form of flowers from paper napkins. The smallest masters are best to develop their creative skills, starting with applications. Such homemakes are very simple and accessible in the manufacture. Often it is the applications that become creative tasks for children in kindergarten, for example, to the day of the mother.
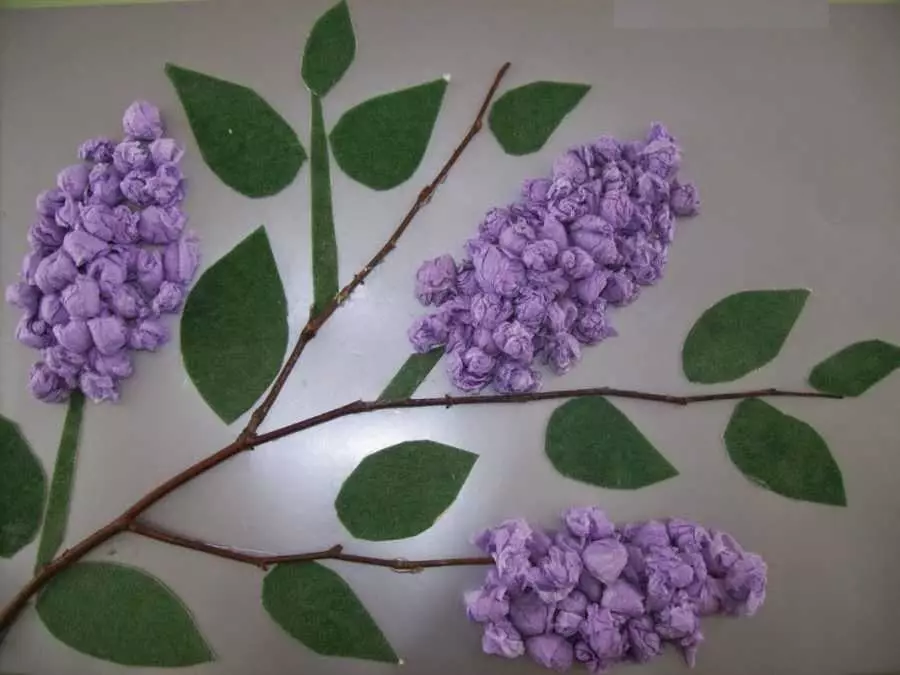
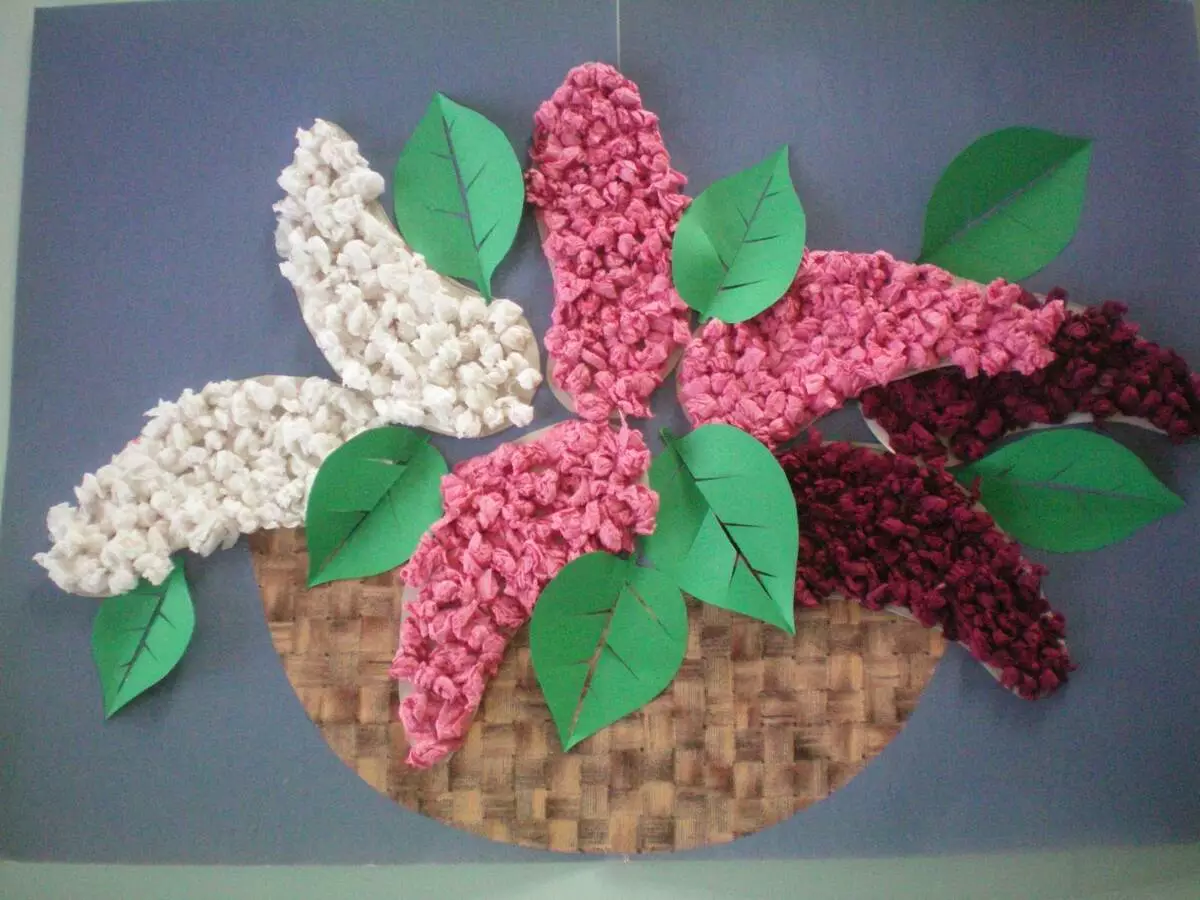
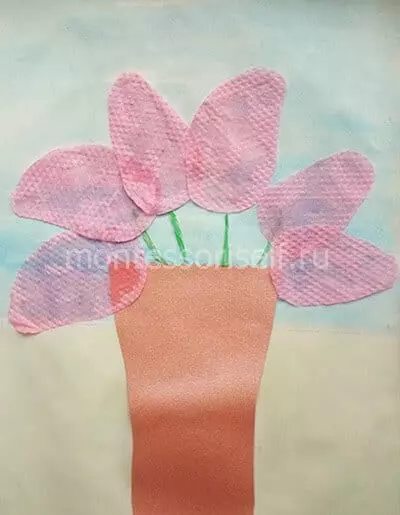
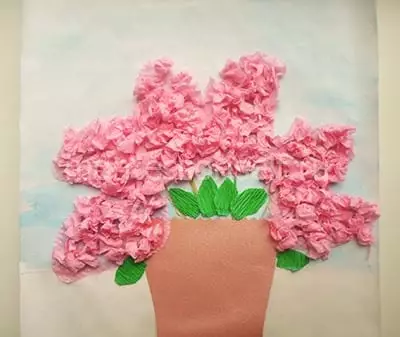
The baby can be entrusted to the manufacture of a very beautiful applique depicting the chopper of the elephant lilac from paper napkins. This homemade is done simply, but in the finished form it looks amazing.
The child will surely like the process of its creation.
To make the original applique, you will need:
- on one paper napkin white and lilac (can be pink) shade;
- corrugated or simple green paper;
- glue composition;
- Cardboard sheet (will play the role of appliqués);
- scissors.
When all these components are ready for creative processes, you can proceed to the manufacture of crafts.
- It is necessary to take a white sheet of cardboard base. It should draw the contours of future branches of lilac.
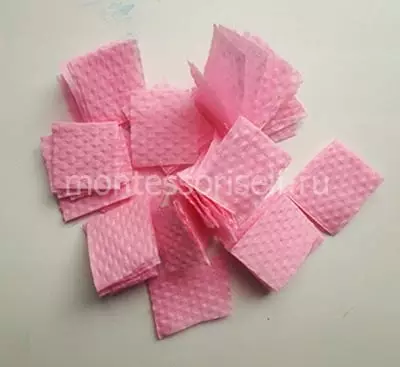
- Next, the napkins are taken. They must be cut into squares, the length of the side of which is 3 cm.
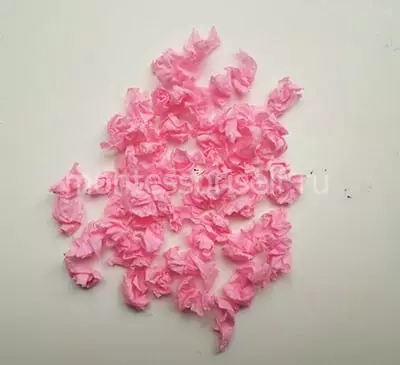
- Next, each of the prepared quadraticles will need to be changed to form several dense paper lumps.
- Now you need to take green paper. It should neatly cut the stalks and leaves of the future beautiful lilac. Ready green parts need to be glued to a cardboard basis, sticking to drawn contours.
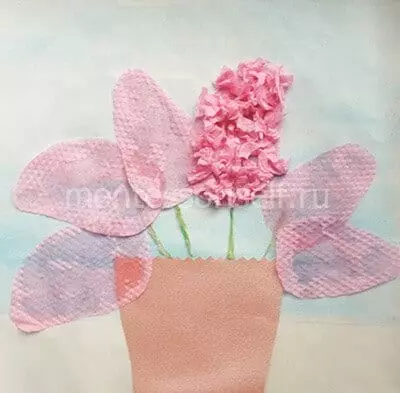
- Further, on the basis it will be necessary to mark the plots where the flower lilacs will be located. After that, paper lumps will need to be fixed in these areas. You need to make sure that these lumps are quite a lot. They should be positioned as close as possible to each other.
- First, the lilac lilac lumps should be fixed, and then glue white lumps. At this stage, the manufacture of the original and very attractive homemade will be completed.
Make appliques from crumpled pieces of napkins is easy, but adults are preferably kept under control, since the young master will have to work with sharp scissors.
Volumeful
With your own hands, a child can make not only colorful appliques, but also of different kind of volumetric crafts, which look no less original and aesthetically. For example, the child's great interest can cause water lilies manufacturing with their own hands.
These volumetric crafts are simulated, however, at the same time, the young master will have to be as attentive as possible. It is advisable to immediately stock patience, since all actions should be neat. Consider step by step how to make spectacular water lilies from napkins.
- First you need to deploy a napkin into one layer. Then this workpiece must be bent and dispersed on the diagonal.
- Now all the corners of the blank napkins should be beatened towards the center.
- Next, the formed angles will need to bend back to the central point.
- The above action will need to repeat again (for the third time).
- Now the preparation of the workpiece must be turned over and adjust all the corners to the center.
- The workpiece is turned over again. To work further it was more convenient, the future homemade is placed on an inverted glass.
- At the next stage, all corners of the crafts should be sequentially bend, moving from the central part to the edges.
- The flower can be removed from an inverted glass.
If there is a need for this, you can strain the petals of the crafts.

Elegant volumetric lily is ready. The technique of manufacturing such a homemade will become more accessible for older children. To very small masters, modeling such a flower may seem too complex.
From the napkins, you can make not only beautiful water lily, but also a luxurious lotus, rose or whole floral bouquets. Such crafts not only contribute to the development of a child's shallow motility, but also have a beneficial effect on his fantasies, creative abilities.

Making trees
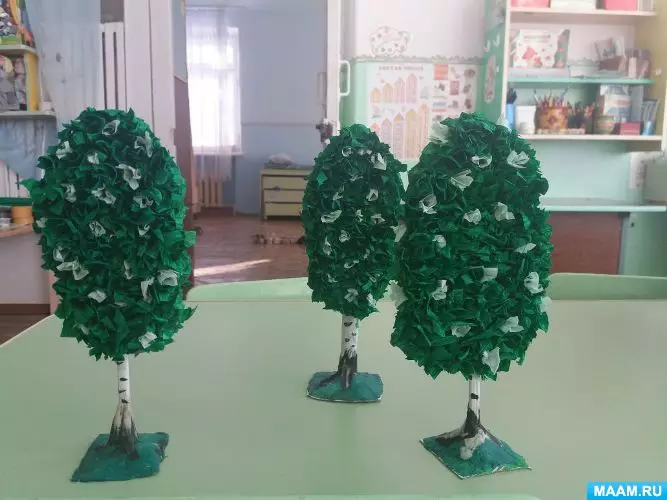
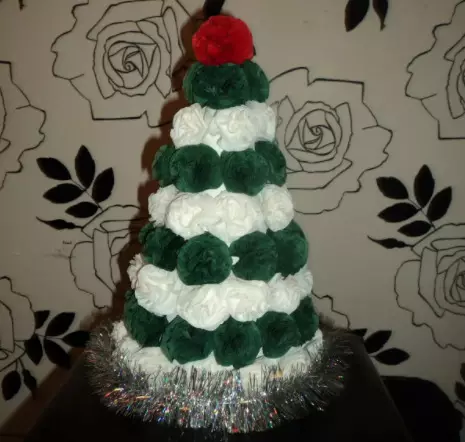
From napkins, a child can simulate not only a variety of colorful flowers, but also attractive trees. The baby will be interested in independently make the original birch or Christmas tree. In the manufacture of these elements turn out to be extremely simple, but very fascinating.
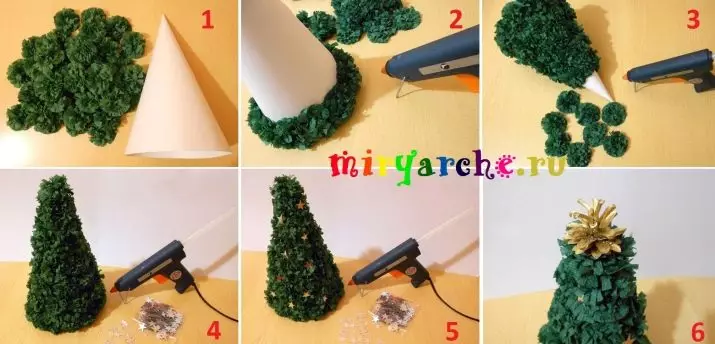
You can make a very spectacular Christmas tree made of simple and affordable materials, including conventional napkins. We will highlight the full list of components that will be needed:
- green napkins;
- a pair of cardboard sheets (will be necessary to prepare a frame base of wood);
- stapler;
- glue;
- Various decorations and scenery (suitable beads, "rain", sequins and so on).
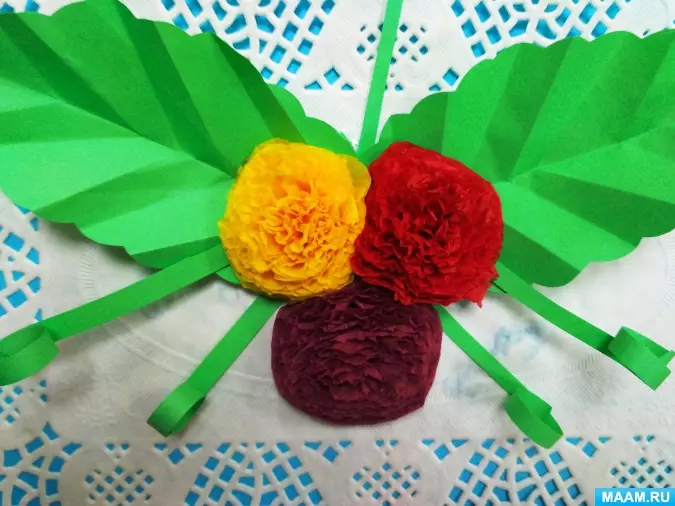
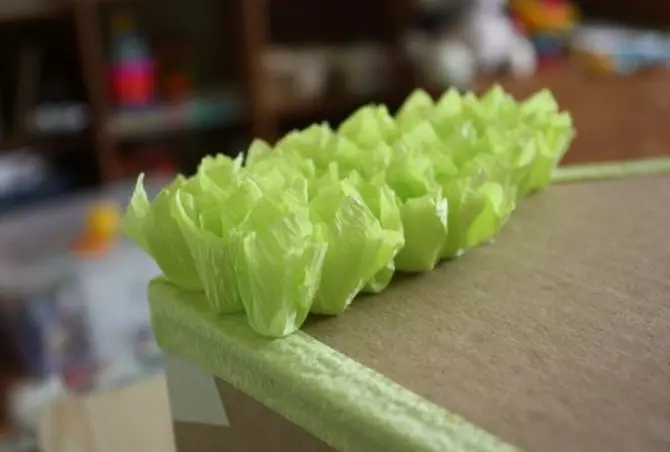
Basic element of the crafts will serve a fluffy flower from a napkin. To make such a component, it will be necessary to fold the napkin to the napkin in half a couple of times, after which the formed bulk quaditic is punch with a stapler in the center. After that, from the workpiece, you can cut a simple circle or more complex forms. The edges are permissible to supplement the fringe.
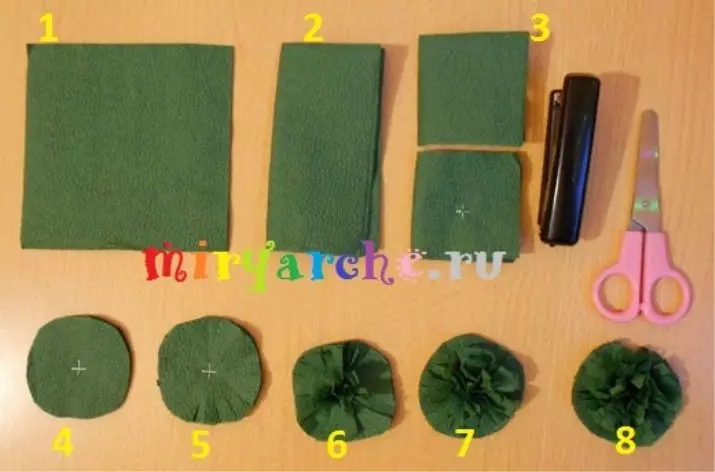
The specified basic elements are recommended to prepare in advance. So that the Christmas tree turned out to be more fluffy and pretty, green flowers are advisable to make more. When these components are ready, one can move to other important stages of work.
- From the cardboard sheet you will need to twist the cone-shaped part. It will serve as the basis for the future original Christmas tree. Fix this item can be stapler.
- Now you should prepare fluffy flowers for the Christmas tree, if they were not harvested in advance.
- Prepared green fluffy flowers follow rows or spirals to glue on a cone-shaped base from cardboard. It is allowed to use the thick adhesive of PVA or a stronger "moment".
- You can decorate the Christmas tree with any ways. For these purposes, a brilliant "rain", sequins, balls, rolled from foil, decorative beads are perfect. It is also possible to carefully cut small paper snowflakes: they will also become an excellent addition to the elegant New Year's tree.
The decoration of the Christmas tree will be the final stage of its manufacture.
How to create numbers?
Napkins are suitable for making a huge number of different crafts. It may be not only lush flower bouquets or homemade on the topic "Autumn". Today, large bulk figures are very fashionable, which are most often used to decorate premises on birthday. Such homemade is also possible to simulate, using parts from napkins.
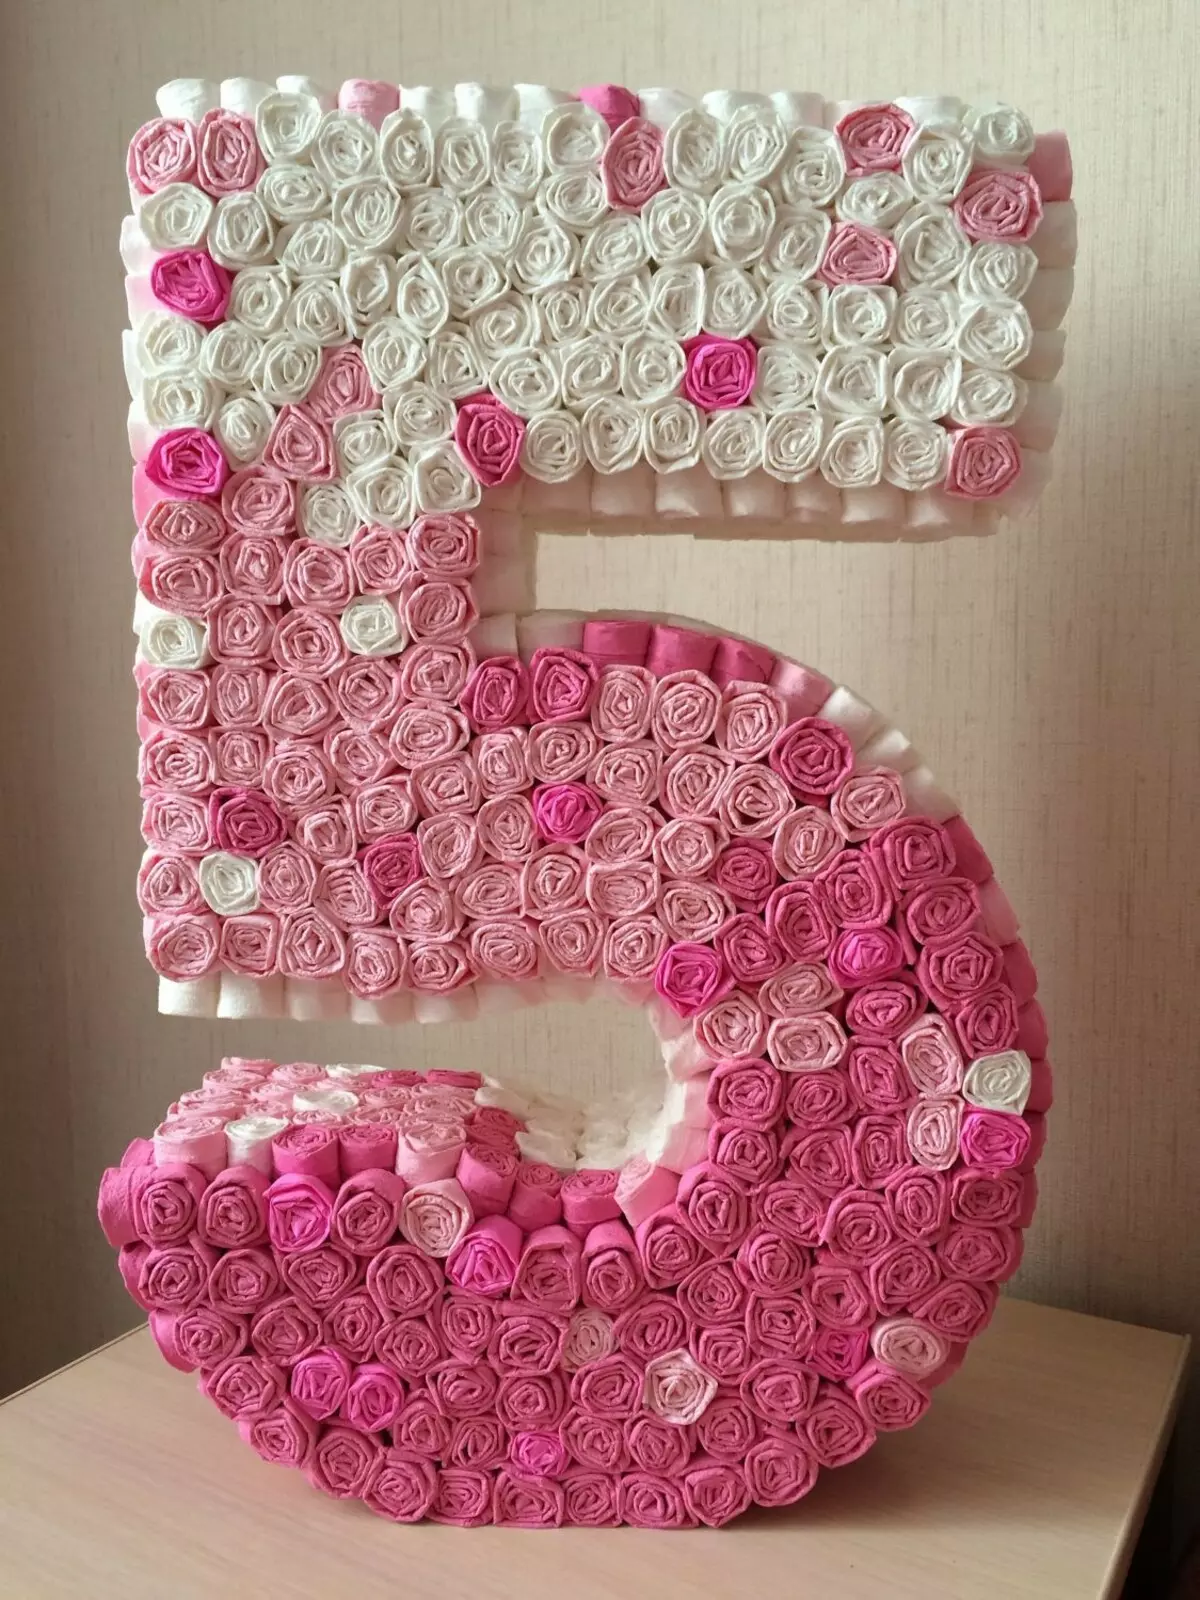
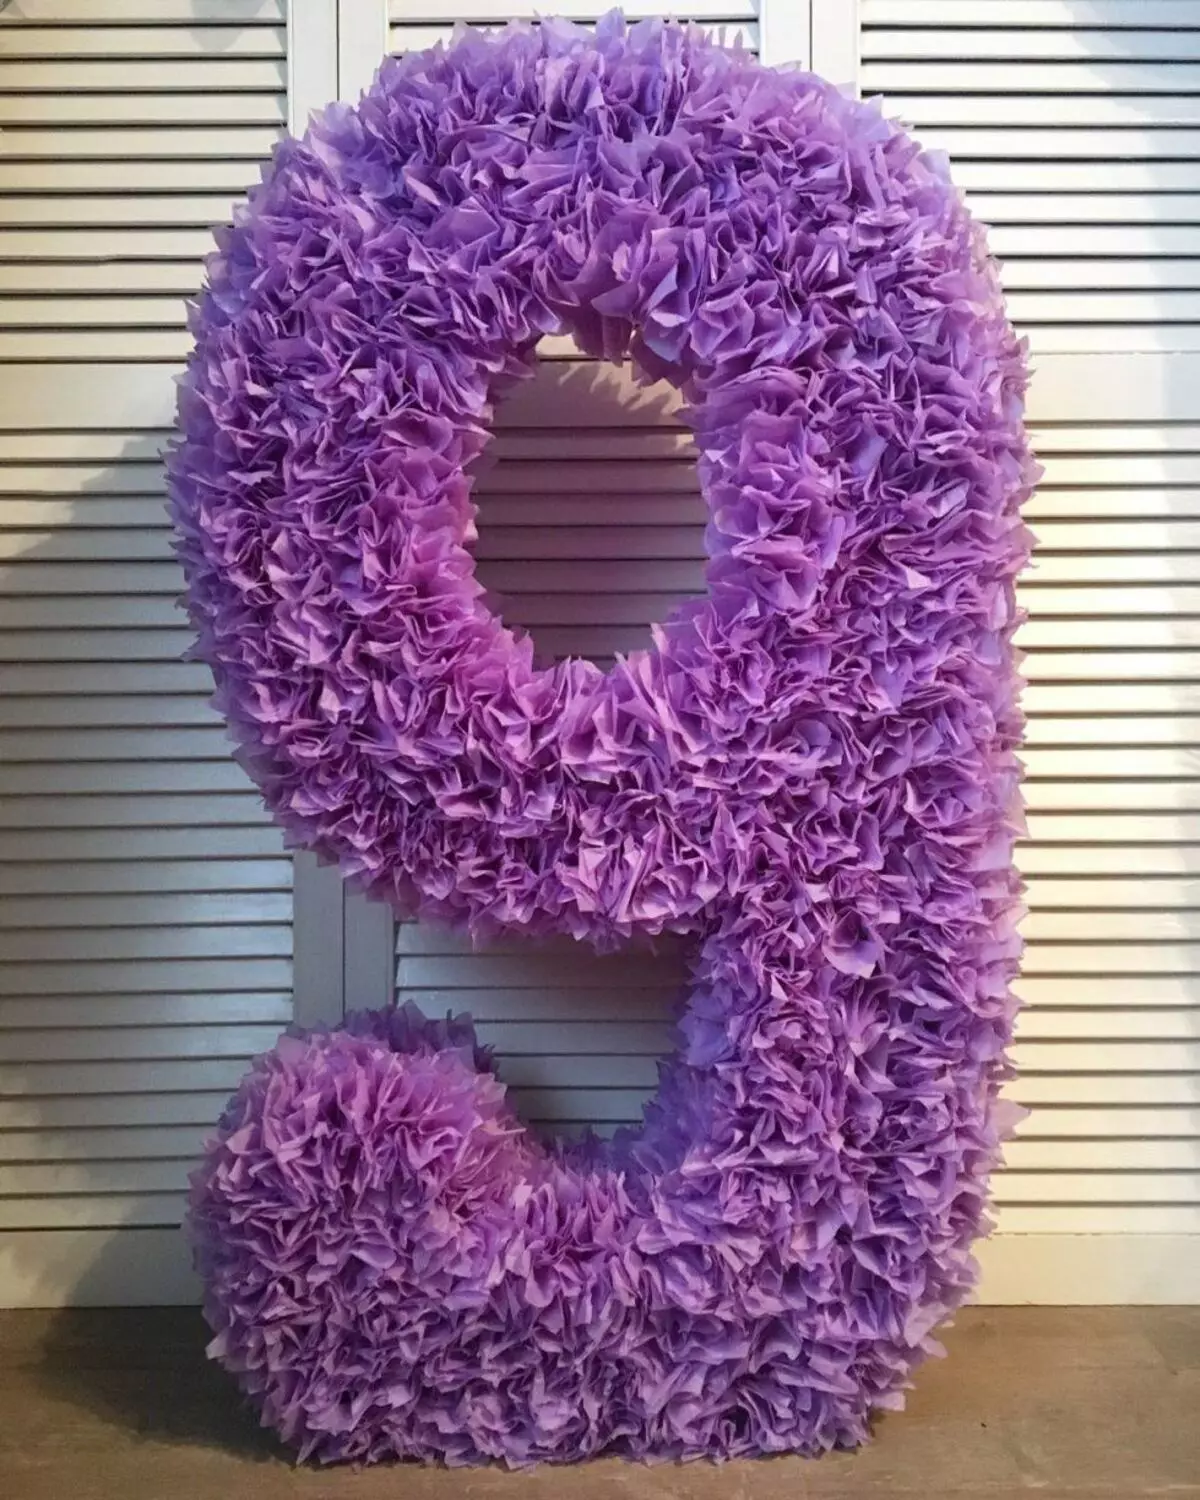
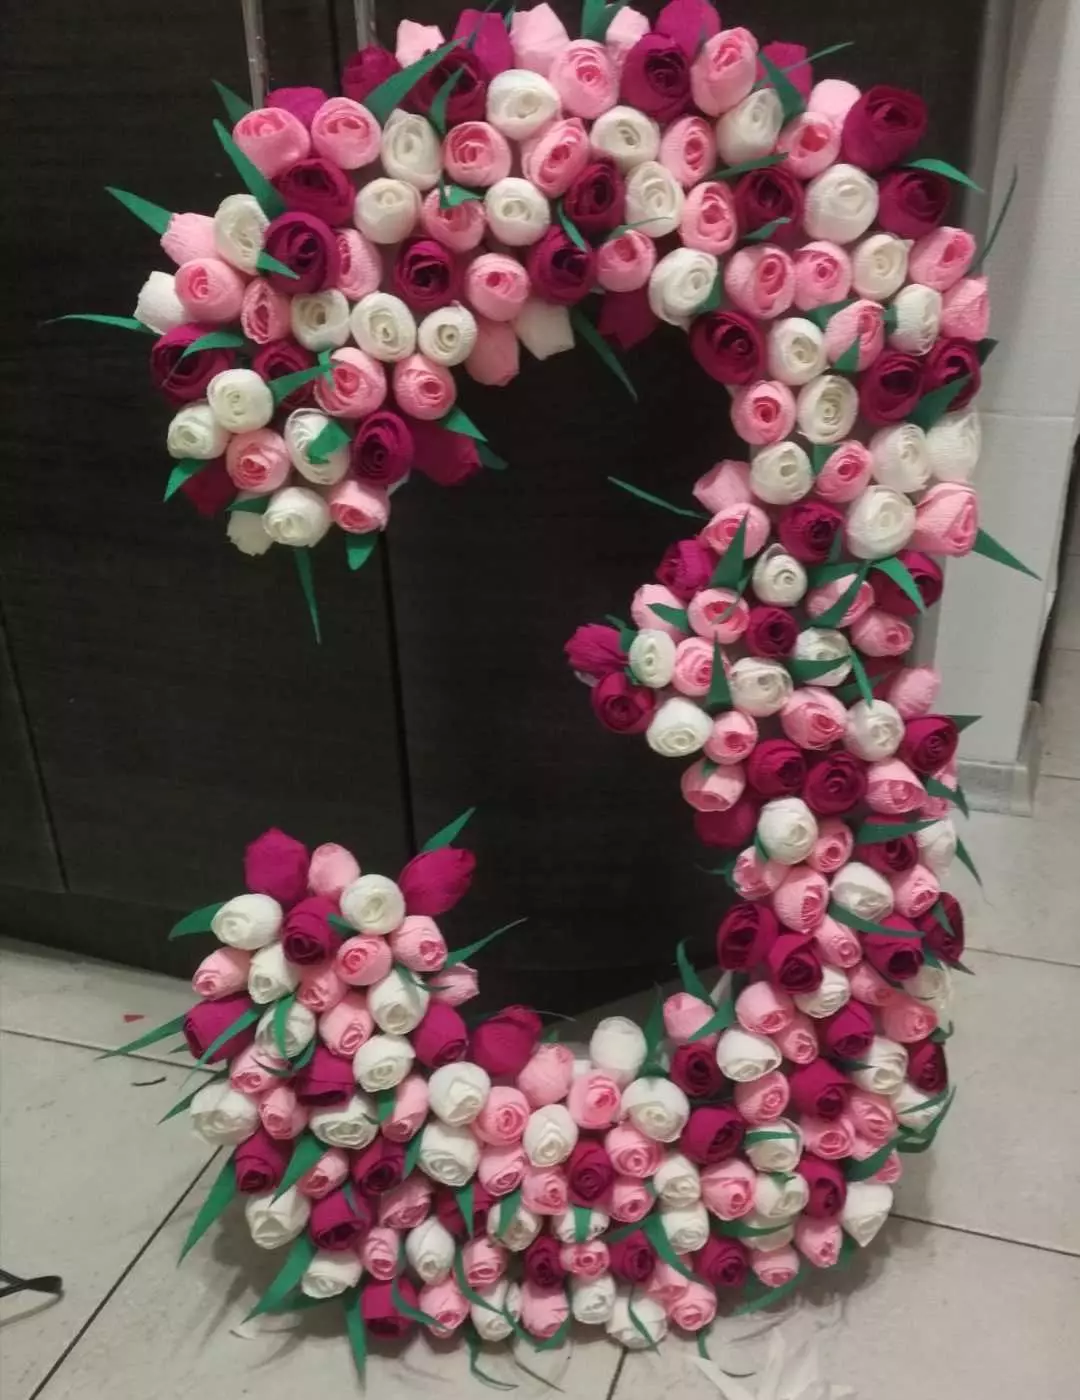
To model, absolutely any digit will require the following positions:
- Cardboard (ideal cardboard parts remaining from boxes, in which household appliances used to be packaged);
- Simple or greasy tape;
- Ruler and pencil;
- Scissors and acute stationery knife;
- stapler;
- napkins;
- Adhesive compositions (suitable PVA or "moment").


We will understand in the phased production of beautiful numbers from the listed components.
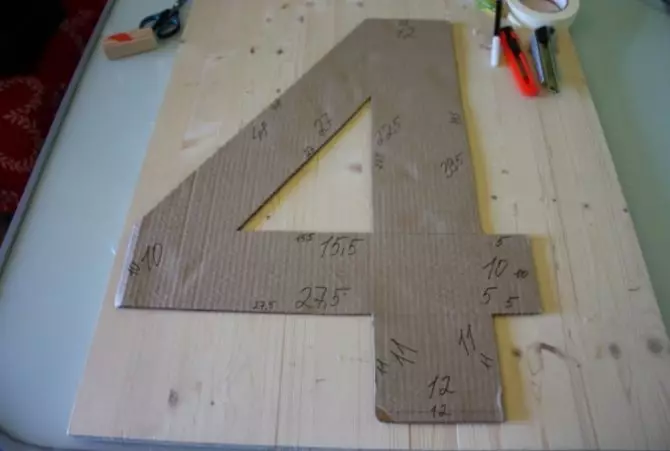
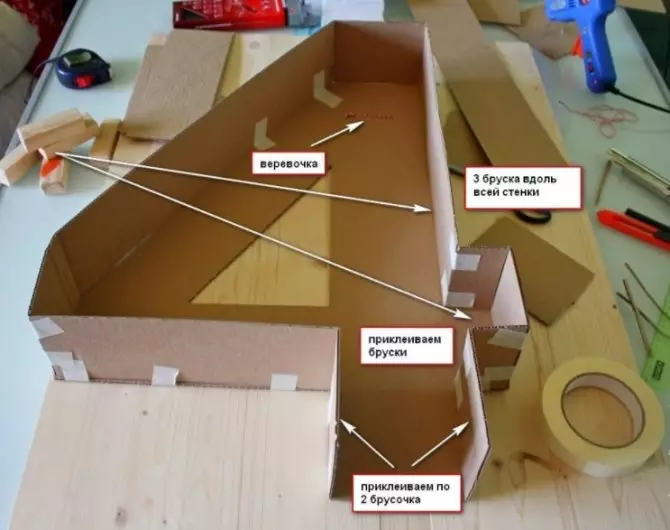
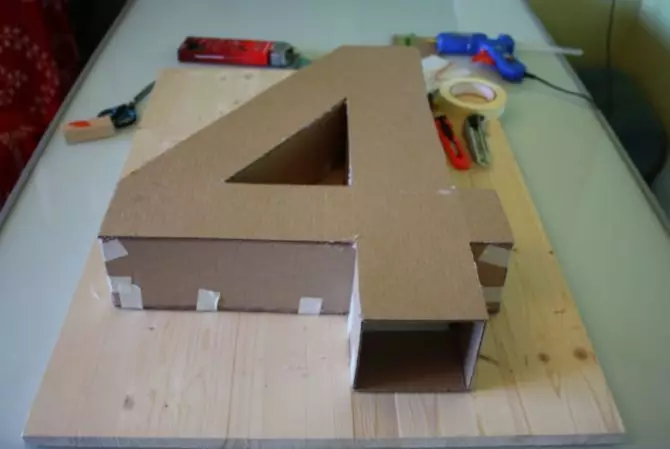
- At the first stage, it will be necessary to make the volume frame of suitable sizes. For this template, the template of the future digit will need to thoroughly flashes in two copies. Cardboard strips of the same width will act as sidewalls.
- When all the necessary framework details are prepared, they will need to glue into a single design. Scotch is suitable for these purposes.
- Now it is necessary to prepare a sufficient amount of fluffy florals from napkins.
- Prepared flowers should be glued to the finished frame-based basis as a specific digit.
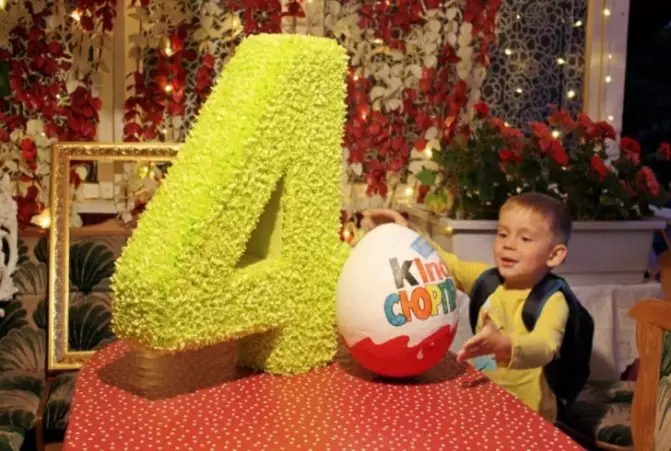
At this stage, the original homemade will be ready. It can be additionally decorated and decorated, for example, elegant ribbons, bows, small crowns or different memorable trifles.
Other ideas
There are countless other interesting ideas of beautiful crafts from ordinary napkins.
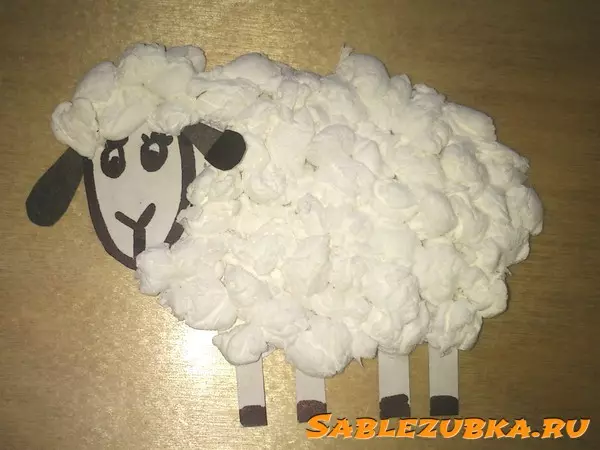
Lamb
For example, you can make a charming lamb. Such an interesting handicraft accurately hobble in a young master.
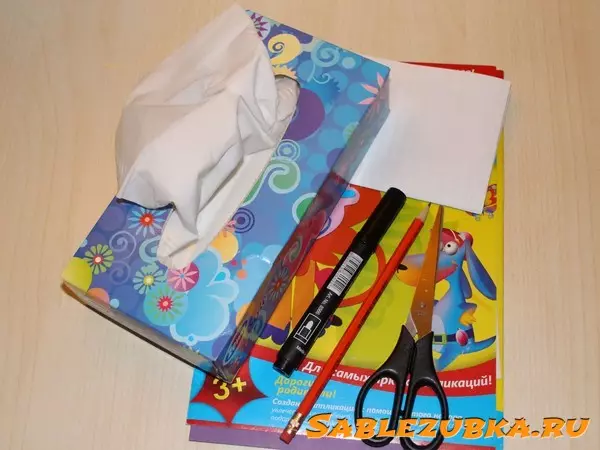
To simulate a similar homemade, use:
- cardboard sheet;
- colored paper;
- White napkins;
- scissors;
- The glue composition of the PVA;
- marker;
Pen or felt-tippers for drawing muzzle lady.
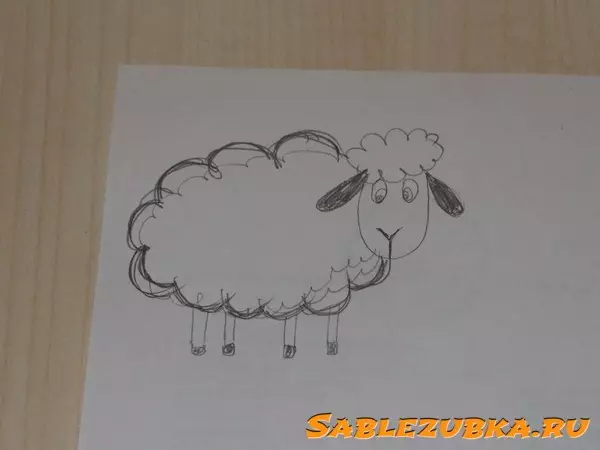
Let's give a simple instruction for making such an attractive craft.
- To get beautiful lambs, you must first prepare the appropriate template. An animal should draw on a cardboard sheet.
- Next, the template of the future lamb must be carefully cut, sticking to the contours. The marker should draw a muzzle and hoof the animal.
- Now from paper black you need to cut ears. They are glued to the head of the lamb. It is necessary to do it only at its foundation.
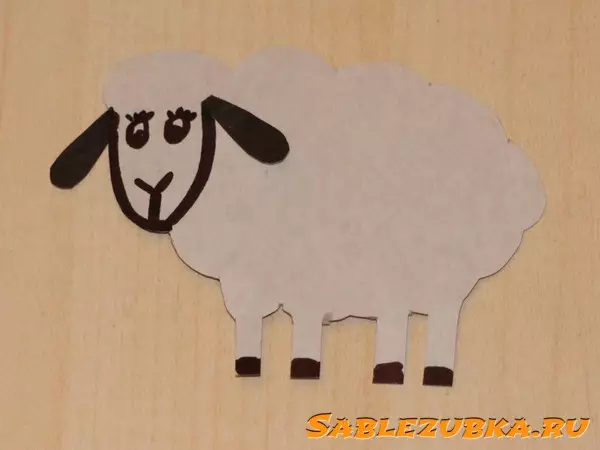
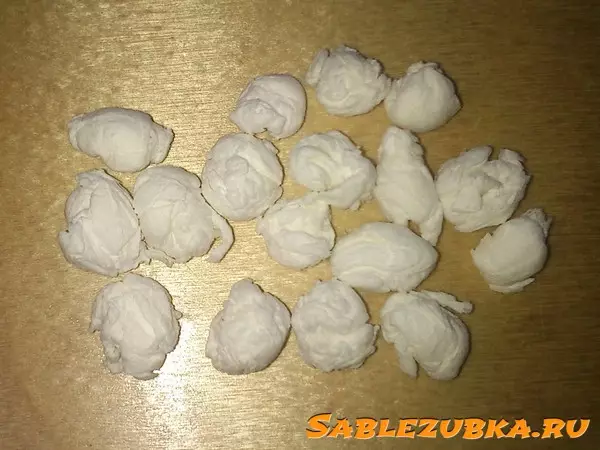
- In the next step, you will need to take the napkins. The first napkin must be broken into several small pieces. It should be broken, and not cut with scissors. It is necessary that when twisting billets in small balls, the edges turned out uneven.
- Now from the needed pieces it is necessary to form balls. They can be twisted or roll.
- When the required amount of white balls from the napkins is prepared, they will be needed to be glued to-lamb, using the glue composition.
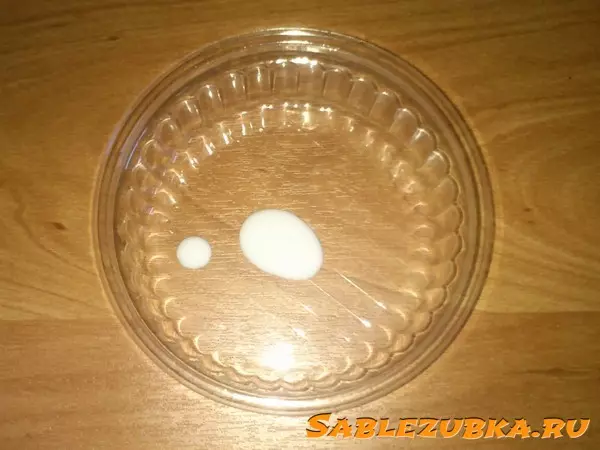
- The glue is best to apply on the template through a tassel. Each paper ball should come to the workpiece with a little effort.
- Once all the balls are pasted, you should wait for a complete drying of the crafts.
- Figure of fluffy lamb can be left in this form, and can be used in the manufacture of a more interesting applique composition.
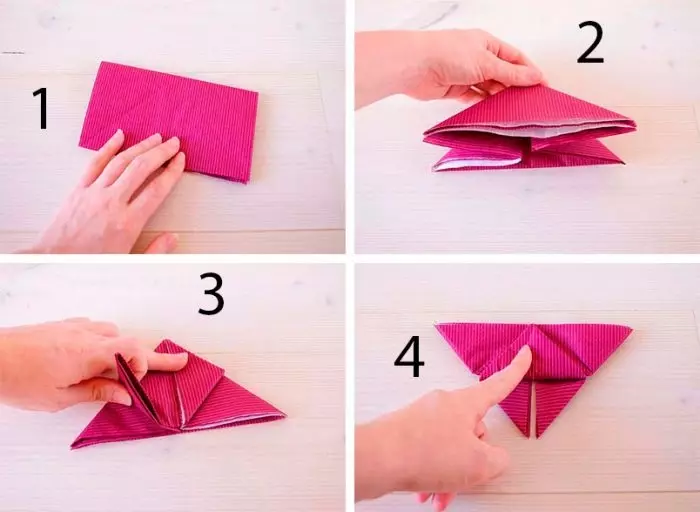
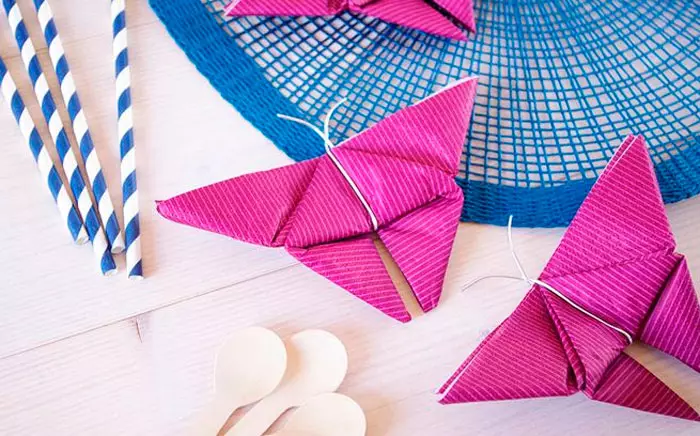
Butterfly
From the napkins, the wonderful beauty of the butterfly is obtained. Such crafts are simulated very simple. We learn how to make a very beautiful butterfly from the materials under consideration.
- First you need to take 1 napkin. On 2 of its diagonals, you will need to form two strips of bend. Then the workpiece is twice.
- Now it is necessary to fold the triangular element in diagonal bends.
- At the next stage, the tips of the triangular part are folded with the top of one side.
- Next, the triangular detail is turned over, after which they connect the vertex with the base.
- The resulting workpiece must be carefully adjusted in half.
- Now it is necessary to prepare a small segment of the wire. This component will need to be folded in half. It should be wrapped with a napkin on both sides.
- Wire base will need to be spinning, and then form a butterfly mustache. All surplus wire should be cut.
Original and very bright handicraft ready.
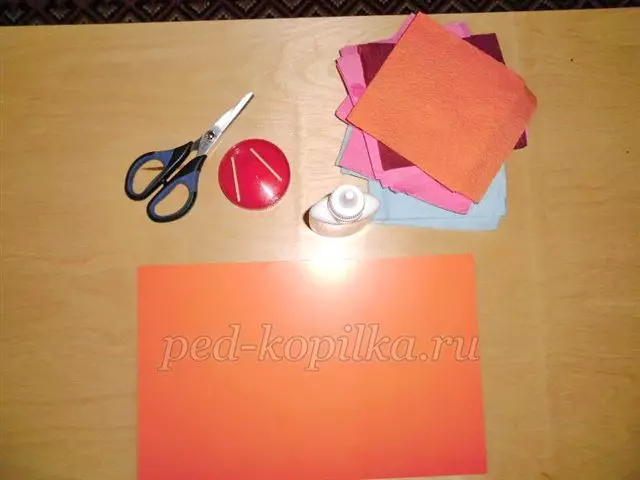
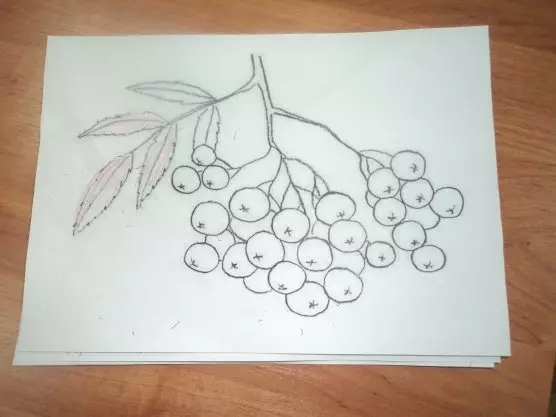
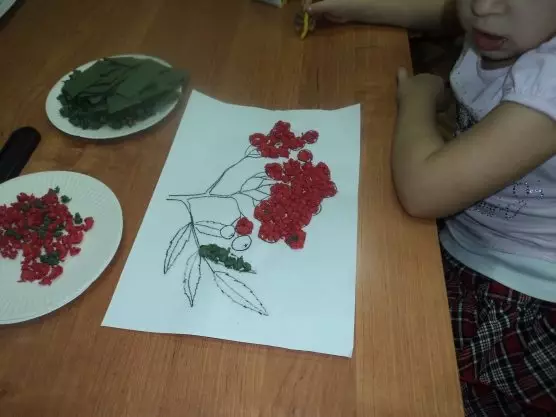
Rowan twig
Throw out how to make it possible to make such a pretty autumnal craft.
- First you need to take a sheet of white cardboard. It needs to draw rowan branch with bunch of berries.
- Now you need to take napkins. Of these, you will need to cut squares. From such elements it will be much easier to ride small balls.
- Ready-made formed balls from napkins are necessary using a wooden wand to dip in the adhesive solution. After that, the parts moistened in the glue can be accurately stick to the pre-harvested circuit.
- Rowan berries It is advisable to make marshests from red napkins, leaves from green. For the decoration, it is necessary to use brown details.
- Red balls from napkins are advisable to glue as close as possible to each other, so that the picture turned out more attractive.
- To make the leaves, it is not necessary to prepare paper balls. You can use simple cut parts with slightly twisted tips. The latter parts need to be especially securely secured.

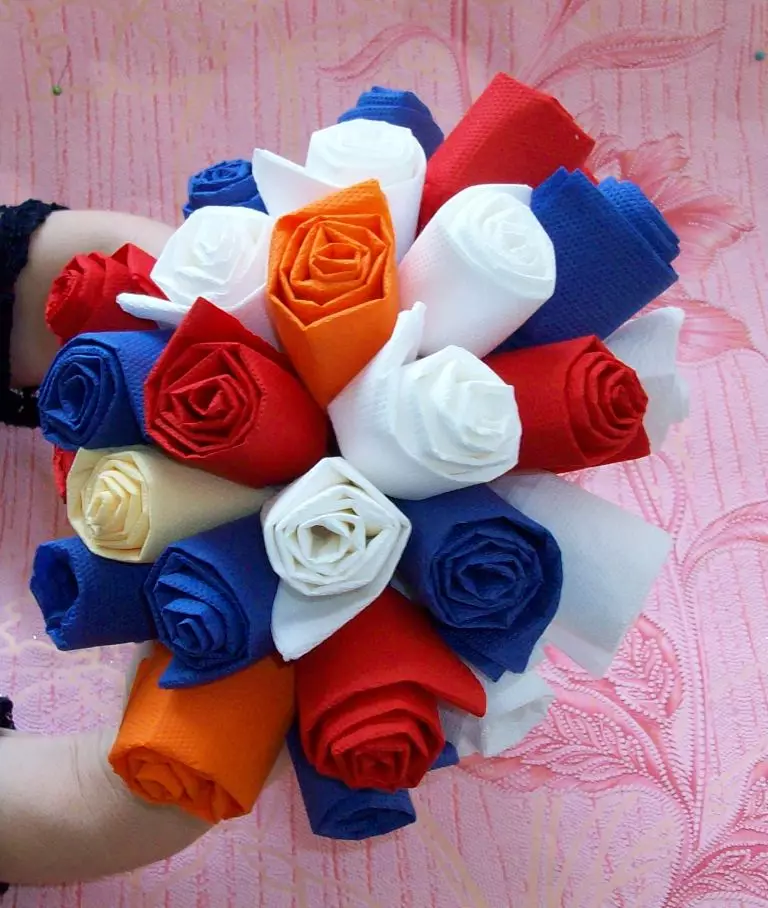
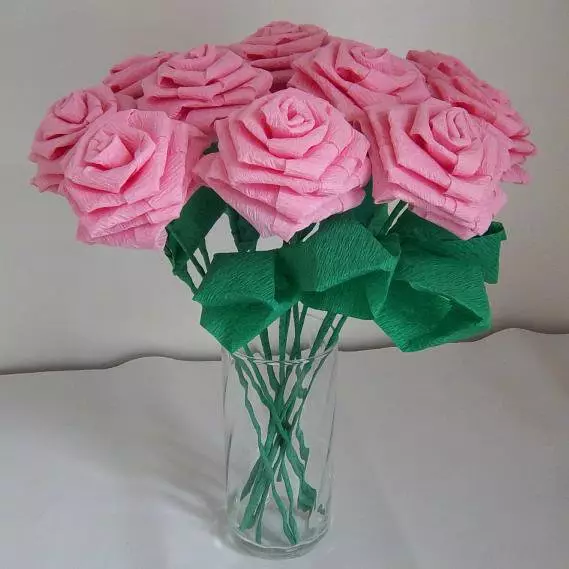
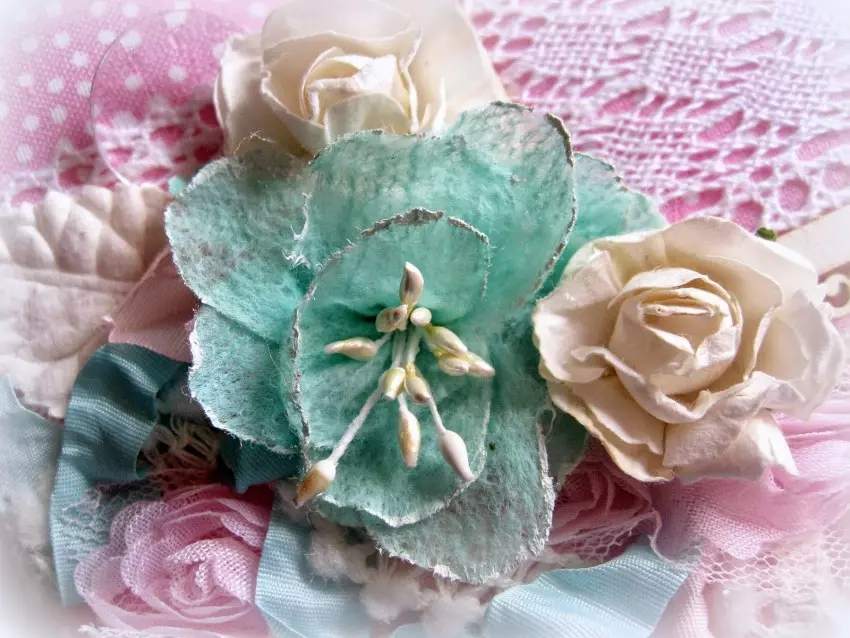
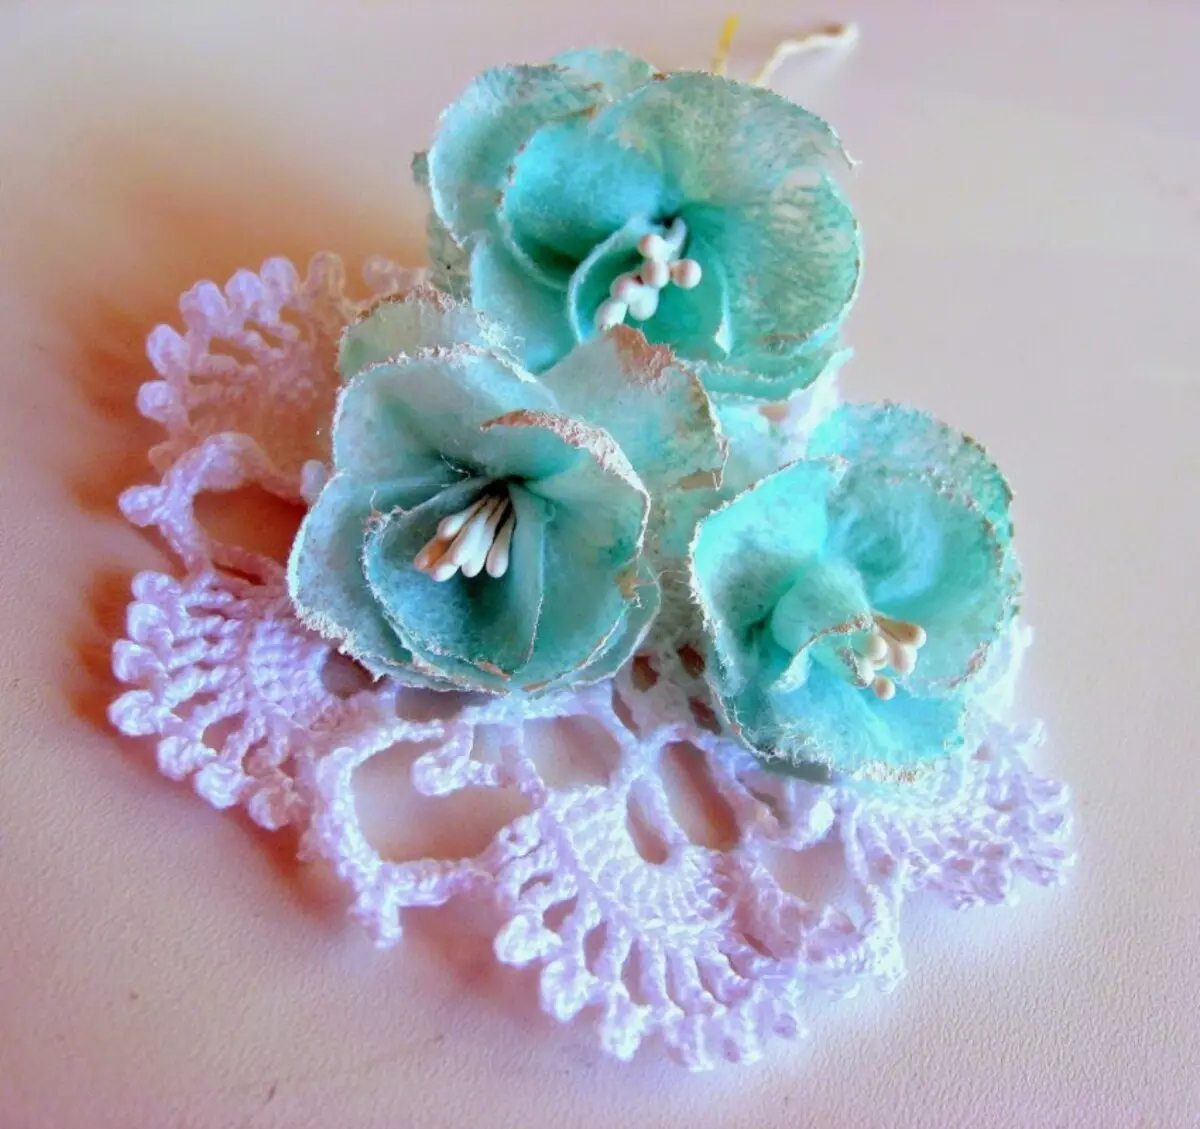
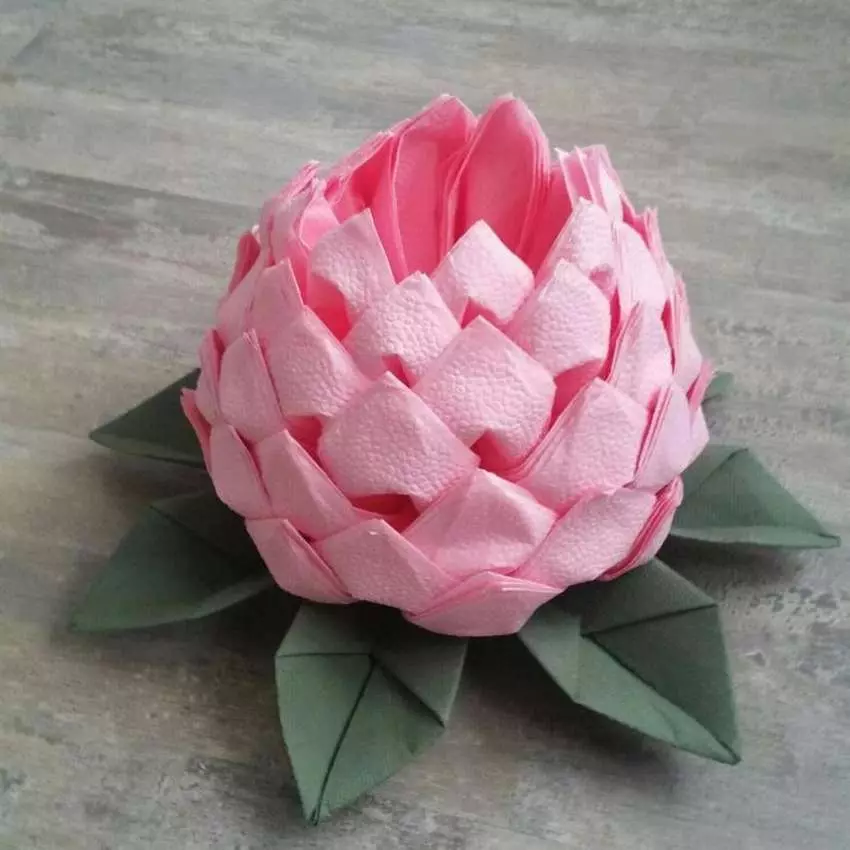
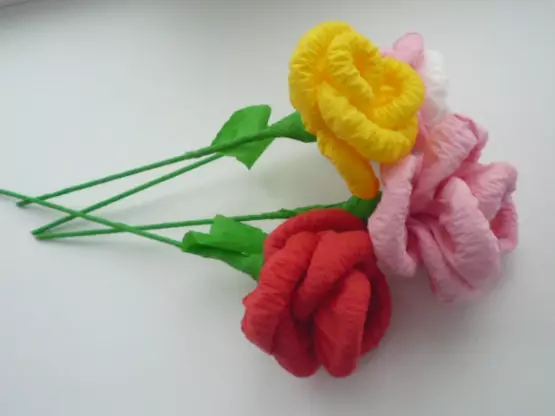
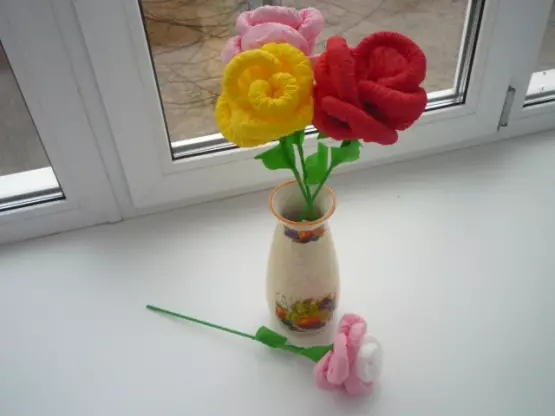
Roses
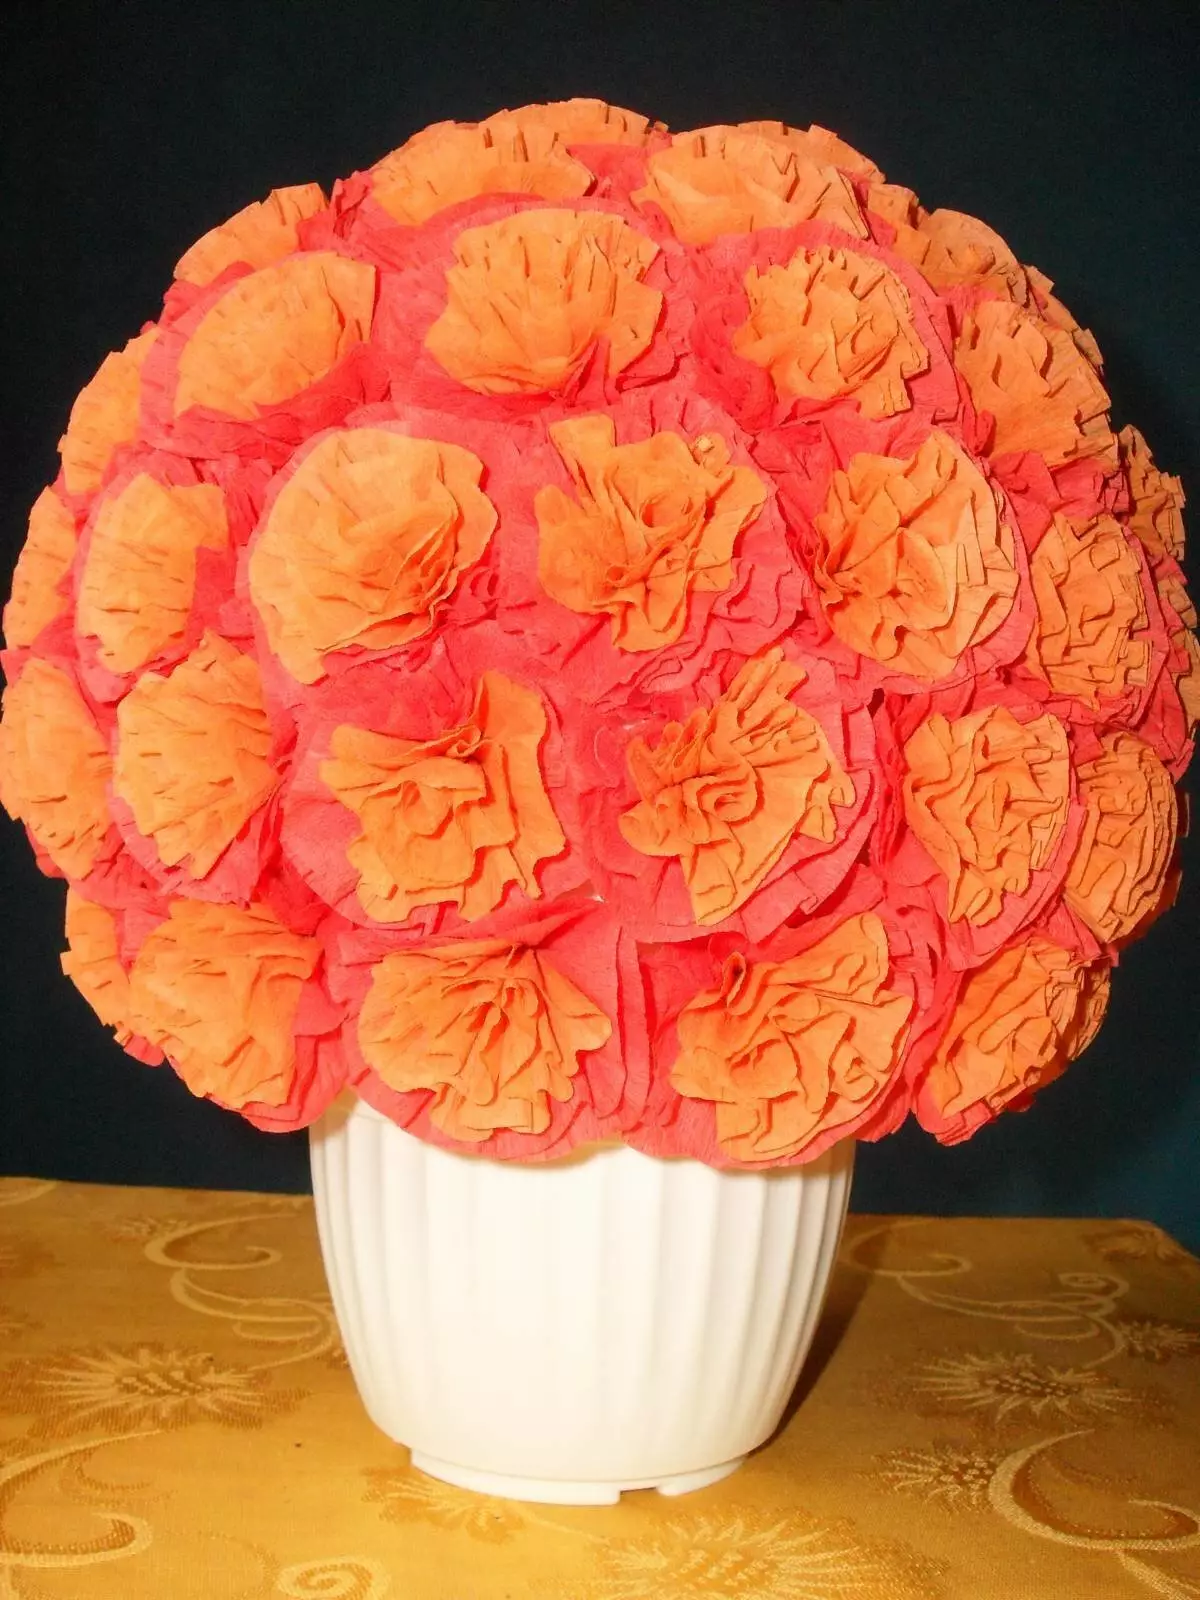
Of the available materials under consideration, it is possible to obtain truly chic volumetric roses on the stalks. Such crafts can be very original and aesthetic interior decorations. To simulate gorgeous flowers, use:
- multicolored napkins;
- Thin pencil or needle;
- wire;
- Corrugated paper green.
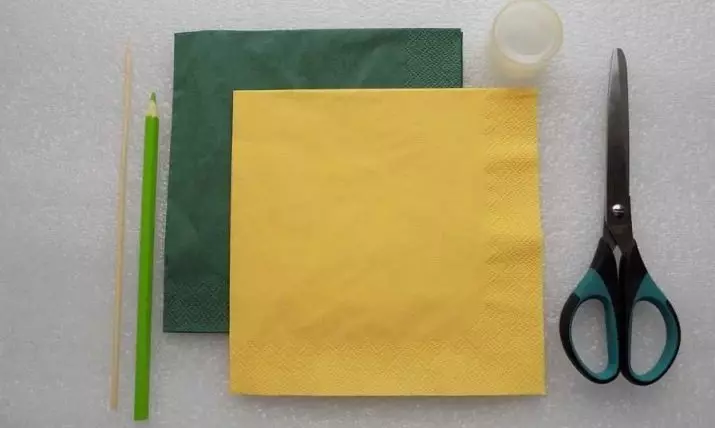
We'll figure it out with the peculiarities of the manufacture of attractive roses.
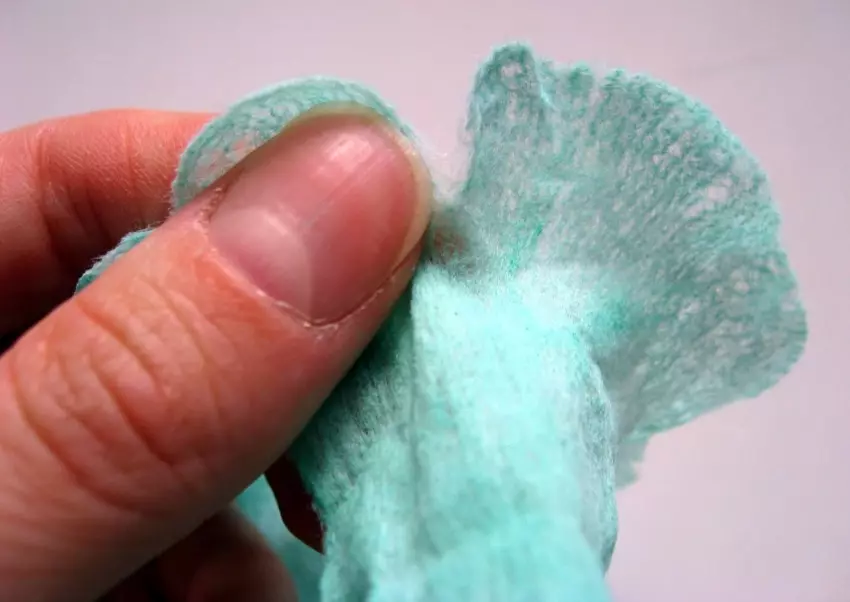
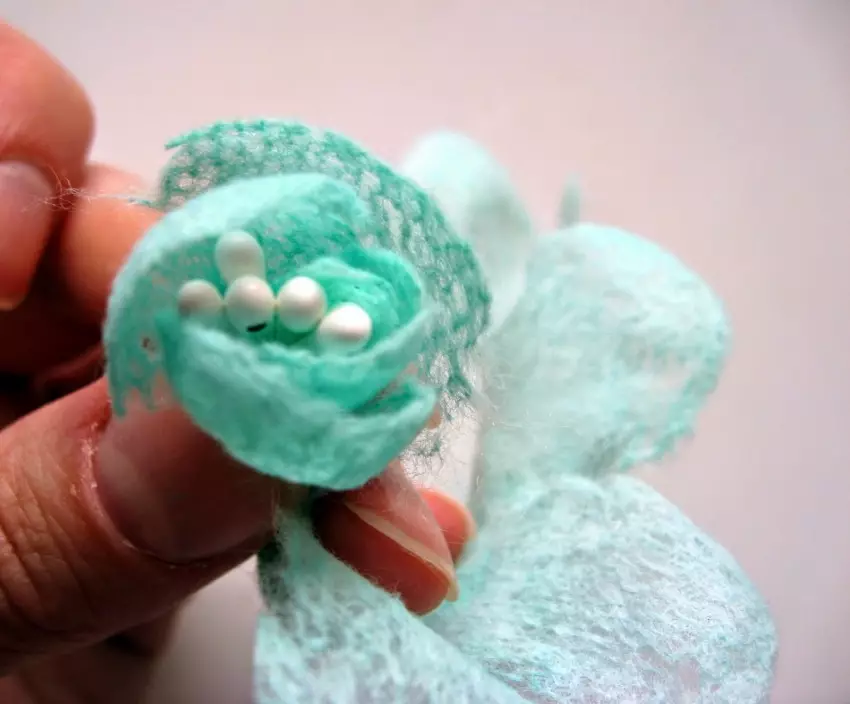
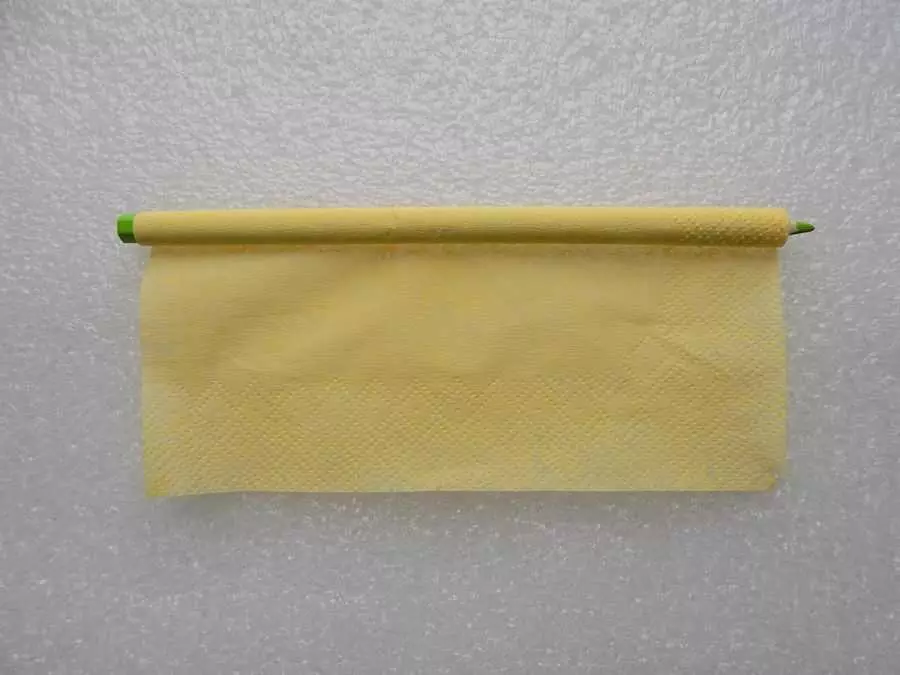
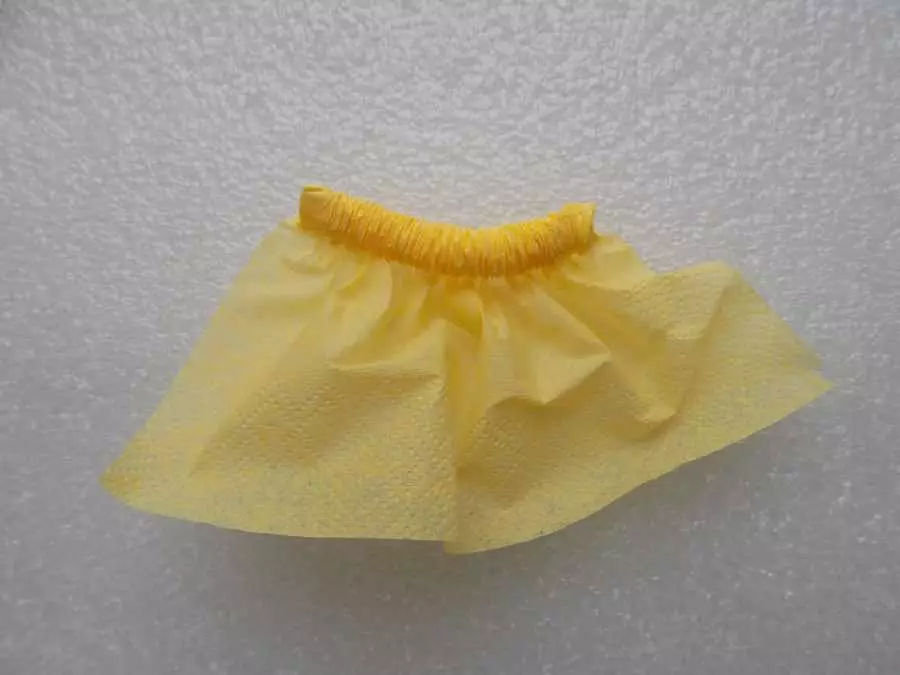
- Based on the size of future colors, you need to cut square blanks of the corresponding dimensional parameters. If the roses are planned to be made very large, then the napkins can not be cut at all.
- Each quadter obtained will need to be neatly spinning up to its middle. Cheat the blank follows the usual needle or pencil.
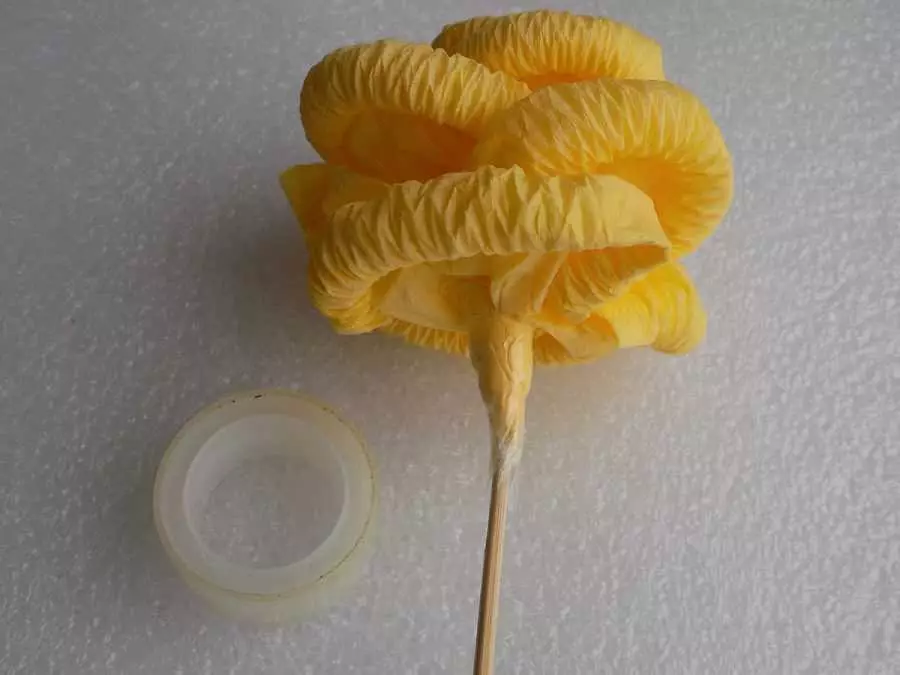
- After that, the detail from the napkin will need to tightly squeeze along the edges and pull out the needle (or a pencil if it was used to twist).
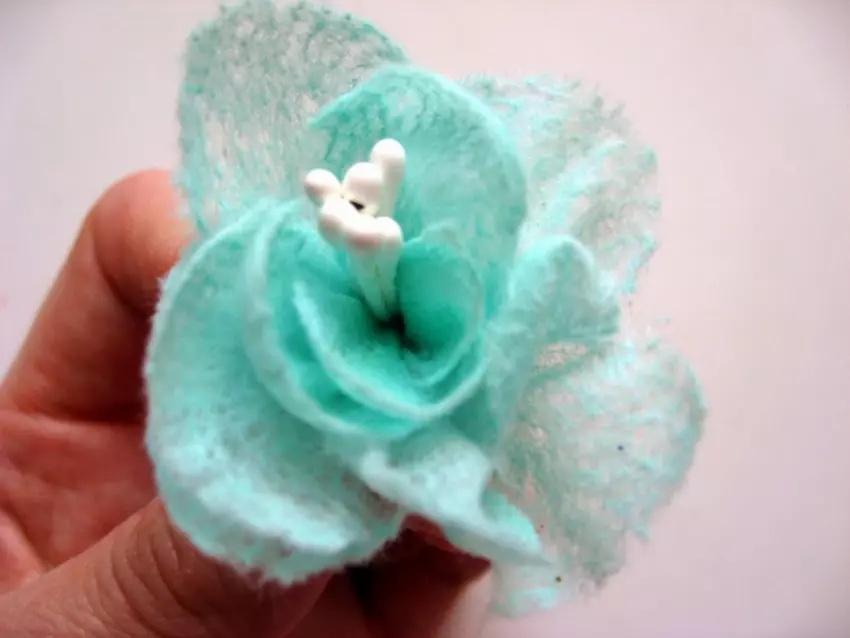
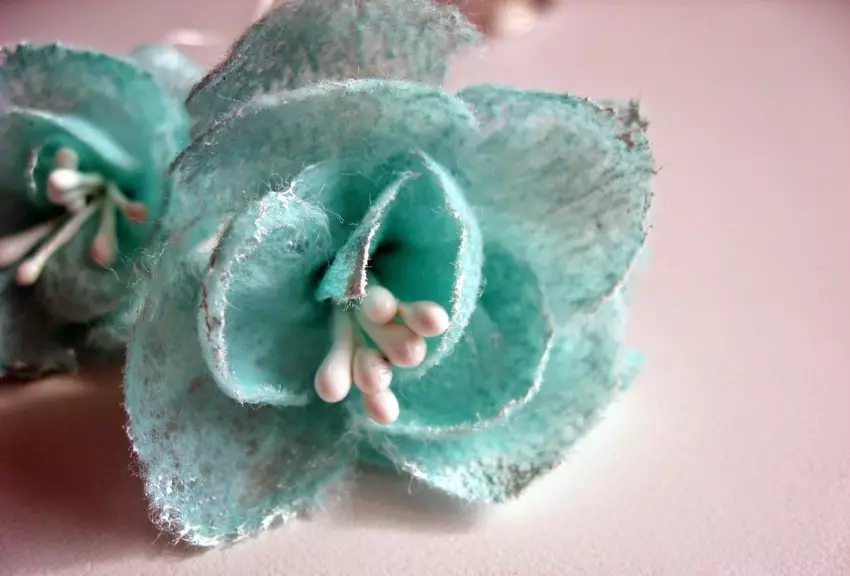
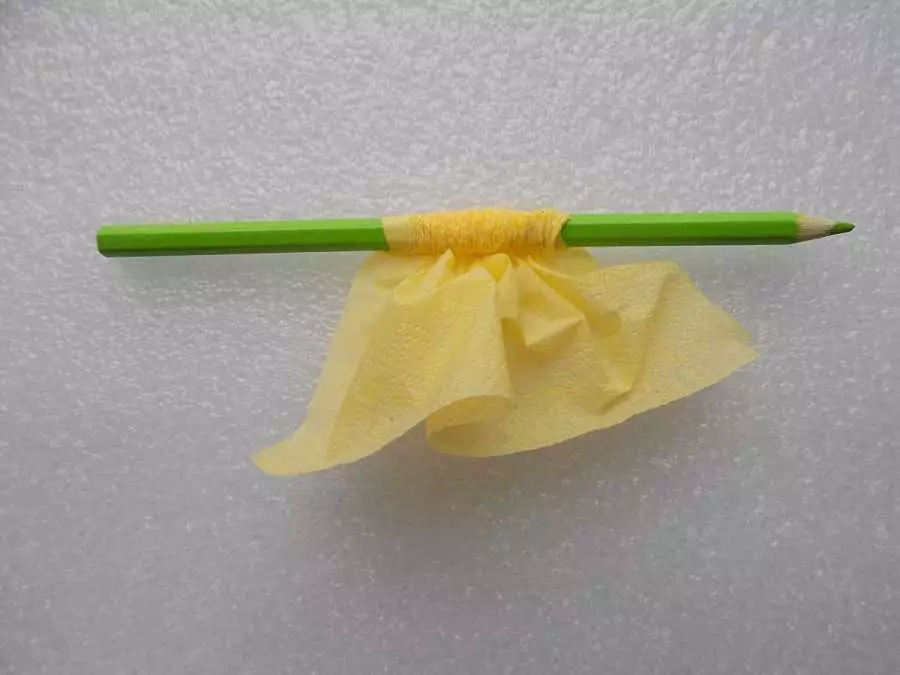
- Now it will be necessary to turn off all the petals on wire details. They will need to disclose as much as possible as the lush flower builds.
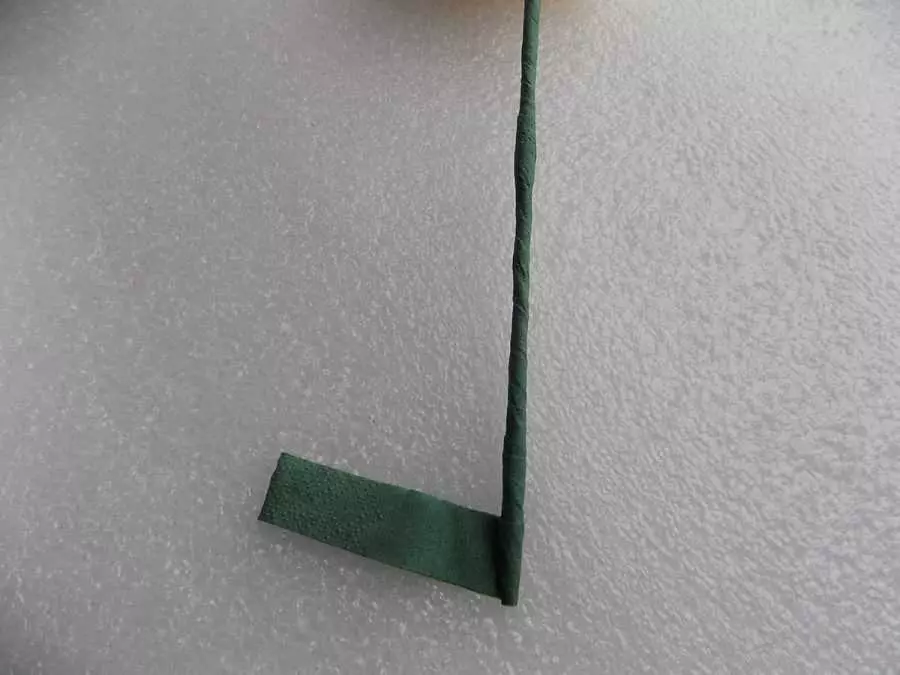
- The resulting workpiece will need to be fixed by the green paper strip. The same detail should be wrapped the entire wire base for its length. So it turns out to form the imitation of the flower stalk.
- If there is a desire, you can connect to the stalk several leaves. After that, luxury roses will be ready.
Now it will only be left to choose a vessel in which you can put the resulting homemade roses from the napkins.
For these purposes, the container made of cardboard is suitable. A ready-made solution will be a ready-made vase.
Star
With your own hands from large napkins, you can make a stunning bulk star. We will analyze a step-by-step master class on the correct conduct of such creative works.
- First, the napkin will need to reveal.
- After that, it is folded so that 2 external edges "watched" to the central point.
- Now the napkin will need to turn 90 degrees, and then adjust 2 external edges to the center.
- The above action will be needed to duplicate.
- At the next step, it will be necessary to carefully fold the resulting triangle by half the central strip. This must be done to eventually get a dense strip. After that, the napkin can be deployed.
- The resulting harmonica must be folded along the fold line. Then the detail unfold and once again fold the harmonica, but already towards the opposite side.
- The harmonica will need to be wrapped in the center of the metal wire item.
- Each angle of napkins will need to be adjusted to the inner side at an angle of 45 degrees. On each side, the harmonic part should be 4 corners.
- Now all existing harmonic tips must be connected from two sides. So a very original and attractive star will be formed.
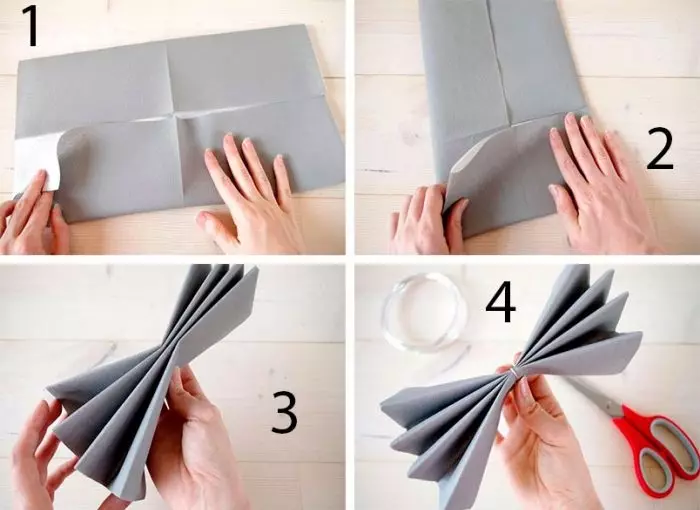
A finished interesting workpaper can be supplemented by any decorative components. The star can be decorated with painted patterns, sprinkles from sequins or other attractive components.
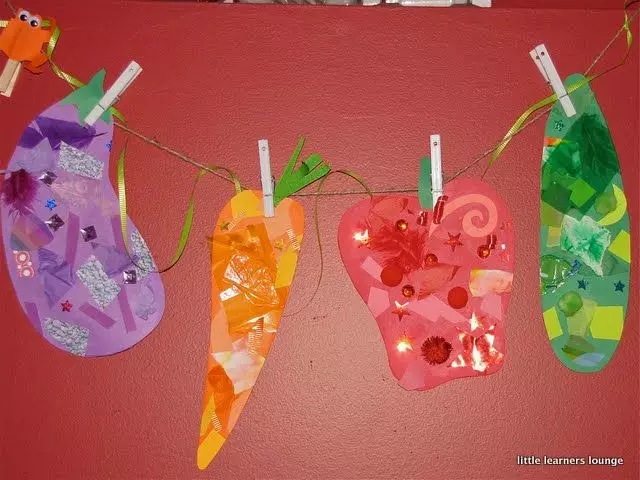
Fruits and vegetables
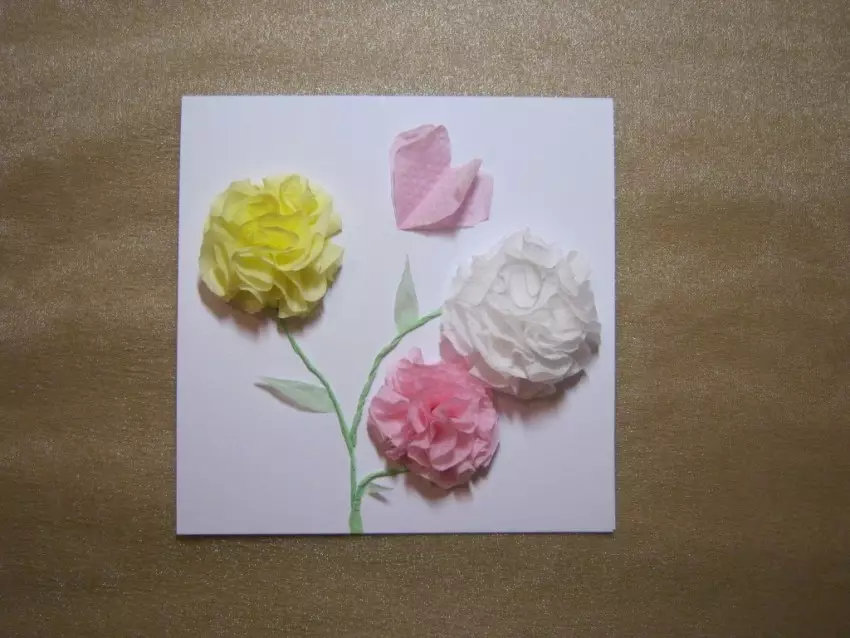
The smallest masters can make excellent applications, which depict various vegetables or fruits. We learn how to model such compositions using paper napkins.
- The contours of any vegetables and fruits should be cut from dense cardboard. Cut all the details needed very carefully, under the supervision of adults.
- On the existing outlines, applied to the cardboard base, it will be necessary to glue pieces of napkins of different colors. These pieces can be cut in advance from napkins or rush.
- The resulting simple composition can be made more attractive and expressive, resorting to additional decoration.
A child can decorate the applique with vegetables through shining sparkles, feathers or other elements of suitable colors.

About how from paper towels and napkins make a beautiful vase plate, see the next video.