
Most often, children and in kindergarten, and at school as a gift Mama on March 8, it is flowers. But I want to diversify the traditional mimos of cotton balls and tulips from a folded tripled colored paper with something truly original, made with your own hands.
Materials and tools
Depending on what a bouquet or flower you are going to do, you may need:
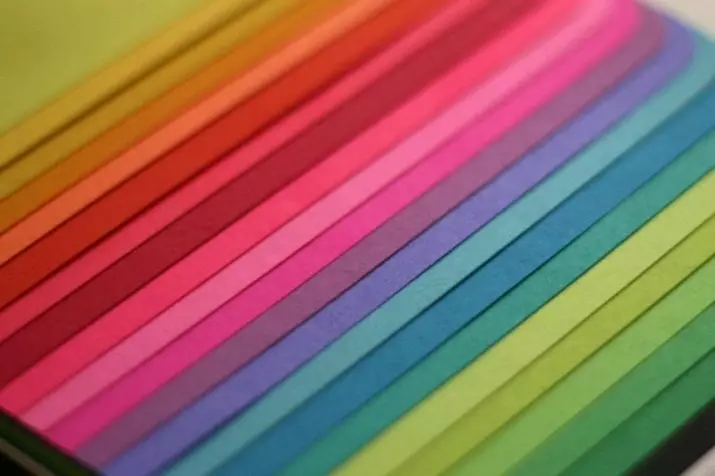
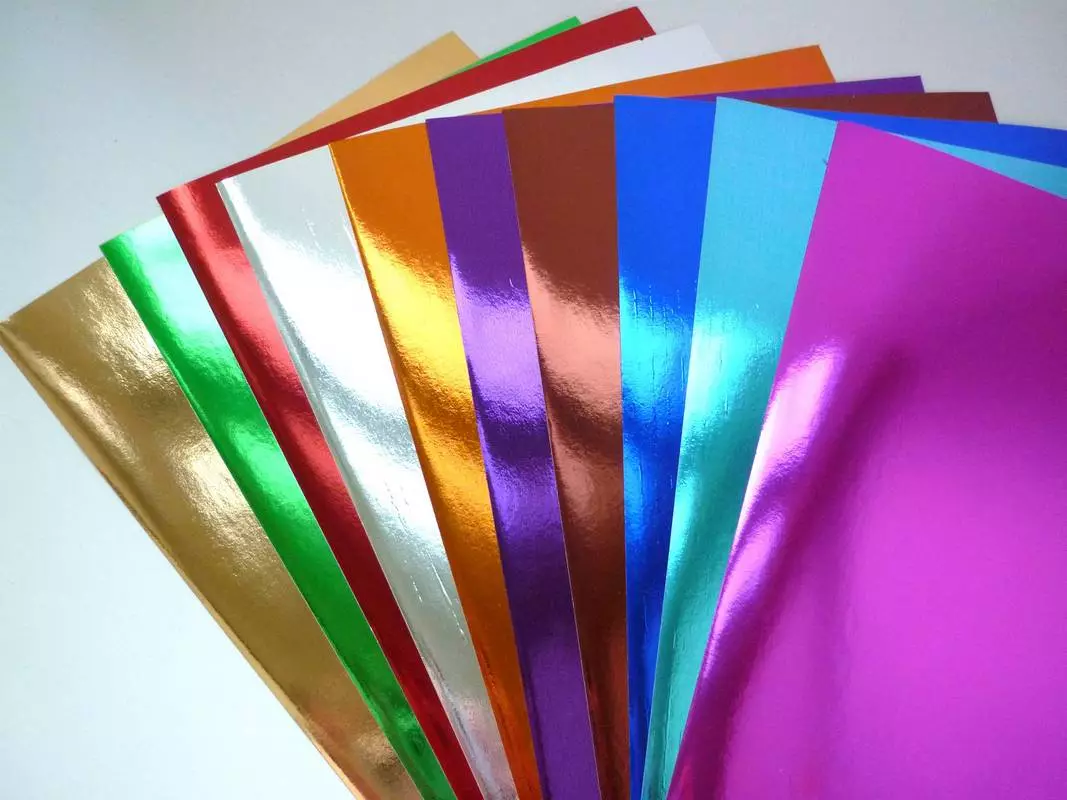
- paper - color (thin or dense), corrugated, foil;
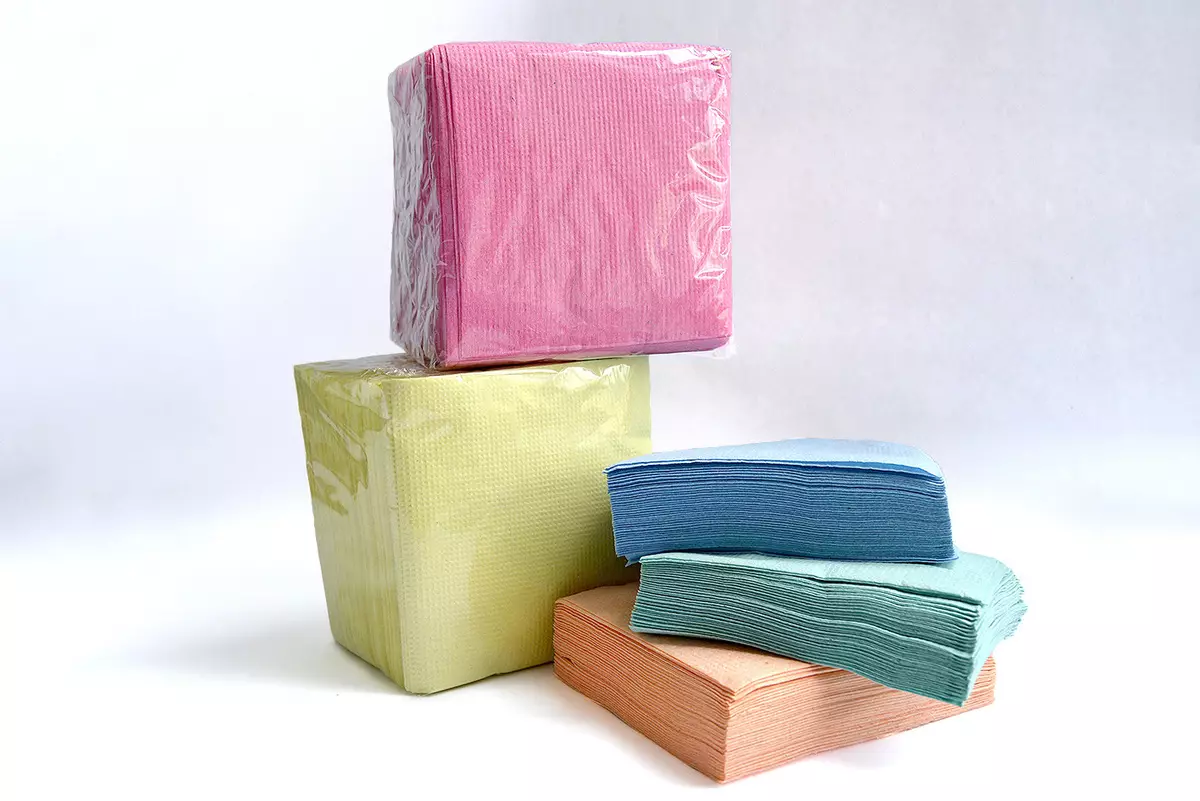
- Napkins of different colors;
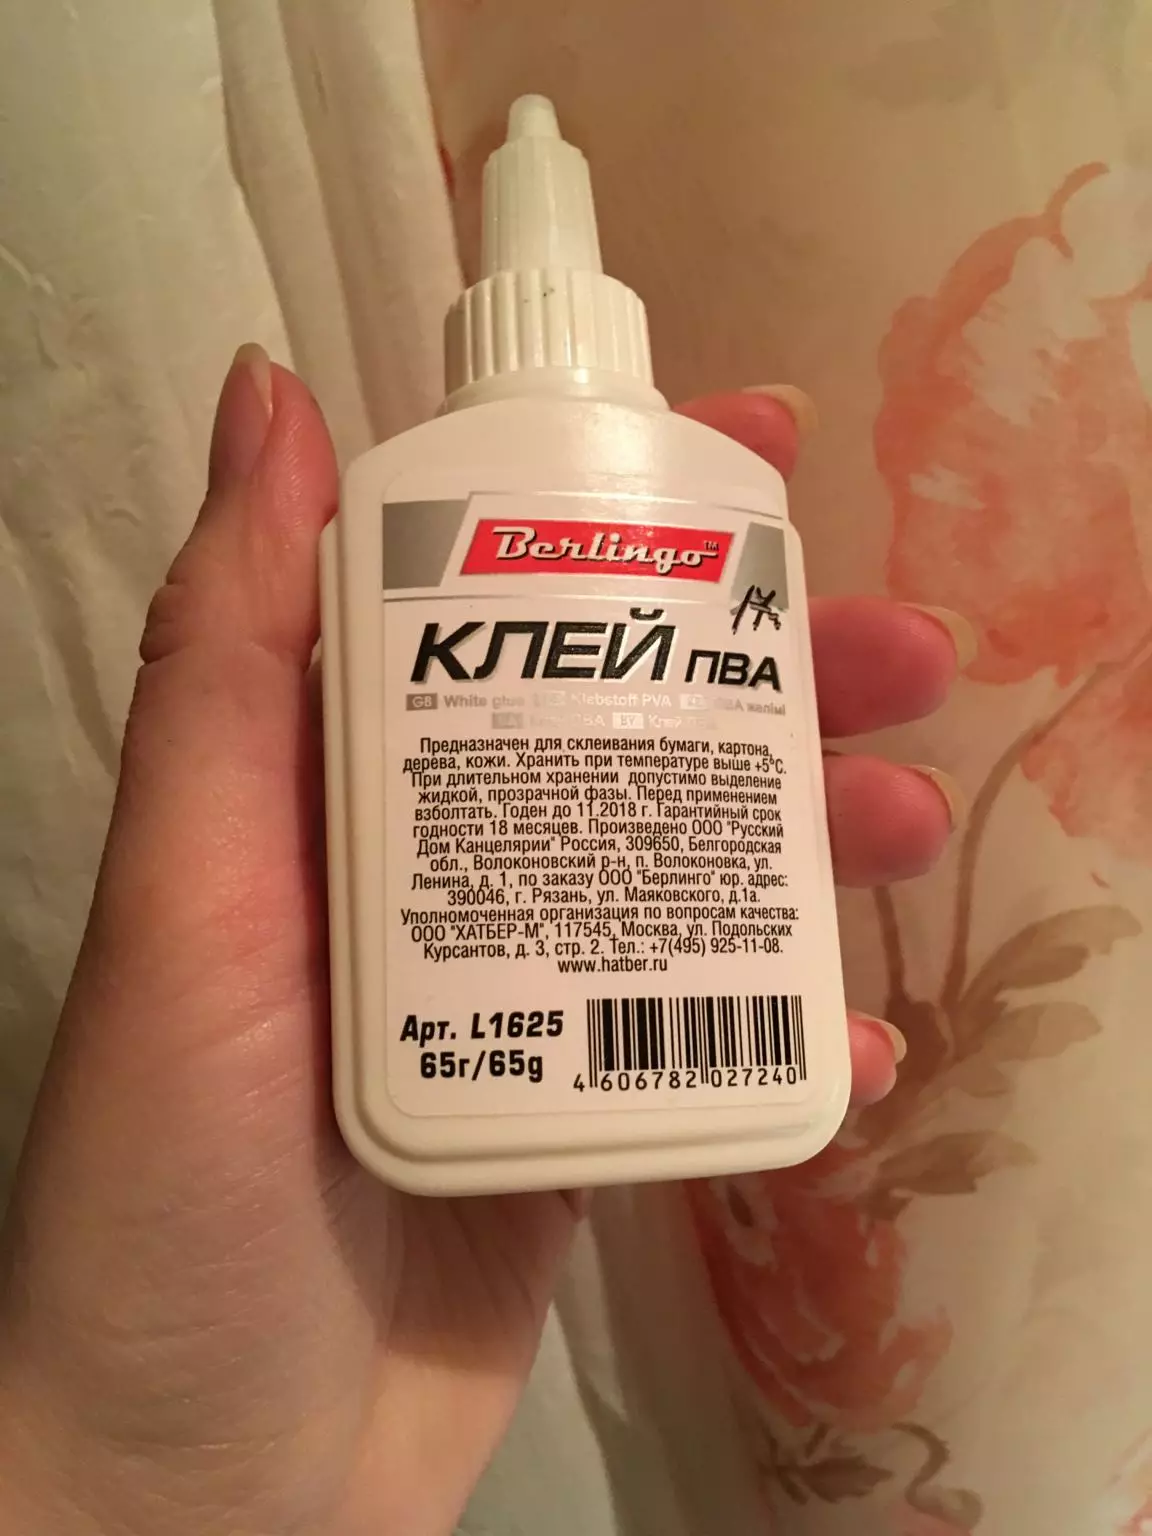
- glue;
- Plastic tubes or wooden spanks;
- scissors;
- Simple pencil.

7.
Photos
It is better before starting work to check for the availability of the necessary gift to create a future gift, so that in the process of work is not distracted.
Prepare a workplace - it should be quite spacious so that you can unhindered to spread the details and blanks of future colors, cut and glue them. Provide good lighting.
The younger child, the safer must be cutting items. Preschoolers and younger schoolchildren better work under an adult supervision.
Flower making
Before starting work, you need to decide which flowers and in what quantity it is planned to be made. Perhaps it will be a bouquet or basket with flowers. Or a composition in which buds look out from a congratulatory envelope. By choosing a future gift, you can start creating it.

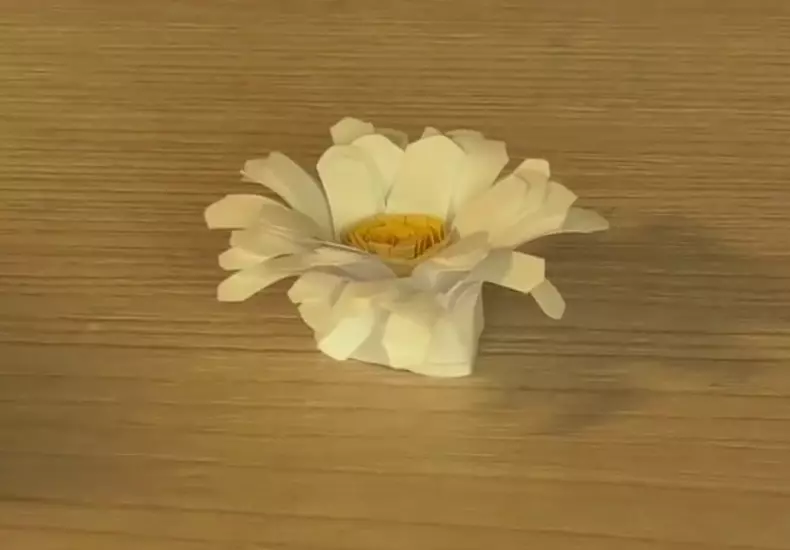
Romashki.
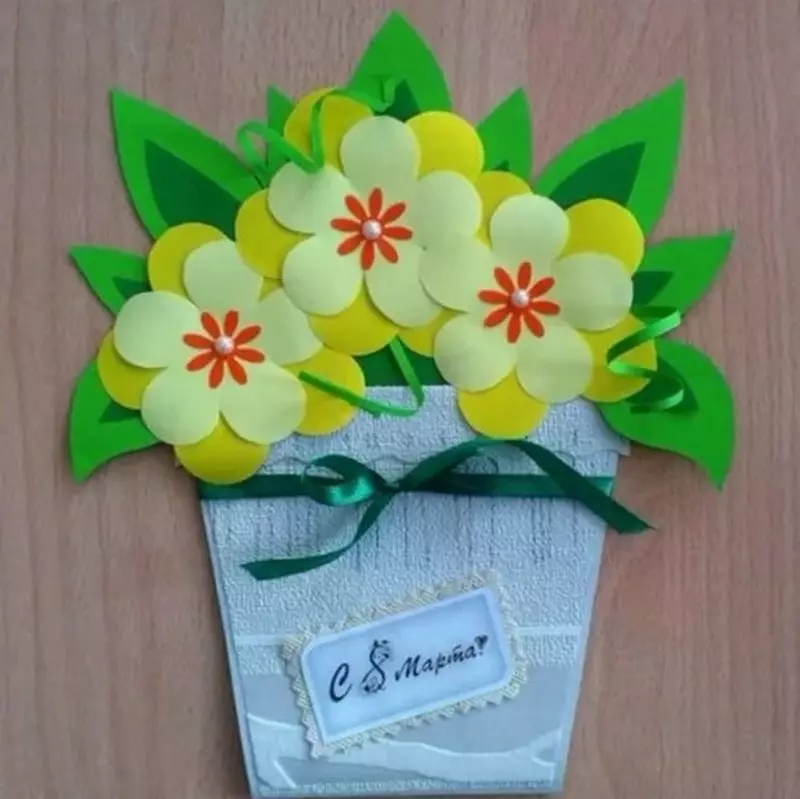
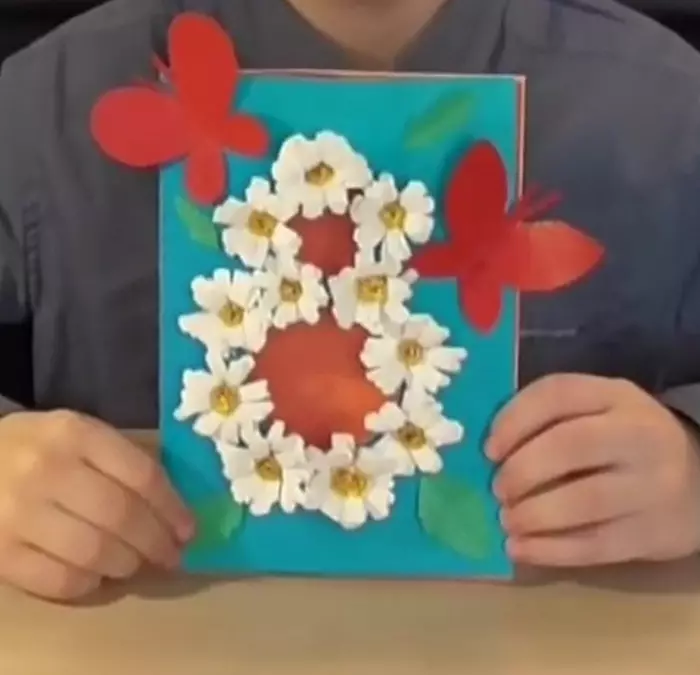
For those who have a non-odinal patience, you can advise to make a spectacular postcard with the "eight" from the bulk daisies.
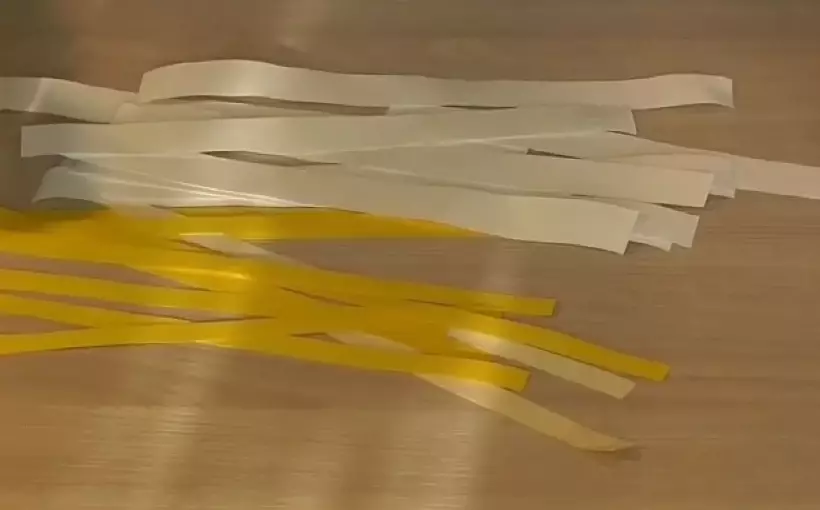
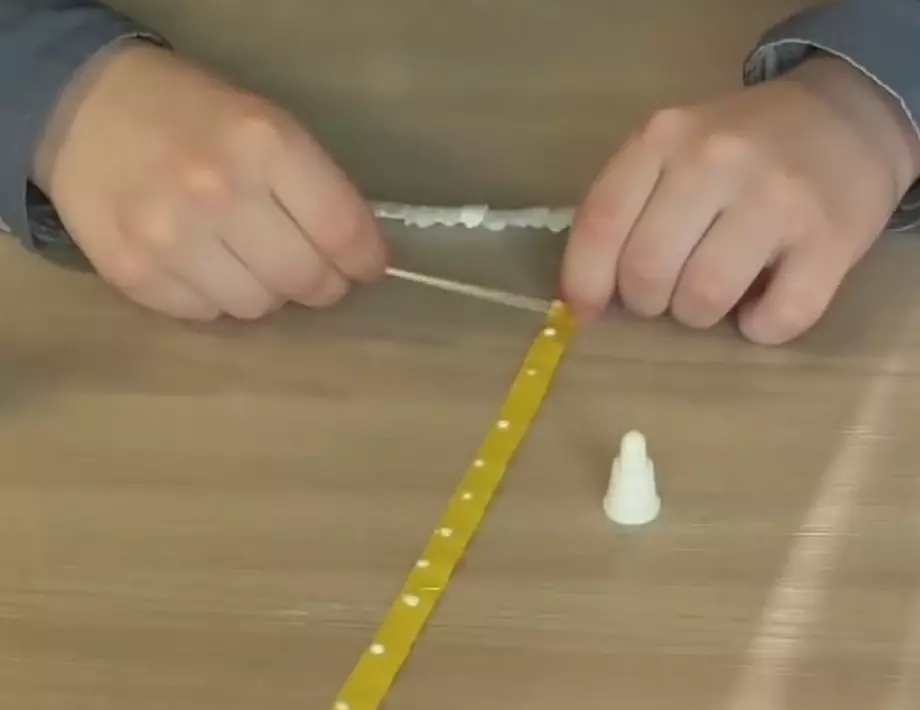
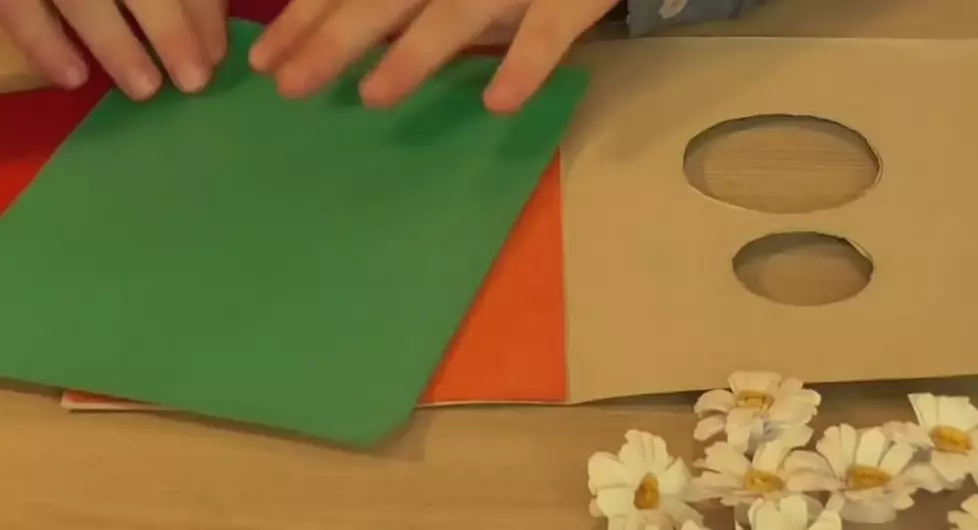
Make a postcard easier - for this you need a sheet of cardboard of the format A4 blue. This sheet needs to be bent in half. As for daisies, it requires one sheet of white and yellow colored paper. White paper cut for 11 bands with a width of 2 cm each. Yellow - also on 11 parts, but the width of one band will be 1 cm. On white stripes you need to make cuts, the distance between which will be 5 mm. With yellow workpieces, the same thing is done, but the "step" of the outbreak - 2 mm.
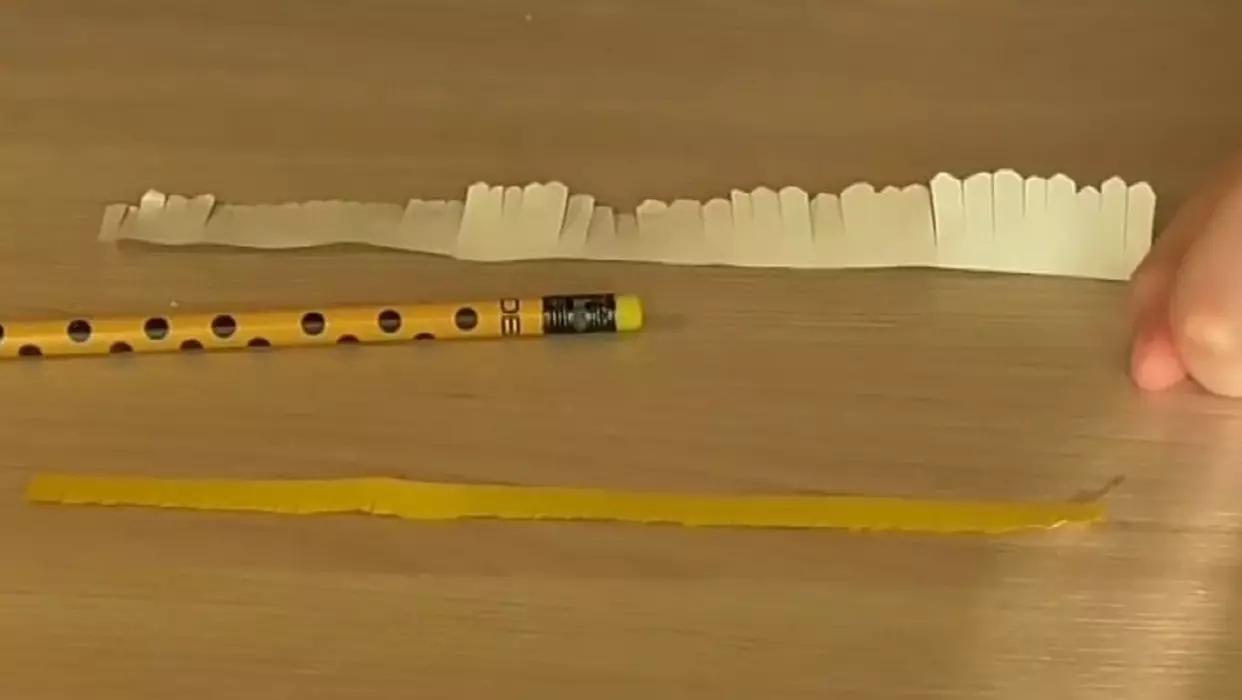
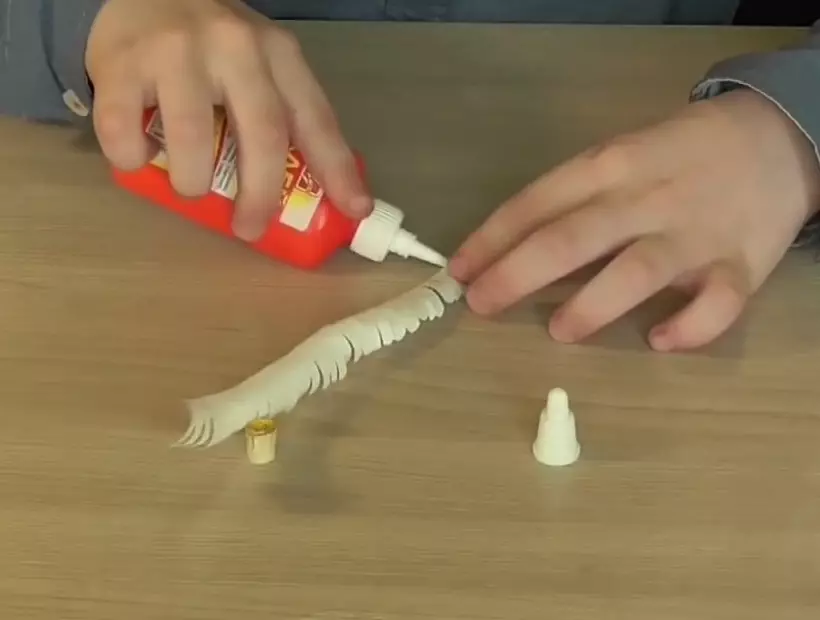
To make the core of daisies, it follows each strip on the bottom of the glue, after which it is turned it on a wooden skeletal or toothpick. After drying the adhesive, it is necessary to safely remove the skewer. Thus, all the cores are formed. White stripes need to be closed slightly from the cut side, forming the bending of the petals. You can make it a pencil. After that, the white strip screws up on the core, after which the chamomile is ready.
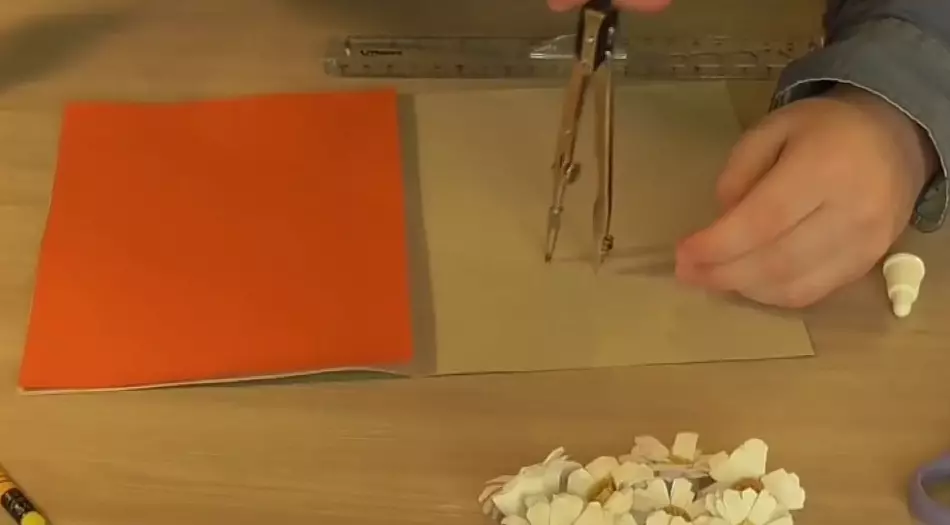
When all daisies are made, the postcard should be made on the postcard for the future "eight". It is necessary to do it on the back. The upper circle should have a diameter of 4 cm, the lower - 6 cm. After marking the circles for the "8" figures, it will be necessary to cut them carefully, trying not to damage the postcard. It remains only to turn the sheet and stick chamomile on it.

Roses
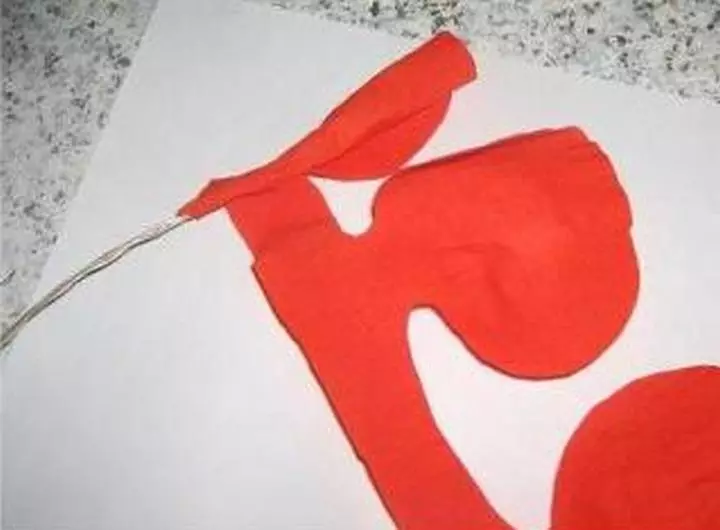
Roses from corrugated paper very effectively. To make such a bouquet, you need: paper-corrugation - red and green, small piece of cardboard, thread, thick wire, as well as glue and scissors.
First you need to cut off the sheet of red paper striped. Its parameters must be 58x19 cm. Then the strip must be folded along the length in half, lubricating the bottom glue. You need to smear along the grainy of the sheet. Halves should be glued.
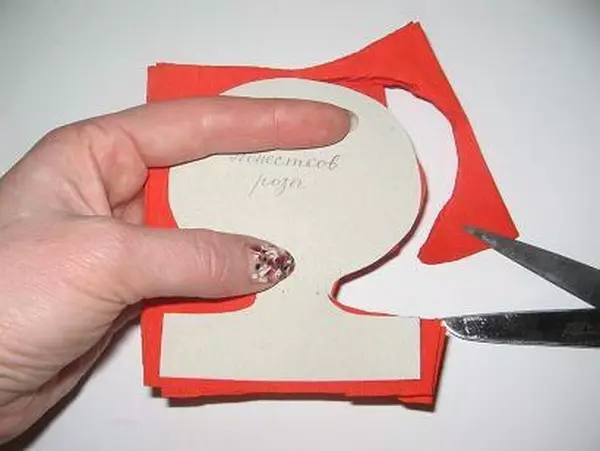
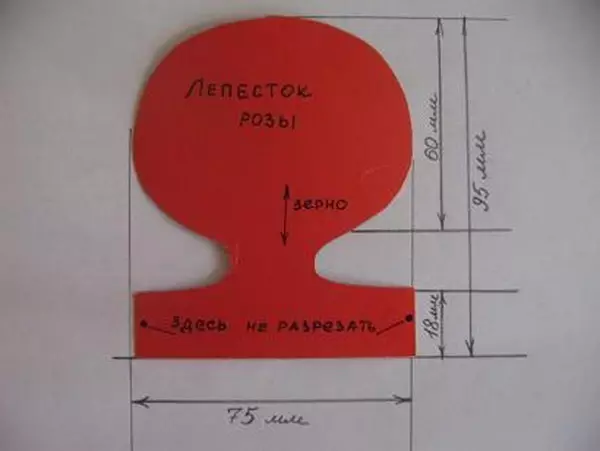
Previously, it is necessary to make a rose petal blank with a size of 9.5x7.5 cm, giving it an appropriate form. Next, the band of red corrugated paper must be folded into the harmonica (the size of one section "accordion" is 7.5 cm) and cut petals. They will be 15 pieces.
Each petal is painted, stretching at the top edge so that it is slightly fed out. The first 2-3 petals are wound on a piece of wire (they should fit tightly to it). The rest wound freely to form a flower. When everything is ready, you need to tie the flower with a red thread, fixing it.

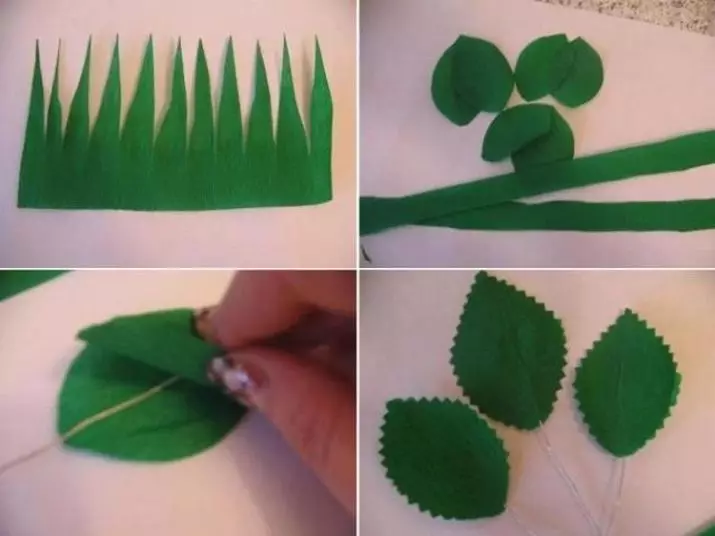
Next, the turn of the cups. For them, you need green paper-corrugation. Its strip should have a size of 12x9 cm. The length of the cloves are cut on the length, the height of which should not exceed 7 cm. After that, the cup must be climbed to the bottom of the flower, pre-missing the place of fastening with glue along the entire length of the strip.
To form a stem, it will be necessary to cut the leaves in the desired amount - their length should not exceed 6-7 cm. The leaves should be attached to the strip or fine green wire, or the corresponding thread color.
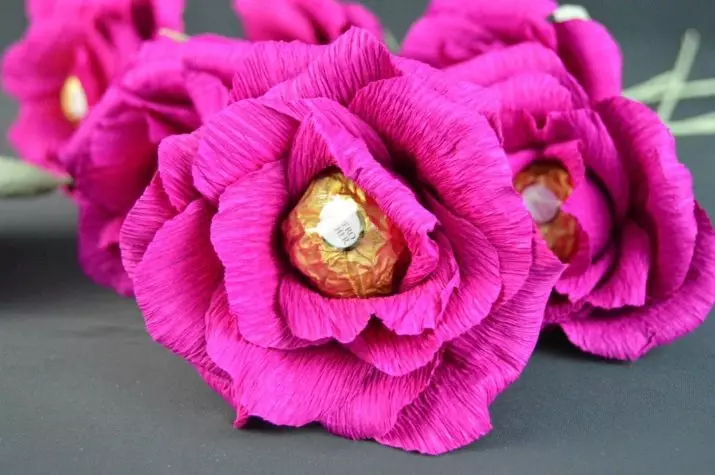
For the manufacture of roses buds, fewer petals will need, but they do not need to bent. Inside each flower or bud, you can put candy, then the gift will be also with a surprise.
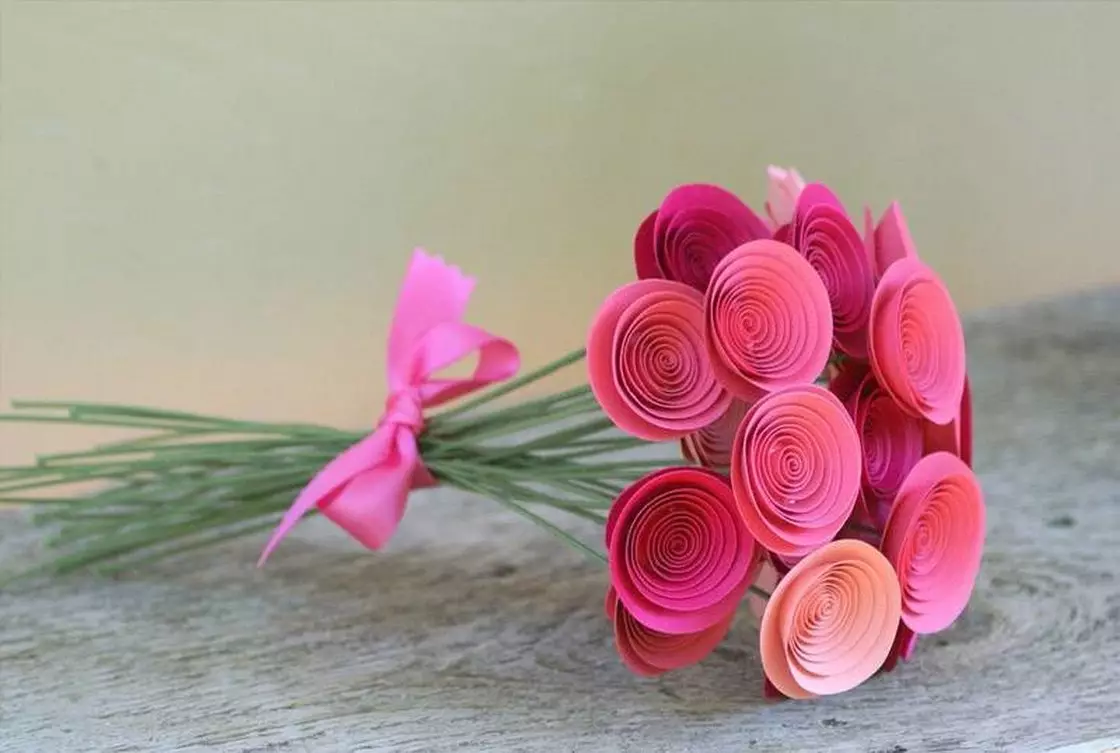
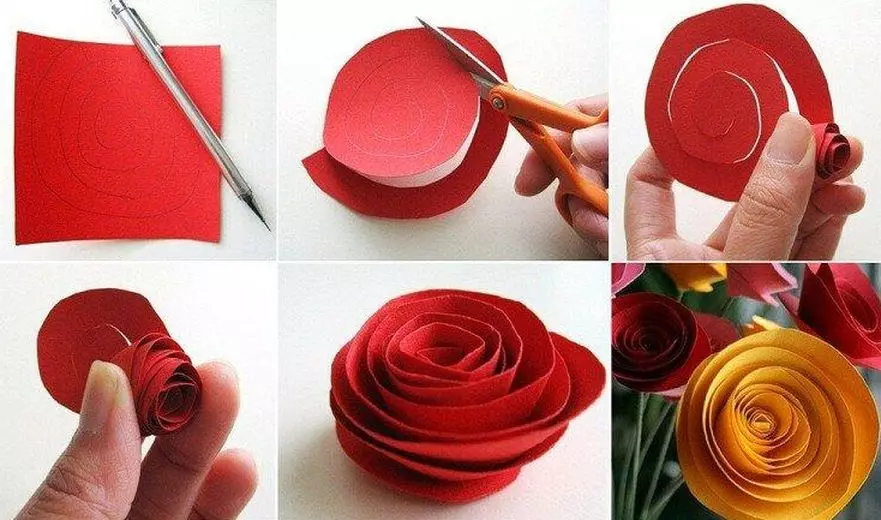
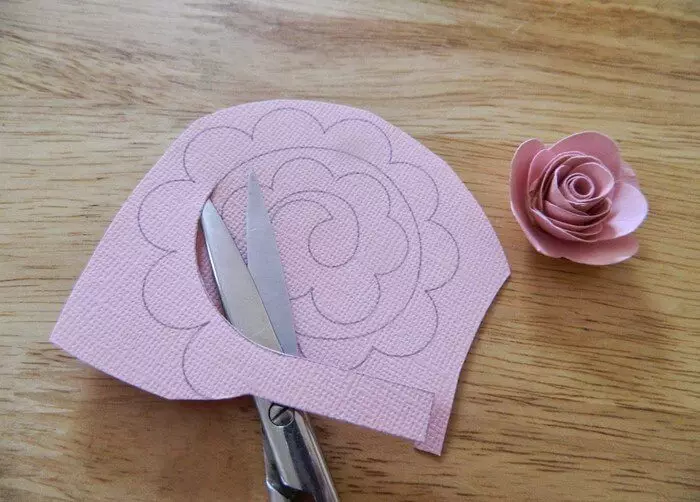
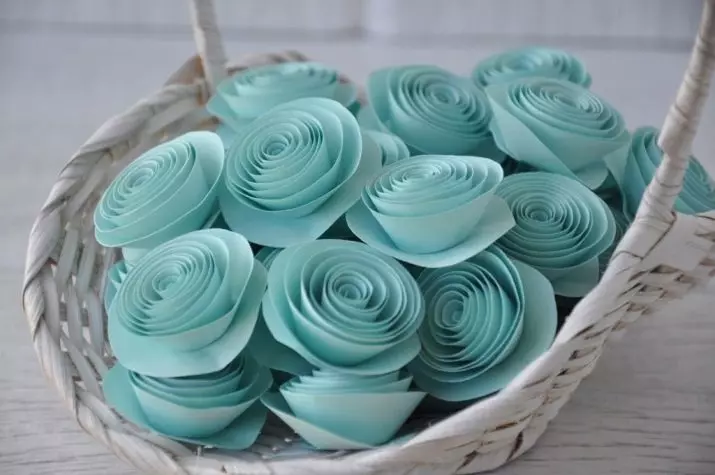
And you can also make roses from rather tight paper for scrapbooking. If there is embossing on it, it will only add flower textures.
From a large square (sizes are defined independently) you need to cut a circle. Spiral cuts out of the circle, and it starts from the outer edge to the center. At the same time, the spirals should be the same width.
After that, the rose must be given the shape by twisting. Depending on the size of the spiral, a wooden wand or pencil will be required. You need to twist as close as possible, and then relax a little twist so that the flower looks out the loose. Next, you need to immediately glue it on the round base of the bottom.
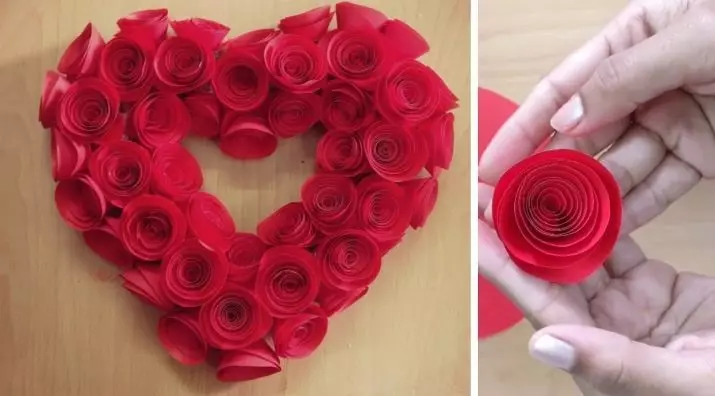
Very beautiful looks such roses stuck on the heart, eight or circle of cardboard. You can take a few shades of paper and make a gradient from colors. Or choose two colors and one to make the word "mom", and the other is to turn it. The same roses can be made of felt, but then for gluing you will need another glue.
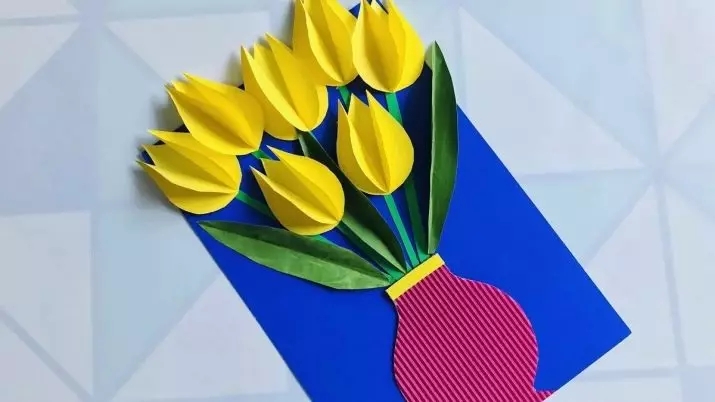
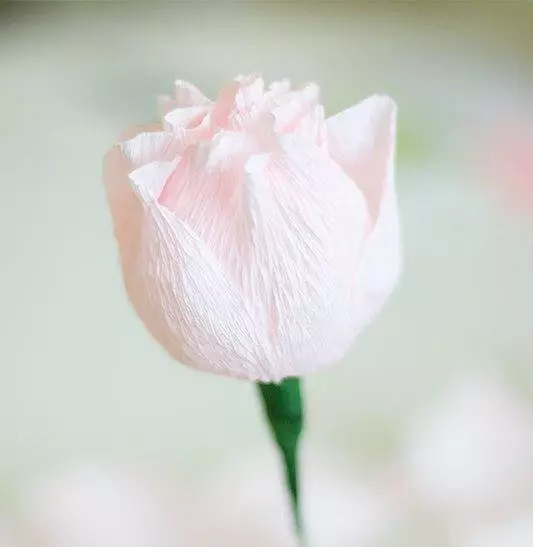
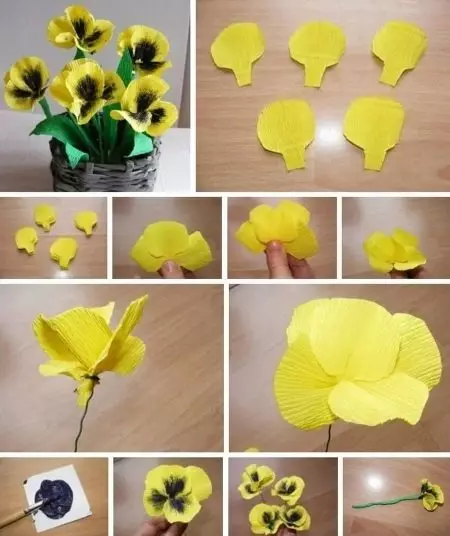
Tulips
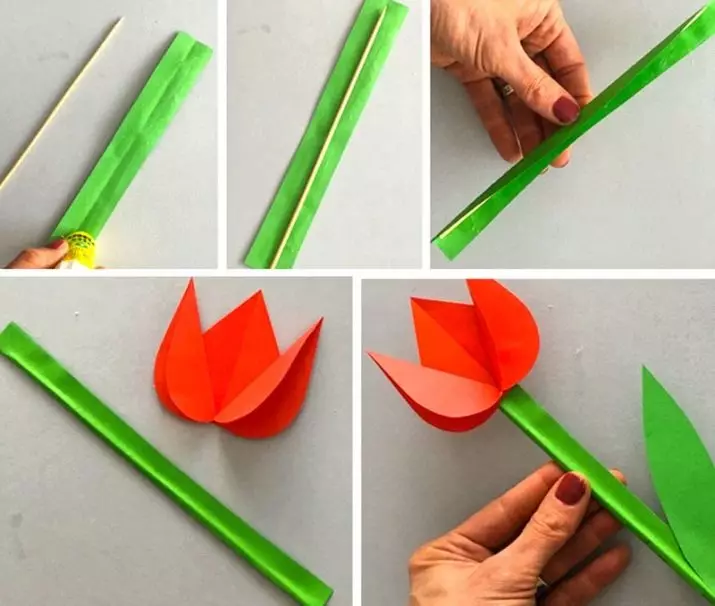
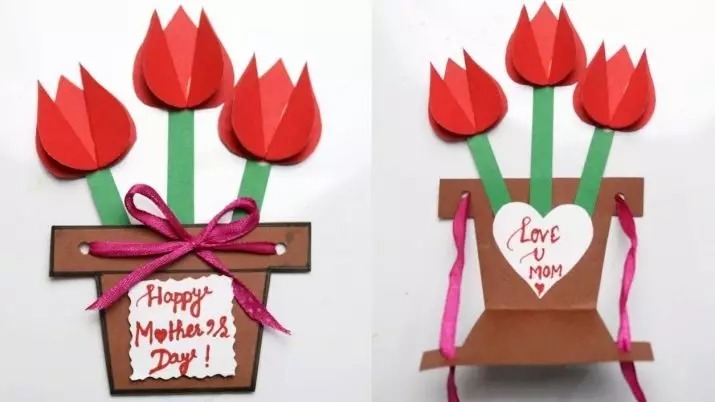
It would seem that everyone knows how to roll from paper tulip. However, you can add a flower of originality. It will take: colored paper, crafting paper for envelope, sticker or sticker for gift inscription, glue, scissors, wooden spanks.
For one tulip you need three petals. To make them, 3 squares are needed. Each of them bend in half and cut out the petal. One petal needs to be deployed - it will be central, and two others bend in half and glue the central petals on the sides. From the green paper cut striped along the length of the wooden skewers, wrap the strip with glue from the inside and wrap it around the skewers, leaving the place to glue the leaves. Next, you should cut the leaves and glue them to the stalk.
To roll the envelope, the square of kraft paper is folded in half, then the side angles need to be beatened to the center. Bending the corners, the vase must be turned out. Envelope is ready.
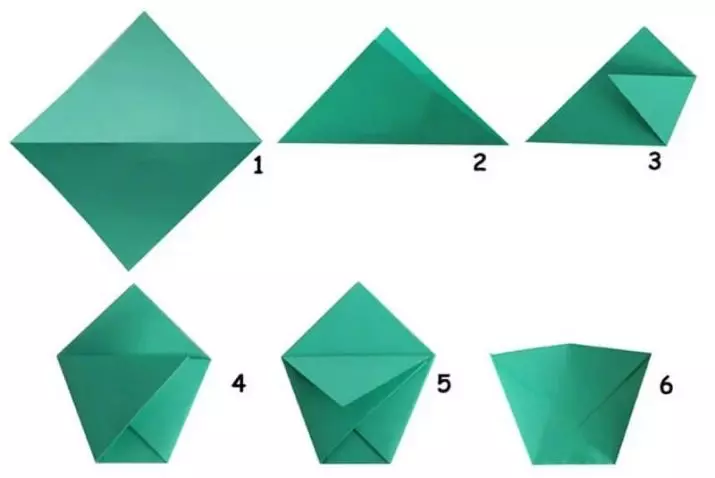
It remains only to stick the sticker, write a congratulation and insert tulips into the envelope-vase.
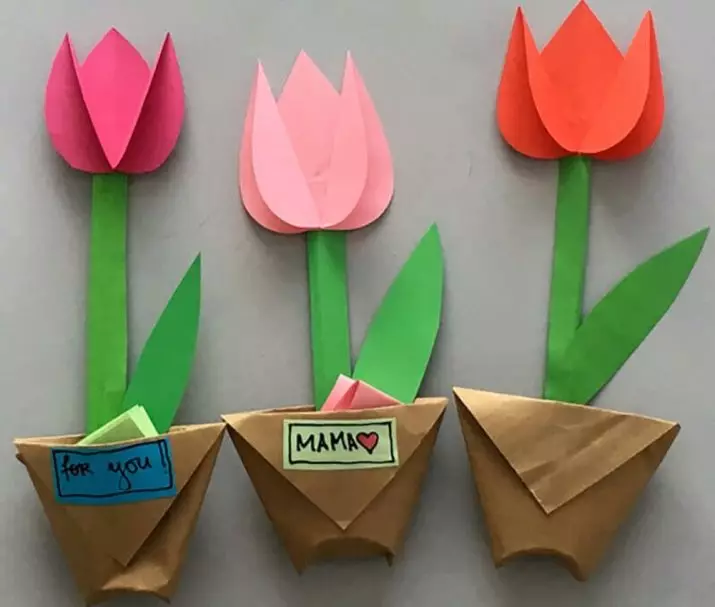
If the manufacture of such a vase causes difficulties, you can make a pot for tulips.
Mimosa
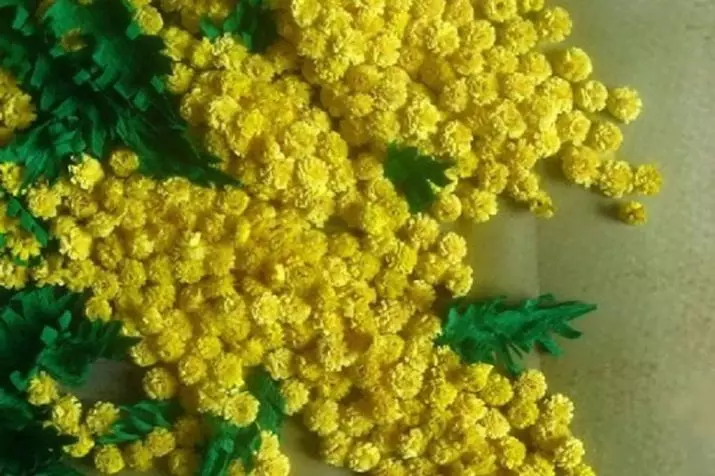
How to glue cotton wool lumps, painted with yellow, per greeting, even children guess. But to create mimos of napkins or paper-corrugations - even many adults do not know. So, You will need: yellow napkins or thin corrugated paper, green colored paper, wooden or plastic wand, glue, scissors.
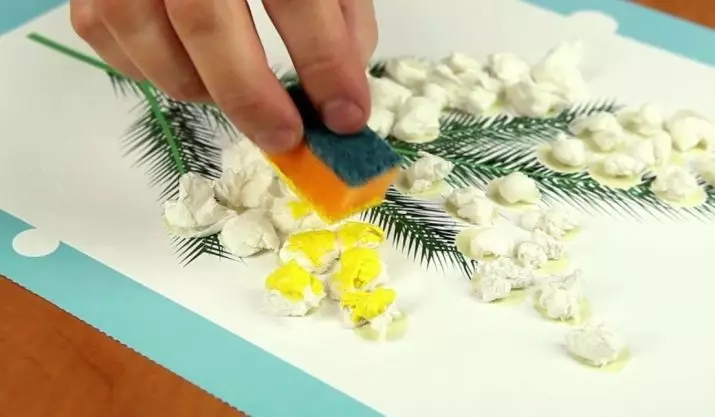
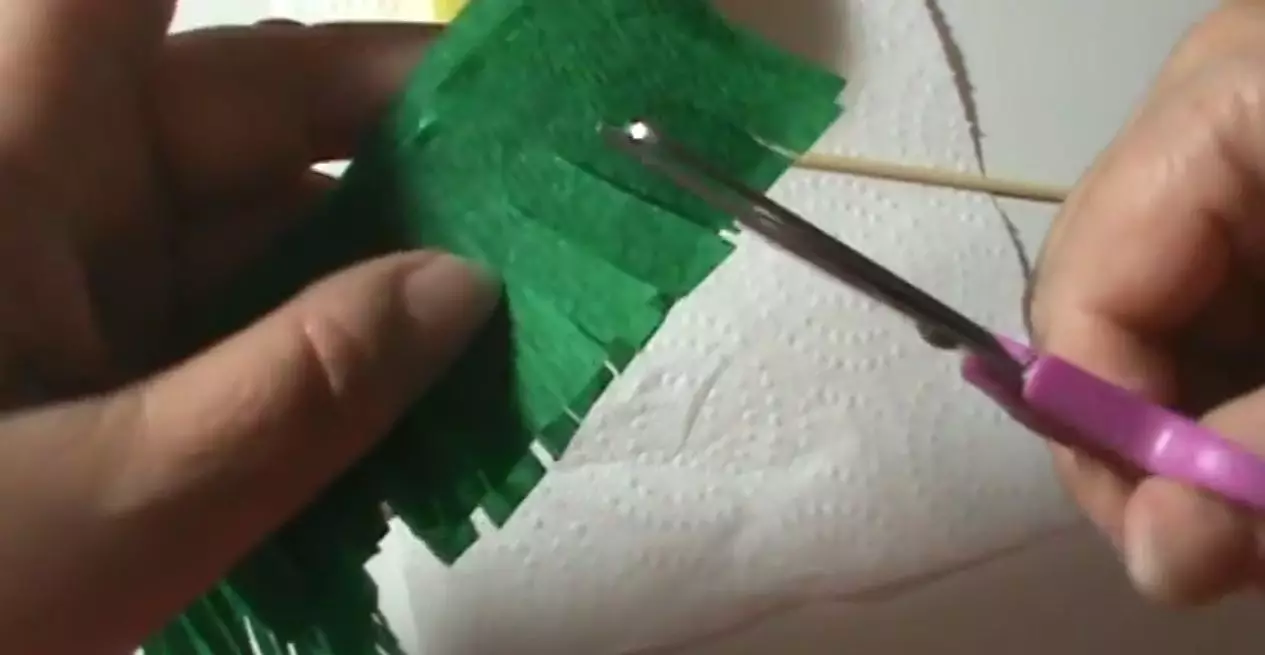
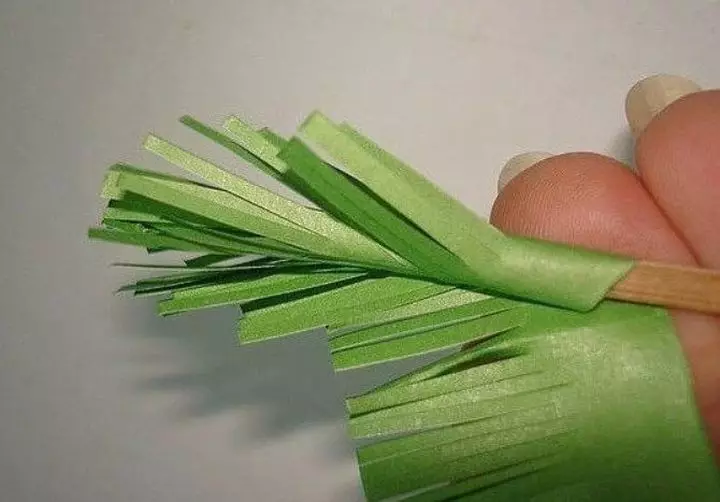
To make flowers, from napkins or paper cut strips 3 cm wide, fold them in half and make very frequent cuts along the entire length. The depth of the cut is not more than 1 cm, otherwise the blank is bullied. Than "fluffy" will get a blank, the better. Now each one needs to be wind into a roll. After that, flowers are formed and fixed on the stem. In each flower there must be an odd number of rolls.
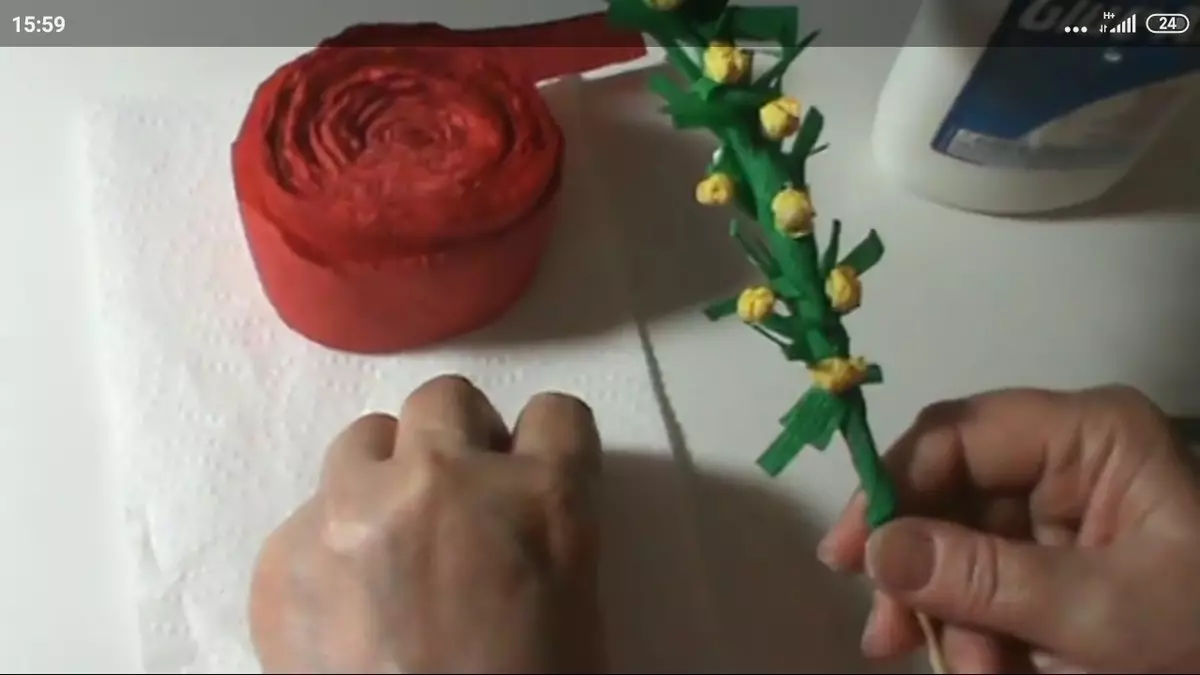
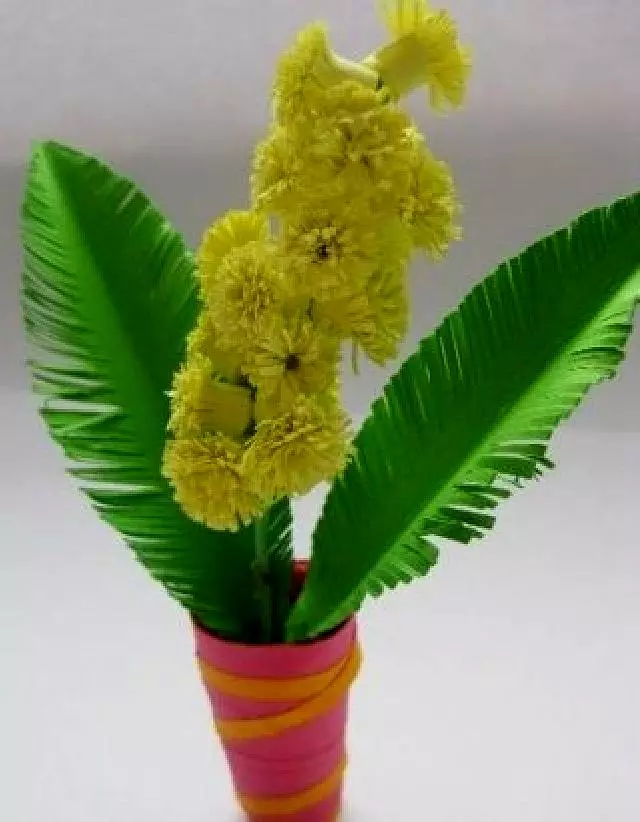
Mimosa leaves are manufactured in the same way, only the width of the strip must be greater. Strips need two. Having made a lot of cuts, it is required to wind the wand-stem with leaves, labeling the incomprehensible side of the glue. To give the completeness to the craft, you can put mimosa sprigs into a plastic glass or crafting mug, and add crumpled green paper into the stability inside. The glass itself needs to be saved by paper in the color of the resulting bouquet. If mimosa is standing in the original circle, you do not need it.
Buds from napkins
The original bouquet of girlfriend can be made pretty quickly. For this you need three-layer napkins of two colors, scissors, stapler and top from a plastic bottle with a neck (It will be a vase).
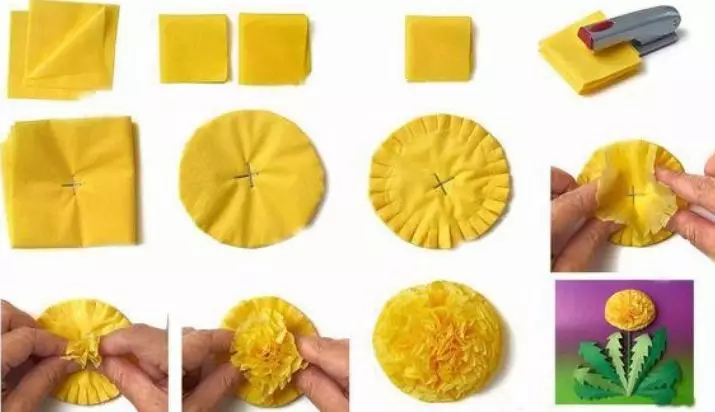
In order to get dandelions, the napkin is folded several times, cut into squares, the cross will be bonded with a stapler in the center, they make shallow frequent cuts around the edges. Then each layer is a little folded to the center, forming a fluffy bud. For the stem, the green wire is suitable, one end of which is neatly inserted into the flower. The leaves are cut out of green paper and gently attach to the stalk.
By making the desired number of dandelions, they fill in the "vase". To hide the unsightly appearance of the vase, it can be wrapped with paper in the tone of the bouquet.
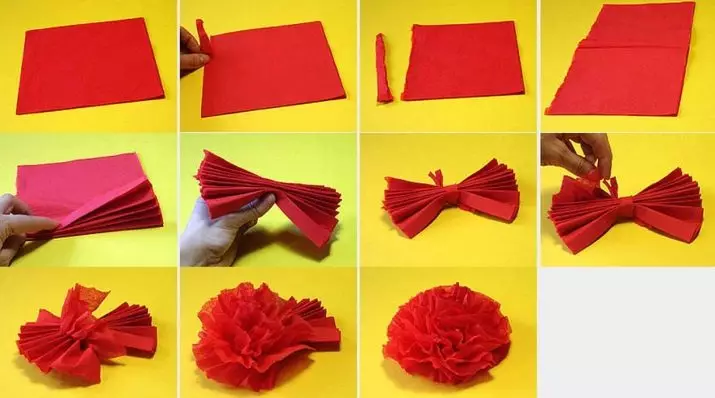
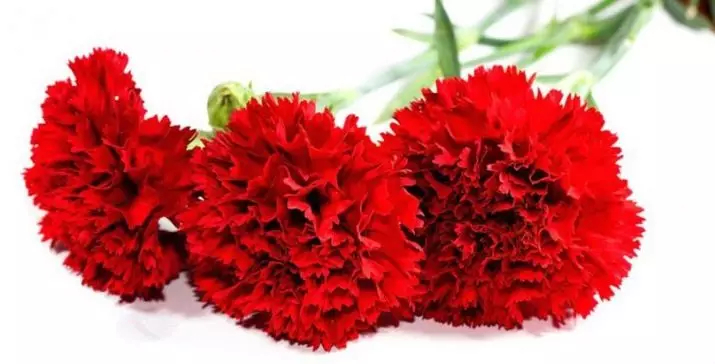
Carnations can also be made from the napkins. For the manufacture of cloves, the napkin is folded into the shallow harmonica, the center is fixed with wire or thin thread. The result is a bow. Further Flower is formed from the harmonica. The more layers in the napkin (and how thinner layers), the more magnificent flower will be.
Corrugated paper
Paper-corrugation - universal material for creating colors, and different sizes.
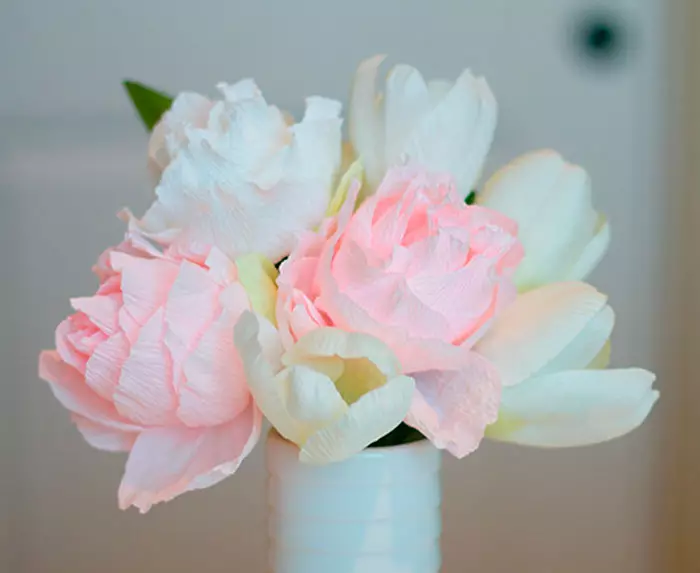
There are several techniques in order to make a flower of crepe paper: By imposing layers on each other, through a screw assembly, by turning into a roll. In addition, you can collect buds or flowers from petals, fix them on a flat or still base.
Work with the imposition of layers implies the assembly of billets into a single integer, followed by the fixation of their wire. In such a technique, peonies and roses are created.
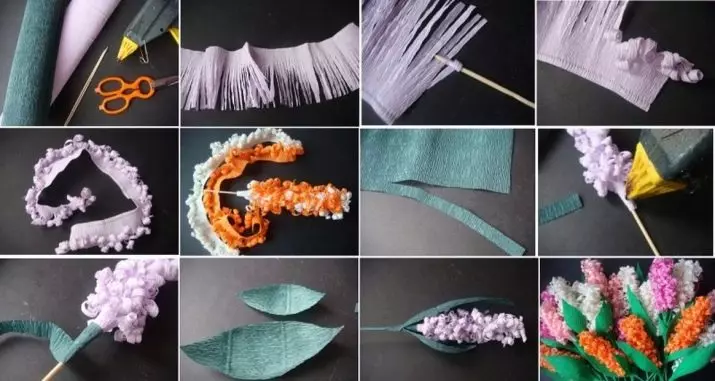
Screw assembly is suitable for creating such colors from corrugations as lavender, lilac, hyacinth. To make them, you need to make a lot of cuts on paper strips, and then wind each strip on a pencil or a wooden wand to give the realistic product. After that, the billet is wound on a wooden or plastic wand-stem, with each turns shifted down.
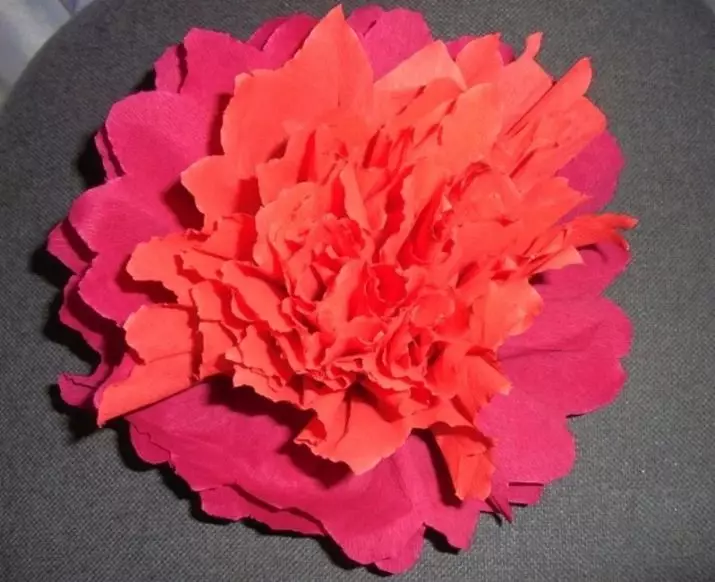
Through folding in the roll, carnations are well obtained. Especially it turns out beautifully if you take two shades of one color - for example, bright pink and powdered pink. This will add the volume of the finished product.
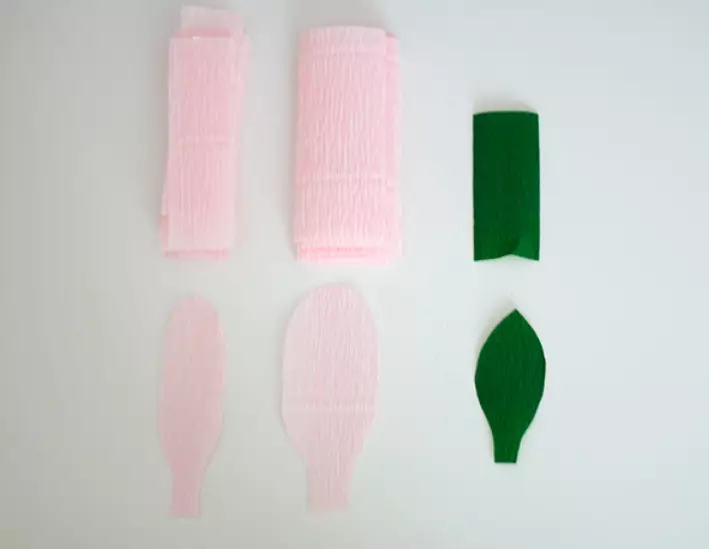
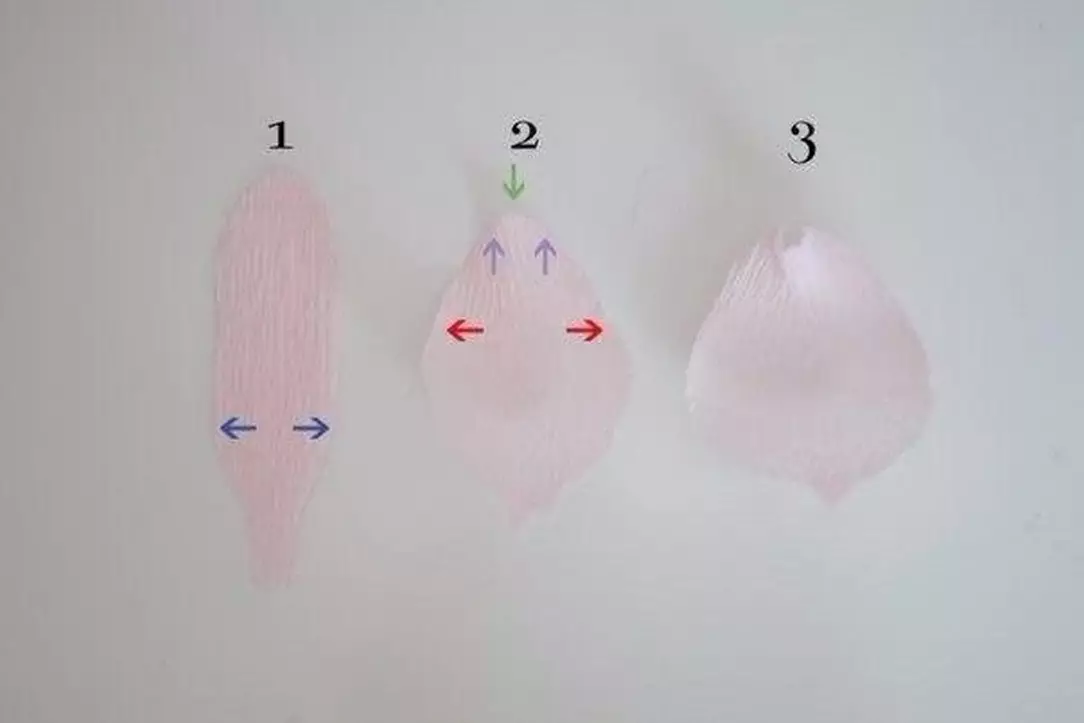
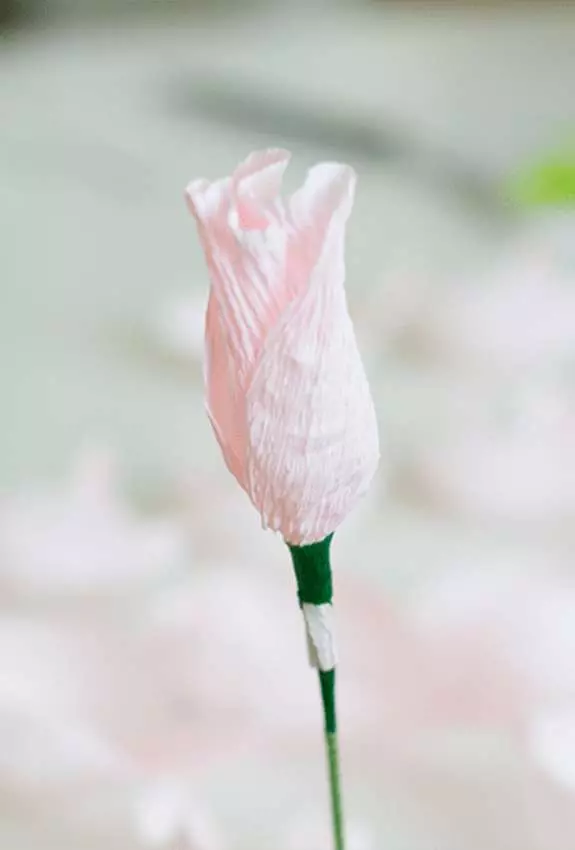
Separate petals are very painstaking work, because these flowers have no foundation, they are connected literally one by one with each other. This technique makes cherry flowers, apple trees, pansies.
Other Ideas of Flower Gifts
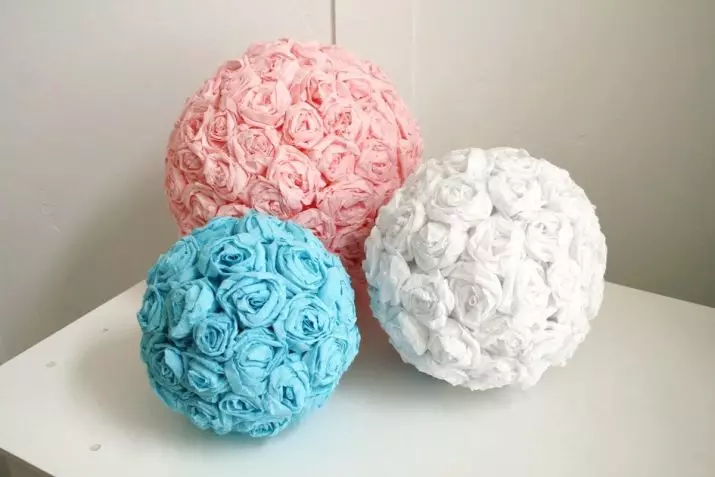
Speeciously looks like a bowl of flowers. It will take a blank in the form of a bowl of foam or cardboard to which finished roses or peonies will be glued. The ball can stand on the surface, in this case its bottom can be simply saked with paper in tone colors. If the ball is completely baked, then it can be hung or put it in the basket.
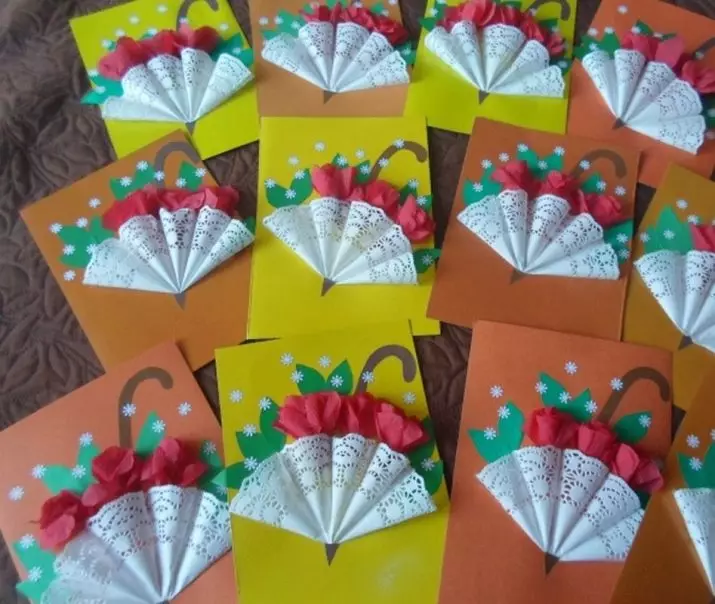
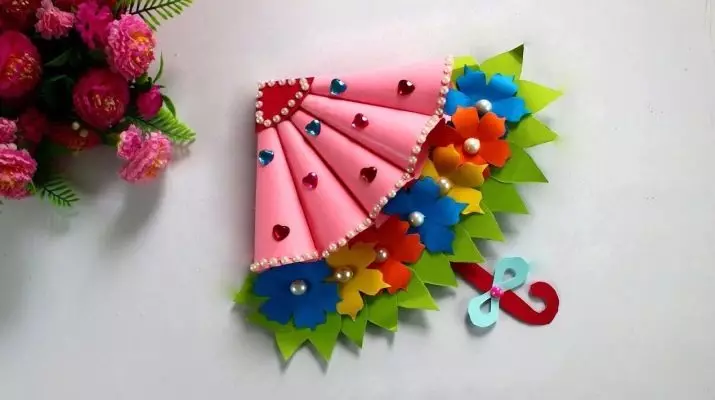
Even a preschooler can cope with the creation of an umbrella with flowers as an decoration of the postcard. The postcard is made from folded in half a sheet of color cardboard or tight paper. A small openwork napkin is suitable for an umbrella, folded fourly, or paper for scrapbooking with a pattern or embossed. This element is glued to the postcard. Small parts - the handle and spout of the umbrella can be drawn with a felt-tip pen or make colored paper. Flowers that will be filled with an umbrella can be any - suitable tulips, roses, dandelions and peonies. They can be performed in any of the technician listed above. For preschoolers, dandelions or roses from napkins are suitable.
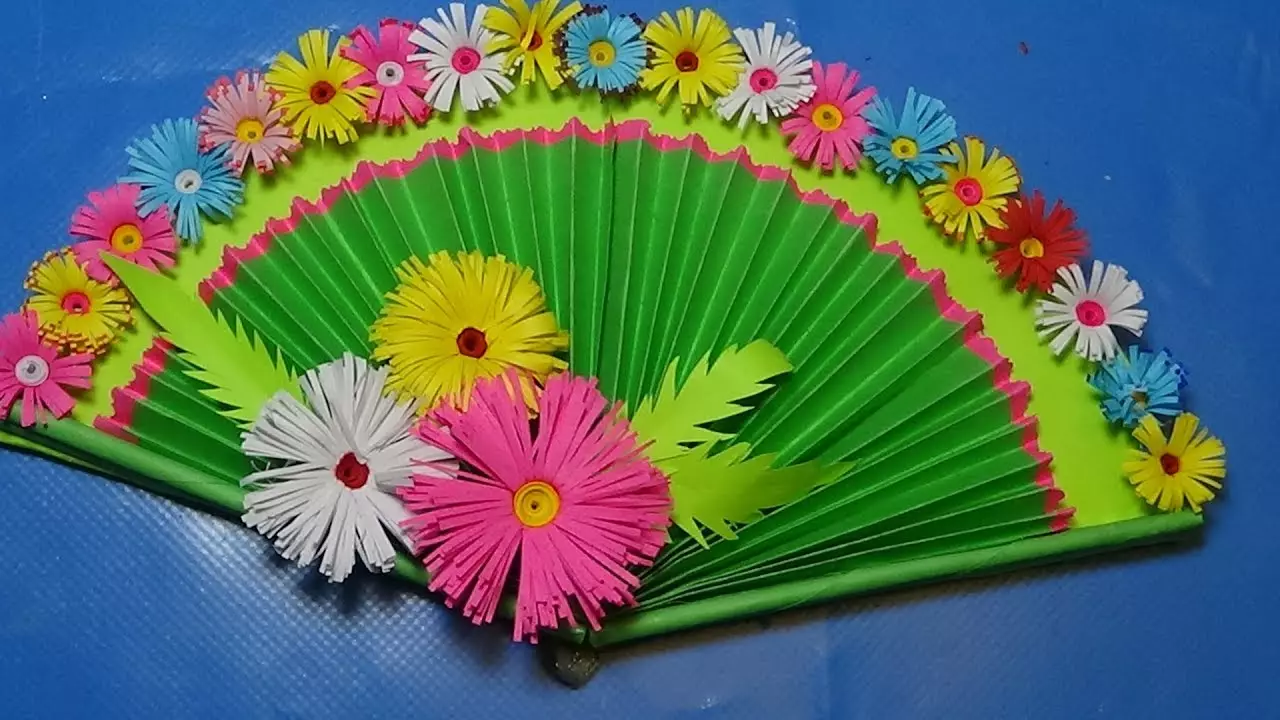
You can make a fan with a color glued to it. The fan can be in the form of a harmonica of colored paper, which is very simple. You can work hard with a more complex option - make a fan of wrapped with corrugated wooden speakers interconnected by a fabric grid. If you make a little effort, the product will be very spectacular.
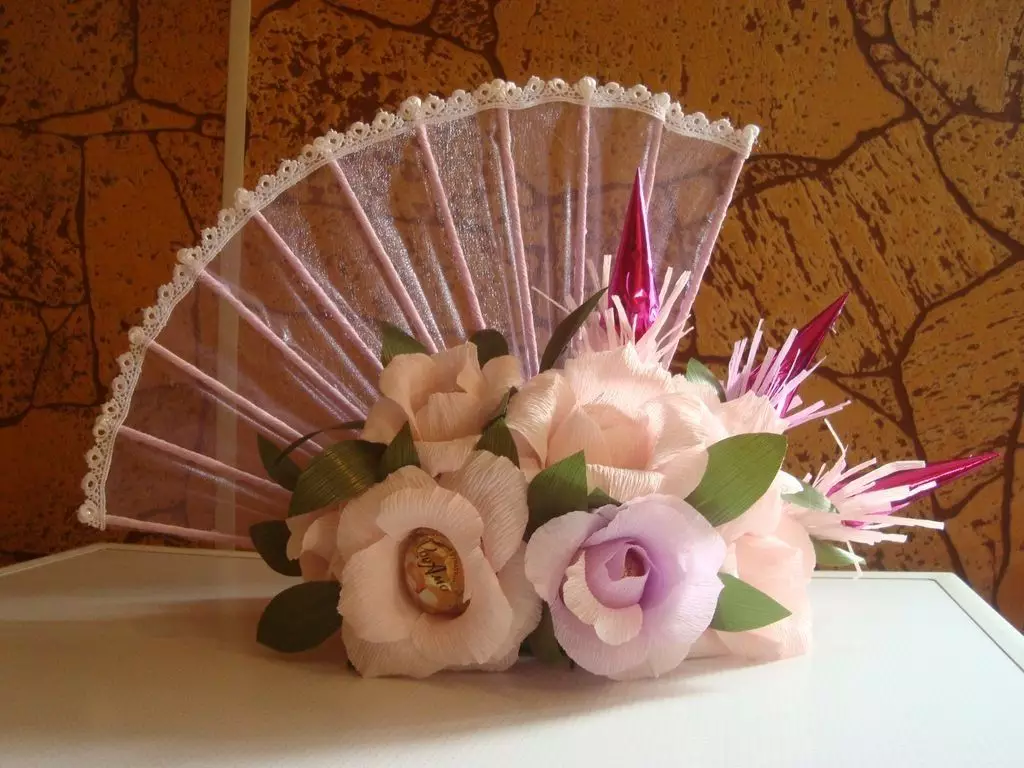
Examples
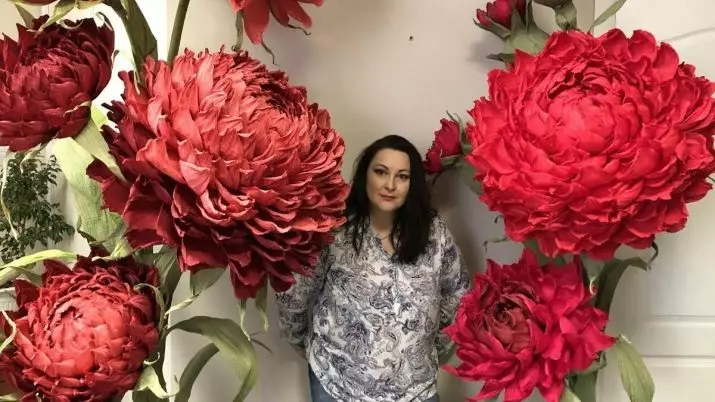
Peony from corrugated can be as big.
Tulips in a convective with a gift inscription - just and cute.
Rosets made of paper for scrapbooking.
At first glance and do not distinguish this mimos from the real!
Carnation from napkins looks alive.
An umbrella with flowers - a snaps, with which even the baby can cope.
How to make a postcard with daisies on March 8, look in the video.