Bag-clutch with your own hands (66 photos): Pattern, how to sew from an old bag, step-by-step master class

Anonim

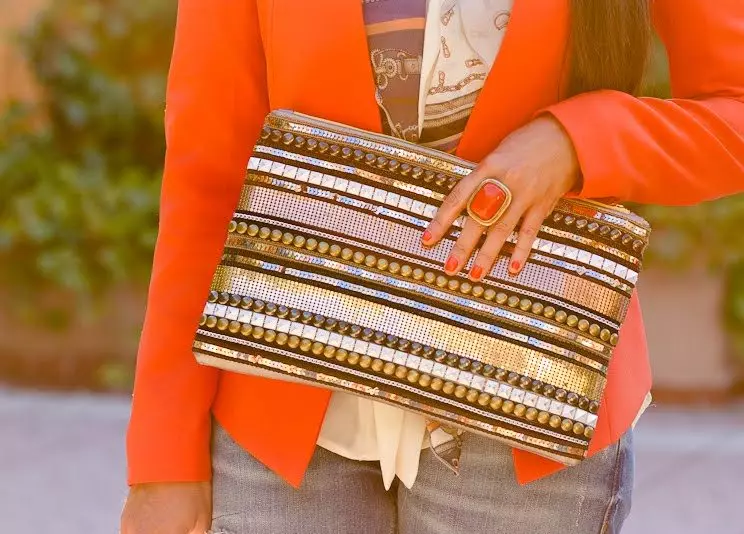
The handbag never happens a lot. Each outfit dictates its own rules for the selection of accessories. You can afford to have clutches for any dresses from the wardrobe, ate to learn themselves to sew themselves. It is not so difficult, as it seems at first glance.

Bag-clutch with your own hands (66 photos): Pattern, how to sew from an old bag, step-by-step master class 15626_2

Bag-clutch with your own hands (66 photos): Pattern, how to sew from an old bag, step-by-step master class 15626_3

Bag-clutch with your own hands (66 photos): Pattern, how to sew from an old bag, step-by-step master class 15626_4

Bag-clutch with your own hands (66 photos): Pattern, how to sew from an old bag, step-by-step master class 15626_5

Bag-clutch with your own hands (66 photos): Pattern, how to sew from an old bag, step-by-step master class 15626_6

Bag-clutch with your own hands (66 photos): Pattern, how to sew from an old bag, step-by-step master class 15626_7

How to sew from the old bag?

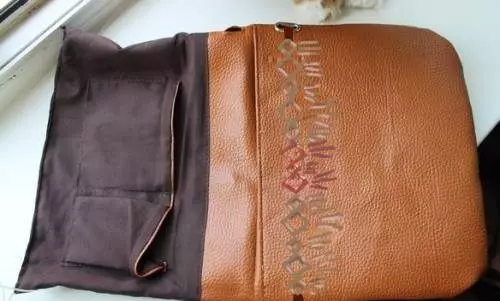
If a large bag was dusted in the closet, which is a pity to throw away, it's time to give her a second life. Forgotten old thing you can turn into a completely new, stylish accessory.

    Bag-clutch with your own hands (66 photos): Pattern, how to sew from an old bag, step-by-step master class 15626_8

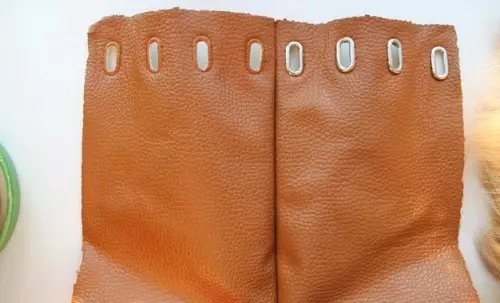
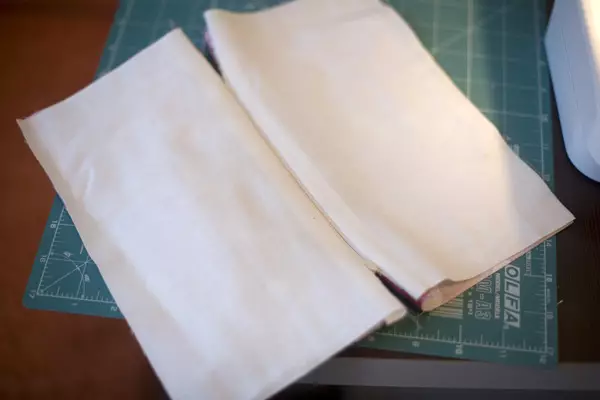
    First, it is necessary to break up all the external seams of a large bag. The lining can not be touched, it is perfect for the interior decoration of the future clutch.

    Bag-clutch with your own hands (66 photos): Pattern, how to sew from an old bag, step-by-step master class 15626_9

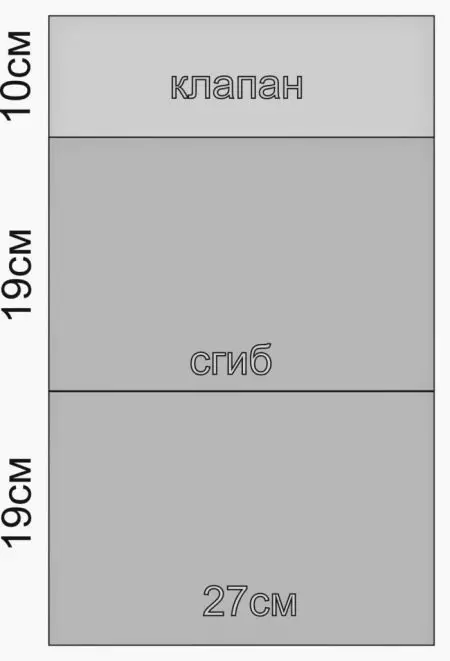
    A new handbag can be made by the most simple pattern, where the rectangular cut of the fabric is conditionally divided into three parts: the front and back sides of the handbag and valve.

    Bag-clutch with your own hands (66 photos): Pattern, how to sew from an old bag, step-by-step master class 15626_10

    • From the old bag, it is necessary to cut the items for the new product. Well, if it happens neatly. If not - also not scary. Just get more attention to pay the decor.
    • When the old bag is cropped and the size of the future accessory is defined, the lining is cut.
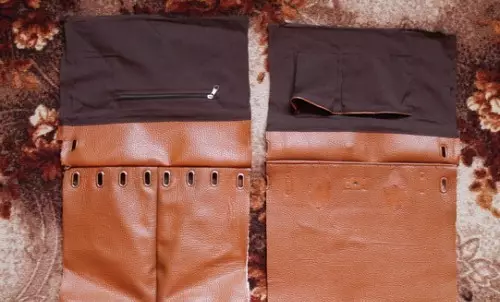
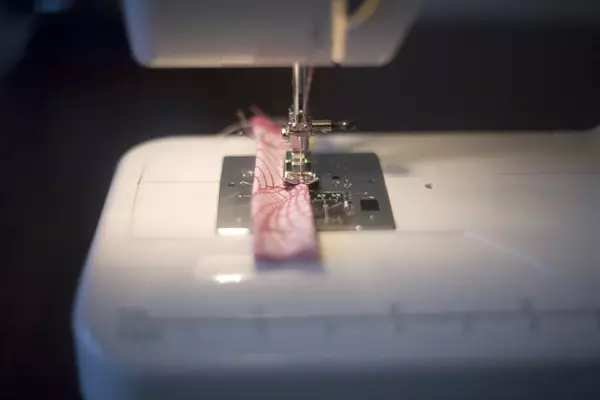
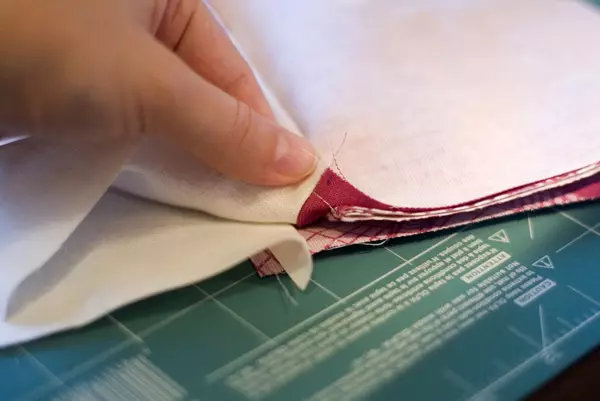
    • Details are stitched from the inside. For this, they are folded by the front side to each other and the line is made along three sides. Following the handles and zipper knobs.
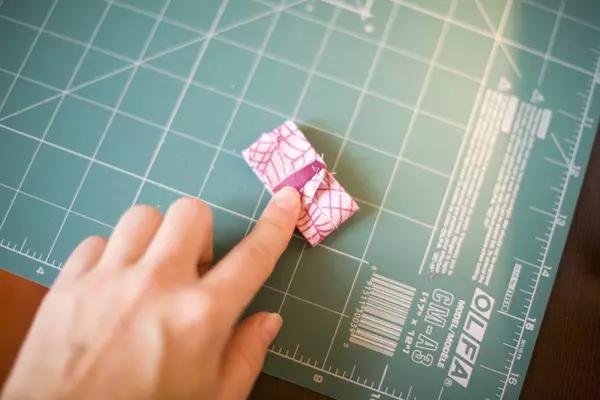
    • After that, the product is turned and connected by the seam along the fourth side.
    • The valve can close on ordinary or magnetic buttons.
    • Upon completion of the seams, the clutch from the leatherette must be meditated with a special hammer. Textile product is enough to try the iron. This is done in order to align the seams, then the work will look careful.
    • To strengthen the seams between the clutch details, it is advisable to apply glue.

    Bag-clutch with your own hands (66 photos): Pattern, how to sew from an old bag, step-by-step master class 15626_11

    Bag-clutch with your own hands (66 photos): Pattern, how to sew from an old bag, step-by-step master class 15626_12

    Bag-clutch with your own hands (66 photos): Pattern, how to sew from an old bag, step-by-step master class 15626_13

    Bag-clutch with your own hands (66 photos): Pattern, how to sew from an old bag, step-by-step master class 15626_14

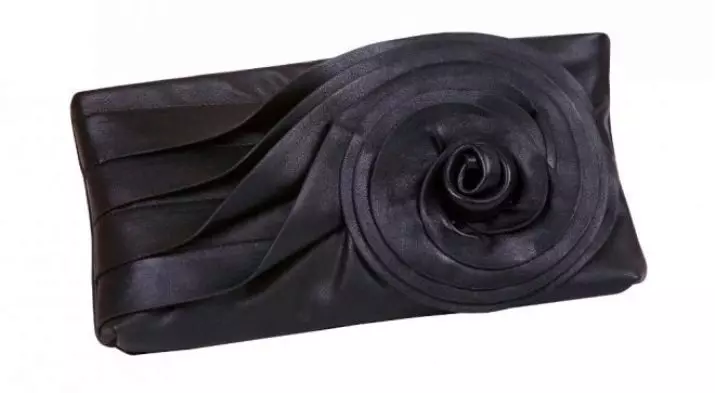
    Clutch envelope from leather

    Sew the leather clutch-envelope with their own hands is completely simple. The advantage of the skin or leatherette is that for such a product it is not necessary to work on the seal. This material perfectly preserves the form. For the same reason, the leather clutch does not require additional fasteners. The main thing is to successfully choose the pattern.

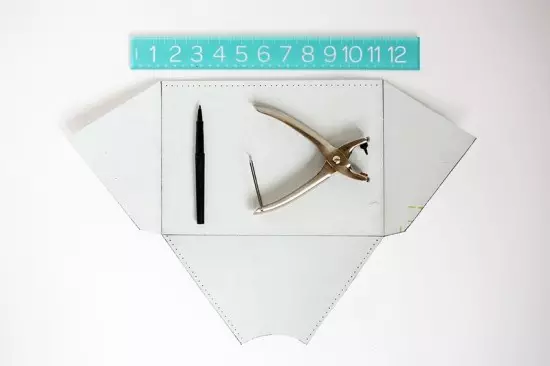
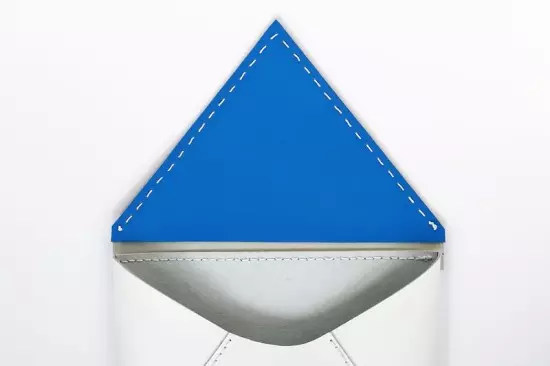
    There is such a thing in a similar way as the clutch from the old bag. Only the item under the valve is made triangular shape. From the cutting of the fabric you can create a handbag of the desired size.

    Bag-clutch with your own hands (66 photos): Pattern, how to sew from an old bag, step-by-step master class 15626_15

    Bag-clutch with your own hands (66 photos): Pattern, how to sew from an old bag, step-by-step master class 15626_16

    Bag-clutch with your own hands (66 photos): Pattern, how to sew from an old bag, step-by-step master class 15626_17

    Bag-clutch with your own hands (66 photos): Pattern, how to sew from an old bag, step-by-step master class 15626_18

    Bag-clutch with your own hands (66 photos): Pattern, how to sew from an old bag, step-by-step master class 15626_19

    Bag-clutch with your own hands (66 photos): Pattern, how to sew from an old bag, step-by-step master class 15626_20

    Evening clutch

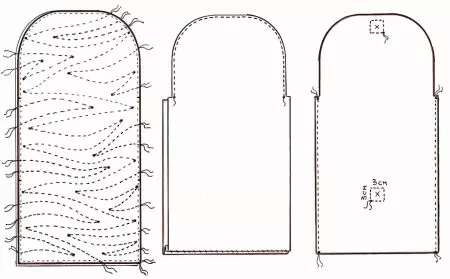
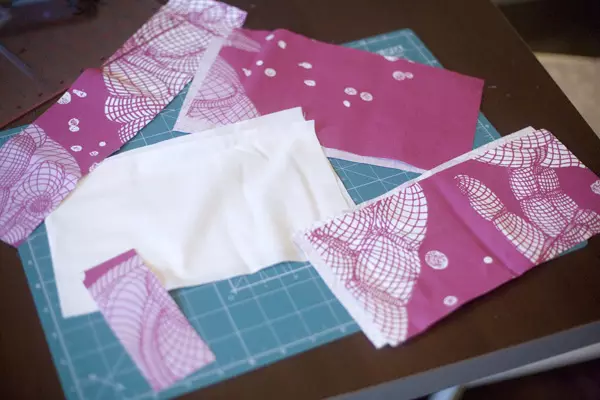
    To sewing the evening clutch, a paper pattern is used - for the main part of the product and for the side insert. In it, the dimensions of the parts are increased by one centimeter, which is necessary for the seam.

    On the same pattern, the parts of the walls are cut: the top tissue, fliesline, syntheps, lining, sealing.

    All the same, except the seal, cut out for lateral inserts. Accordingly, items should be two.

    Bag-clutch with your own hands (66 photos): Pattern, how to sew from an old bag, step-by-step master class 15626_21

    • Details intended for the front side of the future clutch are glued with phlizelin. The skled parts are stitched with synthesis along the sections, then stitching in an arbitrary form, but so that the line is combined with the pattern on the fabric.
    • The seal for seals is shortening by 1.5 cm, then trimmed along the line of the vertex. After that, you can safely remove the protective film and stick already on the seashed wall. After that, the lining is sewn: on the main part - according to the oval line of the valve, on the inserts - according to direct cuts.
    • Now it is necessary to twist the product and sweep the oval edge of the valve, making cuts. After that, complete the finishing line. It remains to be turned out to be manually sunmage.

    Bag-clutch with your own hands (66 photos): Pattern, how to sew from an old bag, step-by-step master class 15626_22

    Bag-clutch with your own hands (66 photos): Pattern, how to sew from an old bag, step-by-step master class 15626_23

    • All remaining sections are connected by one line. The place where the clasp will be needed twice. Then the button will not spoil the handbag with each opening-closing. Then you can also sew a clasp itself.
    • One-piece part is connected to the side inserts. In this case, the lining must be replenished. The seams are turned away towards inserts and hide under the lining, fixing them with secret stitches.

    Bag-clutch with your own hands (66 photos): Pattern, how to sew from an old bag, step-by-step master class 15626_24

    Accessory can be supplemented with a beautiful flower. It is not difficult to make it:

    • Two strips of 90 cm long and 9 cm wide are cut.
    • It is folded in half and stitched, leaving the pass through which it will be convenient to turn the part.
    • One corner of the resulting tape must be screwed and secured stitch.
    • Then the petals are formed, turning the tape at a right angle, fastening the turns of the stitches.
    • The flower will look beautifully on the valve on the place of the clasp.

    Bag-clutch with your own hands (66 photos): Pattern, how to sew from an old bag, step-by-step master class 15626_25

    Stylish model with bow: master class

    Another beautiful and simple model is a small handbag with a bow. Consistently performing all points of the plan, you can create a stylish accessory with your own hands. For a handbag, it is necessary to prepare a cut of the fabric for the front side.

    Bag-clutch with your own hands (66 photos): Pattern, how to sew from an old bag, step-by-step master class 15626_26

    It is better to use tight fabric so that it is not necessary to apply seals. One more cut is needed for lining.

    Bag-clutch with your own hands (66 photos): Pattern, how to sew from an old bag, step-by-step master class 15626_27

    Bag-clutch with your own hands (66 photos): Pattern, how to sew from an old bag, step-by-step master class 15626_28

    Bag-clutch with your own hands (66 photos): Pattern, how to sew from an old bag, step-by-step master class 15626_29

    The handbag will consist of such elements:

    • 2 parts 25x15 cm - the main part of the handbag;
    • 2 parts of 27.5x15.5 - bow;
    • 1 part 36x8.5 cm - handle;
    • 1 Detail of 5x12.5 cm - Middle Bow;
    • 2 parts 25x15 cm - lining.

    Bag-clutch with your own hands (66 photos): Pattern, how to sew from an old bag, step-by-step master class 15626_30

    Bag-clutch with your own hands (66 photos): Pattern, how to sew from an old bag, step-by-step master class 15626_31

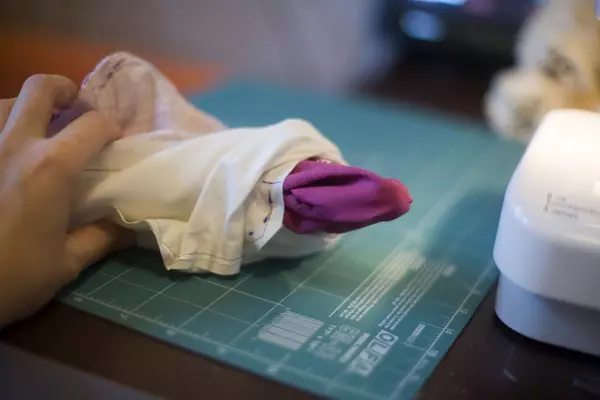
    It is more convenient to start with a bow:

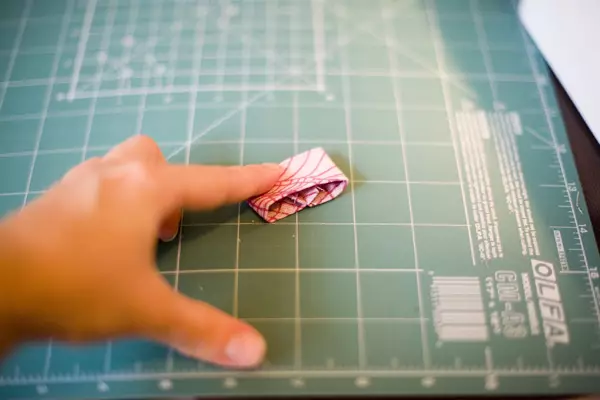
    • The segment of the fabric, designed for the middle of the bow, fold as in the photo.
    • Then each edge is performed on the line.
    • We connect the edges, the front side to the facial.
    • We turn out the ends in different directions, stroke the seam and turn out.

    Bag-clutch with your own hands (66 photos): Pattern, how to sew from an old bag, step-by-step master class 15626_32

    Bag-clutch with your own hands (66 photos): Pattern, how to sew from an old bag, step-by-step master class 15626_33

    Bag-clutch with your own hands (66 photos): Pattern, how to sew from an old bag, step-by-step master class 15626_34

    Bag-clutch with your own hands (66 photos): Pattern, how to sew from an old bag, step-by-step master class 15626_35

    Bag-clutch with your own hands (66 photos): Pattern, how to sew from an old bag, step-by-step master class 15626_36

    Bag-clutch with your own hands (66 photos): Pattern, how to sew from an old bag, step-by-step master class 15626_37

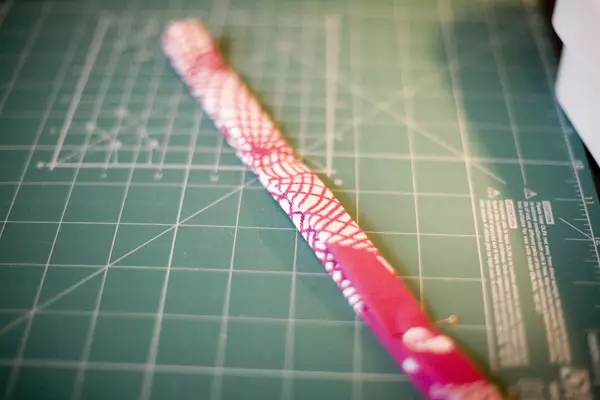
    Now let's go to the handle:

    • We fold the tissue strip in half along and stroke.
    • Then we deploy and fold, but both edges to the center, and again in half.
    • After that, turn again and stitch on the machine.
    • Ends connect and sew.

    Bag-clutch with your own hands (66 photos): Pattern, how to sew from an old bag, step-by-step master class 15626_38

    Bag-clutch with your own hands (66 photos): Pattern, how to sew from an old bag, step-by-step master class 15626_39

    Bag-clutch with your own hands (66 photos): Pattern, how to sew from an old bag, step-by-step master class 15626_40

    Bag-clutch with your own hands (66 photos): Pattern, how to sew from an old bag, step-by-step master class 15626_41

    Bag-clutch with your own hands (66 photos): Pattern, how to sew from an old bag, step-by-step master class 15626_42

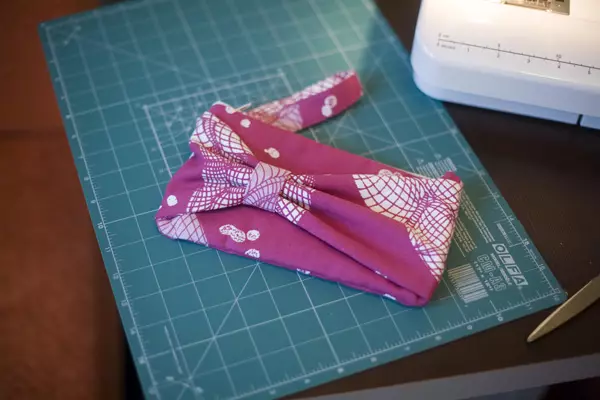
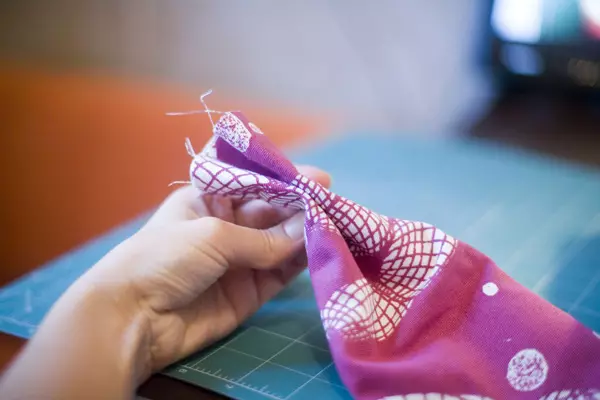
    Let's return to the bow:

    • Both details fold face to face and connect on the sides.
    • The resulting "sleeve" turns on the front side and stroke.
    • Gently collect the folds of the bow and do through the middle.

    Bag-clutch with your own hands (66 photos): Pattern, how to sew from an old bag, step-by-step master class 15626_43

    Bag-clutch with your own hands (66 photos): Pattern, how to sew from an old bag, step-by-step master class 15626_44

    Bag-clutch with your own hands (66 photos): Pattern, how to sew from an old bag, step-by-step master class 15626_45

    Bag-clutch with your own hands (66 photos): Pattern, how to sew from an old bag, step-by-step master class 15626_46

    Bag-clutch with your own hands (66 photos): Pattern, how to sew from an old bag, step-by-step master class 15626_47

    Bag-clutch with your own hands (66 photos): Pattern, how to sew from an old bag, step-by-step master class 15626_48

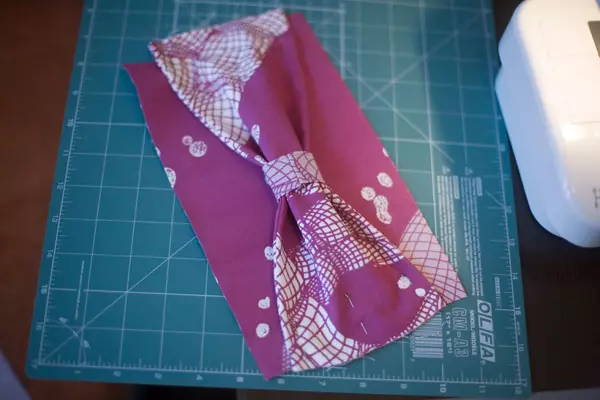
    • We take the main part and apply the bow at the desired level.
    • At the same time, it is necessary to pay attention to that the bow is a bit longer the main part of the clutch, because the decoration should look scene.
    • We press the bow on the sides, combining the edges with the main part.
    • We flash.
    • Then the top edge of the bow sew a handle.
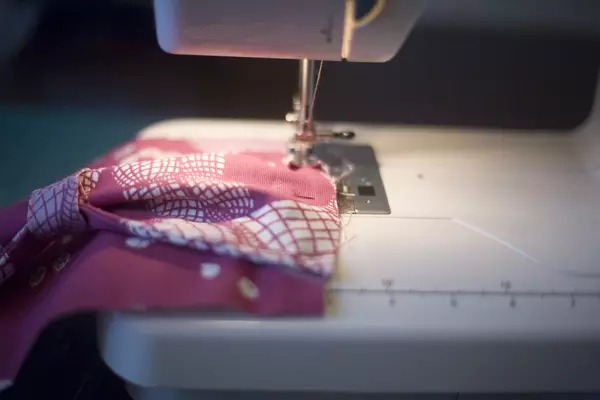
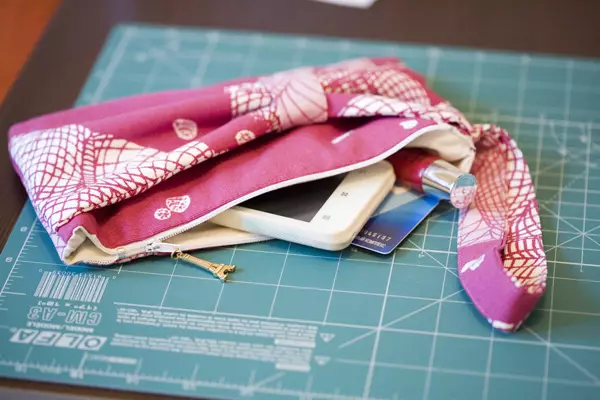
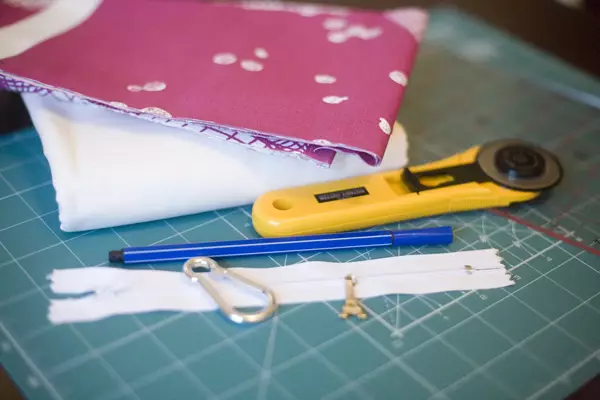
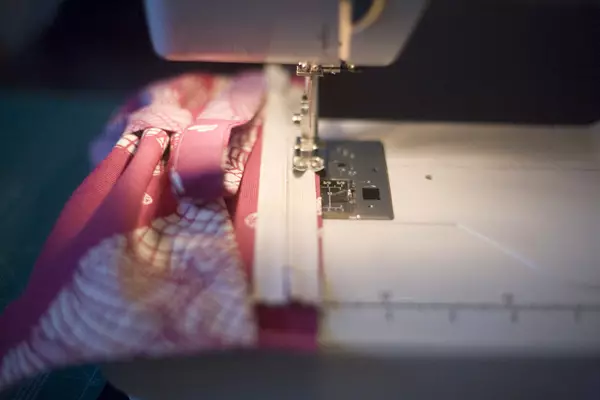
    Bag-clutch with your own hands (66 photos): Pattern, how to sew from an old bag, step-by-step master class 15626_49

    Bag-clutch with your own hands (66 photos): Pattern, how to sew from an old bag, step-by-step master class 15626_50

    Bag-clutch with your own hands (66 photos): Pattern, how to sew from an old bag, step-by-step master class 15626_51

    Bag-clutch with your own hands (66 photos): Pattern, how to sew from an old bag, step-by-step master class 15626_52

    Lightning:

    • We sew one half of the lightning face to face with the front of the future accessory, the second - with the back.
    • Then, with the use of a lightning foot on both parts, we make a line, close to the buckle.
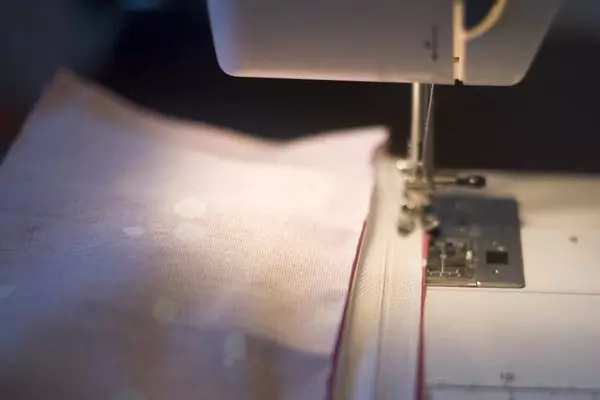
    Bag-clutch with your own hands (66 photos): Pattern, how to sew from an old bag, step-by-step master class 15626_53

    Bag-clutch with your own hands (66 photos): Pattern, how to sew from an old bag, step-by-step master class 15626_54

    Bag-clutch with your own hands (66 photos): Pattern, how to sew from an old bag, step-by-step master class 15626_55

    Bag-clutch with your own hands (66 photos): Pattern, how to sew from an old bag, step-by-step master class 15626_56

    Bag-clutch with your own hands (66 photos): Pattern, how to sew from an old bag, step-by-step master class 15626_57

    LOP:

    • We take a piece of lining and sew a line to the inside of the zipper.
    • The same is done for the front and rear wall of the clutch.
    • Now we combine the resulting parts - the front part with the facial, lining with lining. Here you need to look carefully so that all the edges perfectly come together.
    • We rush around the perimeter the front and lining, then we flash. Corners can be made by semicircular.
    • On the lining you need not to forget to skip the line - leave a place to turn out.
    • Excess fabric on corners can be trimmed.

    Bag-clutch with your own hands (66 photos): Pattern, how to sew from an old bag, step-by-step master class 15626_58

    Bag-clutch with your own hands (66 photos): Pattern, how to sew from an old bag, step-by-step master class 15626_59

    Bag-clutch with your own hands (66 photos): Pattern, how to sew from an old bag, step-by-step master class 15626_60

    Bag-clutch with your own hands (66 photos): Pattern, how to sew from an old bag, step-by-step master class 15626_61

    Bag-clutch with your own hands (66 photos): Pattern, how to sew from an old bag, step-by-step master class 15626_62

    Bag-clutch with your own hands (66 photos): Pattern, how to sew from an old bag, step-by-step master class 15626_63

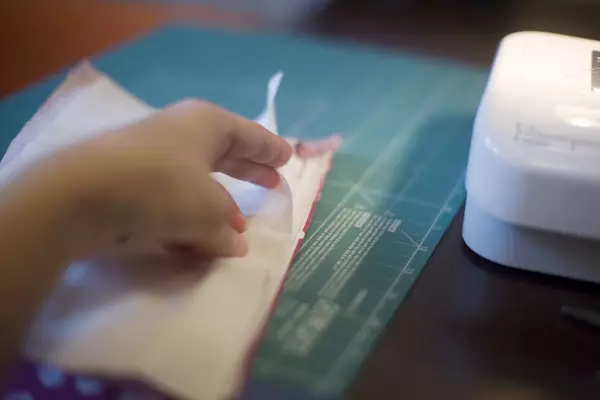
    • Gently turning and straighten.
    • Side hole in the lining.

    Bag-clutch with your own hands (66 photos): Pattern, how to sew from an old bag, step-by-step master class 15626_64

    Bag-clutch with your own hands (66 photos): Pattern, how to sew from an old bag, step-by-step master class 15626_65

    Bag-clutch with your own hands (66 photos): Pattern, how to sew from an old bag, step-by-step master class 15626_66

    Read more